Intex Excursion Pro Review

review intex excursion pro kayak

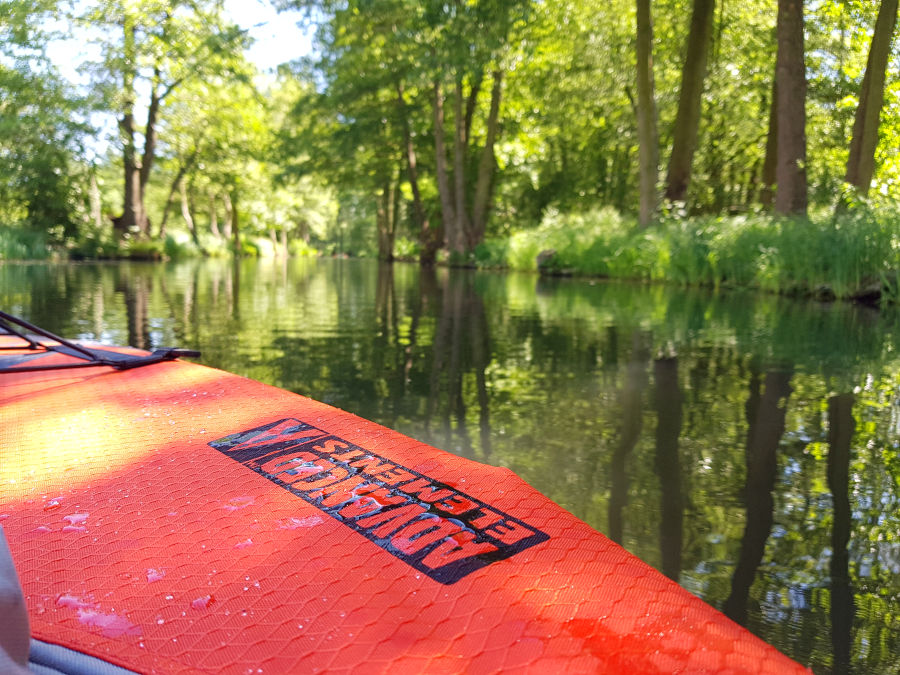
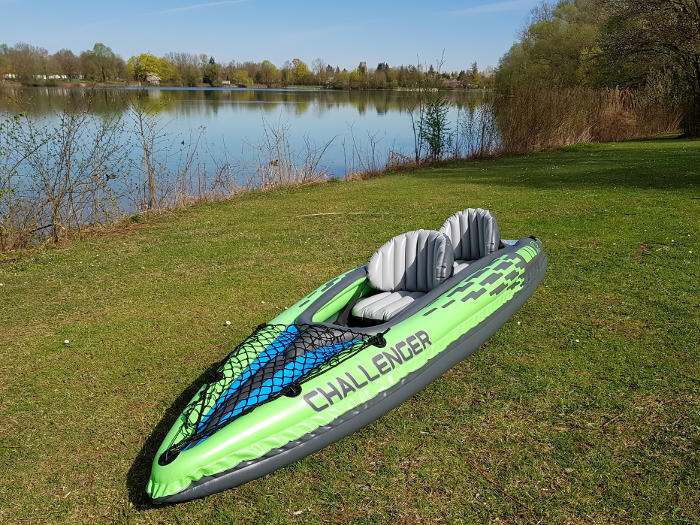
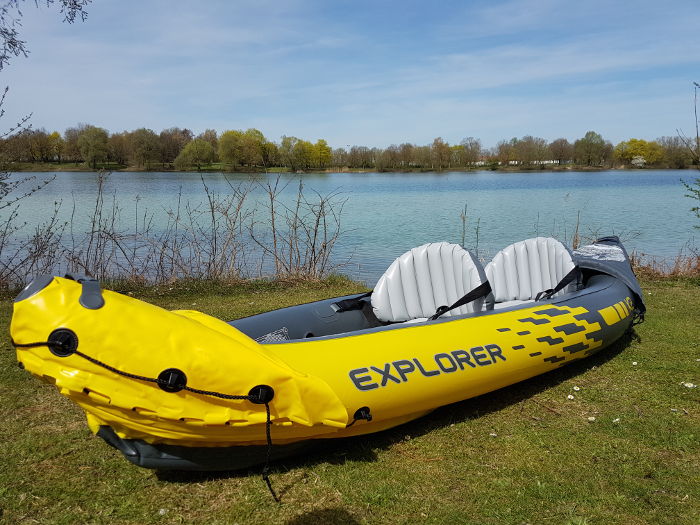
The Intex Excursion Pro is the manufacturer’s latest inflatable kayak on the market. At first glance it looks very similar to the Intex Explorer K2. The differences are not only in the design, but especially in the material and equipment as well as in the accessories. With the Excursion Pro, Intex has a much higher quality inflatable kayak in its range than the Intex Explorer or Challenger. In this review we would like to show you whether the extra cost is worth it and the strengths and weaknesses of the kayak.

intex excursion pro

Technical Specs

Max. paddlers:
Length:
Width:
Capacity:
Packed size:

2
384 cm | 12’6”
94 cm | 3’1”
180 kg | 397 lbs
62 x 58 x 32 cm |
2′ x 1’9” x 1′

Material:
Weight:
Pressure:
Produced in:

PVC
17 kg | 37.5 lbs
0.08 bar | 1.16 PSI
China

Which model has been reviewed?

Intex Excursion Pro model from 2020 and model from 2023

How did we organize the review?

We have purchased the Intex Excursion Pro ourselves.

How intensively has the product been tested?

low

high 1 bar = 1-3 km paddled (first impressions)
2 bars = min. 1 day/ 2 half-day tours
3 bars = min. 4 tours
4 bars = min. 8 tours
5 bars = min. 12 tours (very intense)

Where have we tested the product?

Whitewater

Calm rivers

Lakes

The kayak has some of the features of a fishing kayak. However, we will not go into these features in this review, as we are not anglers ourselves.

Table of Contents

Set-up and first impressions

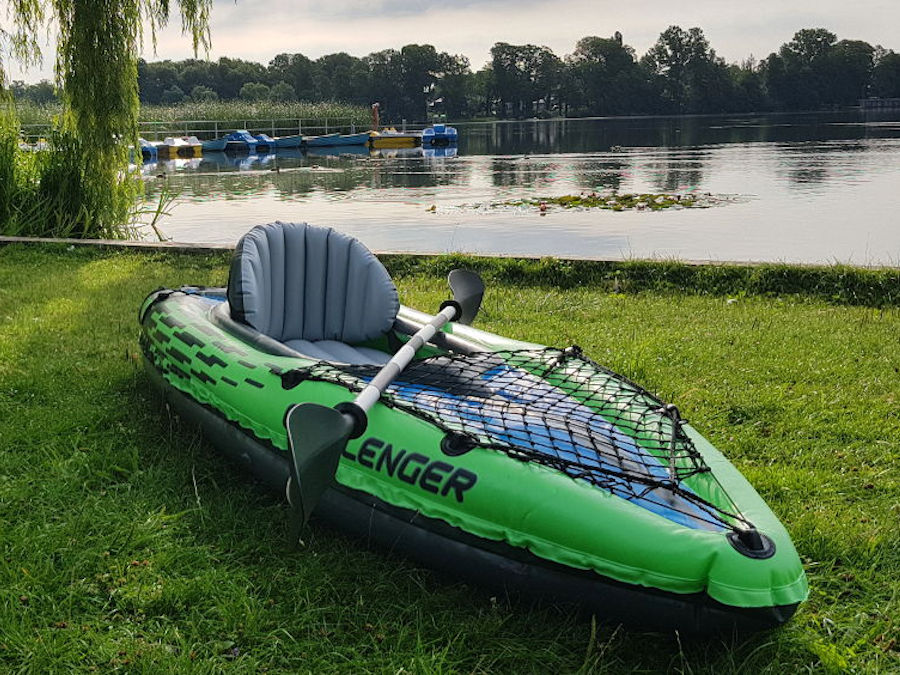
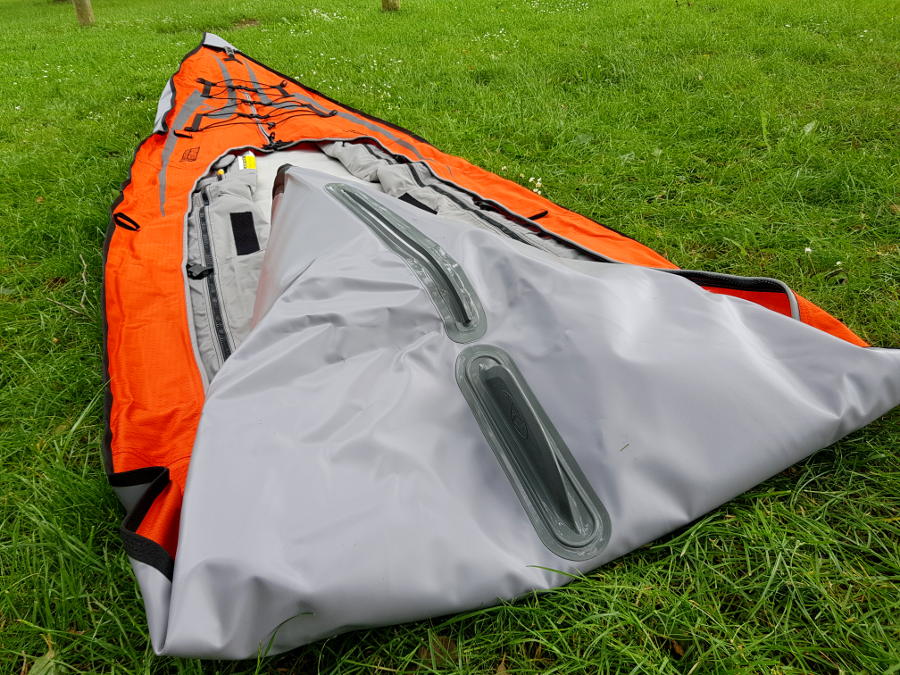
The Intex Excursion Pro comes with a very large carrying case. Compared to the bags of other Intex boats it is coated and much more stable. With this bag we do not have the feeling that it will tear or get a hole after a few uses. The dimensions of the bag are very large. But that makes sense. Because usually you never get the boat folded up as compactly as it was when delivered. This also gives you the possibility to get the boat into the bag a bit untidily folded (in case you are in a hurry).

intex excursion pro kayak transport backpack
The backpack is easy to carry over the shoulder.
intex excursion pro backpack
The Intex Excursion Pro is the manufacturer’s most expensive and highest quality kayak.
intex excursion pro package size
Unfolding the kayak

As usual with Intex, the boat is offered in a complete set. In addition to the larger and more robust carrying bag, there is a larger double action air pump for fast inflation of the kayak and two plug-in double paddles. In addition to the other Intex inflatable kayaks, the following accessories are included in the delivery:

  • Valve key to tighten the valves
  • good repair kit
  • foot brace for the front and rear paddler
  • manometer to check the correct air pressure
  • inflatable seat pad for a higher seating position in the boat
  • several fishing rod holders
  • one skeg each for shallow and deep water (instead of a general skeg)

We can already say that the additional accessories are a useful addition.

intex excursion pro complete package
The Intex Exucrsion Pro comes with a lot of accessories

Meanwhile, Intex has replaced the bag with a lightweight transport backpack with padded shoulder straps. This makes the kayak much more comfortable to transport, for example, if you go by train or bus to the lake or river.

Although the manual says that the boat should be built on a surface without stones and other sharp objects, we did not quite stick to it. If the boat skin would not withstand these small stones, we would like to know that. Of course we don’t want to force any damage, but the boat skin inspires confidence, because it is not just a PVC skin. The boat skin consists of a polyester fabric coated on both sides with PVC. In case of damage, the boat skin can be mended with the enclosed repair kit.

First the bottom and then the side chambers are inflated. The bottom and the side chambers are separate from each other, i.e. each air chamber also has its own valve. This multi-chamber system is common on inflatable boats in order not to sink in case of a hole on the water.

Inflating works well with the supplied pump. Admittedly, the air pump is nevertheless quite small and not very robust. Also the stand is very small. But that is not surprising. You should not expect miracles from the included accessories, especially not if they are in the scope of a cheap complete set.

intex excursion pro inflating
The inflation bag is used to inflate the packraft
intex excursion pro valve air pump
The inflation bag is screwed on the valve
intex excursion pro valve
You create the final pressure with your mouth

As soon as the air chamber reaches its final shape, check the air pressure with the supplied manometer. The chambers can be inflated up to 0.08 bar (1.16 PSI). This is not much for an inflatable kayak, but a little more than for the Intex Challenger K2 and Explorer K2. If you have been on the water with the boat for a longer time, you should check the air pressure during a break on the shore. If the air and water temperature are significantly different, the air pressure in the chambers will drop and they will become slightly softer. But this is quite normal for an inflatable boat and here it helps to pump up. In the case of inflatable boats with a higher pressure (e.g. Gumotex or Grabner), this effect is not that significant.

intex excursion pro gauge
Pressure gauge to measure the air pressure inside the air chambers

We found the handling of the valves less good. It is a little tricky to open and close the valve spring. The valve spring is covered with a screw cap, so that the valve is not accidentally opened on the water. The cap is only attached with a very thin string.

intex excursion pro skeg
The deep-water fin ensures the best directional stability, which you can use from a water depth of 0.5m
intex excursion pro skeg shallow water
The shallow water fin reduces the risk from unnecessary grounding in shallow water

Inflatable kayaks generally have the disadvantage compared to fixed hull kayaks that they have a worse directional stability. Therefore a fin can be attached to most inflatable kayaks to improve the directional stability. With our model we unfortunately had to find out that the fin holder is not attached straight. The sloppy mounting of the fin holder is annoying, because it will make the kayak even worse in terms of directional stability.

intex excursion pro skeg
The fin holder of our kayak is not attached straight.

Both the foot braces and the seats can be placed in different positions in the boat. For the foot brace there are 3 positions each for the front and rear paddler. You can also fix the seat variably to the ground with a long velcro strip. Especially the foot braces surprised us, because something like that is not common in this price class.

Since we are quite tall, we use the whole interior space to place the seats and foot braces. The backrests of the seats are attached by two belts, each of which can be fastened to the side chamber with a plastic carabiner.

intex excursion pro kayak footrest
The foot brace can be placed according to your size
intex excursion kayak place
The straps of the backrest are very widely adjustable
intex excursion pro stern
On the side chambers there are devices for fixing fishing rods

At the bow and stern there is a small spray deck each. A wave from the front (e.g. from a passing boat) would still get into the boat because the spraydeck is sagging downwards.

The spraydeck is primarily used to attach the carrying handles. The boat is equipped with a robust carrying handle at both the front and the back, so that two people can carry the boat. The carrying handles make a robust impression. Unfortunately the opening of the carrying handles is a bit too narrow for big and strong hands.

intex excursion pro kayak carry handle
The carrying handles are practical, but unfortunately the openings of these are a bit narrow

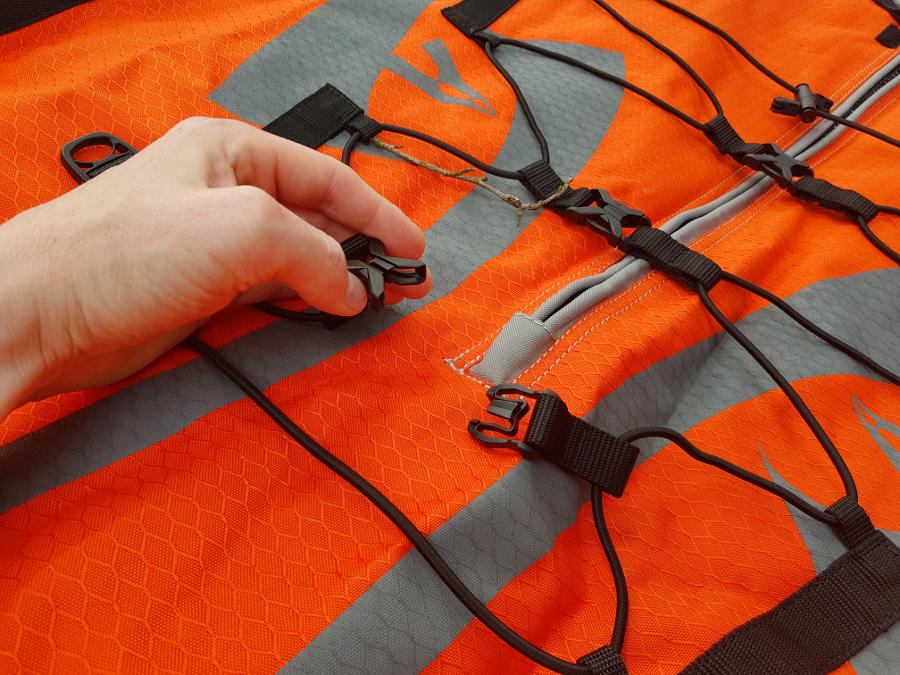
There are also small safety lines at the front and back of the outer edge of the boat. These are quite practical to pull the boat ashore. In addition to the D-rings, which are used to secure the backrests, there are two more D-rings in the front and in the back for securing equipment (e.g. the belt of a dry bag).

On closer inspection, we could not find any processing errors or unclean spots in the gluing, apart from the skeg holder.

intex excursion pro quality
The kayak has additional D-rings on the side chambers
intex excursion pro material
Apart from the fin holder, the kayak was well processed
intex excursion pro setup
The bottom of the kayak also makes a robust impression

In the scope of supply an additional seat cushion is included, which can be placed under one of the seats. The seat cushion increases the sitting position and is intended for children or very small persons, so that it’s easier to put the paddle blade into the water.

intex excursion pro experience

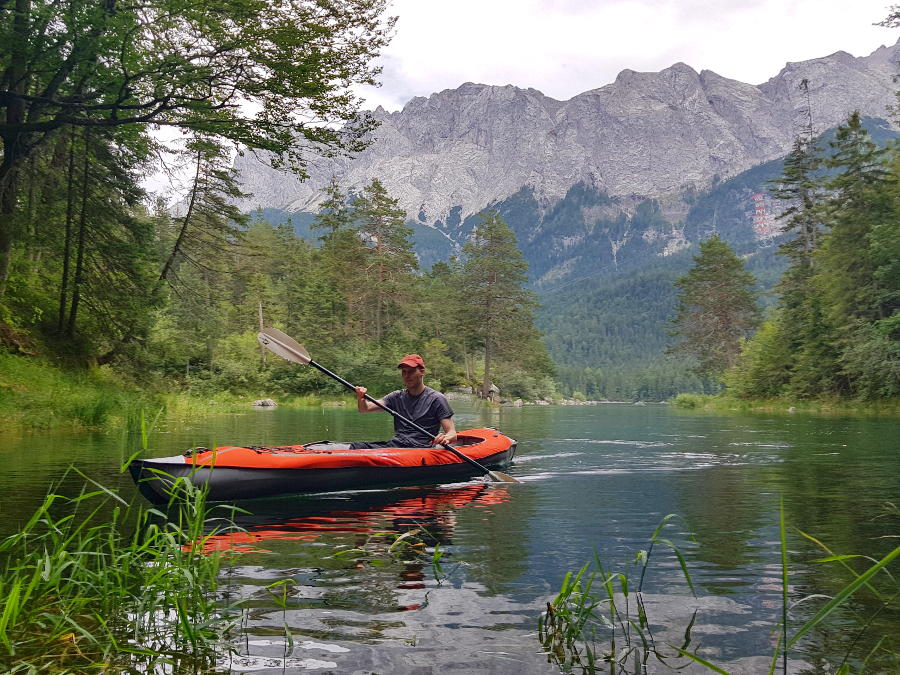
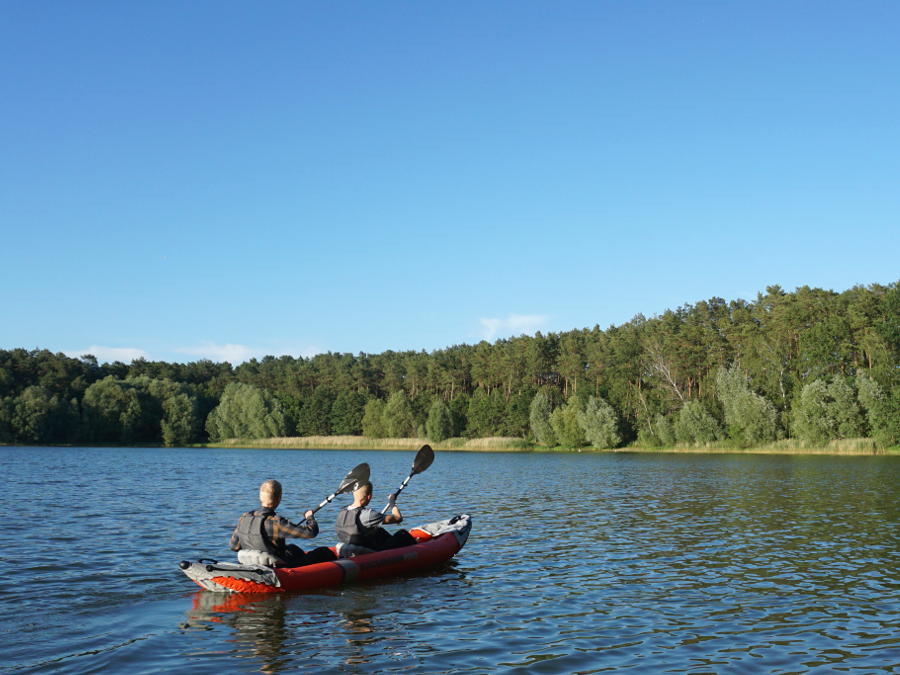
Review of the Intex Excursion Pro on the water

The Intex Excursion Pro has robust carrying handles, so that the kayak can be carried well to water together with another person. However, the low air pressure is noticeable when carrying it. Although the kayak is not very long for a 2-person inflatable kayak, it hangs noticeably when being carried. If you paddle the kayak slo and have to carry it around on river tours, you definitely need a canoe trolley in our opinion.

intex excursion pro carrying
Due to the low air pressure and the length of almost 4 m, the kayak hangs a little when carrying it.

The open construction of the kayak allows easy access to the kayak. Nevertheless, the bottom chamber gives way noticeably when entering the kayak. If you use the deep-water fin, you should only enter the kayak when the water depth is sufficient.

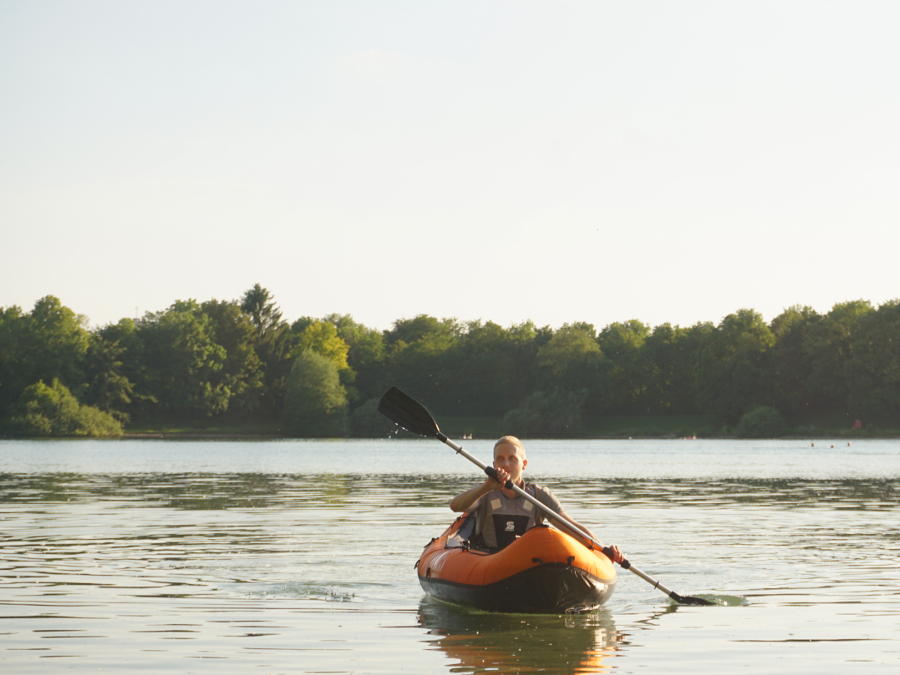
Due to the variable placement of the seats, you can paddle it solo as well. In the following photo you can see that the effective length of the boat on the water, i.e. the waterline, is much shorter than the total length of the boat. The reason is that the weight is mainly concentrated in the middle of the boat. Nevertheless, the Excursion Pro can be paddled without problems with a deep water fin. The speed and the directional stability as a 1-person kayak are alright for short trips.

The seat cushion is high enough so that you don’t have to sit in the wet if water (e.g. splashes when paddling or waves from a passing boat) gets into the boat. The backrest gives only limited support and makes a rather unstable impression. When paddling it supports only a small area of the lower back. If we lean into it properly, it bends away to the back.

solo paddling intex excursion pro
The Intex Excursion Pro can also be paddled as a 1 person kayak

Cheap inflatable kayaks rarely have a foot brace. A foot brace not only gives you a much better hold when paddling. A foot brace also makes paddling easier overall. Since the feet and therefore your torso have a better hold in the boat, you can get the necessary power for the paddle stroke mainly from your upper body instead of your arms. This makes you less tired when paddling. However, since cheap inflatable kayaks are not designed for long paddling anyway, many of them come without a foot brace.

Although the Intex Excursion Pro is only designed for short and comfortable trips due to its low air pressure, wide and yet quite short hull for a 2-person kayak, the foot braces are a nice feature as long as the paddlers are not too tall. For each seating position in the boat (front and back as a 2-person kayak and in the middle as a 1-person kayak) there are 3 positions each for the foot brace.

For tall paddlers the foot braces are rather unsuitable on longer trips. Because even when the foot braces is attached in the outermost loops, we have to bend our legs too much when using the foot braces (see photo below). For short tours this is not a big issue. On half or day tours, however, it becomes uncomfortable. For small persons the foot braces can be a nice support to find enough hold in the boat.

intex excursion pro solo paddling
As a 1 person kayak the Excursion Pro offers a lot of space
intex excursion pro solo paddling
The placement of the foot brace is not really made for tall people.

If you are paddling the boat solo and are tall, we recommend that you use the front bottom loops (which are actually intended for the 2-person configuration). Apart from the footrest, the interior offers plenty of room for a solo paddler.

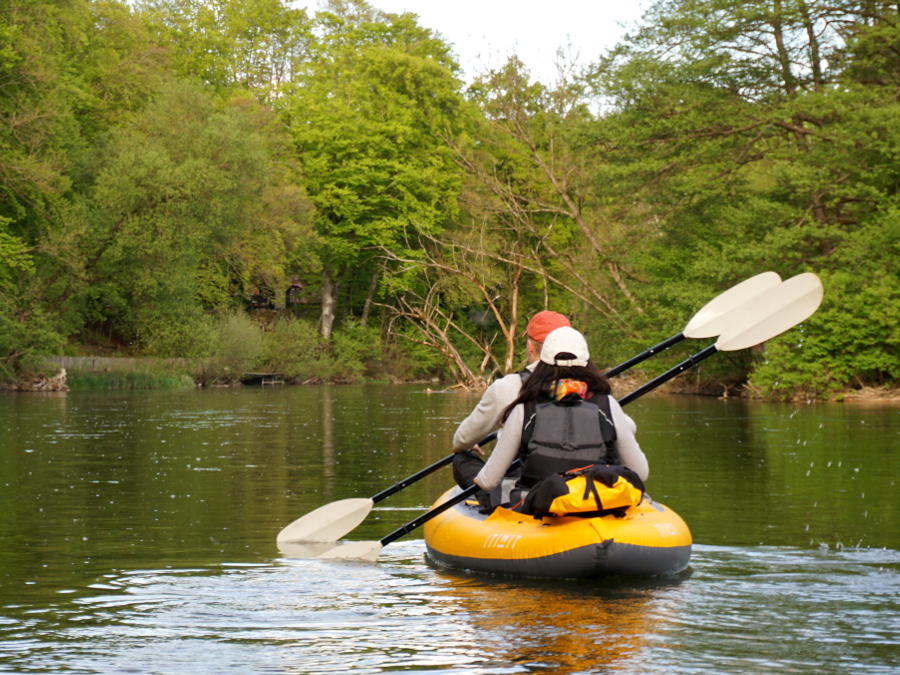
In contrast to the 1-person use, the kayak with a 2-person configuration lies much better in the water. Also in comparison to the other Intex kayaks there have been some improvements. The directional stability are noticeably better due to the length of the boat, the air chambers have become somewhat more dimensionally stable and the maximal load capacity has increased by 20 kg. A speed of 3.1 – 3.4 km/h is quite realistic. The interior is spacious enough to provide enough room for two large paddlers.

intex excursion pro review lake
The Excursion Pro also offers enough space for 2 persons and has reasonable driving characteristics for short paddling trips

The double-bladed paddles (with a length of 218 cm / 2’2”) are well designed for the kayak and for the average paddling beginner, but too wobbly for longer tours. Unlike other portable double-bladed paddles, it’s made not only of 2 or 4 pieces, but even 5 pieces. This increases the compactness of the paddle, but at the same time reduces the stability. For intensive use the plug system of the paddle shafts seems to wear out quickly, which would make the paddles even wobblier in the long run.

For occasional and small paddling trips on the water, the paddles are still useful. Nevertheless, the paddles show that the complete set is only designed for occasional and short paddling trips.

paddling on water intex excursion pro
The kayak paddles are designed for occasional and short paddling trips

After a two-hour paddle tour with numerous landings on the shore, the kayak remained unharmed. The stress on the boat skin and on the boat itself were comparatively low in our review. There were good conditions (no wind) and the lake had only gravel banks. This is exactly what we consider the boat suitable for. In our opinion, the kayak is not the best choice for river tours with possible ground contact as well as half or day tours on lakes.

intex excursion pro inflatable kayak
The boat skin makes a robust impression

Dismantling the kayak

If there is water in the boat, the drain opening in the stern can be used before dismantling the kayak. This way you make sure that most of the water can drain out of the boat. To do this, tilt the boat at the front and the water in the boat will run out of the drain opening. You only have to wipe the interior dry without taking out the water with a sponge. The boat skin can also be wiped dry easily. The seats on the other hand have a slightly fabric-like coating that cannot be wiped dry. These should let air dry.

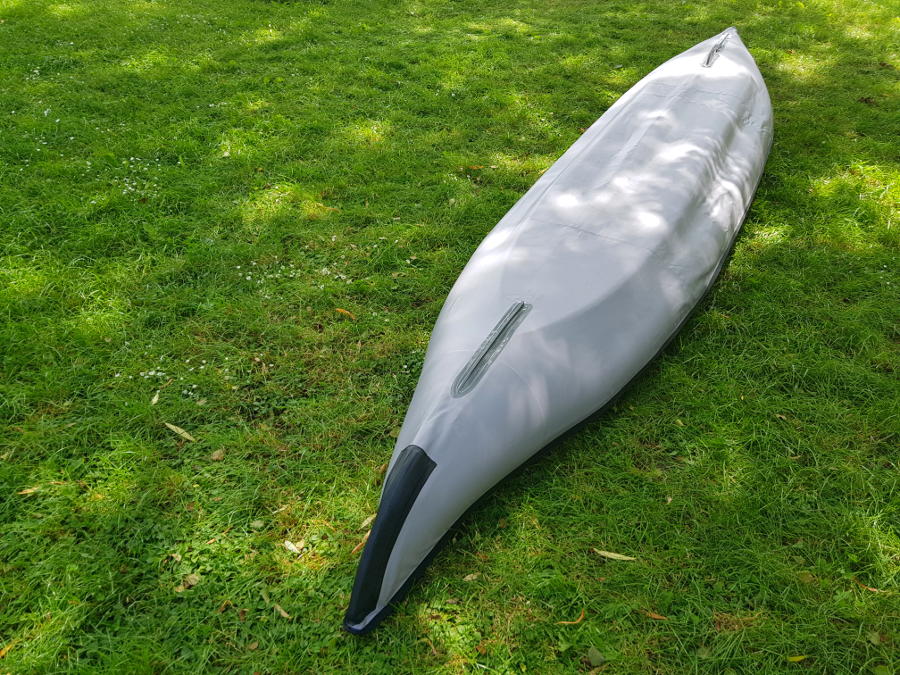
The air went out of the air chambers without much effort and the boat let was easy to fold up so that it fit back into the bag. However, the folded boat did not reach the original pack size.

intex excursion pro drain valve
Before dismantling, the drain opening offers the possibility of draining standing water in the boat.

Strengths and weaknesses of the Intex

It is difficult to identify a concrete strength of the kayak. For a inflatable kayak in the lower price range it has reasonable dimensions and comes with a lot of useful accessories. Due to its generous dimensions the kayak offers much more space inside than comparable kayaks in the price range. The directional stability and the performance on the water is good for comfortable tours on lakes and rivers.

Nevertheless, from our point of view, the Intex Excursion Pro is a beginner inflatable kayak for occasional use. The air chambers are not stiff enough due to the low air pressure, the backrests do not give enough support when paddling on longer tours and the paddles are too wobbly. The boat skin is much more robust than the Intex Challenger or Explorer. But it does not look as robust as the skin of a Gumotex or Grabner inflatable kayak.

intex excursion pro kayak test
The Intex Excursion Pro is suitable for small and relaxing tours.

Advantages

+ easy assembly and dismantling + robust and large carrying bag included + more robust boat skin than other Intex inflatable boats + good driving characteristics (good compromise between speed, manoeuvrability and directional stability) + complete set – also suitable for anglers + enough interior space – very good manometer + useful equipment (e.g. additional D-rings, safety line, handles, seat elevation, …)

Disadvantages

– wobbly kayak paddles – fin holder was not correctly attached for our model – front and rear spray covers offer almost no protection against splash water and smaller waves – no luggage net – low air pressure and therefore soft air chambers- a lot of packaging waste (each part was individually packed in plastic bags) – bulky packing size considering the boat dimensions – foot braces are unsuitable for tall people

Conclusion on the Intex Excursion Pro

The Intex Excursion Pro is a successful further development with numerous improvements of the previous Intex inflatable kayaks and goes in the right direction. We had called the Intex Challenger and Explorer more bathing boats than kayaks. With the Intex Excursion Pro we see it the other way around. But it is definitely not a touring kayak either, it is much more a recreational kayak for occasional use. The running characteristics were better than expected, especially when the kayak is paddled by two persons. Two paddlers give the boat more drive. Also, the higher weight and better weight distribution increases the waterline of the boat. However, our afternoon review cannot conclude how durable and robust the kayak is in the long run.

If you want to find out more about Intex and his products, make sure to check out our overview of Intex boats and kayaks article.

Recommended Kayaking Equipment

The Intex Challenger Excursion Pro already includes a paddle and pump. However, you definitely need to get a life jacket. You also want to consider a dry bag and a proper transport bag for the inflatable kayak.

Accessories for the Intex Challenger K1

The scope of delivery of the boat includes the following accessories:

  • Kayak paddle
  • Inflatable foot brace
  • Air pump
  • Fin
  • Repair patches
  • Transport bag

In addition, we recommend the following accessories:

  • Life jacket: Itiwit BA 50N+ * (good life jacket for beginners, very good price-performance ratio, more details in our test report).
  • Dry Bag: Itiwit dry bag 10L* (ideal for protecting items from splashing water and short immersion in water, good workmanship, with carrying strap, available in different colors and sizes)
  • Transport backpack: only a bag is included, which is intended for storage and short transport of the kayak to the water. If you want to transport the kayak longer distances and more comfortably to the water, we recommend the Itiwit transport backpack*, which is comfortable to carry and has enough space for the kayak and accessories.

Alternatives to the Intex Excursion Pro

There are many other manufacturers, which make also great inflatable kayaks. Sea Eagle for example is very well-known in the US and they have a very wide range of inflatables. The Sea Eagle 420X comes with a drop-stitch floor and is available in a complete set (paddles, air pump, bag). It’s more expensive than the Excursion Pro but you will also get more for your money.

If you look for another affordable kayak, then the Itiwit x100+ might be a good kayak for you as a beginner. It’s a well-designed boat with good materials and quality but due to the hull the driving performance isn’t outstanding. It’s a good leisure boat for slow and comfortable tours on calm waters.

But if performance on the water is important to you, then you should check out kayaks from Advanced Elements. They have some really good boat, which can compete with solid kayaks.

Bestway Hydro Force Ventura Review

bestway ventura kayak review

The Bestway Hydro-Force Ventura is a very frequently sold inflatable kayak on the Internet. It is the best equipped and most robust kayak of the manufacturer. We have received many inquiries from our readers what we think of the kayak. Now we ordered it ourselves and took a closer look at it. Read this test article to find out what our opinion is about this inflatable kayak and how it performs on the water.

bestway hydro-force ventura

Technical Specs

Max. paddlers:
Length:
Width:
Capacity:
Packed size:

1
330 cm | 10’8”
94 cm | 3’1”
200 kg | 441 lbs
75 x 65 x 25 cm |
2’5” x 2’1” x 8”

Material:

PVC (floor and chambers),
Nylon (cover)

Weight:
Pressure:
Produced in:

15 kg | 33.1 lbs
0.06 bar | 0.87 PSI
China

Which model has been reviewed?

Bestway Hydro-Force Ventura from 2020. 

How did we organize the review?

We have purchased the Bestway Hydro-Force Ventura ourselves.

How intensively has the product been tested?

low

high 1 bar = 1-3 km paddled (first impressions)
2 bars = min. 1 day/ 2 half-day tours
3 bars = min. 4 tours
4 bars = min. 8 tours
5 bars = min. 12 tours (very intense)

Where have we tested the product?

Whitewater

Calm rivers

Lakes

Table of Contents

Product update of the Bestway kayak

bestway hydro-force ventura 2021

Since 2021, the Bestway Hydro-Force Ventura is available in turquoise blue. Material, workmanship and construction look identical at first glance. Apart from the color, the new model has become narrower by 8 cm (3”). There are also other seats in the boat, but they hardly differ from the previous model. The new seats also have only a flat seat cushion and a thin backrest. Paddle and air pump are the same as those of the orange previous model.

First Impressions and assembly

The kayak comes in a complete set, which means that two double-bladed paddles, an air pump, a manometer (to measure the air pressure) and repair patches are already included. However, there is no bag included, which you need for transport to the water or for storage at home. For this purpose we recommend for example the Sevylor Quickpak.

bestway hydro force ventura kit
The folded kayak and the included accessory

Considering the materials used and the price, the kayak looks high quality and solid. The black-orange design looks appealing on the one hand and on the other hand you are clearly visible on the water with the orange side color.

bestway hydro force ventura kayak
Bestway Hyrdo-Force Ventura unfolded before inflation

Before inflating the air chambers, the two fins needs to be attached to the bottom of the kayak. They give the inflatable kayak a better directional stability and make paddling easier.

There are also two safety lines that are attached to the bow and stern. These can be handy for gripping the boat better and pulling it to shore.

bestway hydro force ventura skeg
There are two fins, which are attached to the bottom
bestway hydro force ventura kayak rope
There are also two safety lines at the bow and stern

The actual PVC air chambers are covered by a nylon layer. Thus the air chambers are additionally protected from possible damage and the probability of a hole in the air chamber is considerably reduced.

The three air chambers are each inflated via a Boston valve. A Boston valve is a 2-way screw valve. It therefore has two screw caps lying on top of each other. To inflate, unscrew the top cap. A non-return cap prevents the air from flowing out of the chamber as soon as you remove the pump tube. The inflation sequence is noted on the nylon cover. First inflate the side walls and then the floor. The included air pump has a volume of 2.8 L and a double stroke function. A double stroke function means that you pump air into the air chamber both when pulling and pushing the handle. The air pump is quite small, so you have to bend your knees a lot.

bestway hydro force setup kayak
Three air chambers need be pumped up
bestway kayak inflation
First the side chambers are inflated
bestway hydro force ventura pressure
The pressure is measured with a manometer

The recommended air pressure of the air chambers is 0.06 bar (0.87 PSI). This is very little for a inflatable kayak. Check the correct air pressure with the manometer. The manometer works well, but reading the small scale is a bit difficult. A red marking at 0.06 bar would have been very practical.

You can even screw the manometer onto the pump hose and check the air pressure during inflation. To avoid any damages on the air chambers, you should stick to the recommended air pressure of the manufacturer. In addition, you can also use the manometer separately if you want to check the air pressure during a tour while taking a break on shore.

When the boat is fully inflated, attach the seat straps to the side chmabers with the buckles. The very long straps and the continuous Velcro strip on the floor of the kayak allow you to place the seat in the boat in a very variable way.

bestway ventura seat
The seats can be placed very variably in the boat

The bottom of the floor is made of thick PVC, which is much thicker than, for example, the boat skin of an Intex Challenger K2. The actual air chmabers are inside of the nylon cover and are also made of thick PVC. If they are damaged, they can be patched with the included repair patches or replaced with a new air chamber.

The repair patches remind us of waterproof adhesive tape, which can only be used for a small hole in the air chamber. For larger damages as well as holes or cracks in the outer shell the enclosed patches are not suitable. Therefore you should handle the boat with care.

bestway inflatable kayak hull
The bottom of the floor is made of thick PVC
bestway hydro force air chambers
A nylon layer covers the air chambers
bestway hydro force ventura quality
The kayak has a clean finish and the material is robust

The Bestway Hydro-Force Ventura has a total of four carrying handles. One carry handle each on the left and right side chamber in the middle of the boat. This allows you to carry the boat to the water by yourself when you are paddling alone.In addition, there is one handle each on the bow and stern, which are attached to the outermost point of the kayak, which makes it very easy for two people to carry the kayak.

bestway venture kayak features
The kayak has a carrying handle on each side

Compared to many other inflatable kayaks, the Bestway Hydro-Force Ventura does not have small spraycovers at the bow and hood to protect against spray water. In addition, the spraycovers of most inflatable kayaks are equipped with luggage nets, so that a backpack or dry bag can be attached.

Instead, a net bag is attached to the bow of the Bestway kayak. This net bag serves as a storage bag for small items. It is a nice extra, but we would have preferred a transport bag for the kayak. If you want the items in the net bag to stay dry, you need a waterproof bag.

bestway hydro force ventura bag
The kayak offers a storage bag in the bow for small items

The double-bladed paddles included are 218 cm (7’2”) long and made of three parts, which are connected to each other with two connectors. Since the paddles can be disassembled, they are also very easy to transport. The connecting pieces also serve as handles. The paddles look small and cheap at first sight. We are curious how they perform on the water.

bestway ventura kayak paddles
The included paddles look small and cheap
bestway paddle handle
The connecting piece with which the rods of the paddle are screwed together

Review of the Bestway Hydro-Force Ventura on the water

Thanks to the four carrying handles, you can carry and put the inflatable kayak into the water by yourself. Due to the open construction and the wide side tubes, getting into the kayak is very easy and safe without the feeling of capsizing.

bestway hydro force ventura experience
Transport to the water and boarding is easy and safe

The multi-part double-bladed paddle does not wobble, which is unusual for such a cheap paddle (which is included with some cheap inflatable kayaks). The reason for the stability is that the rods of the paddle are not inserted but screwed into the connecting piece. What we cannot say is whether they will wobble after frequent use,. The connecting piece also serves as paddle handle. The paddle handle has a bad feel and is too uncomfortable for long paddling tours.

Furthermore we find the double-bladed paddles with a length of 218 cm (7’2”) too short. For an inflatable kayak with a full width of 94 cm (3’1”) and the flat seats we constantly touch the tubes with the short paddles. We adapted our paddling technique so that when we inserted the paddle blade into the water we held the paddle a little more to the left or right. If the paddles were long enough (at least 230 cm / 7’5”, better 240 cm / 7’9”) it would not be necessary and the paddling would be more comfortable.

bestway ventura kayak review
The included paddles are quite stable but much too short

Another weakness of the inflatable, which we immediately notice on the water, are the seats. The seat cushions are very flat so that we sit too deep in the boat. This makes paddling more difficult, especially with the short paddles. Also you sit faster in the wet if splash water accumulates or a wave comes into the boat. 

As long as there is no puddle in the boat, you will usually stay dry. However, as we think it is a fair weather boat, it should not be a big problem in summer, as most people will paddle in swimming trunks then. We like the fact that the seat is attached to the ground with Velcro and does not slip when paddling. Because of the low air pressure of the floor chamber, you sit soft and comfortable on the ground.

What is more disturbing are the backrests. The backrests are very thin and we quickly get the feeling that the backrest consists of only one strap. On the backrests of the seats there is a small zippered pocket, which is quite practical for storing your mobile phone, for example, because you can quickly have it at hand.

bestway inflatable kayak on the water
The seats give a good first impression, but are not very practical on the water

When paddling the kayak with two persons, a speed of up to 4 – 4.5 km/h (2.5 – 2.8 mph). The straight run is okay with the two fins as long as there is no wind. For short distances the space for two persons is acceptable, on long distances the interior is clearly too small.

bestway hydro force ventura 2 person kayak review
The Bestway kayak can be paddled solo or with two persons

Due to the splash water during paddling (caused by the short paddles, among other things) and getting in and out of the kayak, the interior of the kayak looks like this after a while (see picture below). The nylon has become soaked with wetness. If you get a wave into the boat, there is of course more water in the boat. If there is a lot of water in the boat, you can open the small drain valve at the back of the stern to let the water flow out.

bestway hydro force ventura space
Due to the nylon cover, the floor is quickly soaked with water from paddling

After some time the low air pressure of 0.06 bar (0.87 PSI) becomes noticeable. If the difference between air and water temperature is large, the drop in temperature makes the air chambers softer, which is normal for inflatable boatsHowever, the effect is much more noticeable for inflatable boats with very low air pressure, such as this boat, than for inflatable kayaks with a higher air pressure. After over an hour the air chambers were much softer than at the beginning, so we landed and pumped up. The manometer confirmed that the air pressure was only about half of the pressure with what we started our paddling tour.

Dismantling the kayak

The dismantling of the kayak is very simple. You unscrew the Boston valve completely out of the thread so that the air can escape. If you have time, you can dry the boat in the sun with the valves open. Otherwise you can wipe it a little bit dry and unfold and dry it again at home. If you store the boat wet for a longer period of time, mildew will form on the nylon. Drying the boat in the cellar took longer than one night. We had to lay the boat down again in a different position so that all wet spots could dry. Otherwise we could not really dry the boat. For a short paddling fun on the water the effort of drying the boat is quite big in the end.

bestway hydro force dismantling
When dismantling, unscrew the valve completely from the thread

You fold the boat once in length and then you fold it several times. Fold it from the bow so that the valves are exposed and the remaining air can escape without problem. The Bestway kayak fits perfectly into our Itiwit boat backpack with the air pump, seats and mesh bag. The double-bladed paddles are stored in the outer pockets of the backpack. In that way, the boat can be easily transported to the train or to the car.

backpack for bestway venture kayak
The kayak fits well in an Itiwit boat backpack
itiwit backpack for inflatable kayak
The backpack is also comfortable to carry

Strengths and Weaknesses

Depending on the offer, Bestway offers with its model Hydro-Force Ventura an inexpensive boat in a complete set, which has a robust outer shell and is solidly manufactured.  There were no unclean seams or gluings. Nevertheless, the Bestway Hydro-Force Ventura has numerous weaknesses, which you should be aware of before buying. Due to the uncomfortable backrests, the low air pressure and the bad double-bladed paddles, paddling is hardly fun in the long run (over 1 km without a break). Personally we find the performance on the water of the cheaper inflatable kayaks Intex Challenger K2 and Explorer K2 better. But the Intex inflatable kayaks have a more sensitive boat skin.

bestway hydro force ventura pros and cons
You can not only put something in the bow bag, but also a small backpack or drybag in the stern.

Advantages

+ solid workmanship regarding the materials used + easy assembly and dismantling (easy to pack up) + very stable + 2 paddles and air pump included + bow bag + complete protection of the air tubes by nylon cover + very flexible positioning of the seats

Disadvantages

very low air pressure – very long drying time – poor kayak paddles (too short, uncomfortable handles, small paddle blades) – uncomfortable backrest – more fun boat than kayak (only for short distances) – no transport or storage bag – moderate driving characteristics – no splash protection – difficult repair in case of damage of the cover

Conclusion on the Bestway Hydro-Force Ventura

On the product photos the Bestway Hydro-Force Ventura makes a good impression. You get the impression that you can get a full-fledged kayak for a good price. We have to admit that the kayak has a nice design. The air chambers are protected by the nylon cover and make the kayak look like a fixed hull kayak. 

Moreover, the kayak comes in a complete kit, so that you can start paddling immediately. Depending on the waters and conditions, only the purchase of life jackets is necessary. In short: the offer is quite attractive. The workmanship is good. Everything works and the boat skin makes a robust impression.

From our point of view the Bestway Hydro-Force Ventura is a higher quality bathing or fair weather boat, which can be paddled as a kayak for short distances.  For small calm rivers and lakes the Bestway Hydro-Force Ventura is an option, as long as there are tours with a low paddle percentage. When you fold down the backrests, you can lean on the bow or stern chamber and relax really well on the water. Those who really want to kayak and paddle tours of more than 1 mile should not buy the Bestway Hydro-Force Ventura.

Other entry-level inftlable kayaks​

Intex and Sevylor are two other brands that offer entry-level inflatable kayaks. Intex offers one of the cheapest kayaks on the market, for example the Intex Explorer K2. The boat skin is quite thin and sensetive. Sevylor has also pretty cheap kayaks but also some more solid ones, like the Sevylor Adventure Plus, which can be paddled with up to 3 persons. It also has a nylon cover that protects the tubes from damage.

Itiwit X100+ Review

itiwit_x100+_river_tour

The Itiwit x100+ inflatable kayak is a further development of the popular Itiwit Touring kayak series from Decathlon. It is a 2-person inflatable kayak with drop-stitch floor, which can be paddled by two persons or single. Decathlon promotes the Itiwit x100+ as a kayak for occasional tours of 2-3 hours, which offers a good combination of performance and stability. We have paddled the Itiwit kayak and in this article we would like to tell you about our first impressions and experiences on the water.

itiwit x100

Technical Specs

Max. paddlers:
Length:
Width:
Capacity:
Packed size:
Material:
Weight:
Pressure:

2
365 cm | 11’1”
103 cm | 3’3”
190 kg | 418.9 lbs
67 x 40 cm | 2’2” x 1’3”
PVC Tarpaulin, Polyester
16 kg | 33.3 lbs
0.2 bar | 3 PSI (sides),
0.35 bar | 5 PSI (floor)

Produced in:

China

Which model has been reviewed?

Itiwit x100+ 2-Seater from 2020

How did we organize the review?

The Itiwit x100+ was provided to us by Decathlon, a French manufacturer and distributor of sports equipment and clothing. Itiwit is a brand for the paddle sport of Decathlon. Our review is independent of the manufacturer or shop and reflects our own opinion of the boat.

How intensively has the product been tested?

low

high 1 bar = 1-3 km paddled (first impressions)
2 bars = min. 1 day/ 2 half-day tours
3 bars = min. 4 tours
4 bars = min. 8 tours
5 bars = min. 12 tours (very intense)

Where have we tested the product?

Whitewater

Calm rivers

Lakes

Table of Contents

First impressions and assembly

The Itiwit x100+ comes in a well-sized backpack that is comfortable to carry. A very useful feature of the backpack are the outside pockets where you can stow your paddle. The front of the backpack can be opened almost completely with the zipper. This way you can easily take out the boat and pack it back in without any big efforts. For the total price of the boat we think it is great that a backpack and not just a carry bag. The backpack is functional and has a good quality.

itiwit x100+ backpack
The complete kayak is in the backpack.
itiwit x100 unboxing
Unfolding the kayak.

The Itiwit x100+ has two separate side chambers and a removable drop-stitch floor. Before inserting the floor we inflated it slightly and then put it into the boat. The floor is attached at the bow and stern with a strap click fastener, so that it remains well in its right position without moving around. 

What is Drop-Stitch?

With the Drop-Stitch technology, the upper and lower inner walls of the air chamber are additionally woven with nylon threads. This is the only way to achieve a significantly higher air pressure than with air chambers without the tangled nylon threads. The air chamber thus achieves very good dimensional stability and rigidity. The Drop-Stitch technology is very common for SUP boards (Stand Paddling Boards) and is used more and more for inflatable kayaks. Learn more about this type of inflatable boats, in our buyer’s guide for Drop-Stitch kayaks.

The floor is inflated to 0.35 bar (5.1 PSI), which was an easy job with the Decathlon air pump. The side chambers are then inflated to 0.2 bar (2.9 PSI). For a beginner kayak in this price range, such operating pressures are hard to find. For example, Sevylor inflatable kayaks are in a similar price range but they only have an air pressure of 0.1 bar (1.5 PSI). The higher the air pressure of the air chambers, the stiffer the kayak and better the performance on the water.

itiwit x100 unfold
The kayak unfolded. In the middle is the folded Drop-Stitch bottom.
itiwit x100 inflate
First the floor is inflated and then the side chambers.

The kayak has reasonable valves that can be closed or opened by a spring (same mechanism as on Innova and Grabner inflatable boats). The handling is very simple. The backpack even contains a valve key so that it can be removed and cleaned or retightened if necessary.

itiwit x100 valves
The boat has three air chambers and therefore three valves.
itiwit x100 kayak valve
The spring valves can be opened and closed easily

It takes less than 5 minutes to inflate the air chambers. After inflation, three small skegs are attached to the bottom of the boat. A skeg is very typical for inflatable kayaks to improve straight-line stability. We have not yet paddled an inflatable kayak with three skegs. It is very likely that the Itiwit x100+ has more skegs than other models, as it has a remarkably wide and flat hull, which would otherwise be very turn-happy when paddling.

itiwit x100 kayak hull
The Itiwit x100+ has a very wide and flat hull.
itiwit decathlon kayak fin
The skegs are attached to the bottom of the kayak.

Depending on whether you want to configure your kayak for 1 person or 2 persons, you position the seat. The seats have a high inflatable seat cushion. This allows a raised seating position so that the wide side tubes are not in the way when paddling. You can also inflate the seat a little softer or harder, depending on your preference, to find the comfortable seat firmness for you. The seat is attached to the bottom of the boat by the Velcro strip, which prevents it from slipping while paddling. The Velcro strips on the bottom are sufficiently long for the front and rear seats, so that you can vary the position of the seats.

The robust backrest is attached to the side chambers with a belt on both sides. The position of the backrest is also adjustable. All in all, we really like the seats. They look comfortable, have a good workmanship and promise a good grip when paddling. We are curious to see how they feel once we are on the water.

itiwit x100 inflate seat
The inflation bag is used to inflate the packraft
itiwit x100 seat
The seats are fixed at several places in the boat
itiwit x100+ kayak seat
The seat can be variably positioned and adjusted.

The outer skin of the kayak makes a robust impression. It consists of a polyester fabric coated with PVC Tarpaulin. Due to this robust outer skin, no textile cover is necessary to protect the tubes, as with the Itiwit Touring or Sevylor Adventure. The boat dries more quickly after use (significantly less risk of mould growth) and is easier to repair in the event of a defect. The permanently integrated side tubes are also equipped with a pressure relief valve, so that it is impossible to damage the boat due to excessive inflation or heat exposure.The drop-stitch floor, seats and other parts of the boat can be re-ordered and replaced in case of a defect.

The drop-stitch floor has a recess on each side where drain valves are located. For example, if you are paddling on the beach in the summer and a wave does come into the boat, the water will run off when the valves are open. This way no water will accumulate in the boat.

itiwit_x100_drop_stitch.jpg
Inserted drop-stitch floor with recesses for the drain valves.

The Itiwit x100+ also offers important features of a good kayak. At the top of the bow and stern there is a carrying handle to carry the boat to the water. What we really like are the side carrying handles. If you are paddling the kayak on your own, you can easily put it in the water yourself.

itiwit x100 carry handle
There are carrying handles on the side tubes.
itiwit x100 carry handle stern
There are also carrying handles at the bow and stern.

At the bow and stern there are small spraycovers which provide additional protection against spray water. Furthermore, the kayak offers possibilities to fix luggage or to store small items. On the stern there is a large luggage net where you can put a large backpack or dry bag. At the front of the stern and at the back of the backrests there are small net pockets for small items, which are easily accessible when paddling. Such features seem less important at first sight, but in practice such details prove to be very useful and you don’t want to miss them.

itiwit bungee luggage net
The rear luggage net allows a backpack or dry bag to be securely fastened.
itiwit x100 storage bow spray deck
At the front of the spraydeck there is a small mesh pocket for utensils.

You can also use the boat backpack and store all your stuff there. This even fits in the rear of the boat if the rear seat is placed far forward. You can attach the backpack to the luggage net.

We also attach the backpack with its grey compression strap to the orange luggage net, so that in case of a capsize the backpack would not sink. Note, however, that the boat backpack is not waterproof.

The boat backpack can be stowed in the stern of the kayak.
With the luggage net and the packing strap on the backpack, it can be attached to the boat.

Review of the Itiwit X100+ on the water

The Itiwit kayak has a very high stability due to the wide and flat hull. You can get into the kayak without any worries. Due to the drop-stitch construction it feels very stable when you get in. We have paddled the kayak as a single and two persons configuration.

itiwit x100 kayak 2 persons configuration
Itiwit x100+ as 2-persons kayak.
itiwit x100 1 person configuration
Itiwit x100+ as a 1-person kayak.

The Itiwit X100+ as a 1-person kayak

If you place the seat in the middle of the boat, you can use it as a solo kayak. The carrying handle on the side tube makes it very easy to carry the boat to the water.

Since the three fins are very small, you can already get into shallow water and paddle without touching down. Should there be a shore or a river section with shallow depth, you will touch down very late with the small fins. Nevertheless, we recommend on rivers with very low level to omit the fins to avoid unnecessary grounding.

itiwit x100 kayak transport to water
The kayak can also be carried alone very easily to the water.

During paddling, the kayak lies extremely stable on the water. Jerky movements, adjusting the seat on the water, even standing up can in no way cause the boat to capsize. We have never paddled such a stable kayak before.

itiwit_x100_drop_stitch_kayak
The drop-stitch bottom and generous width allow you to stand in the kayak without any problems.
decathlon itiwit x100 stability
It is quite difficult to tip over with the boat, before that you fall out of the boat yourself.

In favour of stability the kayak loses performance on the water. The straight-line stability is only moderate with the three fins. The kayak also glides only slightly through the water when you stop paddling. Due to the wide side tubes we found a 220 cm long double-bladed paddle a bit too short. It is possible to paddle with it, but a paddle at least 230 cm or 240 cm long would be more comfortable, so that it is easier to get into the water with the paddle blades.

itiwit x100 solo paddling
The running characteristics as a 1-person kayak are rather moderate.

Despite the three skegss, the kayak has good manoeuvrability. However, a complete turn (i.e. 180°) is only possible with many paddle strokes.

The Itiwit X100+ as a 2-person kayak

The kayak is very quickly reconfigured into a 2-person kayak. The front and rear carrying handles make it easy for two people to carry the Itiwit x100 to the water. The carrying handles are placed nice and far outside.

itiwit x100 transport
The kayak can be carried comfortably over short distances to water. Due to the drop-stitch bottom, the kayak does not sag when carried.

When paddling as 2-person kayak, the stability is also very good. The performance on the water is noticeably better with a two persons, as the kayak lies more in the water and thus forms a longer waterline. So the speed and the straight-line stability are better. 

You can reach a speed of between 2,5 and 3,1 mph when paddling comfortably. Compared to other kayaks, the straight-line stability is not really good, but still okay. Here you should not forget that the kayak with a length of 365 cm and a width of 103 cm is not designed for fast but rather for calm and stable paddling tours.

itiwit_x100+_river_tour
As a 2-person kayak the performance on the water is noticeably better due to the larger waterline.

What surprised us is the space available. For a 2-person kayak the Itiwit x100+ is not very long. Nevertheless, as large persons we had enough space inside and enough legroom.  The seating position is really good in a kayak. This is normally something you don’t get in this price range. The seats give a good hold and enough comfort for a nice paddling tour. Due to the integrated drain valves and the raised seat position you will never really sit in the wet. In addition, the seat backs give good support and sufficient comfort for a leisurely paddle.

itiwit x100 space
The interior of the Itiwit x100+ is very spacious and invites you to relax. Here, the rear person sat cross-legged and there was enough room in the front to lie down.

If the seat cushion of the rear seat is firmly inflated, it is difficult to move it far back to the end of the Velcro strip on the floor. The interior is somewhat narrower at the rear and front due to the design. In the photo below you can see the maximum rear position when the seat cushion is fully inflated. If you still want more legroom in the back, you have to let some air out of the seat cushion so that it can be moved further back.

decathlon itiwit x100 experience
The person in front has the best legroom in the boat.
itiwit_x100_inflatable_kayak_spacejpg
Even in the back you have enough space as a large person.

On one of our recent trips on a hot summer day, we also really appreciated the Itiwit x100+ as a bath boat. We took the seats out and paddled a bit into the deep water. The double paddle can be attached to the paddle holder on the side tube. Since you can stand in the boat, jumping in from the boat into the water is no problem and also really fun. Since the boat is so tilt-resistant, you can also get back out of the water into the boat.

Itiwit x100+ 2 seater vs 3 seater

The Itiwit x100+ 2-seater is also available as a larger variant, i.e. 3 seater and 4 seater. The kayaks are identical in terms of equipment, air pressure, tipping stability and material. They differ only in price, color scheme, dimensions, load limit and weight.

itiwit x100 review 2 vs 3 seater
Itiwit x100+ 2 seater in front and Itiwit x100+ 3 seat in the back.

We have tested the 3 seater and compared it to the 2 seater. The Itiwit x100+ 3 seater gives you the possibility to go paddling with three people. With two adults and one child, it offers plenty of space. For three adults, the space is significantly limited, but for short (2 to 3 hours) and leisurely tours still possible.

In addition, the 3 seater can also be interesting for you as a 2 seater kayak, if the load limit and the space offered by the 2-seater seems too little. The 3 seater is another 45 cm longer and has a 50 kg higher load capacity. The rear paddler has much more room to stretch his legs. In addition, the extra space in the middle can be used to carry more luggage or even a dog. With two people, the 3 seater is about 0.5 km/h faster and drifts less when you stop paddling. However, we would not recommend the 3-seater simply because of the minimally better driving characteristics. If you don’t need the extra space and payload, the Itiwit x100+ 2 seater is a good choice.

Dismantling the Itiwit x100+

The dismantling of the kayak was quick and easy. All you have to do is open the three valves. Most of the air escapes by itself. The remaining air can either be pressed or pumped out. We normally pump out the remaining air. If you use the Itiwit air pump to pump out the remaining air, you have to disconnect the pressure gauge.

Remove the drop-stitch floor and fold it back up as originally. Then fold the kayak once lengthwise and place the folded drop-stitch floor on top. Finally fold them together to a packable size. The folded kayak fits back into the supplied backpack right away thanks to the large opening. Squeezing is not necessary here. There is even room for the air pump on the side of the backpack. Before closing the backpack, you still put the two seats and three fins in.

According to the user’s manual, the double paddle is stored in the outer side pockets next to the boat, seats and air pump. This did not work with us, because the backpack was already too tightly filled.

Strengths and weaknesses of the Itiwit X100+

The Itiwit x100+ is one of the most stable inflatable kayaks we have paddled so far. Thanks to the wide hull and drop-stitch bottom, you can even stand up in the boat without capsizing. The entry and exit is also very safe and due to the flat fins already possible in shallow water.

decathlon itiwit x100 review
The biggest strength of the Itiwit x100+ is the extremely high tipping stability.

Unfortunately, when dismantling and wiping dry after another tour, we had to find that the bottom with the side tube is not glued cleanly in case of our model. This had had no effect on the functionality of the boat so far, but it is still unsightly. When asked, Decathlon assured us that such processing errors do not usually occur. Nevertheless, we recommend that you always check the quality of workmanship (especially in the glued joints) of the model when buying an inflatable kayak (regardless of the brand).

Otherwise, Decathlon offers a robust and well thought-out kayak for the price. However, those who want to make long distances on standing water with the kayak will have less fun with the Itiwit x100+.

itiwit_x100_quality
Unclean gluing between the floor and the sidewall in the interior.

Advantages

+ high air pressure and thus a good stiffness for a beginner kayak + extremely stable against tipping + safe and comfortable entry and exit due to drop-stitch floor + drop-stitch floor is replaceable + thoughtful details (e.g. side carrying handles, pockets on the back of the seats, …) + very comfortable and plenty of space inside + robust boat skin + comfortable seats with sufficient back support + solid transport backpack + very suitable as a bathing boat + spare parts can be reordered

Disadvantages

– wide and hull and therefore slower – moderate straight running – on our model the bottom with the side tubes was not sufficiently or improperly glued (so far no effect on the functionality of the kayak) – no foot braces

Conclusion on the Itiwit x100+

Decathlon offers with the Itiwit x100+ a very functional and solid kayak. It is not a cheap inflatable kayak. The price is justified in our opinion. We think the price-performance ratio is very good. It was our first Itiwit inflatable kayak we reviewed and we have to say that Decathlon has launched a good recreational kayak for beginners. It is perfect for paddling on a lake and enjoying the peace and quiet on the water. The boat looks very well thought out. The Itiwit x100+ is unrivalled in this price range.

decathlon itiwit x100+ kayaking
The Itiwit x100+ is also a great fit for a small river tour.

Due to its high stability against tipping, the kayak is mainly aimed at beginners in paddling who would otherwise be afraid of capsizing. The inflatable kayak is also a clear recommendation for adults with children. Decathlon has also launched a 3-persons drop-stich kayak, which is aimed at small families. The Itiwit is a good kayak for small explorations on calm rivers and small lakes. If you want to do a day trip and paddle a long distance (over 20 km), you will have less fun with the kayak. Decathlon advertises a good combination of performance and stability. Stability clearly outweighs performance when you interpret performance as the speed of a kayak. The kayak makes a solid impression in terms of workmanship and robustness.

Alternatives to the Itiwit X100+

The Itiwit x100+ is not the only kayak from Itiwit. There is also the Touring series and we have also reviewed the 2 seater version. The performance on the water is quite similar but it takes much longer to dry due to the the polyester cover. Therefore, the boat is much cheaper.

And then there are also inflatable kayak brands like Intex and Sevylor, which are also well-known for entry-level kayaks.

Intex Challenger K1 Review

review of inex challenger k1

The Intex Challenger K1 is one of the cheapest inflatable kayaks. It even comes in a complete set, so that nothing stands in the way of an immediate paddling tour. We now wanted to know for ourselves how is it to paddle the Intex 1-person kayak and can it compete with a good quality inflatable kayak.

This inflatable kayak is also available as 2-person model. Make sure to check out our review on the Intex Challenger K2 as well, if you are interested in paddling with someone else together. We have also a complete guide about Intex boats and kayaks.

intex challenger k1

Technical Specs

Max. paddlers:
Length:
Width:
Capacity:
Packed size:

1
274 cm | 9′
76 cm | 2’5”
159 kg | 8.4 lbs
59 x 22 x 42 cm |
1’9” x 7” x 1’4”

Material:
Weight:
Pressure
Produced in:

PVC
12 kg | 26.5 lbs
0,069 bar | 1 PSI
China

Which model has been reviewed?

Intex Challenger K1 from 2019

How did we organize the review?

We have purchased the Intex Challenger K1 ourselves.

How intensively has the product been tested?

low

high 1 bar = 1-3 km paddled (first impressions)
2 bars = min. 1 day/ 2 half-day tours
3 bars = min. 4 tours
4 bars = min. 8 tours
5 bars = min. 12 tours (very intense)

Where have we tested the product?

Whitewater

Calm rivers

Lakes

Table of Contents

First impressions and assembly

The Intex Challenger K1 comes in a compact and very light carrying bag. Since the boat weighs only 28.4 lb, it can be carried comfortably over short distances with the included carrying bag. But the carrying bag is not robust. The material of the bag is so thin that already after the first use there was a small hole in the bottom.

Intex Challenger K1 transport
The boat comes with a light bag
Intex Challenger K1 bag
The bag contains the kayak, paddle and pump

The inflatable kayak is quickly unpacked and amazingly handy. To inflate the kayak you need to unfold it. The Intex Challenger K1 has two separate air chambers, a bottom chamber and a side chamber, each inflated by a Boston valve. Boston valves are 2-way screw valves that allow a quick and safe air inflation and deflation. Due to the separate air chambers it is still possible to reach the shore safely even if one chamber fails.

The bottom chamber is inflated at first with the supplied air pump. Inflating is very easy and goes relatively quickly. Nevertheless, many strokes with the air pump are necessary, because the pump is quite small. Fortunately the kayak is not too big. After inflating the bottom, the second chamber needs to be filled with air, which forms the sides and the deck of the kayak.

inflatable kayak Intex Challenger setup
The kayak is easily unpacked and is very compact
intex inflatable kayak setup
Boston valves are used to inflate the kayak
intex challenger inflation
The use the included air pump to inflate the boat

After inflating the two air chambers, the boat has reached its final shape. The interior does not seem very large. There is a hook-and-loop fastener on the floor, which is intended for fixing the seat.

intex boat space
Completely infltated – the interoir does not seem to provide much space

If you are not sure when the correct air pressure is reached, you can measure it. Intex has printed a measuring scale on each chamber for this purpose. With the enclosed measuring strip, it can be checked whether there is enough air in the air chambers or whether one of them still needs to be pumped up.

inflatable kayak air pressure
The air pressure can be easily checked with the measuring strip

The seat can also be inflated with the air pump. This consists of an inflatable seat cushion and a backrest. The backrest is attached to the side walls with straps and can be adjusted as desired. The seat is slightly wide and bulky for the small interior of the boat. Instead, the seat sits firmly in the boat as soon as it is properly placed in the interior. The fastening of the seat with Velcro is a simple and good idea of the manufacturer.

inflatable kayak seat
The seat is inflated via two valves
intex challenger k1 seat
The seat is attached to the boat with hook and loop and click fasteners
intex challenger seat kayak
The seat can be individually adjusted with the straps on the backrest

Finally, the footrest is inflated and placed in the bow of the boat and the skeg is attached. We consider the skeg in particular to be a very important feature. A skeg provides a much better directional stability, especially for inflatable kayaks.

inflatable kayak legroom intex challenger
A simple inflatable footrest is also included
intex challenger k1 skeg
The skeg is mounted on the bottom of the boat

The boat was completely assembled in 8 minutes. We have to admit that we had built up the Intex Challenger K2 before and therefore we are a bit familiar with the construction. Nevertheless we think that a setup of 10 to 15 minutes is possible without any problems.

With exact investigation of the boat, we notice immediately that the firmness of the tubes can’t really compete with high-quality inflatable kayaks. This was not to be expected otherwise, as the kayak has an operating pressure of only 0.069 bar. Higher quality inflatable kayaks have a much higher air pressure (e.g. Advanced Elements AdvancedFrame). However, one cannot expect a higher operating pressure for the price. On the one hand, the air chambers would then have to be processed to a higher quality so that they can withstand a higher operating pressure. On the other hand, a higher air pressure in combination with the boat material wouldn’t be any good. In contrast, the low pressure prevents more or less this material more effective from any ground and stone contact because the thin skin can easier yield.

intex challenger inftalbale kayak review
The air chambers of kayak are very soft due to the low air pressure

Besides the possibility to stow the luggage behind the seat in the stern, the kayak also has a luggage net on the bow. This gives a lot of space for additional luggage, which should be quickly at hand (e.g. shoes, water bottle, lunch box or dry bag). Behind the seat there is not too much space and of course it is also difficult to reach even while paddling. Therefore we like the large luggage net on the bow even more.

intex boat luggage
A lot of luggage can be stowed under the luggage net, which is quickly at hand during the paddling tour.

Review of the Intex Challenger K1 on the water

The air kayak has no handles. These are also not necessary. The boat is handy and light enough to be carried to the water. The canopy makes it a little more difficult to get in. However, the boat is stable in the water, so that capsizing is difficult.

air kayak intex challenger test
The kayak can be carried alone to the water without any problems
challenger k1 paddling
The Intex Challenger K1 lies stable in the water

The inflatable kayak is constructed so that the stern and bow are somewhat closed. This considerably reduces the ingress of spray water. But this has a disadvantage for tall people. In my case the Intex Challenger K1 is too small, because I am too tall for the boat (6’2”). In addition the canopy is very low dimensioned, so that one feels constricted. You should be at least smaller than 5’9”. Otherwise we recommend the Intex Challenger K2, which can also be paddled as a solo kayak.

intex challenger k1 experience
There’s not much space for the legs
intex challenger kayak interior
The interior in the bow is quite narrow

The directional stabilityand manoeuvrability are acceptable. For such a short boat we also expect it to react quickly to changes of direction. The skeg is definitely a must-have for the kayak because it improved the performance on the water a lot. However, it can’t compete with other inflatable ones in terms of performance, for example the Advanved Elements AdvancedFrame.

Those who have no comparison with other kayaks will find the speed to be sufficient and pleasant. The Intex Challenger K1 is perfectly adequate for leisurely explorations on a calm lake. However, if you want to join other kayakers on a kayak trip and they are paddling high quality inflatable kayaks or even fixed hull kayaks, you will not have any fun with Challenger K1. Because the inflatable kayak is too slow for that.

intex challenger k1 on the water
It is quite remarkable that you can get a kayak for so little money

We had tested the Intex Challenger K1 on a calm little lake. The conditions were ideal. That’s what the Challenger K1 is designed for. For long tours on big lakes or fast flowing rivers with possible ground contact we do not recommend the boat. The boat has too little material thickness and too little air pressure for such purposes.

intex challenger kayak experience review
The Intex Challenger K1 is suitable for leisurely paddling tours on calm waters

Dismantling

The dismantling was quick and easy. Only the rest of the air has to be pressed out a little bit while folding up or taking care that there are no sharp objects on the floor that could damage it. Once the air is completely out, the boat and all its accessories will fit without any problems into the carrying bag.

intex kayak dismantling
The Intex Challenger K1 could be stowed again well into the bag

Strengths and Weaknesses

The biggest strength of the Challenger K1 is above all the very reasonable price with complete accessories. The biggest disadvantage for tall people is the small and narrow interior. So paddling is hardly possible or very uncomfortable. Also the material and the driving characteristics speak more for a boat to have fun on the water during ideal conditions on small lakes than a real inflatable kayak.

Advantages

+ very cheap + all accessories already included (except life vest) + very practical luggage net on bow + integrated deck + attractive design

Disadvantages

– small and cramped interior – slow on water – thin material – low operating pressure – more fun boat than inflatable kayak – wobbly double paddles – short warranty period of 90 days (from day of purchase)

Conclusion on the Intex Challanger K1

For those who want to try paddling for themselves first, the Intex Challenger K1 is ideal. The inflatable kayak is the only 1-person kayak for beginners on the market. It is particularly suitable for small paddling trips on calm waters. The boat is offered in a complete set with very useful accessories, such as the skeg, and enables an immediate start into paddling pleasure.

You should not compare the Challenger K1 with a fixed hull kayak, not even with a higher quality inflatable kayak. If you’re already sure you want to make several paddling trips in the season or don’t want to restrict yourself to calm waters, you should buy a higher quality boat. The purchase price is higher, but the differences in terms of handling characteristics and quality are enormous.

Accessories for the Intex Challenger K1

The scope of delivery of the boat includes the following accessories:

  • Kayak paddle
  • Inflatable foot brace
  • Air pump
  • Fin
  • Repair patches
  • Transport bag

In addition, we recommend the following accessories:

  • Life jacket: Itiwit BA 50N+ * (good life jacket for beginners, very good price-performance ratio, more details in our test report).
  • Dry Bag: Itiwit dry bag 10L* (ideal for protecting items from splashing water and short immersion in water, good workmanship, with carrying strap, available in different colors and sizes)
  • Transport backpack: only a bag is included, which is intended for storage and short transport of the kayak to the water. If you want to transport the kayak longer distances and more comfortably to the water, we recommend the Itiwit transport backpack*, which is comfortable to carry and has enough space for the kayak and accessories.

Alternatives to the Intex Challenger K1

Intex has other inflatable kayaks, which could be interesting if you are looking for an entry-level inflatable. But same here, the kayaks are designed for short tours on calm water. There are no big differences between the Challenger K1 and K2. The Intex Challenger K2 is a tandem kayak and can also be paddle as a solo kayak. You are a bit faster with it since it’s longer. The Intex Explorer K2 looks quite different but it’s quite similar with the K2. We have compared both kayaks and you can find out the differences in our Intex Challenger vs. Explorer article.

The Intex Excursion Pro is more solid and the material of the boat skin is thicker. However, it’s also the most expensive Intex kayak.

Advanced Elements AdvancedFrame Review

advanced elements solo kayak

The Advanced Elements AdvancedFrame is a closed 1-person inflatable kayak. The Californian manufacturer Advanced Elements was founded in 2007, but already produces a variety of inflatable kayaks. The AdvancedFrame is the manufacturer’s classic and is very popular and widespread among inflatable kayaks in the US. We had the opportunity to review the kayak for one season and would like to share our impressions with you.

Make sure to check out also our review on the Advanced Elements AdvancedFramce Convertible Elite kayak. This is a 2-person tandem kayak, but it can be also paddled by one person. Thanks to its length, it has a really good performance on the water.

advanced elements advancedframe

Technical Specs

Max. paddlers:
Length:
Width:
Capacity:
Packed size:

1
318 cm | 10’4”
81 cm | 2’7”
136 kg | 300 lbs
76 x 43 x 25 cm |
2’5” x 1’4” x 8”

Material:

600d nylon (deck), tarpaulin
polyester fabric (floor),
PVC (chambers)

Weight:
Pressure:

16.3 kg | 36 lbs
0.14 bar | 2 PSI (side chambers),
0.07 bar | 1 PSI (floor)

Produced in:

Indonesia

Which model has been reviewed?

Advanced Elements AdvancedFrame with backbone (optional accessory) from 2019

How did we organize the review?

The Advanced Elements AdvancedFrame was provided to us by OutEquip, the European distributor of Advanced Elements. Our review is independent of the manufacturer or distributor and reflects our own opinion of the boat.

How intensively has the product been tested?

low

high 1 bar = 1-3 km paddled (first impressions)
2 bars = min. 1 day/ 2 half-day tours
3 bars = min. 4 tours
4 bars = min. 8 tours
5 bars = min. 12 tours (very intense)

Where have we tested the product?

Whitewater

Calm rivers

Lakes

Table of Contents

First impressions and assembly

The inflatable kayak comes with a robust carrying bag, which is not equipped with a backpack strap. This is a shame because the 16.3 kg (36 lbs) boat is not a lightweight. If you also want to transport the boat by public transport, bicycle or on foot, we recommend purchasing a spacious transport backpack. If you want to store your boat or transport it by car in the trunk, the transport bag is perfect. The Advanced Elements is quite heavy for a single inflatable kayak. Other manufacturers can do this better. In the meanwhile Advanced Elements has introduced also another model, the AdvancedFrame Ultralite, which is much lighter.

advancedframe tranpsort bag
The kayak comes in a transport bag

We have reviewed the AdvancedFrame with the backbone, which is optionally available as an accessory. Independent of the backbone, the bow and the stern of the kayak are stiffened with aluminium rails, which are supposed to promise improved driving characteristics.

What does BackBone mean?

The backbone is a four-part pole that is placed between the outer skin and the floor chamber before inflation. The weight of the paddler presses the pole against the bottom of the kayak, forming the usual V-shape for solid hull kayaks, but unusual for inflatable kayaks. The hull of the boat is thus better shaped. The V-shape of the hull improves directional stability and increases speed.

advancedframe floor backbone
Inflatable floor (included) and backbone (optional)
advancedframe backbone
Kayak with backbone before assembling

The kayak has seven air chambers. That sounds a lot at first, but it’s not. For the side tubes there are two chambers, one inner and one outer. This construction gives the tube kayak even more safety, as the inner chamber is protected from the outside. If the outer chamber is damaged, you can still get to the shore safely. The third chamber is the floor, which is very quickly inflated due to the low air pressure. Then there are two air chambers or air tubes for the spray deck and the coaming rim.

The backbone is placed in the boat before inflating the floor chamber. To do this, the four-part rod is half assembled. The two poles are then put together in the boat. Placing the backbone and plugging it in is very easy and does not require a lot of effort. The air chamber of the floor is then placed on top and inflated to 0.1 bar. When inflating, it is necessary to check whether the backbone is in the middle. Even if the backbone is not completely centered, the boat still runs well in the water and deviates only very little from the track. You inflate the bottom chamber until air escapes from the pressure relief valve. Then the correct operating pressure is reached.

advancedframe backbone placed
The ends of the backbones are placed under the air chamber
setup advanced elements backbone
Connecting both end of the backbone

Compared to the Advanced Elements Convertible, the seat does not have a high seat cushion. This is also not necessary as the soft floor of the kayak offers sufficient seating comfort.  The only disadvantage of the flat seat is that when you are in the water, you immediately sit in the wet.

The backrest is attached to the side walls by two straps with a click fastener. You can adjust the position of the backrest individually before and during the ride on the water. The seat is well made and can be placed variably in the boat. The backrest of the seat is nicely high dimensioned. Large people should attach the seat to the far back of the boat (see picture below). Air tubes are integrated underneath the spray deck so that the spray cover itself with the coaming do not hang down. Thus the spray deck gets a good form and an optional spray skirt can be stretched over it.

advancedframe kayak seat
The seat cushion is not inflated
advancedframe coaming
Under the deck and on the coaming there are more valves for inflation
advancedframe attachment seat backrest
The backrest is attached to the side chambers.

The boat is equipped with two directional fins, a very flat elongated fin at the bow and a short larger fin at the stern. Directional fins are essential on inflatable kayaks for good directional stability. Many inflatable kayak manufacturers offer attachable fins so that they can be removed in whitewater or very shallow water. We ride our Gumotex Swing 2 in very shallow water and whitewater without a fin. This is not possible with Advanced Elements, as they are permanently mounted. On the other hand, the fins are relatively shallow so that the risk of grounding is significantly reduced even in shallow waters. In addition, it is not completely rigid and would yield to the side if touched lightly.

advancedframe fin
Fixed fin on the bow
advanced frame kayak keel
The stow and bow are very well-shaped


The Advanced Elements AdvancedFrame is a closed kayak, which can be closed almost watertight with a spray skirt. The emphasis is on “almost”, because the zipper in the hood is not waterproof. For small amounts of water, the grey fabric strips act as a barrier, partially covering the zipper. So the water does not flow to the zipper, but well from the hood again. For larger quantities of water (e.g. if you catch a large wave unfavourably and it sloshes over the bow, water drips into the interior afterwards). On the other hand, the zipper allows easy access to the interior, be it to place the backbone or to wipe the interior of the boat dry. We find the luggage net on the front hood very successful. This makes it possible to stow a drybag or daypack safely and easily.  There is not much storage space behind the seat under the hood, there is only room for a water bottle and a lunch box.

advancedframe cargo bungee net
Big cargo bungee net on the front deck for luggage

In the back there is no luggage net on the hood, but only 4 D-rings as a fixture for fastening luggage. The carrying handles are very similar to Gumotex inlatable kayaks and are very comfortable for transporting the kayak on land.

advancedelements space
The air pump can not be completely placed under the deck at the stern
advancedframe valve
The kayak has different valves for inflation and carrying handles

We think the modular construction of the boat is very good. On the one hand it can be easily repaired in case of damage, because the floor and side chambers are exchangeable. On the other hand, it can be extended or adapted to different paddling conditions. If you paddle large and slowly flowing rivers and lakes, you can equip the boat with the backbone. If you paddle wilder rivers with possible ground contact, you only use the soft floor chamber and the boat cushions unpleasant touches with rocks and stones better. 

In addition, the inflatable kayak has a paddle holder on the hood. When carrying the boat over your shoulder you can take the paddle in your hand. But if you want to rest longer on the water, the paddle holder is quite practical. After building up the inflatable kayak, you immediately notice how well the bow and stern are stiffened. AdvancedFrame owes the great pointed shape to the inner aluminium rails and inserted plastic plates.

advancedframe bow
At the tips of the kayak plastic plates are inserted to shape the ends even better

Review of the Advanced Elements AdvancedFrame on the water

The inflatable kayak can be easily carried to water on its own and used by taking it over your shoulder. Getting started is also easy and safe. If it is too tight for you, you can open the deck cover via the zipper and close it again after entering. 

advanced elements solo kayak
The AdvancedFrame is quickly ready for use

If you now sit in a kayak and start paddling, you will notice two things. First, the kayak lies stable on the water. Capsizing would be difficult. Therefore the kayak is also very suitable for beginners. The kayak has also behaved very stable on the water during waves (due to passing ships). On the other hand, we immediately liked the straight line. The kayak has good directional stability for an inflatable single kayak, compared to other inflatables of similar quality (e.g. Gumotex Swing 1 or Gumotex Twist). This allows paddling without constant correction of the direction.

advancedframe review
The inflatable kayak lies well in the water and is very stable against tipping

The inflatable reaches a speed of over 5 km/h (3 mph) when paddling comfortably, and well over 6 km/h (3.7) when paddling quickly. These are good values for a single inflatable kayak. Nevertheless, it is noticeably slower than the Advanced Elements AdvancedFrame Convertible Elite, the 2 person version of this boat. In comparison to the 1-person version, the 2-person kayak has due to its long hull an even better directional stability and is 1-2 km/h (0.6 – 1.2 mph) faster. The manoeuvrability of the boat is good, but we have also paddled more manoeuvrable 1-person kayaks.

What’s the benefit of the BackBone?

We had tried out the boat without backbone on another paddle tour. We had expected bigger differences. Without the backbone, the inflatable kayak has a slightly poorer directional stability and is between 0.5 and 1 km/h slower (0.3 – 0.6 mph). The price of just over $90 is not justified for such a pole. Those who paddle only occasionally can do without a backbone for the time being, as the boat can also be paddled satisfactorily without this rod.

advanced elements advancedframe inflatable kayak
We have paddled the kayak with and without backbone

The kayak offers plenty of space and legroom (both when paddling with and without shoes) so that even tall people can paddle it. The comfort is also good. At the beginning we found the soft floor chamber to be rather inferior, as it gives way when getting in. Without the backbone, we would have wished for a much harder air floor chamber (e.g. 0.2 bar / 3 PSI). When using the backbone, however, it makes sense that the floor gives way and thus pushes the rod downwards. This is the reason why the V-shape of the hull is the first thing that happens. Unfortunately the seat is not fixed to the bottom of the kayak. A Velcro solution to fix the seat to the ground would have been nice. Nevertheless, the backrest of the seat provides enough support when paddling and has a good height. Although the floor chamber is very soft, the backbone did not pinch in any way during paddling.

advanced elements inflatable kayak review
For a 1-person inflatable kayak, the AdvancedFrame achieves good speed and has straight running characteristics

After several paddle tours on small and large lakes and on rivers with stone contact, the AdvancedFrame convinced us. The outer skin of the bottom is robust and thick enough to withstand unpleasant groundings. Nevertheless, we were able to detect two small, long scratches in the boat skin that we do not see as critical. None of the scratches indicates that it will lead to a hole. That speaks for a thick boat skin, which makes the boat heavier but also more robust. It’s also positive that the material hasn’t rubbed off at any point. Although we landed with the inflatable kayak on pebble beaches, the boat didn’t mind. 

We didn’t try the AdvancedFrame in white water. Here we would recommend not to use the backbone. In case of strong groundings the rod does not give way and the material is fully loaded with friction. Without the backbone, the air floor cushions the “impact” much better.

advanced elements kayak
The driving characteristics convinced us completely.

Dismantling the kayak

The dismantling of the inflatable kayak is very easy and fast. After paddling you open the valves and most of the air escapes by itself. The rest of the air escapes when you roll it up or can be pumped out with the air pump. The big disadvantage is the nylon material of the top and the side tube jacket. The water can be wiped off with a cloth, but the textile remains moist pretty long and has to be put out to dry at home to prevent mold.

Strengths and Weaknesses of the Advanced Elements Advanced Frame

The AdvancedElements AdvancedFrame with BackBone shines above all with its driving characteristics. For an inflatable 1-person kayak the speed and the straight line are really good. The biggest weakness is the long drying of the nylon covers of the side chambers and the spray deck. Also the boat is not a lightweight.

advanced elements kayak review
Winter paddling tour with the AdvancedFrame

Advantages

+ modular design and therefore easy to repair + very good speed for a 1-person inflatable kayak + very good directional stability for a 1-person inflatable kayak + generous interior, also suitable for tall people + good workmanship and robust boat skin + comfortable to sit and paddle + large and easily accessible luggage net on the bow + stable

Disadvantages

-water-permeable zippers – water-permeable zippers – long drying time due to the nylon material – high weight for a 1 person kayak – large pack size for a 1-person inflatable kayak – backbone must be purchased additionally – no foot brace

Conclusion on the Advanced Elements AdvancedFrame

The Advanced Elements AdvancedFrame is a closed inflatable kayak for beginners and demanding kayakers. We always had a lot of fun paddling the AdvancedFrame. Compared to cheap inflatables, it is superior to other kayaks in terms of riding characteristics, workmanship and equipment. Therefore, we find the price justified. If you want to kayak several times during the season, the AdvancedFrame kayak is a good choice. Especially the firm and pointed shape of the bow and stern of the kayak has made Advanced Elements really good and is unparalleled on the market. This allows the boat to cut the water better and comes very close to the driving characteristics of a solid hull kayak. If you don’t want to paddle alone, you can also buy the kayak as a 2-person version. The Advanced Elements AdvancedFrame Convertible was tested as an Elite version on our website.

advanced elements advanced frame comparison
The AdvancedFrame is also available as a tandem kayak

In our point of view, the AdvancedFrame is pretty heavy, compared to other single inflatable kayaks. If the weight is important because the kayak is to be transported in a backpack, we recommend the Ultralite version of the kayak. The Ultralite version is available for an extra charge of around $100. In this case the backbone cannot be used. Also the drying time should be considered before the purchase. After the paddle tour, the boat has to be partially inflate at home to dry. For those who don’t mind the high weight and the long drying time, the AdvancedFrame from Advanced Elements is a great inflatable kayak that is robust and fun to paddle.

If performance, speed and much luggage space matter to you, then please check out the 2 person kayak from Advanced Elements, which can be converted as a 1-person kayak as well.

Accessories for the Advanced Elements AdvancedFrame

Paddle, air pump and life jacket are not included. These essential accessories must be purchased separately and there are numerous accessories available for the AdvancedFrame itself. If you want to improve the performance of your boat, you can get the backbone. If you paddle in cool seasons, you can optionally purchase a spray skirt that protects you from cold and splashing water.

  • Life jacket: Itiwit BA 50N+ * (good life jacket for beginners, very good price-performance ratio, more details in our test report).
  • Dry Bag: Itiwit dry bag 10L* (ideal for protecting items from splashing water and short immersion in water, good workmanship, with carrying strap, available in different colors and sizes)
  • Transport backpack: only a bag is included, which is intended for storage and short transport of the kayak to the water. If you want to transport the kayak longer distances and more comfortably to the water, we recommend the Itiwit transport backpack*, which is comfortable to carry and has enough space for the kayak and accessories.

Alternatives to the AdvancedFrame 1 person kayak

Advanced Elements AdvancedFrame Convertible Elite Review

advanced elements solo inflatable kayak

Advanced Elements is an inflatable kayak manufacturer from California and advertises with an evolution of inflatable kayaks, which is supposed to offer excellent driving characteristics through the use of patented technologies. We had the opportunity to review the AdvancedFrame Convertible Elite for an entire season.

The AdvancedFrame is the most popular inflatable kayak from Advanced Elements. The kayak is available as a 1-person and 2-persons kayak. The 1-person from Advanced Elements is a closed kayak and the 2-persons version is an open kayak. Nevertheless, the 2-person kayak can optionally be converted into a closed kayak with a deck, hence the name Convertible. The designation Elite indicates that the kayak is equipped with a drop-stitch floor. Boats without Elite come with a simple 0.1 bar (1.45 PSI) floor. Nevertheless, the simple version can also be upgraded with a backbone or a drop-stitch floor.

advanced elements advancedframe convertible

Technical Specs

Max. paddlers:
Length:
Width:
Capacity:
Packed size:

1
460 cm | 15’1”
82 cm | 2’7”
136 kg | 300 lbs
95 x 55 x 30 cm |
3’1” x 1’8” x 1′

Material:

600d nylon (deck), tarpaulin
polyester fabric (floor),
PVC (chambers)

Weight:
Pressure:

23.5 kg | 51.8 lbs
0.14 bar | 2 PSI (side chambers),
0.41 bar | 5.9 PSI (floor)

Produced in:

Indonesia

Which model has been reviewed?

Advanced Elements AdvancedFrame Convertible Elite from 2019

How did we organize the review?

The Advanced Elements AdvancedFrame was provided to us by OutEquip, the European distributor of Advanced Elements. Our review is independent of the manufacturer or distributor and reflects our own opinion of the boat.

How intensively has the product been tested?

low

high 1 bar = 1-3 km paddled (first impressions)
2 bars = min. 1 day/ 2 half-day tours
3 bars = min. 4 tours
4 bars = min. 8 tours
5 bars = min. 12 tours (very intense)

Where have we tested the product?

Whitewater

Calm rivers

Lakes

Set-up and first impressions

The inflatable comes with a robust and large carrying bag, which can even be carried as a backpack. It is very practical for the storage and the short transport of the boat. The shoulder straps are attached to the bag with metal carabiners. No matter how we adjusted the backpack, the karabiners pressed painfully into the shoulder. So the backpack function is almost useless. This is a pity, as the kayak is quite heavy.

advanced elements frame convertible carry bag
The inflatable comes with a big bag
advanced elements advancedframe convertible backpack
The transport backpack is uncomfortable to carry
advanced elements advancedframe convertible folded
The AdvancedFrame is folded several times. The fins are permanently mounted on the kayak.

The bottom of the boat consists of a tarpaulin polyester fabric, which according to the manufacturer is composed of 3 layers. High-priced Sevylor boats also use this material for the bottom of their inflatable kayaks. At first sight the material makes a very high quality and robust impression. Our long-term test will show how tear and abrasion resistant the material really is.

advanced elements kayak seat
The included seats make a heavy but at the same time high-quality impression.

The AdvancedFrame Convertible Elite features two inflatable seats and a footrest for the rear paddler. The included seats look a bit bulky and heavy, which contributes to the high overall weight of the boat. Both seats have a high seat cushion. This keeps the seat of your pants dry even when there is splash water in the boat. In addition, the backrests are inflatable and have a pocket on the back for the valve tube and another for small items. The seats make an overall high-quality impression.

advanced elements kayak setup
Transport bag, which also serves as a inflation and dry bag

After putting the boat apart you can see its length. In principle, this speaks for good driving characteristics. In addition, a removable drop-stitch floor is already in the boat, which is supplied as standard in the Elite version. A removable inner floor is very practical in any case. If the Drop-Stitch floor should break down, it can easily be replaced.

advanced elements frame convertible elite valve side chambers
The air chambers are inflated via three valves
advanced elements drop stitch floor
The drop stitch floor is separate air chamber
inflating advanced elements kayak
The AdvancedFrame has two side chambers, an inner and an outer side chamber

The inflation of the air chambers is done quite quickly with a double action air pump. The side chambers must be pumped up to 0.14 bar (2 PSI). Here the air is supplied via two separate valves, because the side walls of the boat consist of a separate inner and outer chamber. This construction gives the boat a high level of safety. On the one hand, the PVC floor and the nylon cover protect the air chambers. On the other hand, in case of damage, only the outer side chamber gets damaged. This ensures safe paddling to the next shore.

The side chambers are in nylon covers, which can be opened with zippers. If an air chamber is defective, it can be replaced. Finally, the Drop-Stitch floor is inflated to a maximum of 0.41 bar (5.9 PSI). Please make sure that the Drop-Stitch floor is centered in the bottom of the boat. At the beginning the complete assembly takes a little longer. As soon as you are trained, it will be faster and the inflatable kayak will take between 10 and 15 minutes to set up.

What is Drop-Stitch and BackBone?

With the Drop-Stitch technology, the upper and lower inner walls of the air chamber are additionally woven with nylon threads. This is the only way to achieve a significantly higher air pressure than with air chambers without the tangled nylon threads. The air chamber thus achieves very good dimensional stability and rigidity. The Drop-Stitch technology is very common for SUP boards (Stand Paddling Boards) and is used more and more for inflatable kayaks. Learn more about this type of inflatable boats, in our buyer’s guide for Drop-Stitch kayaks.
 
The BackBone is a multi-part rod that is placed under the air floor inside the kayak during assembly. Due to the weight of the kayaker, the BackBone is pressed against the outer wall of the boat and thus forms a V-shaped kayak hull, which is unusual for inflatable kayaks. This increases the directional stability and the speed. As a retrofit option, the BlackBone is much cheaper than the Drop-Stitch technology.

advanced elements convertible elite drop stitch floor
The drop-stitch floor is removable, but must be placed in the boat for inflation
advanced elements advancedframe convertible elite drop stitch floor
The drop-stitch floor was easier to inflate than we thought

After inflation, the kayak has reached its full shape. The bottom lies very well in the kayak and is extremely firm due to the drop stitch technology. On each side chamber there are three click fasteners in which the seats can be attached. The boat can be paddled as a 2- or 1-person kayak. For the 1-person configuration, take the click fasteners in the middle.

advanced elements kayak bow stern
The plastic plates are put into the pockets at the bow and stern ends
inflatable kayak bow stern
This makes the ends of the bow and stern even better shaped

In addition, there are flexible plastic plates for the stern and bow end. These are inserted into the pockets provided and thus form the ends of the kayak even better. We think it’s a great idea, because the kayak looks even stronger and higher quality by simple means.

advanced elements cockpit
The kayak is equipped with air chambers underneath the spray decks, which give them a better shape.
advanced elements frame convertible elite cockpit bungees
On the top of the bow is a very practical luggage net
advanced elements kayak deck
The stern features only a device for fastening luggage or preparing for a luggage net

Although the AdvancedFrame Convertible is an open kayak, it is equipped with very generous spray covers at the bow and stern. This is practical in two ways: On the one hand, the spray covers protect against splashing water when there are waves. On the other hand, luggage can be attached to the canopy without disturbing paddling. A luggage net is already attached to the top of the bow, for example to attach a daypack comfortably and safely. On the top of the stern there is only a device in the form of four D-rings. This allows luggage to be fastened with a luggage net or cords. It would have been better if it had already been integrated.

So that the cockpit is not sagging and stretched, there are small air tubes at the front and rear on both sides to inflate. This is again a small detail, which makes the kayak higher quality.

advanced elements water test
Testing the spray deck

The zipper in the front spray deck is very practical for cleaning the boat and positioning the Drop-Stitch or BackBone correctly. But a zipper in the spray deck, which is supposed to keep water out? We tested it. Advanced Elements was aware of this and covered the zipper with grey strips. This works very well in the front area. Most of the water doesn’t flow in. In the long run, it drops a little. It becomes more problematic at the end, where the zipper is located. Here the water runs through and you get wet when paddling. If you expect waves when paddling, you should cover the zipper with removable adhesive tape (e.g. the Scotch Supreme fabric tape, compared to conventional fabric tapes, it leaves no traces of adhesive). The nylon fabric of the top, on the other hand, does not let water through.

advanced elements tandem kayak
The AdvancedFrame Convertible as a 2-person kayak
advanced elements seat position kayak
The AdvancedFrame Convertible as 1-person kayak

The seats can easily be placed in the kayak and sit firmly so that they do not slip any further. The backrest can be individually adjusted with the straps. If you want to paddle the kayak alone, place a seat in the middle of the kayak and use the middle buckles on the side walls to fix the backrest. We like this concept of a variable sitting position very much.

advanced elements paddle holder
Paddle holder on the side chamber
advanced elements cockpit zipper
Optionally, a deck can be attached via zipper
advanced elements cockpit
Deck for 2 person
advanced elements solo deck review
Deck for 1 person

The inflatable kayak from Advanced Elements has many other useful features. It has carrying handles at the bow and stern, which is self-evident, but some inflatables do not have. There are even holders for the double paddles. These are especially useful when carrying the boat around, or when you want to relax on the lake in a kayak and the paddles are not needed. The boat can also be converted into a closed kayak with a cockpit. Therefore, the kayak is equipped with a zipper all around in order to mount the optionally available cockpit. Attaching the cockpit was very easy.

advanced elements kayak hull
Transport bag, which also serves as a inflation and dry bag

Advanced Elements has attached great importance to good driving characteristics. This can be seen in the different characteristics of the boat. The keel of the bow and stern are well formed for an inflatable kayak. These reinforcements are achieved by aluminium rails inside the boat. Thus the water is cut and not “pushed in front of itself”. Not only the keels are well formed, but also the bottom of the boat. On the photo you can clearly see the smooth and flat bottom, which is formed by the inlaid Drop-Stitch floor.

In addition, the inflatable kayak has three integrated direction fins on the bottom. A very flat and elongated fin at the front and rear of the kayak and a large directional fin at the bow. All three directional fins are very flat, so grounding by the fins is unlikely and straight-line stability is improved at the same time.

Review of the AdvancedFrame Convertible Elite on the water

We could already test the boat under different conditions (e.g. on rivers in cities, big lakes with moderate wind and mountain lakes), where the boat had to endure some demands. Our experiences refer to the AdvancedFrame Convertible Elite, with drop-stitch floor.

advanced elements convertible review
The kayak offers enough space for the paddlers

When we first paddled the Advanced Elements AdvanceFrame on the water, we were immediately impressed by the performance. For a inflatable kayak it is very easy to paddle and we always had the feeling of moving pretty quickly. Compared to many other inflatable, the Advanced Elements forms a bow wave much later and is therefore faster and easier to paddle.

Since the Dropstitch floor can be inflated up to 0.41 bar (5.9 PSI), it does not deform when paddling. This makes paddling in the Advanced Elements kayak even more efficient. The solid floor prevents possible deformation due to the weight of the paddlers. This results in a flat and smooth underside of the kayak in the water, with significantly less water resistance. You had the feeling of sitting in a high quality solid hull kayak. 

Even in windy conditions, the inflatable kayak had made a good impression, which is not a matter of course for an inflatable kayak. Because in principle inflatable kayaks are more likely to float on the water than in the water compared to solid hull and folding kayaks. The side chambers give the wind a lot of surface to attack and make paddling more difficult. We had also noticed the effect of the wind on the Advanced Elements and were slightly drifted off course depending on the wind direction. Nevertheless we were satisfied with the performance. In spite of moderate wind and rough sea we made good progress and had a speed of up to 6 km/h (3.7 mph).

advanced elements kayak review
Due to the long construction and the well formed hull the kayak can be paddled quickly

Compared to many other kayaks, the Advanced Elements is stable in the water. It is not quite as stable as the Gumotex Swing 2 (which in our opinion is one of the most stable inflatable kayaks), but still absolutely sufficient. On our paddle tour through Berlin the partly heavy waves of passing ships could not bring the Advanced Elements AdvancesFrame into an unstable position. We always felt safe in the boat.

sylvensteinsee paddling
The seats provide sufficient support for the paddler
advanced elements frame convertible cockpit
Here, the kayak is equipped with a deck

The kayak offers paddlers enough legroom. So it is also suitable for tall people. However, we think it is a pity that there is no footrest for the front paddler. That’s why the front paddler has to move its seat forward so that the feet can be pushed against the inner of the bow.

The seats give a good support when paddling. The backrests are strong enough and do not bend. The seat cushion also retains its position in the boat. During longer trips, however, it can be a bit uncomfortable for the buttocks, as the seat is firmly padded and the Drop-Stitch floor is also very firm. However, we do not consider this to be a disadvantage as a paddle boat is not a sofa. If you like it more comfortable, you can use a soft seat cushion. Alternatively, the AdvancedFrame Convertible with Back-Bone instead of Drop-Stitch would be recommended in this case. There is the standard floor with 0.1 bar (1.45 PSI), which is softer and therefore gives more softness when sitting.

We also find it practical that it is very easy to adjust the backrest when paddling. We have often used this on longer trips to avoid having to sit in the same position all the time.

advanced elements kayak deck review
Solo paddling with deck
advanced elements solo inflatable kayak
Solo paddling without deck

As a single kayak the AdvancedFrame Convertible Elite also has a good trim, so the hull is evenly distributed in the water. The driving characteristics had convinced us here as well. As a 1er the boat can be steered well and paddled quickly. In the 2-seat configuration, the front paddler is well protected against splashing water by the very generous spray deck at the bow. This advantage disappears with the 1-seat configuration, as you slide backwards considerably. Here a 1er cockpit would be recommended on longer tours. Apart from that we also find it a pity that there is no footrest, but this doesn’t bother when paddling comfortably.

inflatable kayak deck hatch
The 1 person deck comes with a hatch
advanced elements kayak deck
Under the hatch is a roll closure and gives access to the stern of the kayak

We really liked the additional deck for solo paddlers. There is a cross brace at the front of the seat hatch so that the deck does not hang down in the paddler’s foot area. The hatch closure is a good idea, and in our view the better solution to the zippers in the deck. Through the roll closure no water gets inside the boat.

advancedframce tandem kayak luggage
We really liked the front luggage net on our paddling tours.

The luggage net also convinced us. The click closures make it easy to accommodate even large luggage. In the case we had clothes and other items of three people stowed in the carrying bag of the boat.

Dismantling the kayak

The dismantling and folding of the boat was easy. However, the kayak did not fit so loosely and easily into the supplied carrying bag. Here it helps to fold the boat without seats, footrest and drop-stitch floor and to lay into the bag. Afterwards it is much easier to store the remaining parts in the carrying bag.

However, at home the kayak has to be disassembled and inflated slightly so that the nylon covers dry properly. Especially the nylon covers of the side chambers dry badly. It is advisable to reposition or turn the tubes after some time, so that everything is dry at the end.

advanced elements kayak fin
Dismantling the kayak is pretty easy

Strengths and Weaknesses

The good driving characteristics are definitely the greatest strength of the Advanced Elements, which it offers as a inflatable kayak. Paddling is really fun with the boat. The two biggest weaknesses of the Advanced Element are its high weight and bulky pack size. Also the long drying time through the nylon cover is a bit annoying compared to Innova and Aquaglide boats. These boats of the manufacturers can be simply wiped dry with a cloth.

advanced elements advancedframce convertible elite

Advantages

+ very good driving characteristics + spacious interior + good workmanship + plenty of well thought-out details and features + good directional stability + modular design and exchangeable side chambers and floor + boat can be extended with accessories (complete cockpit, BackBone, Drop-Stitch floor) + can also be paddled as a 1-person kayak + Increased air pressure compared to other nylon-covered inflatable kayaks

Disadvantages

– susceptible to dirt and long drying time due to nylon cover – high weight and large pack size for an inflatable – less manoeuvrable due to length – no third seat can be integrated for a child (but can sit on the floor and thus be safer) – little space at the rear for luggage – no foot brace for the front paddler – uncomfortable and tightly dimensioned transport bag

Conclusion on the Advanced Elements AdvancedFrame Convertible Elite

For an inflatable kayak, the Advanced Elements AdvancedFrame Convertible Elite has got solid hull drivinig characteristics. With its pack size and weight it belongs to the bulky and heavy inflatable kayaks. As the boat is originally designed for the American market, where the next lake will be reached by car instead of public transport, it is easy to understand why the manufacturer placed less emphasis on weight reduction. On the other hand, the boat scores in driving characteristics, comfort and equipment. With the AdvancedFrame Convertible, it is obvious that the manufacturer did not want to copy another inflatable kayak and bring it onto the market, but wanted to set itself apart from the conventional inflatable kayaks. From our point of view, the manufacturer has succeeded. The integrated aluminium rails in the bow and stern of the boat in combination with a dropstitch bottom or a backbone result in an inflatable kayak which is so unique on the market. It is really fun to paddle because it is very easy and fast. We also noticed that Advanced Elements didn’t cut corners here when it came to workmanship and equipment. The kayak is solid and has a lot of equipment.

Due to its weight, we recommend a permanent canoe cart for the Advanced Elements. If you take your car or camper and paddle accessible rivers and lakes, this aspect is of little importance to you. For those of us who mainly use public transport and like to carry a boat on our backs for more than half an hour, the inflatable kayak is less suitable. For our tests we had transported the boat in a backpack, but only the boat without any other equipment. We usually transport our Innova Swing 2 with all the equipment in a backpack and it is even lighter than the Advanced Elements. The material had made a robust impression on the tours and had to put up with a lot. Small traces of use (like small long scratches) are visible, but not further critical from our point of view. Nevertheless, we recommend paddling the boat with care and drying it properly after the tour. Then you have a great infatalbe kayak, which will give you a lot of paddling fun for many years.

We have also reviewed the Advanced Elements AdvancedFrame 1-person inftlable kayak. This is a great alternative if you are looking for a lighter and more compact kayak and if you would paddle mostly alone.

Accessory for the Advanced Elements AdvancedFrame Convertible Elite Kayak

advanced-elements-cockpit-installed
The AdvancedFrame Convertible with cockpit.

The Advanced Elements AdvancedFrame Convertible can be equipped with a 1-person or 2-person cockpit and thus be converted into a closed kayak. We had tested it and found the installation of the cockpit very easy. Personally we found the interior a bit too narrow. Nevertheless it is a good option to protect yourself from splash water and cold in spring or autumn.

Sevylor Adventure Plus Review

Sevylor Adventure Plus

The Sevylor Adventure Plus is the big brother of the popular Sevylor Adventure and offers space for up to 3 people. We have reviewed this inflatable canoe and would like to share our impression with you. At the end we also give a recommendation for whom the boat is especially suitable.

sevylor adventure plus

Technical Specs

Max. paddlers:
Length:
Width:
Capacity:
Packed size:
Material:

1
368 cm | 12’1”
86 cm | 2’8”
159 kg | 200.4 lbs
43 x 20 cm | 1’4” x 7”
210d high count nylon (hull)
840d ballistics nylon (floor)

Weight:
Pressure:

Produced in:

15 kg | 33.1 lbs
0.06 bar | 0.88 PSI
0.1 bar | 1.5 PSI
China

Which model has been reviewed?

Alpacka Expedition with removable whitewater deck from 2020

How did we organize the review?

We have purchased the Sevylor Adventure Plus ourselves.

How intensively has the product been tested?

low

high 1 bar = 1-3 km paddled (first impressions)
2 bars = min. 1 day/ 2 half-day tours
3 bars = min. 4 tours
4 bars = min. 8 tours
5 bars = min. 12 tours (very intense)

Where have we tested the product?

Whitewater

Calm rivers

Lakes

Table of Contents

First impressions and assembly

The Sevylor Adventure Plus has a nylon cover that protects the inner tubes from damage. This is a good idea, because the nylon cover is definitely more robust than the PVC material. In addition, the nylon cover gives the boat the impression of a real canoe. The disadvantage of this nylon cover is that it is more susceptible to dirt, dries more slowly and makes the boat heavier.

Sevylor Adventure Plus bag
Included transport bag
Sevylor Adventure Plus Fin
The fin needs to be attached before inflating
Sevylor Adventure Plus setup
The floor is quickly inflated with the double action pump

Don’t forget: Plug in the fin before inflating. This is to support the straight run stability of the boat. The fin is already included in the delivery. The boat was in a thin fabric bag. This is mainly for storage and short transport.The inflatable boat makes a very valuable impression when unpacked. The air tubes are already inside the nylon cover. All in all, the assembly is quick and easy. The only requirement: The air tubes must be placed correctly.

Sevylor Adventure Plus zippers
The zippers allow access to the inner tubes

There are two zippers in the nylon cover at the front of the interior. These allow access to the inner tubes in order to position them correctly before assembly or to replace them in the event of damage. The seats can also be removed from their nylon covers. This is handy if you want to wash the nylon cover of the seats.

Sevylor Adventure Plus valves
All 3 air chambers are inflated via a Boston valve

All three air chambers are equipped with Boston valves. The Boston valve is a 2-way screw valve, which allows a safely and quick in- and deflating. The handling of the valves was very simple as well.

Sevylor Adventure Plus Manometer
The air pressure can be accurately measured with the included manometer

The included manometer is particularly practical for determining the air pressure in air chambers. The side chambers may be inflated with 0.1 bar or 1.5 PSI and have a good stiffness due to the nylon cover. The bottom chamber, on the other hand, may only be inflated to 0.06 bar or 0.88 PSI and feels rather soft. It’s a pity that the chamber in the floor doesn’t have a higher air pressure to achieve a higher overall stiffness and better driving characteristics.

Sevylor Adventure Plus Seat
The Sevylor Adventure Plus is equipped with 3 inflatable seats

The seats are also in a nylon cover and make a high-quality impression. These are equipped with two plug valves, one for the backrest and one for the seat cushion. However, the inflating of the seats is negative. The air escaped again and again, if you take away the pump or the mouth in order to close the valve. So, the seats are never really inflated and are therefore very soft. When the valve is closed, the air is held.

Sevylor Adventure Plus seat placed boat
The seats are placed in the boat with Velcro fasteners and straps

The seats can be attached to the floor with Velcro strips and the backrest with straps to the side chambers. This allows the position of the backrest to be varied. The position of the seats in the boat can only be changed very slightly. Here it would be good if the Velcro strips on the floor were slightly longer to position the seats according to the space required in the boat.

The Sevylor Adventure Plus is a very versatile inflatable kayak. It can be converted quickly as a 1, 2 or 3 canoe. As a 3er canoe the Adventure has an optimal weight distribution, but the paddler in the middle has no legroom, unless it is a child. As a 2er canoe the space for paddlers and luggage is good. The person in the back has a lot of legroom, the legroom for the person in the front man is unchanged. As a 1er canoe only the middle seat is used.

Sevylor Adventure Plus with luggage
The 1 person configuration offers a lot of space
sevylor adventure kayak plus review
2 person configuration of the Adventure Plus
Sevylor Adventure Plus
The 3 person configuration offers limited space

Tall people can’t stretch their legs completely. Especially with shoes it is quite tight for the feet. It is more comfortable to paddle without shoes.

Sevylor Adventure Plus legroom
Tall people cannot stretch their legs in the Sevylor Adventure Plus.

The Sevylor Adventure Plus is equipped with small spray decks at the bow and stern. The carrying handles are practical, which makes carrying the boat much easier. There are also small luggage nets to attach a backpack, dry bag or other items (e.g. water bottle, pair of shoes, …).

Sevylor Adventure Plus handles cargo net
On the bow and stern there are carrying handles and a small luggage net
Sevylor Adventure Plus with luggage
The luggage nets are quite small. So only small luggage can be stowed
Sevylor Adventure Plus attachment ring
The fastening rings look practical at first sight, but are too small to fasten dry bags.

The Sevylor Adventure Plus is equipped with small spray decks at the bow and stern. The carrying handles are practical, which makes carrying the boat much easier. There are also small luggage nets to attach a backpack, dry bag or other items (e.g. water bottle, pair of shoes, …).

The luggage nets are quite small compared to other inflatable kayaks. Only a small light rucksack or packsack finds place here. Nevertheless, sufficient for small paddle tours. The bungees can be tightened so that the luggage is secured.

There are fixing rings on the boat walls. Unfortunately, these are too small to fasten e.g. a dry bag. Otherwise it would have been a nice feature.

The Sevylor Adventure Plus has a strap with a clip fastener that holds the boat walls together. Using this feature, the boat is a little narrower and runs slightly easier through the water. If you leave the strap open, the interior is a bit wider and offers more space for paddlers and luggage.

Review of the Sevylor Adventure Plus on the water

We have paddled the Adventure Plus with a paddle from Bravo, which can be used as a single- or double-blade paddle. If you paddle in pairs you use the paddle as a single-blade paddle. Paddling with a single-blade paddle had worked surprisingly well. The side chambers of the boat are not too high and wide, so you could easily make paddle strokes. The Adventure Plus has also made reasonable progress in terms of speed. The directional stability was also good, we only had to correct rarely. In terms of maneuverability we had expected a bit more. The boat is easy to navigate, but it doesn’t react so quickly to a change of direction. A longer paddle would help. Nevertheless, we liked the driving characteristics altogether well.

Sevylor Adventure Plus_on the water review
The Sevylor Adventure Plus can be paddled well with two persons

The single paddling was done with a double paddle. We recommend using a longer double paddle (at least 230 cm / 7’5” ). The directional stability during solo paddling was not as good as paddling with another person together. Paddling with a paddle for two was more fun than paddling alone with a double paddle, because of the driving characteristics.

Sevylor Adventure Plus on the water experience
The Sevylor Adventure Plus can also be paddled alone with a kayak paddle

The seats have proven to be a major weakness of the Sevylor Adventure Plus when paddling. The problem is that the seats don’t provide any support when paddling. The backrest is very low and bends away quickly. A backpack behind the rear seat can help for the person in the back.

Strengths and weaknesses

Advantages

+ can be used as 1-er, 2er or 3er canoe +Sturdy nylon cover protects the inner air tubes + can be easily paddled in pairs + nice design + side chambers have good stiffness due to increased air pressure and nylon cover

Disadvantages

– nylon cover is susceptible to dirt and takes longer to dry – floor chamber has a low air pressure – seats don’t provide enough support when paddling- little space for the persons in the middle and front

Final notes on the Sevylor Adventure Plus

The Sevylor Adventure Plus is definitely not a bathing boat (like the Sevylor Riviera). Due to its nylon cover it is more robust than inflatable canoes or kayaks in the entry-level segment, which are only made of PVC. We liked the driving characteristics considering the price. The Sevylor Adventure Plus is the ideal boat for occasional paddlers who want to undertake short tours of several hours with breaks. The Sevylor Adventure Plus is not designed for ambitious paddlers, as the seats do not provide sufficient support when paddling, the floor chamber is too soft and if the nylon cover were damaged it would be very difficult to repair the boat.

Alternatives to the Sevylor Adventure Plus

Sevylor isn’t the only brand for inflatable kayak for beginners but there are also Intex and Itiwit, which offer also some good kayaks at the entry-level. The Excursion Pro is the best kayak from Intex in terms of quality and material. It doesn’t have a nylon cover and that makes the drying after the paddling tour much easier. 

Another popular brand for inflatable kayaks is Itiwit from the sport goods retailer Decathlon. They have kayaks with nylon covers as well and these are pretty cheaper if you compare it to what you get for this price. They also have kayaks without a nylon cover but with a thicker boat skin and drop-stitch floor. They are a bit more expensive but compared to other inflatables it’s still a very competing price.

Sevylor Riviera Review

Sevylor is one of the best-known inflatable kayak manufacturers and has made a name for itself among many people, especially with its entry-level models. The Sevylor Riviera is the cheapest inflatable kayak from this manufacturer, which promises a lot of paddling fun at the first glance. We had the possibility to review this kayak and want to tell you in this article what impression the boat has made on us and whether we would recommend it to you as a beginner kayak or rather as a simple fun boat.

sevylor tahaa

Technical Specs

Max. paddlers:
Length:
Width:
Capacity:
Packed size:

1
315 cm | 10’3”
92 cm | 3′
159 kg | 200.4 lbs
61 x 41 x 24 cm |
2′ x 1’3” 8”

Material:
Weight:
Pressure:
Produced in:

PVC
8.8 kg | 19.4 lbs
0.06 bar | 0.88 PSI
China

Which model has been reviewed?

Sevylor Riviera from 2018

How did we organize the review?

We have purchased the Sevylor Riviera ourselves.

How intensively has the product been tested?

low

high 1 bar = 1-3 km paddled (first impressions)
2 bars = min. 1 day/ 2 half-day tours
3 bars = min. 4 tours
4 bars = min. 8 tours
5 bars = min. 12 tours (very intense)

Where have we tested the product?

Whitewater

Calm rivers

Lakes

Product update of the Sevylor Riviera!

The Sevylor Riviera has been renamed to Sevylor Tahaa. Nothing else has changed on the kayak otherwise, which means that the Riviera and Tahaa are the same boats.

Table of Contents

Set-up and first impressions

Already during the set-up it was remarkable how light and compact the Riviera is. It seems quite astonishing that a 2 person kayak can weigh less than 10 kg (22 lbs). Inflatable boats are basically quick to set up and this also turns out with the Riviera. All you have to do is to pump up the two side chambers as well as the floor chamber and the boat is almost ready to use. Only the front splash guard is needs to be attached easily over the bug and the two seats in the inside of the kayak, which are inflated with the mouth. In addition to that, we should mention that Sevylor has come up with a rather clever concept for the spraydeck. You can use it as a kind of backpack for the rolled-up boat.

sevylor backpack
The boat can be carried as a backpack or as a simple carrying back

The air pressure displays on the side chambers are also a really clever idea from Sevylor and they are very practical. If the bar is in the green area, you know that the chamber has the ideal pressure. In that way, you don’t need a manometer for the air pressure control. However, there is no such pressure indicator for the floor chamber. Here, you need to  compare the air pressure by hand pressure with one of the side chambers.

inflatable kayak riviera setup
The boat is easily set up with an air pump
sevylor assembly
Measuring scales show if you have reached the ideal pressure

As a newcomer to inflatable kayaking, you can quickly get the impression of having a high-quality inflatable kayak in front of you. Not only does it look like a real kayak, but the design also makes it look really nice and professional. All the features give the impression that every detail has been taken into consideration.

sevylor spraydeck
The front spraydeck can be used as a backpack for the boat

However, someone who already has some experience with inflatable boats will immediately notice that the Sevylor Riviersa is clearly nothing more than a beginner kayak and if not even a better fun boat. The kayak doesn’t make a really robust impression either in terms of material or workmanship. Compared to more expensive inflatable boats, the boat skin is quite thin and therefore more susceptible to damage. Already when setting up the boat you should pay attention to a surface without pointed or angular stones. When putting the boat into the water, you should try to avoid any contact with the boat, especially not on stony ground.

sevylor riviera kayak
The boat skin is quite thin and not very resistant

The incredibly light weight of 23.3 lbs for a 2 person kayak is clearly at the expense of robustness. For a kayak just over $100 you can honestly expect nothing else. The quality difference to a higher quality 2 person kayak like a kayak from Advanced Elements cannot be overlooked in such a comparison.

Thanks to the flexibly placeable seats, the Riviera can be quickly converted from a 2 person kayak to a 1 person kayak. The seats are placed inside the boat without fixation. They find support by the fact that they are wider than the boat interior. In this way, they are simply pressed into place. Another practical feature are the carrying handles at the back and front, which make a quite stable impression.

1 person kayak sevylor riviera
The seats can be placed anywhere inside the boat
sevylor riviera space
The air pump or a backpack can be easily stowed behind the second seat.

There are not many ways to stow your luggage. It would be handy to have luggage nets on the splash guard behind and in front in order to fasten a pack bag or a small backpack. Depending on how you place the rear seat, you can also place the air pump or a backpack behind the seat. If you paddle the boat as a 1 person kayak, you can stow more behind your seat and even in front of your feet.

Review of the Sevylor Riviera on the water

Thanks to its low weight, the boat can easily be put into the water even by one person. However, the cordes on the front and rear splash guards are not really suitable for carrying the boat because they are only thin rubber cords.  They can only be used to pull the boat towards a landing stage when nobody is sitting in it. The use of proper ropes would have been desirable.

If you buy the Sevylor Riviera, you should definitely buy a fitting fin because this is not included in the scope of delivery. Without a fin, the boat has almost no real straight-line stability and it quickly moves sideways. So paddling is not much fun and as a beginner you might ask yourself if there is something wrong with  your paddling technique. The more likely problem, however, is the missing fin, because with it the straight line clearly improves, and at the same time the riding fun as well.

Sevylor Riviera Test
A fin and a higher quality paddle improve driving characteristics

The supplied paddle also didn’t convince us when we used it on the water. Firstly, the paddle with its plug-in system does not look very stable and secondly, what is much more important, the paddle surfaces are simply much too small compared to conventional kayak paddles. This means that you displace less water with each stroke and you drive much slower. The purchase of a better paddle is highly recommended.

sevylor paddle
The included paddle is unstable and makes paddle strokes harder

The seating system also has its disadvantages. Although the seats don’t slip noticeably when paddling, they offer little support on the back, especially when paddling more powerfully. They are comfortable and certainly quite well designed for people who prefer to go paddling in order to relax in the sun, but we were not convinced by the seats for ambitious paddling.

sevylor riviera experience
For one person, the Riviera offers enough space

If you paddle the Riviera alone, the is enough space for your legs, because you can place the seat as you like. In addition to that, there is plenty of room for luggage, but which cannot be fastened. With 2 persons the space is still completely ok, but not immensely and particularly for tall persons with longer routes quite unsuitable.

With an operating pressure of 0.06 bar (0.88 PSI) and a rather wide boat shape, it is also not surprising that you are not so fast on the water with the Riviera. But for small comfortable tours on lakes, the speed is still completely sufficient. With the low air pressure, the air chambers feels also quite soft. However, you should follow the manufacturer’s instructions and not simply inflate more air, as the pressure in the chambers can quickly rise, especially in high sunlight. And finally, the material is not designed for higher pressures.

sevylor drain valve
Drain valve and the possibility for mounting a fin

The Sevylor Riviera is from our point of view especially suitable for calmer lakes and rivers, where you can avoid ground contact. Certainly there are also some who would use this kayak for the open sea, but we would not recommend it. The kayak is also not made for multi-day trips, nor for sporty and ambitious trips. It is a inflatable kayak rather for quiet and comfortable short tours.

Strengths and Weaknesses of the Sevylor Riviera

The biggest selling point of the Sevylor Riviera is certainly the price. For a little more than 100$, you get a inflatable kayak that is worth its money at first glance. But everyone should be aware that in this price category you can’t expect a high quality kayak. Although the kayak impresses with its low weight and compact packing dimensions, it comes with poor material quality. A stable boat skin is especially important for an inflatable boat if you want to devote yourself intensively to your paddling passion and enjoy your boat for a long time.

A little budget should be planned in any case additionally for a fin and a higher-quality paddle. If you want to paddle it in pairs, you will have to buy a second paddle as well. These two things will upgrade the boat without a doubt.

Advantages

+ very light for a 2 person kayak + small packing size + quick and easy assembly + easily convertible into 1 or 2 kayak + appealing design + integrated backpack system

Disadvantages

– little robust material and no high-quality finish – little space for 2 tall people – poor directional stability – delivered without a fin – seats give little back support – low-quality paddle in scope of delivery

Conclusion on the Sevlor Riviera

The Sevylor Riviera can only be recommended for absolute beginners with a limited budget or for those who are looking for a better fun boat. Although the Riviera looks nice and professional and at first glance it can give a high-quality impression to beginners, it cannot compete with higher quality boats in terms of robustness and driving characteristics. Those who are serious about kayaking should rather look for a higher quality inflatable kayak from Sevylor or another manufacturer like Advanced Elements. If you want to buy the Riviera, you should also invest in a fin and better paddles.

Intex Challenger K2 Review

Review of the Intex Challenger K2

The Intex Challenger K2 is the best-selling kayak from the inflatable boat manufacturer Intex and probably the best-selling kayak on the Internet. The boat is available as a 1-person kayak (Intex Challenger K1) and as a 2-person kayak (Intex Challenger K2). There are a lot of positive reviews of this low-priced inflatable kayak online. Not to forget that the Intex Challenger K2 is supplied with all the necessary accessories (two double paddles and an air pump). This actually sounds too good to be true.

We wanted to find out what the truth is and tested it for you. We have already paddled numerous inflatable kayaks and can therefore make a good comparison.

intex challenger k2

Technical Specs

Max. paddlers:
Length:
Width:
Capacity:
Packed size:

2
351 cm | 11’5”
76 cm | 2’5”
159 kg | 353 lbs
59 x 32 x 41 cm |
1’9” x 1′ x 1’3”

Material:
Weight:
Pressure:
Produced in:

PVC
15 kg | 33.1 lbs
0,069 bar | 1 PSI
China

Which model has been reviewed?

Intex Challenger K2 from 2018, Intex Challenger K2 from 2023

How did we organize the review?

We have purchased the Intex Challenger K2 ourselves.

How intensively has the product been tested?

low

high 1 bar = 1-3 km paddled (first impressions)
2 bars = min. 1 day/ 2 half-day tours
3 bars = min. 4 tours
4 bars = min. 8 tours
5 bars = min. 12 tours (very intense)

Where have we tested the product?

Whitewater

Calm rivers

Lakes

Table of Contents

Set-up and first impressions

The Intex Challenger K2 is delivered in a light and thin transport bag. The bag doesn’t make a rough impression but for short transports or storing the kayak at home the transport bag should be sufficient. The Challenger K2 is not a very lightweight inflatable. Everyone who wants to transport the kayak some hundred meters by foot should buy a larger transport backpack (e.g. the affordable Itiwit boat backpack*).

intex k2 transport bag
The Intex Challenger K2 comes in a thin carrying bag with all the necessary accessories.

The transport bag fits the complete folded boat (weighed 10.45 kg or 23 lbs) and all the accessories. These include two inflatable seats, an air pump, an inflatable “footrest” for the person in front, a skeg, two double paddles including drip rings, a measuring strip (for checking the air pressure) and repair patches. The supplied Intex Double Quick II* is a small-volume double-stroke pump with three different attachments. Double stroke means that air is expelled both when the piston is pushed down and when it is pulled up, thus enabling more efficient pumping.

intex kayak accessoires
The kayak set includes two paddles and an air pump

The boat itself consists of a bottom and side chamber, which are inflated via Boston valves with the supplied air pump. As the pump is relatively small, it takes a little while to inflate the boat completely, despite the double-stroke function. Alternatively, you could buy a larger pump, which would make it much quicker and easier. On the other hand, a small pump is of course more space-saving (especially handy when taking it with in the boat)

intex challenger k2 review inflating
The kayak consists of tow separate air chambers that are inflated one after the other.

The measuring scale printed on the air chambers is pretty practical. At the correct operating pressure, the measuring scale is 10 cm long. It is important to inflate the air chambers correctly, as too high an operating pressure can damage the air chambers and too low an operating pressure can impair rigidity and riding characteristics.

intex challenger k2 valvce air pump
The kayak has boston valves
intex k2 kayak pressure measure
Measuring scale to check the correct air pressure
Soft air chambers due to the low air pressure

The two seats consist of a seat cushion and a backrest, which are inflated by mouth or with one of the air pump attachments, just like an air mattress. Inflating them was not only a little tedious, but also a bit fiddly, as the air always escaped quickly before the valve was closed.

There are two Velcro strips in the interior on the floor of the boat for attaching the seats. There is a longer strip for the rear seat so that its position can be varied. The Velcro fastening on the floor also prevents the seats from slipping while paddling. The seats are also attached to the side chambers of the kayak using two adjustable straps. These straps can be used to adjust the position of the backrest.

intex challenger k2 inflating seat
Inflating the seats
intex challenger k2 review placing seat
Placing the seats
intex challenger k2 seat buckles
Fastening the backrest using the straps

There is also a footrest for the person in front. This is a small air cushion that is placed in the bow. This gives the front paddler (especially small people) a better grip when paddling. The rear paddler already has good support when paddling due to the front seat.

intex challenger k2 footrest
Inflating the “footrest”
intex challenger k2 placing footrest
Placing the footrest

A very nice feature is the front luggage net, which is very spacious. A bag or backpack and shoes can be stowed underneath it without taking up additional space in the boat or getting in the way. The luggage net is also easy to reach on the water.

However, an additional luggage net at the rear would have been even better. For a light bag or shoes, it fits quite well at the front. However, if you want to stow more weight (e.g. a backpack with a few drinks, the cockpit will quickly sag at the front and further restrict the footwell).

intex challenger k2 review luggage net
There is a spacious luggage net at the front

Cosidering the price, it really surprised us that there is a skeg included. A directional skeg can be attached underneath the kajak hull, which is secured with a split pin. A directional skeg noticeably improves the directional stability of an inflatable kayak, as inflatable kayaks tend to float on the water rather than in the water compared to rigid hull and folding kayaks.

Overall, it is noticeable that the bottom of the kayak is very flat and has no keel. On the one hand, this speaks for good tipping stability and good trim on the water.

intex challenger k2 mounting skeg
Mounting the skeg
intex challenger k2 kayak review skeg
Bottom of the Intex Challenger K2

Review of the Intex Challenger K2 on the water

Unlike the Intex Explorer K2 and Intex Excursion Pro, the Challenger K2 does not have carrying handles. Instead, we use the safety lines for transportation, which works well due to the low weight of the kayak, as long as the kayak is not loaded with luggage. For longer transfers on river tours, however, the carrying handles would definitely be missing.

If you have got some experience with inflatable kayaks, you will also notice that the material is not as thick as used for high-quality inflatables. So, the boat skin can’t be very resistant and solid. Therefore, you should really try to avoid any contact with the ground. Be also careful outside the water with the kayak that there are no sharp stones or branches on the ground.

intex challenger k2 kayak assembled
The kayak has no carrying handles. The safety lines can be used instead

Compared to the Intex Explorer K2 or Excursion Pro, the Challenger K2 has a semi-open cockpit. A cockpit is a practical protection against splashing water. However, the space between the floor chamber and the cockpit chamber is so narrow in the kayak that you have to contort yourself to get your legs under the cockpit.

As the kayak is very flexible with the soft air tubes, it still works well enough. As long as your legs are under the cockpit, even tall people have enough legroom. On longer tours, we would feel too cramped due to the cockpit. And in many cases, the space under the cockpit is definitely too small when wearing shoes. One more reason why it is more of a fun boat, as the kayak is best paddled barefoot.

intex challenger k2 kayak legroom front
With a little effort, the legs go under the cockpit
intex challenger k2 legroom front
If the legs are under the cockpit, the person in front has enough legroom

There is much less space in the back. The legs have to be bent at an angle (e.g. 1.86cm / 6’1″ tall) in order to sit properly. If you lean heavily into the backrest, the soft backrest bends backwards. This indicates a lack of support in the lower back area (particularly important on longer trips). Moreover, the backrest is difficult to adjust on the water. The cockpit makes it difficult to reach the straps to loosen or tighten them.

intex challenger k2 legroom back
Rear footwell
intex challenger k2 kayak legroom back
The seats provide little support

We also don’t have enough space in the back when paddling. Both paddlers sit too close together. It is not possible for the paddler in the back to fully extend the arm when paddling. This is because the kayak is pretty short for a 2-person kayak with a cockpit (due to the cockpit, the seat can only be positioned far back to a limited extent) at 351 cm / 11’5” in length.

In terms of handling characteristics, the kayak’s initial impression on the water is impressive considering the low price. For an entry-level kayak with a relatively low operating pressure, the Challenger K2 can still be paddled relatively quickly on the water. The skeg also ensures good directional stability. However, if you paddle too fast (around 6 km/h or 3.73 mph), paddling becomes a wobbly affair. Compared to other inflatable kayaks, the Challenger K2 is somewhat sluggish and reacts slowly to a change of direction. The person in the back needs several powerful paddle strokes to move the kayak in the desired direction.

intex challenger k2 review lake
The double paddles fulfill their purpose for short tours
intex challenger k2 review lake two seater
The kayak can be paddled relatively quickly on the water
intex challenger k2 review tour
The kayak is fine for short trips on the water.

The seats are very comfortable to sit in. However, the emphasis is on relaxation. The seats are not designed for longer trips. The seats are too soft and provide too little support. The Challenger K2 also has a relatively low operating pressure (0.069 bar). Higher quality inflatable kayaks (e.g. Gumotex Solar, Gumotex Seawave, Itiwit x500, nortik scubi 1 XL, …) have a 3-5 times higher operating pressure, which results in considerably better handling characteristics and a significantly higher rigidity.

The paddles supplied (1000 g or 2.2 lbs each, which is not too heavy for an entry-level double paddle) definitely serve their purpose for beginners and are comfortable to paddle for short distances. But you shouldn’t expect much more from these double-blade paddles. However, you should not forget that a high-quality paddle often costs more than the whole Intex boat.

The paddle blades have a high flex (very flexible) so that powerful paddle strokes quickly become ineffective. They are also 5-piece paddles. This saves a lot of space when disassembled, but the double paddles also make a somewhat wobbly impression with a total of 3 plug-in connections. On the other hand, the drip rings, which reduce splashing water in the boat, are a positive feature.

Intex Challenger K1 as a 1-person kayak

The Intex Challenger K2 can also be used as a 1-person kayak. The Velcro strip on the floor and the seat straps are long enough so that you can position the front seat sufficiently far back or in the middle of the kayak. The footrest cannot be used in this configuration. Nevertheless, a reasonable paddle is possible, although the footrest would be missing on longer tours in the long run.

intex challenger k2 solo review
The Intex Challenger k2 can also be used as a single kayak

There is plenty of space in the 1-seater configuration. There is also enough space behind the seat to stow a large backpack.

Although the trim of the kayak is still good on the water (despite the low operating pressure), the straight-line stability and speed are logically poorer when using this 2-persons kayak as a 1-person kayak. Nevertheless, with the Intex Challenger K2 in the 1-person configuration, you can reach a speed of approx. 5 km/h or 3.12mph, which surprised us.

intex challenger k2 kayak review solo
The trim on the water is still amazingly good

Dismantling the kayak

Dismantling the boat has proved to be harder than the setup. On one hand it was not easy to wipe out the water. The Challenger K2 has some hard-to-reach areas (especially in the bug) that makes wiping the boat dry quite difficult. Whereas deflating the air chambers was easy thanks to the Boston valves

Strengths and Weaknesses

The greatest strength of the Intex Challenger K2 is the unbeatable price including the accessory. And, that’s why this kayak is so popular. You have got everything to start paddling. But for this low price you shouldn’t really expect a high-quality kayak. Intex kayaks look great and professional regarding design but at a closer look you notice big difference with inflatable kayaks from other manufacturers that cost much more.

The operating pressure is quite low and the material of the boat skin is too thin. On our first day, we had already two little holes in the floor chamber and we have started paddling yet. We could repair it quickly without any big problems. But the used material for the boat skin is very sensitive and the greatest weakness of this inflatable boat. So, we can only partly recommend the Intex Challenger K2. We wouldn’t call it an actual kayak but rather a fun boat. For paddling  from time to time a bit on a calm and small lake where you want to relax the Challenger K2 is great option. But this boat is not a good option for anybody looking for a real kayak. If you want to do regularly some longer tours, you should invest in high-quality kayak.

intex challenger k2 kayak review


Advantages

+ very affordable + very handy cargo bungee net in front + kayak paddles and pump already included seats can be positioned variably + comfortable seats for chilled kayak tours + can also be used as a single kayak Good speed and good directional stability + good trim on the water + attractive design

Disadvantages

– lack of carrying handles on bow and stern – more fun boat than inflatable kayak – sensitive boat skin – low operating pressure and therefore soft air chambers – more difficult to dry/clean due to lack of drain valve and existing cockpit (hard to reach places in the interior) – little space with shoes (especially at the front due to the cockpit) – little space for the rear paddler to paddle properly (short seat distance) – footrest not very useful – seats provide too little support on longer tours – wobbly double paddles – short warranty period of 90 days (from day of purchase)

Conclusion on the Intex Challenger K2

The Intex Challenger K2 is a very affordable inflatable kayak and very popular among beginners. It comes with an astonishing amount of accessories and nothing is missing that you need for paddling. You only need to buy two life jackets. However, due to the low price, you should not expect a real inflatable kayak, but rather a fun boat. The operating pressure is too low for this and the material is too thin.

intex challenger k2 inflatable kayak review
Perfect for short tours, but still more of a fun boat than an inflatable kayak

We even had two small punctures in the bottom chamber of one model on the first day, even though we hadn’t even paddled yet (most likely caused by stones when setting up on the shore). This can be mended, but it is still an indication that the material is not very resistant. The Challenger K2 can therefore only be recommended to a limited extent.

It is intended for smaller tours on lakes where the focus is on chilling on the water. The Intex Challenger K2 is also suitable for a leisurely river or lake tour lasting a few hours, as long as you avoid ground contact and don’t have too high expectations. It is not intended for people or aspiring ambitious paddlers who want to go on regular tours lasting several hours.

intex explorer k2 challenger k2 comparison
Unfortunately, the Intex Challenger K2 does not have carrying handles

If you’re wondering whether the Intex Challenger K1 or K2 is right for you, we recommend reading the article 1, 2 or 3-seater canoe – Which boat size should it be? Here we compare the different sizes of inflatable boats and show under which circumstances which size is most suitable. There are also frequent questions about the differences between the Intex Challenger K2 and the Intex Explorer K2. We have tested these two inflatable kayaks for you in a comparison test.

Accessories for the Intex Challenger K1

The scope of delivery of the boat includes the following accessories:

  • Kayak paddle
  • Inflatable foot brace
  • Air pump
  • Fin
  • Repair patches
  • Transport bag

In addition, we recommend the following accessories:

  • Life jacket: Itiwit BA 50N+ * (good life jacket for beginners, very good price-performance ratio, more details in our test report).
  • Dry Bag: Itiwit dry bag 10L* (ideal for protecting items from splashing water and short immersion in water, good workmanship, with carrying strap, available in different colors and sizes)
  • Transport backpack: only a bag is included, which is intended for storage and short transport of the kayak to the water. If you want to transport the kayak longer distances and more comfortably to the water, we recommend the Itiwit transport backpack*, which is comfortable to carry and has enough space for the kayak and accessories.

Alternatives to the Intex Challenger K2

A similar inflatable kayak is the Intex Explorer K2. The biggest difference is the design. We have also an article where we compare both boats: Intex Challenger vs. Intex Explorer.

The Intex Excursion Pro looks quite similar to the Explorer K2 but here there are especially differences regarding material and quality. The Excursion Pro is the most expensive inflatable kayak from Intex but the boat skin is much thicker and it has much more features. If you are willing to pay more, then this one might be the better choice for you.

Intex Explorer K2 Review

Intex_Explorer_K2

The Intex Explorer K2 is one of most affordable inflatable kayaks. On the internet a lot of customers share positive experience with this inflatable Intex kayak. Most of the customers can only make a limited evaluation since they have never paddled any other inflatable kayaks than the Intex Explorer K2. We have examined the Explorer K2 carefully and have paddled it on a bathing lake. We have already paddled many inflatable kayaks and are able to give you a solid recommendation for who the Intex Explorer K2 is best suited for.

If you are hasitating between the Challenger K2 and Explorer K2,  make sure to read also our review about the Intex Challenger K2 and our  Intex Explorer vs Challenger article.

intex explorer k2

Technical Specs

Max. paddlers:
Length:
Width:
Capacity:
Packed size:

2
312 cm (10’2”)
91 cm (3′)
160 kg | 353 lbs
59 x 34 x 41 cm |
1’9” x 1’1” x 1’3”

Material:
Weight:
Pressure:
Produced in:

PVC
14 kg | 30.9 lbs
0,069 bar | 1 PSI
China

Which model has been reviewed?

Intex Explorer K2 from 2018

How did we organize the review?

We have purchased the Intex Explorer K2 ourselves.

How intensively has the product been tested?

low

high 1 bar = 1-3 km paddled (first impressions)
2 bars = min. 1 day/ 2 half-day tours
3 bars = min. 4 tours
4 bars = min. 8 tours
5 bars = min. 12 tours (very intense)

Where have we tested the product?

Whitewater

Calm rivers

Lakes

Table of Contents

First impressions and assembly

The Intex Explorer K2 comes in a thin transport bag, which does not look particularly robust and the carrying handles are not padded. However, the bag should be sufficient for storing the kayak or for carrying the kayak short distances to the water. The bag contains the boat and all its accessories. If you often want to transport the kayak and accessories a few hundred meters on foot, you should buy a larger transport backpack (e.g. Itiwit boat backpack*).

intex explorer k2 transport bag
The Intex Explorer K2 comes in a thin carrying bag with all the necessary accessories.

The transport bag contains the folded boat (weighed 9.45 kg / 20.8 lbs) and all the accessories. These include two inflatable seats, an air pump, a skeg, two double blade paddles including drip rings, a measuring strip (for checking the air pressure) and repair patches.

The included Intex Double Quick II* is a small-volume double-stroke pump with three different attachments. Double stroke means that air is expelled both when the piston is pushed down and when it is pulled up, thus enabling more efficient pumping.

It’s amazing that so many accessories are included for such a low price. This makes immediate paddling possible.

intex kayak accessoires
The kayak set includes two paddles and an air pump

The folded kayak is quickly out of the bag. At first, the material makes a pretty rough impression, but reminds us a little of the somewhat thicker PVC material of an air mattress at the second glance, which air mattresses are made of. Compared to higher quality inflatable kayaks, there are huge differences in the roughness of the used material. That’s why you should be very careful with the Explorer K2 and prevent any contact with stones and branches.

The kayak must be unfolded for the setup. The air chambers can be inflated with the included air pump. The Intex Explorer K2 has two side chambers and a bottom chamber. We really like this multiple air chamber design because it makes the boat safer. If the kayak were to get a puncture, only one air chamber will deflate and the other two will remain still inflated.

The two side chambers each have a Boston valve, which is common for beginner kayaks. The bottom chamber, on the other hand, only has a simple plug valve, which is reminiscent of the valve on an air mattress. It is functional, but still makes a very cheap impression for an inflatable kayak.

intex explorer k2 assembly setup
The kayak consists of three separate air chambers that are inflated one after the other.

Inflating the kayak was simple and quick (less than 10 minutes). Intex has printed a measuring scale on the chambers. With this scale you can see with the included measuring strip or ruler if the right air pressure is on each chamber. This is very useful and important at the same time. A too high air pressure would damage the chambers for sure and a too low air pressure would reduce the driving performance of the boat. As well as the boston valves have been working great.

intex explorer k2 boston valve
The Boston valves have a 2-way closure system. If the cap comes off, the air in the chamber still remains in the boat.
intex explorer k2 kayak pressure measure
The printed measuring scale is practical. This allows you to check the air pressure of the boat with the measuring strip supplied.

The two seats were a bit more cumbersome to inflate. But we really liked the Veclro straps on the floor of the boat. They hold the seats in the right position when paddling. The Velcro strap for the backseat is longer dimensioned so that you can adjust the position of the backseat more individually, either more legroom or more space for you gear behind the backseat. Both seats have a backrest with adjustable belts which are attached to the side chambers. All in all, the seats are a good feature of the boat in this price segment.

intex explorer k2 seat
The seats are also inflatable
intex explorer k2 seat mounting
The backrest is fastened with two straps
intex explorer k2 kayak seat mounted
Mounted kayak seat

Stern and bow are equipped with small spray decks that can be inflated as well. These can also be inflated to give them more shape. The side chambers are pretty high compared to other Intex kayaks. Moreover, the Intex Explorer is not suited for white-water at all. We assume that these are intended to give the boat a better look. The carry handles on the bow and stern are really practical for lifting the boat.

intex explorer k2 kayak grab handle
Carrying handle
intex explorer k2 stern
Storage space in the stern

After inflating, the boat must be turned to mount the included skeg. This is secured with a split pin. The skeg is recommended for a better directional stability, as inflatable kayaks tend to float on the water rather than in the water compared to rigid hull and folding kayaks.

Finally, the Intex is completely set up. We are especially pleased by the appealing design of the boat. The last thing to do before paddling is to plug the paddle together. You will notice immediately that the paddles are not made for longer paddling tours. They are quite wobbly and that even in new state. But nevertheless, two functioning double-blade paddles for that low price, hard to believe.

intex explorer k2 mouting skeg
Mounting the skeg

Despite the low price, we could not find any manufacturing faults with the boat. The PVC material is welded together in a similar way to an air mattress. Nevertheless, you can see that the boat skin appears thin. The boat skin is a simple PVC foil without any reinforcement (such as a polyester core on the inside).

intex explorer k2 material
Workmanship and material of the Intex Explorer K2

A big difference between the Intex Explorer K2 and other higher-quality inflatables is the low air pressure that results in very soft air cambers. The Intex Explorer reminds us more of a fun boat than a proper inflatable kayak.

The air chambers are quite soft due to the low pressure.

Review of the Intex Challenger K2 on the water

Two people can easily carry the inflatable kayak to the water when unloaded using the carrying handles. The open design makes it very easy to get in. However, the low air pressure compared to higher quality inflatable kayaks or drop-stitch kayaks is noticeable here. The soft bottom and side chambers don’t give a lot of support. When you get in and sit down, it reminds us more like a bathing boat.

However, the soft air chambers and inflatable seats make it very comfortable when the focus is on spending time on the water. The emphasis is on chilling. However, the seats are not suitable for longer and sportier tours as they do not provide sufficient support. Nevertheless, if you only plan short trips, the focus is on relaxing on the water, you don’t go paddling often and you don’t have high expectations, you will be completely satisfied with the Intex kayak to begin with.

intex explorer k2 review test lake
Suitable for short trips on the water
intex explorer k2 review paddle lake
There is not much space in the boat

What we notice when paddling are the rather high and wide side chambers. On the one hand, this makes the boat more stable and safer on the water. On the other hand, when paddling with the double paddle paddle, you often come up against the wide side tubes, which would be annoying on longer trips.

We were surprised by the speed. You can reach a reasonable speed with the Intex Explorer K2. Speeds of between 5.1 km/h and 5.6 km/h (between 3.2 mph and 3.5 mph) are realistic in good conditions. If you paddle too fast, it becomes a pretty wobbly affair. A change of direction by the person behind also works quite well. It is more maneuverable than the Intex Challenger K2. The skeg supports the directional stability of the boat well. We also have to say that we had good conditions for kayaking with an inflatable kayak that day (no wind or waves).

intex explorer inflatable kayak review
The paddles are not too bad for beginners

There is just barely enough space for two adults and a daypack. A small daypack or dry bag can be placed behind the rear seat. There is no room for luggage at the front of the bow, as the person in front would otherwise not know where to put the feet. Due to the more open design, you sit less cramped than in the Intex Challenger K2. Nevertheless, the person in the back must place the feet on the sides of the front seat to avoid having to sit at an angle in the boat. However, this is no problem as the soft side chambers are so flexible.

The paddles supplied (1 kg / 2.2 lbs each, which is not too heavy for a beginner double blade paddle) definitely serve their purpose for beginners and are comfortable to paddle for short distances. However, you shouldn’t expect much more from these double blade paddles. You immediately notice that the double paddles are not intended for long tours. In addition to the high flex of the paddle blade, the double paddle is quite wobbly overall, even when new. But still, for the price, two functional double paddles, hard to believe. On the other hand, the drip rings, which reduce splashing water in the boat, are a positive feature.

Intex Explorer K2 as a 1-person kajak

The Intex Explorer K2 can also be used as a 1-person kayak. The Velcro strip on the floor and the seat straps are long enough so that you can position the front seat in the middle of the kayak. For longer tours, we would personally miss a footrest. A larger dry bag may help here.

intex explorer k2 inflatable kayak
The Intex Challenger k2 can also be used as a single kayak

There is plenty of space in the 1-seater configuration. There is enough space behind the seat to stow a large backpack or dry bag.

Although the trim of the kayak is still good on the water (despite the low operating pressure), the straight-line stability and speed are logically poorer when using a 1-person kayak. Nevertheless, with the Intex Challenger K1 in the 1-person configuration, you can reach a speed of approx. 4.8 km/h (3 mph), which surprised us.

intex explorer k2 kayak solo test
Transport bag, which also serves as a inflation and dry bag

Dismantling of the Intex Explorer K2

After the use, the Intex Explorer K2 dries quickly. Deflating the kayak is easy as well. So, there is no problem to fold the kayak as it was before. We really liked the drain valve. The boat can be tipped backward, and the left water runs out of the drain valve easily. The boat can be wiped dry without using a sponge to get out the water.

Intex_Explorer_K2_drain_valve
The drain valve is good for emptying the boat of water

Strengths and Weaknesses of the Intex Explorer Kayak

The greatest strength of the Explorer K2 is not the boat itself but the offer, i.e. the included accessory and the really low price for an inflatable kayak. The less robust boat skin the main weakness of the Explorer K2 which should not be a surprise considering the low price.

intex explorer k2 kayak review
The Intex Explorer K2 is a great offer for those who don’t have high demands

Advantages

+ complete accessories already included + seats can be positioned variably + practical carry handles to lift the boat + very affordable + appealing design + easy boat cleaning thanks to drain valve + good maneuverability as a 2-person kayak + can also be paddled alone + good directional stability with the skeg

Disadvantages

– sensitive boat skin – rather a fun boat than an inflatable kayak – little space for luggage and tall paddlers in the back – low air pressure and therefore soft air chambers – seats provide too little support on longer tours – wobbly paddles – short warranty period of 90 days (from the day of purchase)

Conclusion on the the Intex Explorer K2

The Intex Explorer K2 is one of the best-selling inflatable kayaks for a reason. It is easy to paddle for beginners and comes with all the accessories you need for paddling. It is primarily for people who want to spend some time on the water. Covering distance or longer tours (paddling for several hours) are not the main focus. Then the Intex Explorer K2 is a good option.

intex explorer k2 review
The Intex Explorer K2 is easy to paddle for beginners but not designed for long tours

However, if you really want to go paddling on selected tours, you should spend more money on an inflatable kayak. The Explorer K2 is not designed for longer paddling. The seats do not provide enough support, there is not enough space in the long term and the operating pressure is too low to expect good handling characteristics similar to a hard-shell kayak. In addition, the boat skin is too thin and only seems to be designed for gentle use. We don’t recommend the Intex Explorer K2 for trips on the water with grounding included, that can happen on rivers.

intex explorer k2 challenger k2 comparison
A very similar alternative to the Explorer K2 is the Intex Challenger K2

A lot of people wonder what the differences between the Intex Explorer K2 and Intex Challengers K2 are. We have reviewed both in our article Intex Explorer K2 vs Challenger K2. Check also out our article about Intex to get an overview of all his products.

Accessories for the Intex Explorer K2

The scope of delivery of the boat includes the following accessories:

  • Kayak paddle
  • Inflatable foot brace
  • Air pump
  • Skeg
  • Repair patches
  • Transport bag

In addition, we recommend the following accessories:

  • Life jacket: Itiwit BA 50N+ * (good life jacket for beginners, very good price-performance ratio, more details in our test report).
  • Dry Bag: Itiwit dry bag 10L* (ideal for protecting items from splashing water and short immersion in water, good workmanship, with carrying strap, available in different colors and sizes)
  • Transport backpack: only a bag is included, which is intended for storage and short transport of the kayak to the water. If you want to transport the kayak longer distances and more comfortably to the water, we recommend the Itiwit transport backpack*, which is comfortable to carry and has enough space for the kayak and accessories.

Other Intex kayaks

A similar inflatable kayak is the Intex Challenger K2. The biggest difference is the design. We have also an article where we compare both boats: Intex Challenger vs. Intex Explorer.

The Intex Excursion Pro looks quite similar to the Explorer K2 but here there are especially differences regarding material and quality. The Excursion Pro is the most expensive inflatable kayak from Intex but the boat skin is much thicker and it has much more features. If you are willing to pay more, then this one might be the better choice for you.