Oru Kayak Inlet Review

The Oru Kayak Inlet is a folding kayak, or more precisely an origami kayak. Such a kayak consists of a single sheet of plastic that is folded into a kayak. The manufacturers of such boats promise their customers a boat that is hardly inferior to the rigid hull version in terms of its performance on the water. The complicated and time-consuming assembly of typical folding boats is not an issue for the Oru kayak. Thanks to origami technology and it is supposed to be quick and easy.

Oru Kayak is the best-known manufacturer of origami boats and has been active on the market for over 10 years. We had the opportunity to extensively paddle and review the Oru Kayak Inlet, which is advertised as a recreational and beginner kayak. In this review we share our experience and impressions of the kayak.

Technical Specs

Max. paddlers:
Length:
Width:
Capacity:
Packed size:

1
295 cm | 9’8″
75 cm | 2’5″
125 kg | 396,8 lbs
107 x 25 x 46 cm |
42″ x 10″ x 18″

Material:

Plastic

Weight:

9 kg | 20 lbs

Produced in:

Mexico

Which model has been reviewed?

Oru Kayak from 2023

How did we organize the review?

The Oru Kayak Inlet was provided to us on a rental basis by the manufacturer Oru Kayak. Our review is independent of the manufacturer or store and reflects our own opinion of the boat.

How intensively has the product been tested?

low

high 1 bar = 1-3 km paddled (first impressions)
2 bars = min. 1 day/ 2 half-day tours
3 bars = min. 4 tours
4 bars = min. 8 tours
5 bars = min. 12 tours (very intense)

Where have we tested the product?

Whitewater

Calm rivers

Lakes

Table of Contents

Assembly and first impressions

The Oru Kayak Inlet is characterized by its exceptional compactness and lightness for a folding kayak. When folded, it can be carried like a bag and is therefore very convenient to transport over short distances. Typical uses cases here are transportation by public transport or by car. It should be noted that only a 4 piece paddle would fit when the boat is folded. You would have to carry the life jacket and other equipment in the other hand or in a separate bag or backpack.

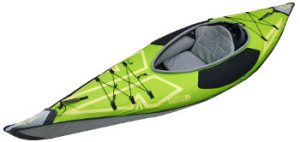
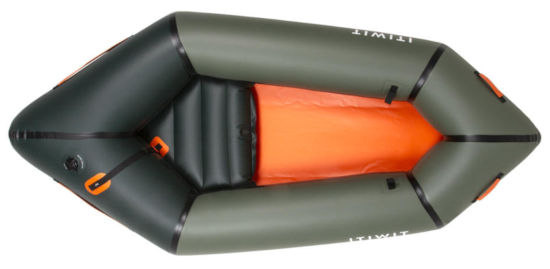
However, if you want to cover longer distances on foot with a portable boat, you will usually use a large backpack. Unfortunately, the Oru Kayak Inlet does not fit into any of the usual transport backpacks due to its packed size. Only transportation with a boat trolley would be conceivable for longer distances. So if you don’t want to use a boat trolley and definitely want to transport the boat on foot for longer distances, you should look for a lightweight inflatable kayak (e.g. Advanced Elements AdvancedFrame Ultralite) or packraft (e.g. Itiwit Packraft 500). These boats are much more compact and can be transported in a backpack.

oru kayak inlet transport
Oru Kayak Inlet when folded

When storing the boat, however, the folded boat as a bag is very practical. It can be conveniently stored in the cellar or in a larger cupboard or corner in the home.

The first question that arises for us is: Can the Oru Kayak Inlet score over conventional folding kayaks thanks to its quick and easy set-up? The simple answer is yes. The kayak impressed us with its quick and easy set-up. If you’ve already set up the boat more than a few times, it’s actually really fun because it’s so quick and easy. A good and detailed description is included in the scope of delivery for the first assembly, which provides you with good support during the first assembly. It takes a little longer to set it up the first time, as you first have to familiarize yourself with the folding technique. At the beginning, you don’t have the confidence to fold the boat with full force. Over time, however, you learn that the material can withstand this effort without any problems. It only takes a few minutes and the manufacturer’s stated assembly time of 3 minutes is completely realistic.

Unfolding the kayak
origami oru kayak dismantling
Folds on the designated lines
oru kayak inlet aufbau erfahrungen
Inserting the bow plate

For the main structure of the boat, the main plate is first bent in the main folds to create the rough hull shape. Small plates are then inserted at the bow and stern. The bow plate is also used to attach the footrest suspension. As soon as these plates are correctly positioned, the main plate is folded further at the bow and stern and closed with click fasteners. This gives the kayak its final hull shape.

oru kayak inlet setup
Closing the click fasteners at the bow and stern

Finally, the footrest and seat are attached. The footrest is attached to the inside of the kayak using click fasteners. This also makes it very easy to adjust the position of the footrest.

oru kayak inlet footrest
Footrest of the Oru Kayak Inlet

The seat cushion is attached to the floor with an elastic band and can therefore not slip when paddling. Behind the seat cushion there is a slot in the bottom of the boat into which the backrest is inserted. The backrest is also attached to the inside walls of the boat with click fasteners.

oru kayak inlet backrest
Anbringung der Rückenlehne
oru kayak seat wedge
The seat cushion is slid under an elastic band
oru kayak seat system
The seating system makes a well thought-out impression

Overall, the seating system makes a very good and well thought-out impression. However, it is immediately noticeable that the seat position in the boat is fixed and therefore cannot be moved backwards or forwards. Variable positioning of the seats is particularly common in inflatable kayaks and allows tall paddlers in particular to position the seat further back if necessary to gain more legroom. Compared to rigid hull boats and many other folding kayaks, however, it must be said that a fixed seating position is not a characteristic of Oru Kayak, but rather the norm. The manufacturer wants to ensure that there is an ideal weight distribution in the boat and that the boat lies on the water in such a way that it can perform optimally. However, the footrest can be easily moved backwards and forwards so that you can adjust it to the required leg length.

What is adjustable on the seat, however, is the backrest. This allows you to adjust the angle depending on how upright you want to sit when paddling. The height of the backrest can also be adjusted. This allows you to choose whether you want to position the backrest in the lower or middle back area. As the backrest is quite narrow, a highback life jacket (with a high-positioned buoyancy chamber on the back) is generally recommended.

oru kayak life jacket
The most comfortable way to paddle is with a highback life jacket

Apart from the good seating system, all other details on the boat also appear well thought out and of high quality. For example, the material edges are protected with additional strips and the bow and stern have been fitted with an additional plastic cap to prevent material damage in the event of minor collisions.

oru kayak inlet quality
Stips protect the edges of the material
oru kayak folding kayak quality
Plastic caps additionally protect the bow and stern

The same applies to the overall material of the boat. It looks robust and gives the impression that it will last a very long time. Only the folding edges are the parts of the boat that have the potential to damage the quickest due to folding. Fortunately, the manufacturer states that the boat can be folded up to 20,000 times without any problems. This is more often than you would ever do in recreational use and therefore eliminates this concern in advance.

However, we cannot judge how well the boat would tolerate major collisions or too frequent grounding over time. In our use, pulling over pebble banks did not leave any marks. Nevertheless, you should bear in mind that this is a recreational kayak. This means that the Oru Kayak Inlet is primarily intended for use in shallow, calm and sufficiently deep water. If you want to paddle in white water, this boat is not the right choice (due to the many groundings and possible collisions).

oru kayak folding kayak material
Overall, the material makes a robust impression

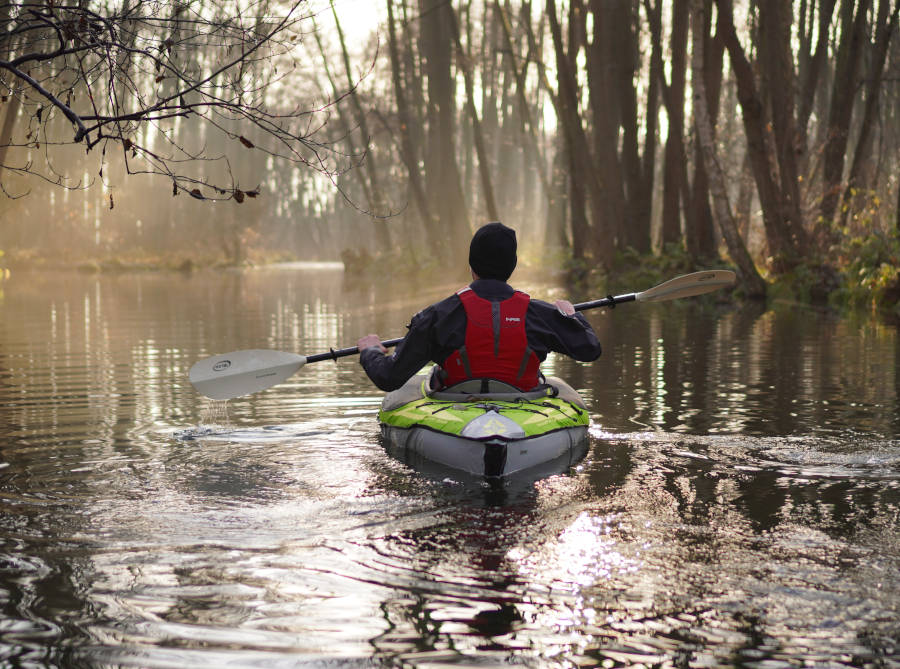
Rewiev on the water of the Oru Kayak Inlet

The low weight not only pays off when transporting the boat, but also when you want to carry it to the water. You can carry the 20 lbs (9 kg) kayak without any help, even when assembled. This is a real advantage over many other folding kayaks, which are significantly heavier.

The fact that the kayak is primarily aimed at beginners and recreational paddlers is also revealed by the boat’s wide cockpit opening. This makes it very easy to get in and out. This open design also gives you maximum freedom of movement on the water.

folding kayak oru kayak inlet experience
The kayak is very easy to carry

As a beginner and recreational kayak, the boat must also perform well in terms of tipping stability. Thanks to the flat and wide hull shape, the Oru Kayak Inlet is also fully convincing here. The boat feels very stable when getting in and out of the water and we never once had the feeling that we would capsize while paddling.

However, if you are used to paddling with inflatable kayaks, which are very stable on the water due to the wide side tubes and every hasty movement is balanced out immediately by the side tubes, you will have to get used to it a little. In the Oru Kayak Inlet, you notice the movements much more, but you soon realize that it is very difficult to reach the tipping point with the boat. Because once you lean to the side, you realize how well the boat is balancing it out

oru kayak tipping stability
The Oru Kayak Inlet is very stable against tipping

However, you should not forget that a very stable kayak cannot be the fastest kayak and that you have to compromise on performance on the water. But that should be fine for a recreational kayak.

However, the exciting question is how good the balance is between tipping stability and driving characteristics. And with the Oru Kayak Inlet, the folding boat technology pays off. Although the boat is quite short, thanks to its design it sits very nicely in the water and can make good use of its hull length. The shaped ends of the bow and stern also ensure good handling characteristics. This means that the kayak accelerates well for its length of just 9’8” (295 cm).

Typical for the dimensions of the kayak (short and rather wide) is the very good maneuverability. This means that the boat can be turned very easily and just a few paddle strokes are enough to change course. For us, this makes the kayak also a good choice for calm rivers that have sufficient draught but can also be narrower at times. The straight-line stability is also impressive, even without a fin. The kayak holds its course well and even if you stop paddling, it doesn’t immediately drift to one side.

oru kayak inlet test
The boat is great fun for recreational use
oru inlet folding kayak test
The kayak is very maneuverable
oru kayak review
The kayak also has a good straight line chracteristic

Overall, we would attest to the kayak’s good driving characteristics and solid speed for recreational use. You shouldn’t expect any speed miracles from such a boat. If you want to be sportier and faster on the water, you should take a look at the Oru Kayak Beach LT or Bay ST, for example, which are significantly longer and narrower and can therefore perform even better on the water.

However, due to the wide cockpit opening at the bow, some spray water quickly gets into the boat. In a good swell, the front canopy would not keep much water out. And even if you paddle longer tours, depending on your paddling technique, some water quickly collects in the boat. The flat seat cushion means you can quickly end up sitting in the water. This may not be a problem in summer when paddling in swimwear, but otherwise it can be annoying. Here we recommend using the additional seat pad from Oru Kayak. This allows you to sit a little higher and not get wet so quickly. If Oru Kayak had made the cockpit opening smaller, the model would look too much like the manufacturer’s other models and lose its recreational character. The design decision is therefore understandable, but you should be aware of the disadvantages.

oru kayak inlet comfort
Thanks to the optional seat pad, you won’t get wet quickly

In addition to the handling characteristics and tipping stability, the space and seating comfort are of course also crucial for a recreational kayak. As mentioned at the beginning, the position of the seat cushion is fixed. However, as the footrest is variably adjustable, the interior also offers enough space for tall paddlers, as it can be adjusted according to the space required.

oru kayak legroom
The Oru Kayak Inlet also offers enough legroom for tall paddlers

The manufacturer recommends the inlet for people with a maximum height of 6’2” (188 cm). This is a good guideline, but we believe that you can also be a little taller for the boat. In the end, the decisive factor here is probably not only your overall height, but also the length of your legs.

The boat not only offers sufficient space for the paddler in length, but also in width. It is even possible to sit cross-legged and paddle. I even paddled in the Oru Kayak Inlet with my daughter. I was able to sit her between my legs and we sat very comfortably and I was able to paddle without any problems. I folded a towel several times so that she could sit on it without immediately getting wet if splash water collected inside. I can well imagine that some dog owners (depending on the size of the dog) who would like to take their four-legged friend paddling with them will also make a good decision with the Oru Kayak Inlet.

oru kayak paddling with child
It is possible to take a small child with you without any problems

In terms of space for luggage, the options are rather limited. There is still enough space behind the seat for a small to medium-sized dry bag. However, there is no more space or options for stowing luggage. Therefore, you won’t be able to go on multi-day trips with the kayak, only day trips. But that’s perfectly fine for a recreational kayak. Nevertheless, a small luggage net on the bow would have been very practical. This would have made it possible to attach a small dry bag so that you could easily access important items while paddling.

Disassembly the Oru Kayak Inlet

Dismantling the boat is just as easy as setting it up, if not easier and faster. This is because no great effort is required to dismantle the boat. You open the buckles, take out the bow and stern plates and remove the seat system and footrest. The kayak is then folded back into a bag and secured with the buckles so that it stays in shape.

It is definitely advisable to wipe the boat dry with a towel after paddling. As the boat is unfolded, this is also very easy to do as, unlike a conventional rigid-hull or inflatable kayak, you have no problem getting into any hard-to-reach corners or tight places. At home, I always open the buckles so that the boat is slightly open and even the last bit of water has a chance to dry off.

Strengths and weaknesses of the Oru Kayak Inlet

The greatest strength of such an original kayak is undoubtedly the combination of good handling characteristics, easy transportability as a foldable bag and uncomplicated assembly and disassembly. The only major disadvantage of the boat is that water quickly collects in the interior and the low seat cushion means you quickly end up sitting in the water. However, this can be remedied with an additional seat pad. All other weaknesses are more due to the construction of a leisure kayak and do not carry too much weight in the overall rating.

Advantages

very easy to assemble and disassemble + low boat weight + can be carried as a bag when folded + well thought-out concept and details + robust material + good workmanship + good legroom + good driving characteristics for a recreational kayak + good tipping stability + wide cockpit opening allows easy entry and exit + good seating system + very good footrest

Disadvantages

high-priced entry-level kayak – little splash protection due to wide cockpit opening – no possibility to attach luggage to the canopy at the bow and stern – thin seat cushion offers little protection against water in the boat – large pack size compared to other portable 1-seater kayaks

Conclusion on the Oru Kayak Inlet

The Oru Kayak Inlet is a successful recreational kayak for beginners but also for experienced paddlers who are looking for a portable and lightweight second boat for an uncomplicated and leisurely paddle tour on an afternoon. The manufacturer keeps all its promises with this boat. The rather annoying disadvantages of rigid hull kayaks (high transportation costs and high space requirements for storage), typical folding kayaks (high weight, time-consuming assembly and disassembly) and inflatable kayaks (compromises in driving characteristics and high susceptibility to wind) are eliminated with the origami kayak. The Oru Kayak Inlet really impressed us in recreational use and gave us a lot of fun on the water. Anyone who is prepared to spend around €1000 on such an innovative boat in the recreational segment will certainly not be disappointed in the end. Above all, it is a recommendation for all those who have held back from buying a portable boat due to the disadvantages of other boat types mentioned above.

Anfibio Packrafts Reviews

Anfibio Packraft is a brand from Germany that is specialized in the development of ultralight packrafts and related equipment. The boats are manufactured with a partner in China. We had the chance to test different Anfibio packraft models on the water and would like to share our opinion on these packrafts in this review post.

Anfibio Delta MX Review

The Anfibio Delta MX is an extremely lightweight yet spacious 1-person packraft. When rolled up, it is so small that it fits into any backpack.

anfibio_delta_mx_river
Very spacious for a 1-person ultralight packraft

Advantages

very light and compact + skeg holder already fitted
+ very spacious + comfortable seat with integrated backrest + high load limit + scratch-resistant surface + accessories and spare parts (e.g. seat, skeg) available + 3-year guarantee on materials and workmanship

Disadvantages

Our new model had a small (inconspicuous) deformation in the side tube – without the skeg, the straight-line stability is only moderate – compressing the seat is laborious – the lower side of the air chamber is poorly protected against rough groundings – only repair material but no repair kit (i.e. material including adhesive) included in the scope of delivery

anfibio_delta_mx_size
Not bigger than a sleeping mat

The Anfibio Delta MX is a successful packraft. With this small pack size and weight, there is no reason not to take the boat with you and combine it with other activities. It is a simple packraft that still offers great comfort and good running characteristics as a single packraft with a skeg. From our point of view, it is not only a packraft for crossing a river, but also for paddling down a river for several hours or taking a short leisurely tour on a lake in good conditions (i.e. no wind/no waves). It also offers a surprising amount of interior space.

anfibio_delta_mx_review
Stable and good running characteristics with the optional skeg

Anfibio Rebel 2K Review

The Rebel 2K is a packraft from the Anfibio brand. It is similar to the Anfibio Delta MX. The big difference is that the Rebel 2K comes with more equipment (especially the integrated spraydeck) and therefore offers other options for tours.

anfibio_rebel_2k_packraft_cruiser_spraydeck
Ultralight packraft with an integrated spraydeck

Advantages

very light and compact + skeg holder already fitted
+ spraydeck can be opened (packraft can be paddled as an open packraft) + sprayskirt is in integrated in the spraydeck + comfortable seat with integrated backrest + scratch-resistant surface + accessories and spare parts (e.g. seat, skeg) available + 3-year guarantee on materials and workmanship

Disadvantages

spraydeck suitable for moderate white water only
– difficult to compress the seat – lower side of the air chamber is poorly protected against rough groundings – only repair material but no repair kit (i.e. material including adhesive) included – little space for tall people with the spraydeck closed

anfibio_rebel_2k_size
Slightly bigger than the Anfibio Delta MX

The Anfibio Rebel 2K is a great addition to Anfibio’s ultra-lightweight Prackrafts. It is a very versatile packraft with a good finish. Thanks to the integrated spraydeck, you are optimally prepared for many situations. It keeps you dry from splashing water and warm on cool mornings or in cooler seasons. The Rebel 2K is also available with waterproof inner pockets in the air chamber (70 L per side). This increases the packraft’s transport capacity enormously and is perfect for longer outdoor activities.

In order to achieve the low weight, the Rebel 2K has been designed without unnecessary material thicknesses and coatings. It is therefore less robust than other packrafts (which are significantly heavier). Nevertheless, we consider the Anfibio Rebel 2K to be suitable for most applications of a packraft (crossing waters, river tours, leisurely paddling on lakes, …). For frequent whitewater use, where not only the bottom but also the air chamber is subjected to heavy stress, we would be cautious with the Rebel 2K. Although it is an ultra-light packraft, you don’t have to sacrifice comfort and useful features (e.g. comfortable seat, skeg holder, numerous straps).

anfibio_rebel_2k
Great packraft for river tours

Anfibio Omega C2 Review

The Anfibio Omega C2 is a very light canoe packraft. There are now packraft models from numerous manufacturers on the market, but packrafts as canoes (known as Canadian canoes in technical jargon) are still a rarity among packrafts.

anfibio packraft review
Packraft canoe which can be also paddled as a kayak

Advantages

very high configurability (up to 2 skegs, backrests for kayak configuration, MultiMat for stiffening the floor, …) + very compact and lightweight for a 2-person canoe + very flexible positioning of the seats
+ comfortable seat cushions + plenty of space for the paddlers in the canoe configuration + two skegs fittings already attached + high rigidity (air pressure) achievable with the aid of the hand pump + can also be used as a kayak + possibility of stowing and securing luggage in the interior + good workmanship + 3-year guarantee + good running characteristics and good directional stability (with at least 1 skeg) for an inflatable canoe

Disadvantages

no carrying handles – somewhat more tippy than conventional packrafts due to the raised seating position – cords for fastening the seat wear out quickly – without MultiMat not a good seating position (too low and cramped) as a kayak – lower side of the air chambers is not very protected against rough groundings – only repair material but no repair kit (i.e. material including glue) included – luggage compartment in the air chamber would have been very interesting for multi-day tours – inflation bag and hand pump could be of higher quality

anfibio canoe packraft
Inflatable seats mounted as canoe seat benches

The Anfibio Omega C2 is a very successful and interesting packraft. If we didn’t already have a few boats of our own, the Anfibio Omega C2 would be worth considering buying. It is the lightest, most compact and affordable inflatable canoe available on the market. The manufacturer has taken care to make the Packraft as variable as possible. Thanks to the variable seating concept, the Anfibio Omega C2 in combination with the MultiMat and the backrests can be used not only as a canoe but also as a 1- or 2-person kayak.

As a canoe, it is a real alternative to conventional inflatable canoes (e.g. Gumotex Palava). The raised seating position and long internal length offer plenty of space for paddlers and luggage on a day trip. Skegs are very common with inflatable kayaks, but hardly ever found with canoes. The Anfibio Omega C2 is different. It can be equipped with up to 2 fins and has good running characteristics and therefore does not have to hide behind conventional inflatable canoes. For a 2-person packraft, it has very generous dimensions despite its small pack size and weight.

anfibio-omega-canoe-packraft
Good performance as a canoe

Ally 16.5 Canoe Review

The Norwegian outdoor manufacturer Bergans, which owns the Ally brand, promotes the Ally 16.5 DR as the world’s best-selling folding canoe. Anyone who has ever been paddling in Norway will certainly have seen an Ally boat on the water. There the Ally canoes are very popular. We had the chance to paddle an Ally canoe at a boat fair and can say in advance that we had a lot of fun paddling the canoe.

ally canoe 165

Technical Specs

Max. paddlers:
Length:
Width:
Capacity:
Packed size:
Material:

2
500 cm | 16’4”
90 cm | 3′
380 kg | 838 lbs
110 x 42,5 x 50 cm | 3’6” x 1’4” x 1’6”
fiberglass reinforced PVC (boat skin)
aluminium (frame)

Weight:
Produced in:

20 kg | 44.1 lbs
Norway

Which model has been reviewed?

Ally 16.5 DR from 2020

How did we organize the review?

The review was created in the context of an outdoor fair.

How intensively has the product been tested?

low

high 1 bar = 1-3 km paddled (first impressions)
2 bars = min. 1 day/ 2 half-day tours
3 bars = min. 4 tours
4 bars = min. 8 tours
5 bars = min. 12 tours (very intense)

Where have we tested the product?

Whitewater

Calm rivers

Lakes

Table of Contents

First impressions and assembly

Since we have reviewed the boat in the context of a boat show, we could not assemble and disassemble it ourselves. Therefore, we can not provide our own experience here. The information about the assembly is based on research and the exchange with the manufacturer. According to the manufacturer, it takes about 25 minutes to set up. At the beginning, however, you will have to plan considerably more time. Especially with new Ally boats, the aluminum tubes do not yet go into each other so easily and that is why a rubber mallet is also included.

The Ally 16.5 consists of a total of 4 parts: Boat skin, foam floor, plug frame frame and seats. The boat skin is made of glass fiber reinforced PVC coated material. This is said to be particularly resistant and UV-resistant. Nevertheless, the boat skin can be damaged by razor-sharp stones or very sharp branches. In general, however, the material can withstand a relatively high level of stress. In the case of minor to medium damage, it can be repaired even with the included repair kit.

ally boat
The design of the Ally looks modern and sporty

The foam floor, which is placed between the plug-in frame and the boat skin, provides the necessary buoyancy. The aluminum poles are simply plugged together using a rubber cord inside, just like tent poles. The cross braces are attached to the longitudinal poles via plastic click fasteners.

ally folding canoe
The canoe is stretched by a plug-in frame
folding canoe floor
Longitudinal and transverse struts are connected by click fasteners
ally canoe material
The foam floor provides the necessary buoyancy

At the click fasteners then also come the seats. These are not only adjustable in height and inclination, but can also be flexibly placed inside the boat. They are not only hooked into the interior of the boat, but are firmly locked to the frame, which in any case provides more seating stability.

The boat is ideally paddled by 2 people, which makes it easiest to paddle and still leaves plenty of room for luggage. Experienced paddlers can also paddle canoes solo without any problems. For this, you simply mount one seat less in the boat. In the scope of delivery are only 2 seats, but by buying another seat it can also be paddled by 3 adults. For families, the canoe is also suitable, because it can accommodate 2 adults and 2 children without any problems. Even in this combination, enough luggage can still be taken along. It is amazing how much can be stowed in the bow and stern alone.

ally canoe 165 review
The seat are fixed to the floor
ally folding canoe
The seats are adjustable in height and inclination

The keel line of the boat is only slightly curved, which allows the manufacturer to promise good straight running characteristics. It should always be taken into account that the boat with the best straight line cannot be the most maneuverable boat. Nevertheless, thanks to the collapsing bow and stern, the boat has a pretty good maneuverability.

Included with the boat is a backpack for transporting and storing the boat. The padded shoulder straps and chest strap definitely make it easier to carry. Nevertheless, the boat weighs 20 kg and at least paddles and life jackets must be added as equipment. This is a weight that should not be underestimated, as we also found out when we put it on for a test run. Short tours on foot should not be a problem. Longer walks with the backpack, however, would undoubtedly be quite energy-sapping and sweaty.

ally canoe backpack
The scope of delivery also includes a backpack for transport and storage

Review of the Ally 16.5 canoe on the water

Right from the start, we immediately noticed the low weight of the assembled boat, which is very comfortable to carry and also easy to put in the water from landing stages. Due to the frame of aluminum tubes in the interior, you can quickly ask yourself whether you have to be particularly careful when entering the boat, for example, not to step on the connectors. However, this concern is unjustified, because you can step anywhere in the boat without any problems.

We paddled the boat in good conditions, sunny and little wind, which is actually how you imagine the perfect day for a paddling trip.

We really enjoyed paddling the Ally 16.5 DR on the lake. You are immediately amazed at how good the handling characteristics of a folding boat can be. Thanks to the only slightly curved keel line, we also had no problem getting the boat in a good straight line. The big advantage over inflatable canoes, besides the better handling characteristics, is undoubtedly the better executability of the paddling technique. With classical inflatable canoes, you have the wide side tubes where you can’t use the paddle as close to the boat and accordingly have to adjust your paddling technique a bit.

ally boat experience
The driving characteristics of the Ally were really convincing

After a few powerful paddle strokes, we were not only positively surprised at how quickly the boat picks up speed. Although the Ally Tour 16.5 is not the fastest model according to the manufacturer, we had the impression that we could travel faster with the boat than with a rigid hull canoe.

Even in small or larger waves, you are on the safe side with a folding canoe. Due to the flexibility of the hull, the boat literally winds over the waves without really losing shape. Especially in white water you would not have the classic impacts in the stern and bow. As a result, less water gets into the inside of the boat than in any solid hull variants, and it stays dry longer even in stronger swells. Another advantage that arises here is that strong movements in the boat are not immediately transferred completely to the end and the boat remains quite stable. This is especially advantageous if you have your dog or children to sit in front.

ally canoe 165 hull
The driving characteristics of the Ally were really convincing

The Ally Tour 16.5 with a length of 5 m will never be as maneuverable as a 2 m whitewater kayak. When we paddled the Ally, we already noticed that the canoe takes a little time to react. Still, it is relatively maneuverable for a canoe. Since the maneuverability is largely determined by the keel jump, the folding boat can be influenced by the seating position and loading. In whitewater, you should therefore load the middle of the boat in order to have a stronger keel jump. When paddling on lakes, you should distribute the luggage evenly in the stern and bow in order to have a straight keel line and thus benefit from optimal straight running.

Since the maneuverability is largely determined by the keel jump, the folding boat can be influenced by the seating position and loading. In whitewater, you should therefore load the middle of the boat in order to have a stronger keel jump. When touring on lakes, you should distribute the luggage evenly in the stern and bow in order to have a straight keel line and thus benefit from optimal straight running.

Especially in stronger winds, the boat would offer a large attack surface and limit maneuverability and speed. It makes sense here to purchase spray covers that also protect you in the rain. Because just with a large Canadian you will probably undertake tours lasting several days, where you can not completely assess the weather beforehand.

The makers of Lappland-Tour.de are also on the road with an Ally Tour 16.5 and give in an article interesting tips to improve the durability. It is also positive that spare parts can be reordered from the manufacturer.

folding canoe
The Ally 16.5 DR makes a high-quality impression both visually and on the water

Strengths and Weaknesses

The great strength of the Ally Tour 16.5 are its driving characteristics and its flexible use. If you are willing to invest more for a high-quality folding boat and have patience for the assembly, especially in the beginning, you will not find many other disadvantages of the boat.

Advantages

very good driving characteristics + suitable for both lakes and white water + stable construction + variable seating positions + plenty of space inside + also suitable for tours lasting several weeks + backpack already included in delivery

Disadvantages

– high purchase price – time-consuming assembly – new Ally boats are tough to assemble – sharp tube ends – boat with little load is quite susceptible to wind

Conclusion on the Ally 16.5 Canoe

Ally canoe is exactly the right choice for those who have neither car for transportation nor enough space at home to buy a rigid hull boat, but still want to enjoy the canoeing hobby. Thanks to the folding technology, Ally canoes have very good stiffness and come very close to the driving characteristics of a rigid hull boat.

The boat is ideal for longer trips with a lot of luggage on lakes as well as on calm to wild rivers. Classical use cases of such a canoe are for example for tours in remote areas. For the small afternoon tour, however, certainly the more time-consuming assembly and disassembly is a disadvantage to consider. Here, potentially interested buyers should also inform themselves about the inflatable alternative of other manufacturers. These do not have quite as good driving characteristics as folding canoes, but they are much faster and easier to assemble.

In any case, the boat convinced us of its behavior on the water and we are sure that we would like to paddle it again in the future.

Pump for inflatable kayaks and canoes

For an inflatable boat, an air pump is an indispensable accessory. For the majority of inflatable kayaks or canoes on the market (with the exception of a few brands), the air pump is not included and must be purchased separately. In this article, we’ll go over the different types of air pumps for inflatable kayaks and canoes, and explain the differences to you. We also give tips on choosing the right air pump.

Table of Contents

best pump for inflatable kayak
A pump is indispensable for inflatable kayaks and canoes

How to find the right air pump?

The right air pump depends on numerous factors:

  • Do you prefer a hand, foot or electric pump?
  • How important is it to you to inflate your inflatable quickly?
  • How easy should it be to pump with the air pump?
  • How much pressure do the air chambers of your boat have?
  • How big is the boat, so how much volume of air do you need to pump in?
  • How much space do you have in your backpack and in the boat to carry the air pump?
  • Do you need a deflation function for the pump?
  • Does the pump have the appropriate adapters for your boat valves?

Pumps of any kind are already available for between 10$ and 20$. Higher priced air pumps usually have more (e.g. integrated pressure gauge, change between single and double action mode, can generate higher air pressure, have a higher build quality, …). We have a double action pump for 20€ and have been using it regularly for over 3 years.

If you want to inflate your inflatable boat as quickly as possible, an air pump with a high pumping volume (at least 4 liters) is important. You can achieve this with a voluminous double action pump. Especially for large inflatable boats, such an air pump is highly recommended. In addition, the required air pressure of your boat is crucial when choosing the right air pump. If your inflatable boat consists of drop stitch (or high pressure air chambers), you should make sure that the air pump can handle the increased air pressure.

best pump for inflatable kayak
The air pump is often stowed behind the seat
stowing air pump in kayak
Alternatively, the air pump can be stowed on the deck of the kayak, if available

With an air pump, you can not only inflate your inflatable boat, but also, depending on the model, pump the air out again. This is particularly practical, because when you open the valves, only part of the air escapes from the air chambers by itself. Therefore, when buying, make sure that the air pump has a deflation function. Such air pumps have two sides, usually marked “Inflate” and “Defalte”. Depending on the function, the hose is switched. This is especially convenient for getting out the remaining air before folding the boat. The boat is then easier to pack and you get the original packing size when folding the boat properly. Otherwise, you will have to push out the remaining air when folding the boat. To do this, start folding the boat with the opposite side of the valves. This way the valves are exposed and the air can escape when folding the boat.

If you transport your inflatable kayak or canoe by car, the dimensions of the air pump are not really important. In addition to a repair kit, the air pump belongs in the boat on every paddling trip. If a hole gets in an air chamber or after inflation the valve was not closed correctly, the air pump is needed on the tour. Also, during long breaks in the middle of summer, paddlers let out air from the boat to protect their boat against overpressure. Read more in our article: 6 tips for proper inflatable boat use. For paddlers who transport the boat and equipment in a backpack via public transport, a compact pump can save some space.

The different types of air pumps

There are a variety of air pumps for inflatable boats available. Basically, these can be divided into hand pumps, foot pumps and electric air pumps.

Hand air pump

Hand pumps have a cylindrical piston inside, and are therefore also called piston stroke pumps. The air pump is operated with both hands. During pumping, the feet can be placed on the side feet of the pump.

inlating itiwit kayak with air pump
Hand pump in use for inflating a kayak

There are both single and double action pumps. A double action pump is particularly effective because it pumps air into the boat not only when pushing but also when pulling the piston. In addition, there are air pumps that can be switched between single-action and double-action modes.

Single action hand pumps are easier to use because you only have to apply force (partly from your body weight) when pushing the piston. However, this requires you to perform twice the number of movements. We generally use double action pumps for inflatable boats, as they are particularly effective and quickly fill the inflatable boat with air. In our opinion, the increased effort required to raise the piston is hardly noticeable. It only becomes noticeable when the air pressure exceeds 0.3 bar (4.4 PSI). This is why the double action pump with a wide piston shows its limits with high-pressure chambers (e.g. with drop stitch), as pulling up the piston becomes very energy-consuming from a pressure of 0.4 bar (5.8 PSI). This is exactly why there are air pumps that can be switched between single and double Action mode. At the beginning, the double action mode is used to quickly get a lot of air into the air chambers. From a higher pressure is then switched to single action mode. However, if you only need to get a pressure of up to 0.5 bar (7.3 PSI), you can also do it with a simple large (4 liter) single action pump.

For inflating inflatable boats, we recommend an air pump with a thick piston. These generate sufficient pressure and have a high volume so that the inflatable kayak is quickly inflated. Thin and tall piston pumps can also be used in general, but are primarily intended for inflatable SUP boards. They have a much smaller volume, but can generate a very high pressure. The most efficient way to inflate is to keep your arms extended, stand vertically over the air pump and inflate in squats.

Bicycle air pumps cannot be used for inflatable boats because they do not have the correct valve adapters. Even if you have a valve adapter for your inflatable boat, they won’t attach to the tube of a stand-up bicycle pump. Not to mention how long the pumping process would take.

Foot air pump

Foot pumps are foldable and can therefore be better stored in the backpack as well as in the boat. A foot pump in the folded state has a size of a DIN A4 sheet and a thickness of 5 – 8 cm. As a rule, foot pumps are less powerful than hand pumps. They also take longer to inflate compared to a double action hand pump, as they do not have a double action function.

portable boat foot pump
Foot pump in use for inflating a canoe

In general, inflatable boats can be pumped up to 0.1 bar without any problems and up to 0.2 – 0.25 bar with foot pumps. From a higher pressure, a high-pressure foot pump is recommended, which then pumps with a lower volume. Foot pumps are also a good alternative for people with back problems. With a foot pump, you don’t have to bend over, and the movement comes exclusively from your leg. In addition, most foot pumps are more space-saving to store than hand air pumps.

Electric air pump

Who wants to buy an electric air pump for his inflatable boat, should pay attention to a 12 V connection for the cigarette lighter in the car, or better buy a battery-powered air pump. Then you can use the electric air pump anywhere regardless of an existing power connection.

With an electric air pump, manual inflation should be eliminated, at least in part (depending on the air pump and the required air pressure of the inflatable boat). This is because a majority of compact electric air pumps with rechargeable batteries do not have the necessary power to generate a sufficiently high air pressure. Unfortunately, such pumps too often do not specify what air pressure they create. However, for inexpensive inflatable boats with an air pressure below 0.1 bar (1.45 PSI), an air pump powered by rechargeable battery is sufficient. At an air pressure of 0.1 bar (1.45 PSI), you usually have to pump a little more with a hand or foot pump.

electric pump for inflatable kayak
A compact electric air pump can help with assembly

Even if the electric air pump does not have sufficient power for the required operating pressure of your boat, such a pump can still be a useful addition. At an air pressure of 0.2 bar, you need to pump about 2/3 to 3/4 less. This is because the air chamber is already mostly filled with air by the electric pump. You only have to pump a little more with a hand air pump to get the final pressure.

We like to have such an electric pump for kayaks in the basement when we unfold our boat again to dry after a paddling trip. The inflatable boat simply dries better when the air chambers are a little filled with air.

Careful with compressor air pumps!

However, do not use an electric compressor air pump for your boat. Compressor air pumps are much more powerful and not suitable for inflating inflatable kayaks or canoes. The risk of overpressure is very high and will burst the chamber of the boat.

A battery air pump is a comfortable alternative to the conventional hand pumps. Nevertheless, we use exclusively or additionally a double action pump for inflating our inflatable kayak by the water. From our point of view, hand air pumps are much more resistant and essential to create a sufficiently high pressure. An electric battery air pump is quickly unusable if it falls on the ground or even into the water, or if the battery was not sufficiently charged.

Valves and valve adapters

The air pump is connected to the valve of the inflatable boat via a valve adapter. There are a variety of different valves. In this section we would like to discuss the most common types.

  • Plug valve: The plug valve is the simplest form of valve on inflatable boats. This valve is very rarely found on inflatable boats. For higher priced inflatable canoes, this valve is not found at all. The big disadvantage is that it can be opened accidentally.
  • Boston valve: Boston valves are 2-way screw valves. The top screw cap is removed for inflation. If you take off the air pump adapter after inflation, no air escapes because a flap inside closes the valve hole, and only opens during inflation. Nevertheless, the top cap should be screwed on for safety. If you want to release the air, unscrew the lowest cap. Due to the large valve opening, the air escapes very quickly. Both Intex, Bestway and Sevylor inflatable boats have Boston valves.
  • Military / Push Push Valve: Some European brands like Gumotex/ Innova and Grabner use these valves and call them Push Push valves. The American brand Advanced Elements inflatable calls them Military valves. The valves are characterized by a spring that can be operated very easily with a finger using a push-turn knob. If you push the spring in, air escapes. When you inflate, you push the spring out. When connecting the valve adapter, no air escapes either. Compared to the Boston valve, a twist-lock valve allows you to deflate very precisely if a little too much air has been pumped up.
  • Twist-Lock Valve: Twist-Lock valves are used by Advanced Elements for its air tubes under the canopy and for the coamings, or Gumotex/Innova for its inflatable seats, among others. The valves can be inflated with a Boston adapter or inflated by mouth. The handling is very simple. The twist cap also makes it very easy to adjust the air pressure.
intex explorer drain valve
Plug valve
boston valve
Boston valve
advanced elements valve
Spring valve
itiwit x100 kayak valve
Push push valve
advanced elements inflating
Twist-Lock valve
pumping up with adapter
Inflating with valve adapter

Manometer for kayak and canoe pumps

A manometer is an air pressure gauge to measure the pressure in the air chamber of your inflatable kayak or canoe. This is the only way to know how much air you still have to pump into the air chambers. As with the air pump, the pressure gauge must be suitable for the valve, otherwise air pressure measurement is not possible. Some people pump up the boat by feel. We always check the air pressure with a pressure gauge, because defects due to accidental overpressure are excluded by the manufacturer’s warranty.

Relief valves

Some inflatable kayaks or canoes have a pressure relief valve built into the air chambers in the bottom chamber. This valve allows air to escape from the chamber in case of overpressure. Some manufacturers even offer a pressure relief valve for the air pump. This is then screwed onto the pump hose and this already prevents overpressure during inflation.

Nevertheless, a separate pressure gauge is not always necessary. Some air pumps have an integrated pressure gauge so that you can read the air pressure during inflation. Some inflatable boats (e.g. Intex and some Sevylor inflatable boats) have a measuring scale printed on the air chamber. This way you can check if there is too little or too much air in the chamber.

intex inflatable kayak air pressure
Measuring strip
sevylor kayak pressure
Measuring scale
aqua marina steam air pump gauge
Pump with integrated manometer
sevylor pressure gauge
Separate manometer

Kayaking and Canoeing in Germany

eibsee germany

Canoeing enjoys a great tradition and popularity in Germany. And that’s quite obvious, because the country with its numerous waters has a lot to offer. From north to south, different paddling areas attract many recreational paddlers to the water every year. So there is something for every taste. Whether impressive mountain lakes in Bavaria, the Spreewald with its labyrinth of waterways or urban paddling in big cities like Berlin or Hamburg. With this variety, everyone should find what they are looking for.

In this article we would like to present you our most beautiful paddling tours in Germany, which we have done in the past years. In addition, there are of course many other destinations that are at least as beautiful. A list of all these possibilities would be almost impossible and therefore this article should serve as inspiration for your next canoe or kayak trip and convince you of the beautiful paddling spots that you can find in Germany.

Table of Contents

Canoe trips in Germany for several days

Many waters in Germany offer the possibility to extend a day trip to a tour of several days. It is mainly the large lakes and chains of lakes, but also rivers, which invite you to canoe tours lasting several days. Especially the lakes and lake chains have a good infrastructure of campsites and many of them are even located directly on the shore. Due to the dense population in Germany, there is often no need to carry provisions for several days, as you have supermarkets and restaurants nearby almost everywhere.

As in many other countries, wild camping is not allowed in Germany. While it may be tolerated in some regions, you should not try your luck in nature reserves in particular, as it can get quite expensive. If you are looking for a canoe trip of several days in secluded nature and love wild camping, Scandinavia (e.g. Sweden as a canoe destination or Lake Saimaa in Finland) is recommended, because there the Everyman’s Right applies.

South Bavaria – Kayaking between Mountains

If you love the mountains, you will quickly fall in love with the lakes in Bavaria. Here there is not just the one beautiful lake to discover, but a dozen. The lakes impress with crystal clear water, impressive mountain scenery and Bavarian culture on the shores.

We have already paddled numerous lakes in Bavaria and if we had to name our 3 favorite lakes, it would probably be the Staffelsee, the Chiemsee and the Eibsee.

The Staffelsee is actually a moor lake and therefore always warmer for swimming than all the other lakes. In addition, the small lake impresses with its numerous islands to discover. If you want to go island hopping for a day as a little adventure, the lake is just the right choice for you.

kayak winter paddling germany
Staffelsee
chiemsee bavaria kayaking tour
Chiemsee
eibsee germany
Eibsee

Lake Chiemsee is the third largest lake in Germany and we also love this lake because of its islands. The islands Herreninsel and Fraueninsel are like two worlds apart. One is home to a large forest with walking paths and a replica of Versaille Castle. The other island is basically an idyllic Bavarian village with a women’s monastery. Both islands can be explored extensively on a long summer day.

Eibsee is a fairly small lake with numerous islands as well. But it’s not the islands here that fascinate us so much as its location and water. Lying at the foot of the mountain Zugspitze (the highest mountain in Germany), you can not only see the mountains in the distance, but directly on the shore the imposing mountain massifs pile up with a view of the Zugspitze. In addition, the turquoise-blue water color conveys Caribbean flair.

North Bavaria – A destination for river paddlers

Not only South Bavaria has a lot to offer paddlers, but also the rest of the state, e.g. the hiking rivers in Franconia. The Altmühl Valley, for example, with its numerous shelters for paddlers, is also a popular address for canoe tours lasting several days. The river Altmühl rises in Franconia and slowly seeks its course to Old Bavaria. The emphasis is on slow, because the Altmühl is one of the slowest flowing rivers in Germany. So endurance is also required here when paddling. On the other hand, you will find many beautiful little villages along the banks that are worth discovering. Due to its many shelters for paddlers and very calm current, the Altmühl is especially popular among families.

pegnitz canoe tour
Pegnitz near Vorra
bamberg germany paddling trip
Regnitz at Bamberg
altmühl germany canoe trip
Altmühl river near Solnhofen

Another beautiful river in north Bavaria is the Pegnitz. The over 100 km (62 miles) long river Pegnitz has its origin in the Franconian Switzerland, flows through Nuremberg and unites in Fürth with the left Rednitz to the so-called Regnitz. Common paddling routes run between Neuhaus an der Pegnitz and Hohenstadt, although paddling between Neuhaus and Artelshofen is only permitted above a certain minimum water level. On the Nürnberger-Land website, a traffic light system shows whether the sections are currently navigable. In addition, the river is not allowed to be paddled with a SUP, raft or inflatable boat until Hohenstadt. Only canoes, kayaks and inflatable kayaks for a maximum of 3 persons and max. 6 m (19’7”) length are allowed. We paddled the section from Vorra (entry point Pegnitzinsel with nice refreshment stop) to Hohenstadt.

Another nice canoe tour in north Bavaria is a 9 km (5.6 miles) long canoe tour through Bamberg, where you paddle on the right and left arm of the river Regnitz. In the meantime you have to portage your boat into the Hollergraben in front of the Chance-Jugend-Fähre in the city center. Shortly afterwards you will get back to the left arm of the Regnitz. There you will also see the Old Town Hall of Bamberg. In addition to the portage into the Hollergraben, the round trip includes a transfer at the Jahnwehr and at the Friedensbrücke (to get back from the left arm of the Regnitz to the right arm).

Lake Constance – Germany’s 2nd largest Lake

Lake Constance is the second largest lake in Germany and is located in the border triangle with Switzerland and Austria. Geographically, it can be divided into three parts, Upper Lake Constance (Obersee), Lower Lake Constance (Untersee) and Lake Ãœberlingen.

The charm of the lake is mainly its size, the mountains in the background and the beautiful towns on the shores. If you are looking for more nature, Lake Ãœberlingen is the right place. Here, the shores are not so much built up and there is a great view of the mountains from here.

lake constance kayaking
Wasserburg at Lake Constance
lake constance paddling germany
View of the Alps from Wasserburg
canoe trip lake constance
Lake Constance, near the mouth of the Schussen river

Spree Forest – A Labyrinth of Channels

From our point of view, the Spree Forest (german: Spreewald) is unique. It is a green oasis of forest and moorland, characterized by its numerous natural and man-made river arms of the Spree. Paddling here feels like a walk through the forest. And in between you come across a few idyllic villages. This feeling of walking through the forest on the water is what gives the Spreewald its special flair for us.

Especially the villages of Lübben and Lübbenau with their good train connections to Berlin are ideal starting points for a canoe tour. But also the village of Burg, which is less well connected by public transport, is worthwhile as a starting point for a paddling trip. Thanks to its size, the Spree Forest also offers ideal conditions for a canoe trip of several days. Campsites but also nice small guesthouses and hotels offer every paddler the right accommodation. Thanks to the small canals, the calm waters and the absence of motorboats, this paddling area is also a very good address for families with children.

paddling spreewald river and canals
Paddling in Spree Forest
canoe trip spreewald
Village Lehde
spreewald holiday germany
Restaurant at Lehde

Berlin – Urban Paddling

As the capital of Germany, Berlin not only has a lot to offer historically and culturally, but is also more than worth a visit as a paddling destination. With the Spree and Havel rivers, two large rivers flow through the city. In addition, there are small rivers, canals and lakes.

Of course, some parts, especially in the city center, are closed to recreational paddlers, but the opportunities that are still available are enormous. Theoretically, you can cross Berlin once by kayak and thus experience sightseeing from the water.

berlin canoe tour
Spree at Berlin
urban paddling germany
Metro in Berlin
urban paddling germany
Landwehr Canal

Mecklenburg Lakeland – The Land of a thousand Lakes

In the south of Mecklenburg and in the north of Brandenburg stretches the Mecklenburg Lakeland. The center of this area is Germany’s largest lake, the Müritz. In addition to the Müritz, however, there are other large and small lakes, with many of them connected by canals. This gives endless possibilities for a canoe trip.

This lake district is the right place for you if you want to go on a canoe tour and not just discover one lake. In addition, small towns and villages as well as a rural area characterize the canoeing area. Many campsites have specialized in canoeing and therefore the Mecklenburg Lakeland is also a paradise for canoe tours lasting several days. Depending on the lake and canal where you are paddling, you will encounter quite a bit of motorboat traffic. This lake area is also a popular address among boaters and sailors.

Mecklenburg Lakeland germany canoe trip
Mecklenburg Lakeland near Fleether Mühle, near Mürow
castle rheinsberg brandenburg kayak tour
Rheinsberg castle
lake paddling germany
Lake Rätzsee

Dresden – National Park and Urban Paddling

How does it sound to you when you start your paddling tour in a national park and end it in the city center of Dresden, the capital of Saxony? That’s exactly the kind of tour we did. First we hiked in Saxon Switzerland and then we paddled from Schmilka near the Czech border to Dresden by packraft.

At the beginning, Saxon Switzerland shapes the banks of the Elbe River and at the end, the beautiful Dresden. Since there are not as many opportunities for paddling in Saxony as in some other states, we would like to mention this Elbe tour here, because it is definitely a very special paddling tour.

packrafting germany
Saxon Switzerland
kayak tour elbe dresden
Dresden city center
canoe tour saxony germany
Pillnitz castle

Saale near Jena – Beautiful river landscapes

The Saale Valley is one of the most beautiful river landscapes in Germany and with its location in Central Germany it is also easily accessible for many. The 413 km (257 miles) long river meanders through parts of Saxony Anhalt, Thuringia and Bavaria. In addition to the beautiful nature, there are numerous cities such as Jena, Saalburg, Naumburg or even the large city of Halle as well as numerous castles and palaces to discover.

germany river paddling
Beautiful river landscapes can be found at the river Saale
saale jena canoeing
Paddling the Saale river
nature outdoor germany
Rural areas make paddling tours very peaceful

We hope you enjoyed our small selection of canoe and kayak tours in Germany. We will definitely expand the list in the future. And if you know of any other paddling spots in Germany that shouldn’t be missed, feel free to let us know in the comments.

Kayaking and Canoeing in Sweden

kayaking dalarna sweden

A canoe trip in Sweden is a dream for many paddling enthusiasts. The country offers endless possibilities, so that the choice is quite difficult. Many regions are so thinly populated that canoe trips are also possible, on which you can enjoy nature as good as all alone. Traffic noise is almost never present, because either often no roads pass nearby or only small roads that are not busy. So Sweden is a canoe destination that satisfies the longing for untouched nature and isolation.

In this article we would like to introduce you to the most exciting regions for canoeing and kayaking in Sweden. From lake landscapes with canals and countless islands, to natural rivers and urban paddling regions, there is something for everyone. It is also possible to discover the coastal regions in the west and east with its archipelago. We do not provide any routes here, but would like to inspire you for your next canoeing vacation and support you in your research.

Table of Contents

Sweden as a destination for canoe and kayak trips

Besides region for canoeing that promises absolute solitude and tranquility, it is also the nature that attracts us paddlers to Sweden. The country has almost 96000 lakes, breathtaking coasts with archipelagos, endless forests and white sandy beaches.

The south of Sweden is quite densely populated by Scandinavian standards. Accordingly, the accessibility by public transport is good here. The paddling areas have numerous canoe rentals and small villages and towns are never far away to fill up your own provisions. Due to the Everyman’s Right, wild camping is no problem and makes most paddling tours a lot less complicated, if you are equipped accordingly. Nevertheless, campsites can be found in many places.

decathlon packraft
Sweden offers endless possibilities for paddling tours

The north with Lapland offers opportunities for canoe trips in extreme remoteness, which are also then more difficult to reach. Here are for the tours not only a particularly good preparation of need, but also plenty of paddling experience. In general, the further north you travel in Sweden, the more you will have to deal with mosquitoes. The main season for mosquitoes is from mid-July to mid-August. From then on, the first night frosts set in and the number and mobility of mosquitoes decreases significantly.

Swedes also love to explore the nature by kayak or canoe. Therefore, you will often have no problem to find a boat rental especially in the popular and well visited areas. But of course you can also come with your own boat. For tours on lakes lasting several days, inflatable canoes or folding canoes are very practical, as they not only offer a lot of space, but are also easy to transport. For adventurers, the use of packrafts is also a good idea, with which you can combine hiking and paddling.

Best time for a canoeing vacation in Sweden

Especially in southern Sweden you should try to avoid the vacation season in summer. Many Swedes like to travel in their country at this time and use the surrounding lakes and nature reserves for their summer vacations. You can check the exact dates of the school vacations in Sweden on the internet before. In Scandinavia, good weather is often a gamble. Lots of sun and warm temperatures are not guaranteed in any month. However, the best chances are in July and August. In these months you also benefit from the long days and the fact that it does not get really dark. In any case, you should be equipped for a canoe trip for changeable weather, because the weather can change incredibly quickly.

sweden trip
In good weather, nature and villages look like in a picture book

Packing list for several days paddling trip in Sweden

To make your canoeing vacation successful and fun, you should have the right equipment with you. If you want to make your tour independent of a canoe rental company, then an inflatable canoe or a folding canoe as a boat is recommended, especially for the long journey. For outdoor enthusiasts, packrafts are also suitable, which can be used to combine paddling with hiking and biking. We would recommend a canoe or a packraft.

Since the weather in Sweden can be quite changeable, you should definitely take rainproof and warm clothes. In addition, there is some camping equipment, such as tent and sleeping bag, which should also be designed for bad and cold weather. The further north you travel, the more mosquitoes accompany you during a canoe trip. We have come to appreciate anti-mosquito coils, as they are pretty good at keeping mosquitoes away. But and also a mosquito net for the head should not be missing especially in Lapland in the packing list. So that the things also remain dry if it rains times on the tour, you should not forget in no case a few good dry bags. In our opinion, water shoes are also indispensable for canoe tours lasting several days

  • Tent
  • Sleeping bag
  • Camping mat
  • Hammock
  • Camping chair
  • Camping tableware
  • Camping Stove
  • Tarp
  • Anti-mosquito coils
  • Mosquito net for head
  • Sun hat
  • Water shoes
  • various dry bags

Dalsland – The perfect destination for paddling beginners

For canoe beginners, Dalsland is an ideal introduction to the Swedish wilderness. The region is characterized by its narrow and long lakes. Thus, there is hardly ever a swell worth mentioning and the way to the next shore is always nearby.

Dalsland is located about 200 km north of Gothenburg and stretches along the Norwegian border. The journey from Gothenburg or Oslo is therefore easy. Civilization with its asphalt roads, supermarkets and restaurants is never too far away and yet here you have the feeling of loneliness and vastness. The great danger that you are on your own here in secluded wilderness is therefore not given here.

dalsland sweden paddling destitination
Lake Västra Silen in Dalsland (Photo from 2342639 of Pixabay).

With over 400 lakes and numerous rivers, canals and locks, surrounded by a slightly hilly landscape, the region is unique in Sweden. Thus, Dalsland gives paddlers in particular endless possibilities for a canoe trip. Numerous islands also invite you to take a break or spend the night. Between the lakes there are hills with beautiful forests. From time to time, small villages with the typical red wooden houses can be found near the shore. The region has adapted to canoeists, and campsites with fireplaces and wood as well as toilet and shelters await paddlers at many shore points and small islands. For the equivalent of three euros a day, there is a nature care card that allows the use of these designated places. It is also good to know that all lakes in Dalsland have drinking water quality.

However, due to the fact that the region is so easily accessible, offers a nature as you would expect from Sweden and offers paddling conditions even for beginners, you have to share the beautiful nature with numerous paddling friends, especially in the high season. This should not be a big problem, but it is said that canoe tourism in Dalsland has become mass tourism. There are for example German tour operators through which you can book your complete tour with travel and all equipment. By bus it goes then from Germany to Dalsland and also the food is transported directly from Germany, in order to reduce the costs. This also meets with displeasure in parts of the population, since the local tourism industry only gets a little of it. In the evenings, for example, one is often left out when the shelters are already occupied by other paddlers.

A good idea in the high season is not to choose the typical routes on the lakes Le Stora and Foxen to avoid all the groups of tour operators. Coupled with the Swedish vacation season, there can be up to 5000 canoes on the lakes every day. Also, be aware that some lakes are open to motor traffic. Therefore, you should put your route on less popular lakes and by the numerous watercourses that connect the lakes, especially also offers a round trip.

Vänern – The Swedish Inland Sea

Lake Vänern is located in the southwest of Sweden and is the largest lake in the country and the European Union, and still the third largest in Europe. With a width of 75 km and a length of 140 km, it can rightly be called the Swedish inland sea. At first glance on the map, it is almost impossible to imagine, but Lake Vänern has about 22,000 large and small islands, as well as archipelagos (bare rock islands), which are located mainly near the shore.

vänern sweden
View on the lake Vänern from Halleberg

However, some archipelagos are nature reserves under special protection, which has allowed to preserve a fascinating natural landscape. Here you should pay attention to where you can land with your kayak and where not.

Especially for sea kayak fans, Vänern is very suitable, but also generally for paddling beginners, because many small towns and other activities are waiting for you on the shores of the lake. However, for most of the paddling tours you need to have a good basic condition.

Numerous small towns and villages are located around the lake. Karlstad with over 60,000 inhabitants is the largest one and is located on the northern shore of the lake. Vänersborg is the largest town at the southern tip. The easiest way to get there is from Gothenburg or Oslo. From Oslo there are direct bus connections to Karlstad several times a day, e.g. with the provider nettbuss. From Gothenburg, you can reach the town of Vänersborg within 40 minutes with a direct train connection.

Glaskogen – A dream for canoeing

Glaskogen is also located in southwestern Sweden and is a nature reserve with winding rivers, small and large lakes, and vast forests, some of which are untouched. Unlike the other canoeing areas in southern Sweden, the Glaskogen Swedish Nature Reserve is well developed, but still allows for true solitude. In total, the area includes about 80 lakes. In addition to moose and badgers, there are also numerous animal species that are rare for Sweden, such as lynx and wolves. In forests there are numerous overnight accommodations for both hikers and paddlers in the form of wooden shelters, equipped with fireplaces and firewood, as well as outhouses. There are also many other bays that are perfect for camping.

Really wild and lonely is the larger lake Stora Gla, which can also quickly become uncomfortable when the weather changes.

The village of Lenungshammar with about 30 inhabitants, located in the heart of the reserve, has a campsite, a small grocery store, café and canoe rental. Canoe rentals are also available in Arvika or Glava Glasbruk. If you want to stay in Glaskogen, you have to buy a visitor’s card. The proceeds are used for the care and maintenance of the nature reserve.

The easiest way to get there is from Oslo. Trains run directly from Oslo to Arvika with a journey time of just under two hours. Alternatively, it is possible to travel via Gothenburg, also by train, but with a change of trains and a travel time of about 3 hours.

Swedish Lapland – The rough and lonely wilderness

Lapland is a landscape in Northern Europe, but it can refer to a different size of the region depending on the context. There is no clear geographical definition of the region. Most often, it refers to the part of Scandinavia that lies north of the Arctic Circle. We consider only the Swedish part, which is Swedish Lapland.

swedish lapland
Swedish Lapland (Photo from Steen Jepsen of Pixabay)

In Swedish Lapland, there is an average of 2 inhabitants per square kilometer. In the USA, on the other hand, there are 37 per square kilometer. In addition, most people in Lapland tend to live in the larger towns. This means that we find large parts of the region that are completely unpopulated. Lapland in Sweden also has numerous lakes and rivers that can be explored by canoe. In addition, the landscape is very much characterized by mountain ranges. So it is the right destination for every experienced paddler who wants to have the great adventure as well as really enjoy the nature and solitude.

Kalixälven is with 461 km the longest natural river in Sweden and a popular destination for river paddlers. The river Torne älv is also a popular destination for paddling enthusiasts.

A very elongated and narrow lake in the south of Lapland is Storvindeln.

Bohuslän – The Wild West of Sweden

Bohuslän is located on the western Swedish coast north of Gothenburg. To the north, the Swedish province borders directly on Norway and to the east on the also popular paddling area of Dalsland. Bohuslän is mainly known for its rocky coastline with offshore islands and skerries. It is also home to Gullmaesfjorden, Sweden’s only fjord. What is a paradise for experienced sea kayakers can quickly become stressful or even dangerous for the beginner paddler. Paddling on the west Swedish coast is quite demanding and wind and wave conditions can change quickly.

bohuslän sweden
Small harbor Hunnebostrand in Bohuslän (Photo from Marie Sjödin of Pixabay).

In the north, by the way, is Kosterhavet, Sweden’s only marine national park. Since the archipelago is located a bit further from land, it is best to take the ferry from Strömstad. Especially paddling on the open sea should not be underestimated here and participation in one of the tours of the local kayak providers is recommended. Please always make sure that the island where you want to land is not under bird or seal protection. Especially in a national park there are quite a few of them.

The section between the coastal towns of Grebbestad and Fjällbacka is also very popular. The large islands of Pinnön and Otterön offer shelter for paddlers and also good camping opportunities. Fäjällbacka is also a well-known tourist destination on the Swedish west coast, with the steep walls of Vettenberg rising almost vertically behind the village. Numerous islands around Fjällbacka have beautiful sandy beaches and the water here is crystal clear.

wes sweden bohuslaen paddling
View over Fjällbacka

About 13 km (8.1 miles) from Fjällbacka are the Väderröarna islands or weather islands. Most of the 365 islands are small and hilly. On one of the islands there is even a small hotel (Väderröarnas värdshus). The islands are also known for the large number of seals living there, and the lighthouses. Again, if you are not an experienced paddler, you should take a guided tour.

There are so many more beautiful spots on the West Swedish coast that make the paddler’s heart beat faster.

Stockholm and its archipelago – A sea of thousands of islands

Stockholm is also a really good spot for paddling. The Swedish capital is spread over 14 islands and just outside the city is the country’s largest archipelago and the second largest group of islands in the Baltic Sea after the Archipelago Sea, which belongs to Finland.

stockholm kayaking sweden
Transport bag, which also serves as a inflation and dry bag

Djurgarden and Langholmen are particularly suitable for urban paddling. On both islands, which are part of downtown Stockholm, there are also rental stations where you can rent a kayak. On Djurgarden there is a huge park and it is very quiet to paddle. We have already paddled this tour and in our report on kayaking in Stockholm you can find the map for paddling and many photo impressions of the tour. But if you want to go around Djurgarden completely by kayak, you have to be prepared for a rougher and more busy south side. Because ferries and large ships also go along here and can cause quite a swell.

The smaller island of Langholmen is quieter. The island was once the site of a prison. Today Langholmen is a green oasis and on warm summer days city residents like to stay here for a picnic or swim. On the website of the rental station of Langholmen there is even an overview of some paddling tours in Stockholm describes and has also drawn them on the map.

stockholm archipelago canoe tour
Stockholm Archipelago near Ingarö

The Stockholm Archipelago with its 24,000 islands offers so many paddling opportunities that you could spend several summer months here. From large islands with villages to small rocky islands for camping, you can find everything here. Important for a tour in the archipelago is above all good and stable weather. Especially a tour with an overnight stay on a small island is something very special. Many canoe stations also rent camping equipment. Most of them also offer guided tours and take care of the equipment and food. If you are not a big camping fan, you can also plan your tour in such a way that you stay in a cabin on one of the islands in the evening.

stockholm archipelago kayaking
View in Björnö nature reserve

Mälaren – Sweden’s third largest lake

In addition to the archipelago to the east of Stockholm, there is Lake Malären (also called Lake Malär) to the west. It is the third largest lake in Sweden. Similar to the Stockholm archipelago, the lake is characterized by many bays, islands and peninsulas. The lake is also home to famous sights such as Gripsholm Castle in Mariefred, Drottningholm Castle and the most important trading center in Scandinavia called Birka, which dates back to the 10th century. It is possible to make day trips to the sights as well as multi-day trips to discover the lake and its beauty.

mariefred sweden
Mälaren with Mariefred in the background

Dalarna is a popular travel region for Swedes. Because here in the middle of the country not too far from Stockholm and Gothenburg there is rough and lonely nature as we know it from the far north. The name Dalarna means “the valleys” and refers to the hilly and wooded landscape of the region. With its numerous large and small lakes and rivers, Dalarna is also the ideal place for kayakers who want to find secluded nature and natural islands on the lakes.

Dalarna – Lonely nature in the heart of Sweden

Dalarna is a popular travel region for Swedes. Because here in the middle of the country not too far from Stockholm and Gothenburg there is rough and lonely nature as we know it from the far north. The name Dalarna means “the valleys” and refers to the hilly and wooded landscape of the region. With its numerous large and small lakes and rivers, Dalarna is also the ideal place for kayakers who want to find secluded nature and natural islands on the lakes.

dalarna sweden canoe tour
Small lake called Rämmasjön

Lake Siljan as the seventh largest lake in Sweden the center of tourism for the region. The south is mainly characterized by its mining tradition and it is rather the north and center of Dalarna that attracts the real outdoor enthusiasts. It is almost impossible to list all the canoeing and kayaking possibilities. Also smaller and very unknown lakes like Rammasjön or Stor-uppdjusen with their small islands offer beautiful nature and full Sweden feeling.

kayaking dalarna sweden
Stor-uppdjusen with its numerous islands

Gothenburg – Cozy urban paddling

Urban paddling is also possible in the Swedish harbor city of Gothenburg. There are small lakes, such as Lilla Delsjön or Stora in the east of the city with surrounding forests, which invite you to quiet tours with picnic breaks. But you can also paddle through downtown Gothenburg.

Gothenburg kayak tour
The Älvsborgsbron bridge to the harbor entrance in Gothenburg (Photo from Peter H of Pixabay)

Like Stockholm, Gothenburg also has an archipelago just outside the city that is ideal for sea kayaking. There are several canoe and kayak rental stations in Gothenburg and guided tours are also offered.

styrsoe gothenburg sweden
Styrsö island in the archipelago near Gothenburg (Photo from Marie Sjödin of Pixabay).

Have we forgotten a paddling region in Sweden that you think should be mentioned? Then write us in the comments and we will gladly include it!

The best Kayak and Canoe Tours in France

France is considered one of the most popular tourist destinations in the world. Many tourists are attracted by the culture, the good food, the beautiful cities and the diverse regions with their castles and fortresses for a vacation. In addition to numerous trips to France, we ourselves have explored several paddling destinations there in recent years and can now say that France is a real paddler’s paradise. In the following we would like to introduce you to the most beautiful regions of the country where it’s worth going kayaking or canoeing. Some of them we have paddled ourselves and tour reports with maps will help you with your planning. Other paddling regions should serve as inspiration.

Table of Contents

Kayaking and Canoeing in France

Canoeing enjoys great popularity in France and attracts not only its own citizens but also many tourists who want to explore the country’s beautiful waters during a vacation in nature. It is mainly the beautiful rivers that make the country so attractive among paddling enthusiasts. Compared to the rivers in other countries like Germany, they are often left in their natural state, making a canoe trip a lot more relaxed (less portages ) and natural. Many of the popular rivers are located in the south of the country. Thus, you often have the good weather on a canoe trip also on the side. In Provence, whitewater rivers are waiting, flowing through gorges rarely found in Europe.

Lake chains are rather not found in France. Likewise, the largest lakes in the country cannot compete with other big lakes in Europe. The only candidate here is Lake Geneva (Lac Léman in French), which the French share with Switzerland. There are also plenty of opportunities for coastal paddling. Especially the Mediterranean Sea in the south is a true paradise for sea kayakers. Beautiful bays, azure waters and steep cliffs, such as those found near Marseille, definitely make for a unique paddling experience in good weather conditions.

canoe tours france
For river paddlers, France has some of the best canoeing spots in Europe

Multi-day canoe trips in France

Especially on the popular rivers, numerous campsites have settled, which also specialize in canoe tourism. Canoe rental stations also often offer camping equipment and it is very typical that at the end of a tour you are brought back to the starting point by a shuttle bus.

Wild camping is generally not allowed in most parts of France, but is often tolerated in the wilderness. Thus, it is common to see canoeists pitching their tents on the riverbanks. Of course, you should always leave the place as you found it.

Even those who do not like camping are well served in France. Idyllic accommodations with equally beautiful hotels and guesthouses await you along many stretches of river. A tour like this is really fun if you round off the evening with a visit to a restaurant to enjoy French cuisine.

Paddling with kids in France

For families with children, the country offers the best conditions. Good weather in the south allows swimming fun for the little ones and the numerous campsites have also adapted to families. Thus, most campsites have playgrounds, swimming pools, restaurants and a small grocery stores. Especially in the rural areas you can also find many affordable accommodations.

In addition, the country is quite densely populated and you are never really in isolated wilderness. If the worst comes to the worst, the next town or village is never too far away. Another big advantage are the mostly natural rivers. Especially the annoying portage for families can be completely avoided here.

Best time to go kayaking in France

In the south of the country, thanks to the Mediterranean climate, summer comes early and goes late. Above all, you should try to avoid the French school vacations, because the French also like to be on the rivers with their families for a canoe trip. In the south of France, the rivers often have very little water in high summer, which makes canoeing easier for inexperienced paddlers due to the lower currents. On the other hand, you will have to tow or carry your canoe in places where the water is too shallow. We recommend May and September as ideal travel months for the south of France. For the rest of the country, paddling is most fun in the summer outside the vacation season.

Ard̬che РOne of the most popular white water spots in Europe

The 27 km (16.8 miles) long Ardeche Gorge is the spot for whitewater sports par excellence in France. The river is also ideal for beginners in whitewater sports and sporty touring paddlers. That’s why there are numerous boat rentals at different places in the gorge.

At vacation times and in high summer, when the water level is quite low, the region is crowded with tourists. In spring until the end of May you can still travel relatively quietly by kayak. The highlight of this tour is without a doubt the famous Pont d’Arc rock passage.

canoeing ardeche
The passage through the Pont d’Arc is the highlight of a canoe trip in Ardèche
hiking ardeche
Not only for canoeing, but also for hiking invites the Ardèche gorge
ardeche kayaking
In the summer and during the vacations there are many day tourists with rental boats

We have already kayaked through the Ardeche Gorge twice and we are sure that it was not the last time. We did the first tour in May and there were some wild spots that were really fun. The second tour we did in July and the river had a nice current to go fast but there were no wild passages. Therefore, anyone who does not like it so wild, but still wants to marvel at the beautiful scenery from a kayak, should rather plan a tour later in the summer.

If you want to have the river for yourself a little bit, you should ideally use your own boat or see if a rental company gives out a boat very early in the morning. Because the masses come only in the later morning.

Dordogne – Paddling along picturesque villages, chateaux and castles

The Dordogne is a 490 km (305 miles) long river in the southwest of France. For paddling, the 150 km (93 miles) long section between Argentat and Limeuil is particularly interesting. The river is largely natural there and you don’t have to portage the boat at any point, as there are boat slides at weirs for this purpose. Especially for families with children the Dordogne valley is an excellent paddling region. There are numerous campsites along the route, the water is quite tame in summer and early autumn and there is really a lot to discover along the banks. Besides really beautiful villages, countless castles and chateaus await and there is even a cave or two.

dordogne valley
High rock walls characterize parts of the Dordogne Valley
dordogne village
Picturesque villages in medieval style invite you to stop
france castles
Countless castles line the banks of the Dordogne

The Dordogne is highly recommended for canoe trips lasting several days. It is so varied that one can never get bored. But if you have only one day for a paddle, you should paddle the section between Vitrac and Beynac. Here you can discover beautiful nature, idyllic villages and the most famous castles of the region within a short time. For such a day trip, however, it is better to avoid the vacations and weekends, as this route is very popular and accordingly very busy.

In our tour article on the canoe trip on the Dordogne we report on our 6-day trip.

Gard – In the footsteps of the Romans

Nature is actually in the foreground of every paddling tour, but it is different on a tour on the Gardon. The highlight of this tour is the Roman aqueduct Pont du Gard, one of the best preserved bridges of the Roman Empire. The Pont du Gard is one of the most popular destinations in the south of France and there is nothing more beautiful to explore this historic structure from the water.

Since canoeing is a favorite pastime of many French people, there are many rental kayaks and canoes on the river during the vacations, which preferably head for the Pont du Gard. With your own inflatable canoe or folding boat, you can paddle to the historic bridge even after the rush hours and thus take in the surroundings at your leisure. Similar to the Ardeche Gorge, the water level is also quite low in high and late summer.

pont du gard france
The Pont du Gard is one of the most popular sights in the south of France
pont gu gard view
The banks of the Gardon are little developed and mostly natural
canoe tour pont du gard
In the summer, the water is fairly shallow and you can also paddle most of the way back

The canoe trip can be ideally combined with visits to some beautiful French cities. Nîmes, Avignon and Arles are in the immediate vicinity, all of which have their own charm and are well worth a visit.

Read the tour report about our canoe trip on the Gard.

Les Calanques – Mediterranean Coastal Paddling

For many French people, Les Calanques National Park is one of the most beautiful coastal regions in the country. High chalk cliffs, narrow bays and azure waters paint a picture of a paradisiacal landscape, which one associates with the Mediterranean.

Most tourists come to the national park for a hiking tour. We have also made numerous hiking tours in the national park and can only recommend a hike there to you. It is simply a unique experience to hike along such a beautiful coast and to rest in one of the beautiful bays.

calanque en vau
Some bays look simply paradisiacal
calanque sugiton
When the weather is nice, many use the bays to go swimming
morgiou
Excellent hiking trails let you explore the national park on foot as well

In ideal weather conditions, which means no waves and stable weather conditions, the coast is suitable for wonderful sea kayak tours. The many small bays with their beaches invite you to stay.

If you are ambitious, you can paddle the entire national park from the coast, as we did. You start in the small harbor town of Cassis and head towards Marseille. We ended our tour directly in the old harbor “Vieux Port” of Marseille. On the way there are imposing rock formations and numerous bays, which entice you to stop and swim. In Cassis and Marseille there are also kayak rental stations. If you don’t want to paddle the whole route from Cassis to Marseille, you can also do only a part of it. However, it is recommended to start in Cassis, because from there you can reach the more impressive bays faster. A comfortable day trip in this case would be the route Cassis to Calanque d’en Vau.

Learn more about our tour in the article Kayaking in the Calanques.

Verdon – The Grand Canyon of France

The Verdon is an alpine river in southern France and is also called the Grand Canyon of France. No wonder, with chalk cliffs, which are up to 700 m (2300 feet) high, the gorge offers impressive scenery. Five dams have already been built here for energy production and flood protection, which means that nowadays some parts of the gorge have been “swallowed up” by these reservoirs.

Nevertheless, the region is a popular destination for many tourists, who use the reservoirs for summer bathing and go hiking and climbing in the gorge. The lakes are just as inviting for a leisurely canoe trip and parts of the Verdon Gorge are also easily navigable. In addition to good weather that you should bring, it is important that you find out in advance when from the hydroelectric power the flood wave is sent into the Verdon.

verdon river paddling
The Lac d’Esparron reservoir is a good starting point for a canoe trip
kayaking tour verdon
Entrance to the Verdon Gorge between Lac d’Esparron and Lac de Sainte-Croix
holiday france verdon
In the region you can find many idyllic villages

Lac d’Annecy – A mountain lake with alpine scenery

Among paddling enthusiasts, it is mainly the rivers that the country has to offer. Nevertheless, there are also some beautiful lakes that invite you to a day trip. The alpine lake Lac d’Annecy is a very good example here and is one of our favorite lakes in France. Since the lake is fed by mountain rivers with drinking water quality and no runoff is discharged into the lake, the lake is one of the cleanest waters in Europe.

On the north shore is the town of Annecy, which can be easily reached by train. The place is famous for paragliding. But it is equally worthwhile to explore the area by kayak from the water. The 14.6 km (9.1 miles) long lake offers beautiful views of the southern mountain panorama. Since it is an alpine lake, you should pay attention to good weather conditions, because it can also quickly become wavy and uncomfortable on the lake in wind and storm.

lac anncey france
Lac d’Annecy is a mountain lake like something out of a picture book
anncey lake
With a kayak you can make beautiful day trips on the lake
anncey paddling destination
It is also nice to hike around the lake

Around the lake there are very beautiful hiking trails that you can also explore. So you can hike up one of the mountains to admire the lake from a height. A bike ride along the lake is also a lot of fun, which you can rent at one of the many rental shops in Annecy.

Sorgue – canoe trip near the source

The Sorgue is known for its emerald waters in large parts of France. Ideally, you start your tour from the Fontaine de Vaucluse, where the river rises. It is about 8 km (5 miles) to the small town of L’Isle sur la Sorgue, so it is also perfect for families. Depending on the season and the amount of rain, the water level can vary greatly. Especially during dry periods in summer it is possible that the river has water only further downstream.

canoeing la sorgue
La Sorgue is popular destinations for family paddling tours
kayaking fontaine de valcluse
You will see some interesting and beautiful bridges
la sourge france
It’s very calm to paddle on the river

There are kayak stations near the Fontaine de Vaucluse, which also receive the boats back at the destination point and organize the return transport to the starting point.

The water is so crystal clear in many places that you can see right down to the bottom even in very deep places and observe the fish life. The river is mostly overgrown with trees and wild bushes and therefore offers enough shade on the water even on hot summer days.

Loire – An endless natural river

With a length of more than 1000 km (620 miles), the Loire is the longest river in France. The beautiful and special thing about this hiking river is that it is largely natural. Thus, the Loire divides at various points in several river arms, thus forming beautiful islands that are very popular with paddlers as a place to rest and spend the night. On the banks, sandy beaches, forests, fields and, of course, numerous castles await.

loire france paddling
The Loire near Tours (Image from blitzmaerker of Pixabay).
canoeing tour loire
Kayaker on the Loire (Image from manfred Kindlinger of  Pixabay).
canoeing france
Retournac (Image from Gabriel De Siam of Pixabay).

The upper course of the Loire is a real white water with class III-V and originates in the Massif Central. The middle course with class WW II is no problem for experienced river paddlers and the current ensures fast progress. The lower course of the river is characterized by a calm current and is also ideal for paddling beginners and families. The Loire is the ideal river for camping enthusiasts, because here you can paddle several weeks without any problems.

Kayak tour in San Francisco

Kayaking is quite popular in the USA. Americans are not only drawn to the lakes and rivers of the country’s beautiful national parks, but urban paddling in the big cities is also very trendy in many parts of the country. The last time we were in San Francisco during a vacation in the USA, we took advantage of the good weather to get to know San Francisco a little better as a paddling destination. In this tour report you will learn everything about our little tour in Richardson Bay and other tips for tours in and around San Francisco.

Key facts about the paddling tour

Duration

2 hours

Culture

Public transport

Buses

Traffic noise

no traffic noise

Landscape

houseboats, sea lions, sea birds

Table of Contents

Kayaking in San Francisco

San Francisco has a special charm thanks to its location on the coast, the sunny weather and of course the world famous Golden Gate Bridge. Many people dream of paddling with a kayak under the Golden Gate Bridge. But you should not be too hasty, because the waves and especially the currents in the area around the Golden Gate Bridge can quickly be a danger for inexperienced paddlers.

Therefore, it is not surprising that you will see almost no kayak or canoe during your walk over the Golden Gate Bridge. In San Francisco, the wind often whips directly from the sea, making the waters along the coast seem very rough. Nevertheless, if you want to take a kayak tour to the Golden Gate Bridge when conditions are good, you should join a guided tour. Sea Trek Kayak is a local kayak rental company that offers such tours on a regular basis.

golden gate bridge san francisco
Paddling under and around the Golden Gate Bridge is considered dangerous

We rented a kayak from Sea Trek and explored part of Richardson Bay on our own. This very beautiful bay is well protected and the paddling conditions are actually very good most days. If you prefer to paddle close to the San Francisco skyline, you should rent a boat from the City Kayak rental station. In the end, it’s a decision between a tour with skyline views or a tour with a focus on a bay full of sea lions, water birds and stylish houseboats.

When planning your trip, you should consider that it is considerably more expensive to rent a kayak in the USA than in Europe for example. For a single kayak you pay $30 per hours, for a double kayak $50 per hour. If you want to do a lot of paddling on your USA trip, you might be better off with your own inflatable kayak. If you don’t want to carry that much luggage because you don’t have a car, you might want to take a look at the ultra-light and compact packrafts that are also very popular in urban paddling.

Our Richardson Bay paddling tour

The rental station is located directly in Richardson Bay and is easily accessible both by car and by bus. The staff there also gives very good tips on where exactly to paddle, for example to see sea lions, water birds or to go through a small area with houseboats. Besides recreational kayaks, there are also sports kayaks and SUP board for rent.

kayak rental san francisco
Sea Trek kayak rental is located directly in Richardson Bay

These suggestions we have also oriented for our tour. The tour is ideal for those who only want to make a small morning trip on the water. With 2 hours you are comfortably on the way and discover sides of San Fancisco that most tourists do not see.

Already when leaving the rental station, the bay conveys an incredible tranquility far away from the noise of the big city. This is really a good change from sightseeing in San Francisco. The shores are lined with numerous docks for sailboats and motorboats.

birds richardson bay
In the morning, Richardson Bay conveys a sense of tranquility far from the hustle and bustle of the big city

Once you are in the middle of the bay by boat, you have a great view of the surrounding landscape. Richardson Bay covers an area 5 km (3.1 miles) long and 3 km (1.9 miles) wide. Although the shore is heavily developed with docks for boats and houseboats, the surrounding land areas are still an important breeding and migratory area for water and shore birds. For this reason, the bay is also classified as an Important Bird Area.

canoe tour california sea
The bay is pretty big and has a lot to discover

While paddling, you notice that this is a popular area for birds. Everywhere you look, you see different species. Equally noticeable is the presence of sea lions, which can be seen either in the water or sunning themselves on the shore. In general, sea lions are very peaceful animals, but nevertheless you should keep enough distance to them so that they do not feel threatened by the kayak.

birds richardson bay
The best way to watch birds is to perch on one of the many wooden piers in the water
richardson bay san francisco paddling
In some places, especially many animals gather to enjoy the sun
sea lions san francisco
Even though the sea lions seem very peaceful and playful, you should not approach them too closely

After a short time you can also see a houseboat district. Many of them give the impression that it is rather a villa on the water than a small houseboat. You should definitely turn in the small “alleys” and go on a discovery tour.

richardson bay san francisco
The shore resembles its own neighborhood with numerous houseboats. Most of them are pretty impressive.
houseboat richardson bay
Also very small houseboats join the big ones
paddling san francisco
Also in the middle of the bay is one or the other interesting houseboat

For the way back to the kayak rental we took the same route as for the outward tour. If you have more time, you can extend the tour and discover other corners of Richardson Bay. For kayak fanatics it would also be an interesting idea to rent a kayak in the afternoon at the downtown harbor and explore the city again from a different perspective. Unfortunately, on the day we paddled, this rental station was closed.

kayaking san francisco
Kayaking back to the rental station

Overall, we liked the tour very much. Within a short time we saw numerous animals and got to know an interesting side of the city with the houseboats. Especially the peace from the big city bustle has done us good.

Other activities in and around San Francisco

If you come to Richardson Bay for paddling, you will also want to discover San Francisco and its surroundings. Here we have listed 3 activities that you should not miss.

Sightseeing in San Francisco

Sightseeing tips for San Francisco are a dime a dozen. We especially liked the beach at the Golden Gate Bridge to relax. We would have loved to go to Alcatraz, but you have to book your tickets at least a week in advance. Our favorite restaurant was Tommy’s Joynt, which offers hearty food at fair prices in a cozy atmosphere.

san francisco

Redwood Nationalpark

Our nature highlight in California was the Redwood National Park. With its gigantic redwood trees, it invites you to hikes where you can’t get out of your amazement. The trees here are among the oldest and tallest in the world. By the way, a part of Jurassic Park was filmed in Fern Canyon.

redwood national park

Yosemite Nationalpark

Yosemite National Park is considered one of the most popular parks among Americans. Especially for mountaineers it is a paradise. But also for hikers it offers endless possibilities. In spring and early summer hikes to one of the numerous waterfalls are worthwhile. The starting point is often Yosemite Valley, which can also be easily explored by bike.

yosemite national park

Advanced Elements AdvancedFrame Ultralite Review

advanced elements ultralite kayaking tour

The AdvancedFramce Ultralite of the American brand Advanced Elements is a very light and compact 1-person kayak. The manufacturer is known for its inflatable kayaks with particularly good driving characteristics. How well the Ultralite kayak performs on the water and whether it convinced us as a kayak, we tell you in the following review.

advanced elements advancedframe ultralite

Technical Specs

Max. paddlers:
Length:
Width:
Capacity:
Packed size:
Material:

1
318 cm | 10’4”
81 cm | 2’7”
102 kg | 225 lbs
79 x 45 x 15 cm |
2’6” x 1’5” x 5”
ripstop fabric (deck)
polyurethane Tarpaulin (floor)
polyurethane (chambers)

Weight:
Pressure:
Produced in:

7.2 kg | 15.9 lbs
0.12 bar | 1.7 PSI
China

Which model has been reviewed?

Advanced Elements AdvancedFrame Ultralite from 2020

How did we organize the review?

The Advanced Elements AdvancedFrame was provided to us by OutEquip, the European distributor of Advanced Elements. Our review is independent of the manufacturer or distributor and reflects our own opinion of the boat.

How intensively has the product been tested?

low

high 1 bar = 1-3 km paddled (first impressions)
2 bars = min. 1 day/ 2 half-day tours
3 bars = min. 4 tours
4 bars = min. 8 tours
5 bars = min. 12 tours (very intense)

Where have we tested the product?

Whitewater

Calm rivers

Lakes

First impressions and assembly

In the past, we had already tested the classical AdvancedFrame kayak from Advanced Elements and have often been on tours with it. It has convinced us of its driving characteristics and the quality of workmanship very much. However, the high weight and the large pack size for a 1-person kayak was a pain point for us. This was probably the case for many other paddlers who do not only transport the kayak in the trunk of the car. It is precisely for this target group that the manufacturer offers its AdvancedFrame kayak in a lighter version, which weighs more than half less. In order to be able to compare both boats with each other, we also had the classic AdvancedFrame with us during the review and could thus compare it directly on the water.

The first difference is already noticeable in the bag. The Ultralite version not only has carrying handles, but also shoulder straps, so that the bag can be carried on the back. The AdvancedFrame Convertible Elite 2-person kayak also comes with such a bag, which we have used very often. At first glance, it seems practical that you can remove the shoulder straps via carabiners, but that’s exactly where the weak point lies. The carabiners lie exactly on the shoulders and when carried for a long time, this is disturbing or even painful./

inflatable kayak advanced elements backpack
A suitable transport backpack is already included
backpack kayak advanced elements
The bag can be carried by hand as well
advanced elements ultralite setup
Boat, foam floor, seat and foot brace

Nevertheless, we also know that many other manufacturers do not even include a bag with a backpack system, but only a small carrying bag. Therefore, a bag designed for the boat is a big plus if it is already included. The bag itself contains the boat, the seat, the inflatable foot brace, the foam floor and two small aluminum elements to stretch the front deck. There is also room for paddles and an air pump for inflatables in the bag, but these must be purchased separately.

advanced elements advancedframe construction
Built-in aluminum ribs define the bow and stern
advancedframe ultralite material
The material is significantly thinner than that of the classic AdvancedFrame

In order to achieve a weight saving of almost 10 kg for the boat, the manufacturer must have worked on the materials. For example, the deck is made of a 300D ripstop fabric instead of a 600D ripstop fabric.

When unpacking, we also notice that the boat skin is clearly thinner than compared to the classical AdvancedFrame kayak. However, the boat skin is definitely much more robust than that of inexpensive entry-level inflatable kayaks (e.g. Intex or Sevylor).

A second big weight saving comes from the floor foam. Typically, most Advanced Elements boats have an additional air or drop-stitch chamber for the floor. However, the Ultralite uses a floor foam that strongly resembles a yoga mat. This is rolled out and inserted into the kayak floor. To do this, you lift the side chambers a bit and push them down. By inflating the side chambers, the floor foam finds its hold and can no longer slip. We found the insertion of the floor foam very simple and well designed.

advanced elements ultralite unboxing
The unfolded kayak
advanced elements advancedframe assembly
The floor foam is very easy to insert
inflating advanced elements kayak
The two side chambers are inflated with a pump

To get the boat into shape, the two separate side chambers are inflated. In the classical AdvancedFrame kayaks, there are not two side tubes, but an inner and outer tube. The air tubes are additionally protected by a nylon cover. The side tubes can be removed from the boat for drying or cleaning and in case of repair.

After the two side tubes are inflated, most of the assembly is already done. Then the front deck is stretched by two aluminum elements. The rail is inserted crosswise and the rod is inserted lengthwise under the deck. The stretched deck gives you more legroom, and when you attach luggage to the bow, the luggage doesn’t press the deck down.

advanced elements valve
Valve of the air chambers
advanced elements ultralite kayak deck
Two aluminum elements support the front deck.

Last but not least, the seat is attached to the boat. This can be positioned variably in the boat. Those who are smaller can position the seat further forward and thus have more space behind the seat for additional luggage. Taller paddlers like us, on the other hand, will position the seat as far back as possible to have enough room for the legs. The seat cushion is pressed firmly on the floor under the side tubes. Thus, the seat then lies really firmly in the boat and can not slip while paddling. Finally, the back of the seat is attached to the side tubes by two click fasteners. This makes it very easy to vary the position of the backrest. On the back of the backrest is a small pocket in which smaller items such as sunscreen and co. find space.

advanced elements ultralite seat
The backrest is attached to the side tubes and can be adjusted individually
advanced elements deck bungee net
On the bow is a bungee lacing for luggage
inflatable kayak deck
There is also a smaller bungee lacing on the stern

We also really like the bungee lacing on the stern and bow. This makes it very easy to attach luggage and equipment to the boat and everything is quickly at hand. The manufacturer did not include a zipper on the front deck. This would allow quick access to the inside of the boat for cleaning and drying. However, when paddling the other AdvancedFrames with bow zipper, we found that they are water-permeable. Thus, in stronger waves often came a little water into the boat interior. With the Ultralite, this can no longer happen.

The included footrest is inflated by mouth and can be pushed under the deck into the bow. Of course, it is not obligatory to use it, but we are curious how it can be paddled with this foot brace on the water.

The foot brace and placed under the deck
inflatable kayak foot brace
The foot brace is also well suited for tall people.

After the boat is fully assembled, let’s take a look at the bottom. For an inflatable kayak, the bow and stern are very nicely shaped. By using the aluminum ribs in the bow and stern, the ends of the kayak are very pointed. This promises good driving characteristics, as the water can thus be cut. A non-removable fin at the stern and a keel strip at the bow should further improve the tracking stability of the boat. The fin is very flat, so that the probability of grounding remains minimal.

advanced ultralite bow
The kayak has a well-shaped bow and stern
inflatable kayak hull
Hull of the kayak
advanced elements boat fin
Non-removable fin at the stern of the kayak

Review of the Advanced Elements Ultralite on the water

Since the boat is very light, it can be carried to the water without much effort and very comfortably. Just as convenient and easy to get into the boat thanks to the wide opening in the deck. Tall people have no difficulty getting their legs under the deck and thus the entry is not a shaky affair for paddling beginners. The front luggage net is also ideal for fastening shoes or a dry bag right at the start.

advanced elements ultralite
The kayak is very easy to carry to water
ultralite kayak entry
Thanks to the large opening it’s easy to get it
paddling advanced elements boat
The front bungee lacing provides ideal space for shoes

The use of a floor chamber is very common in inflatable kayaks, but it has been replaced by a floor mat in the Ultralite to reduce weight. In our opinion, this is also very well done, because the boat still seems stable and the floor foam also insulates well from the cold. Although we sat barefoot in the boat and the water was very cold that day, we had no cold feet. On the other hand, the very flexible floor makes you feel every little wave or grounding. This may take a little getting used to at the beginning, but we quickly got used to it.

advanced elements kayak comparison
The classical AdvancedFrame is significantly faster with BackBone

In terms of paddling, the AdvancedFrame Ultralite is a lot of fun right from the start. It has the usual good driving characteristics that we are used to from other boats of the manufacturer. It keeps its track well and we move forward quite quickly. During leisurely paddling, we measured a speed of 4.7 km/h (7.6 mph). If you paddle faster, you can reach a speed of up to 6 km/h (9.7 mph). Above this speed, however, a bow wave forms and paddling becomes more inefficient. The maneuverability of the kayak is fine. Course changes are effortless. But a 180° turn requires considerably more paddle strokes.

With the classical Advanced Elements AdvancedFrame with backbone, we reached a speed of 5.5 km/h (8.9 mph) on the same day during leisurely paddling. When paddling fast, we were able to measure up to 7.5 km/h (12.1 mph). We felt it clearly that the Ultralite is slower, but the Ultralite doesn’t feel like a slow boat. If you’re paddling alone and the one km/h more or less doesn’t matter to you, you’ll be happy with the speed. However, if you are paddling with someone else who has a longer kayak, you will have a hard time keeping up.

Compared to the classic AdvancedFrame, the AdvancedFrame Ultralite cannot be upgraded with a BackBone or drop-stitch floor.

kayak
For leisurely lake and river trips with good water depth, the kayak is well suited

Thanks to the closed construction of the kayak, you are well protected from splashing water. However, if a little water gets into the boat, the raised seat cushion pays off. Many kayaks (like the classical AdvancedFrame) use only a thin seat cushion for the seat and thus you sit faster in the wet. The seat is very comfortable even after long paddling and gives very good support. Likewise, we have come to appreciate the foot brace. With the right positioning of the seat and foot brace, you sit very well in the boat.

We see the AdvancedFrame Ultralite primarily for use on lakes and calm rivers with sufficient water levels. The boat is aimed at day-trip paddlers who want to get on the water quickly and easily for a leisurely tour. For ambitious sport paddlers who want to cover a lot of distance or go on multi-day tours, the Advanced Element AdvancedFrame Convertible Elite is recommended, which is longer and therefore faster and offers more space for luggage.

Regarding the whitewater suitability of the boat, the manufacturer specifies whitewater class 2. We haven’t tried that ourselves yet, and wouldn’t. The boat’s skin seems too fragile for that, and in addition, the fin and the front keel strip cannot be removed. If you get stuck with it, the boat skin could get broken.

kayak tour advanced elements
The foot brace supports really well while paddling

Dismantling the kayak

Dismantling the boat is very simple and fast. Simply let out the air and pump out the rest. Then it is folded again and fits in the bag without any problems. In most cases, however, you will not get around to unpack the boat again at home and let it dry. Especially the nylon covers can not be wiped completely dry and need time to dry in the air. You should never store the boat in a wet or moist condition for a long period of time, as this can lead to mold growth.

advanced elements advancedframe air chambers
The air tubes can be removed from the kayak together with the cover

Strengths and Weaknesses

The Ultralite’s greatest strength is its light weight combined with an integrated deck. In addition, it is easy to paddle on the water. In favor of the weight, the boat skin is significantly thinner and only coated on one side, in contrast to the classical AdvancedFrame. On a river trip with rapids, we had the first unsightly scratches in the boat skin. Therefore, the kayak should only be used for tours with sufficient water depth. Another weakness of the boat that cannot be ignored is the long drying time due to the nylon cover. Especially on long tours (a lot of getting in and out of the boat during breaks and portages) and river tours with small rapids, water gets into the boat and the cover gets soaked with water. Good that you can remove the nylon cover with tube, so that everything can dry reasonably.

advanced elements ultralite quality
There are a few scratches on the boat skin
advanced elements advancedframe ultralite cockpit
Soaked nylon cover after a day trip

Advantages

+ very light + very stable against tilting + very useful bungee lacing on bow and stern + comfortable seat and practical foot brace + good workmanship + air chambers are replaceable + good tracking stability + reliable splash protection when paddling in calm waters due to the integrated deck

Disadvantages

– long drying time due to the nylon material -uncomfortable transport bag – boat skin is sensitive to ground contact (thin and one-sided coated boat skin) – no splash skirt can be attached to the seat hatch – large seat hatch lets in a lot of water during rapids and waves – not suitable for heavy persons

Conclusion on the Advanced Elements AdvancedFrame Ultralite

With the Ultralite, Advanced Elements addresses a target group that wants to transport and paddle their boat to the nearest lake or river without a car and without heavy carrying. And the manufacturer has succeeded in this, as long as there is sufficient water depth. We don’t consider the Ultralite kayak suitable for whitewater and shallow rivers with a lot of grounding. If you keep this in mind, you can have a lot of fun on the water with the kayak and will appreciate the good driving characteristics considering the low weight. For small or even extensive day trips, the Advanced Elements Ultralite is a very good choice.

advanced elements ultralite kayaking tour
The AdvancedFrame Ultralite does not like ground contact

Itiwit Packraft 100 Review

Decathlon entered the packrafting segment with the Itiwit Packraft 500 at the end of 2021. Now, with the Itiwit Packraft 100, another model has appeared, which is aimed more at beginners, both in terms of price and equipment. In this review you will find out what the new Packraft from Decathlon has to offer and what experience we have already gained with this packraft.

itiwit-packraft-100

Technical Specs

Max. paddlers:
Length:
Width:
Capacity:
Packed size:
Material:

1
205 cm | 6’7”
95 cm | 3’1″
110 kg | 242.5 lbs
25 x 40 cm | 8” x 1’3”
TPU/PU coated nylon

Weight (Boat):
Weight (Complete):
Produced in:

1.8 kg | 4 lbs
2.0 kg | 4.4 lbs
China

Which model has been reviewed?

Itiwit Packraft 100 from 2022

How did we organize the review?

We have purchased the Itiwit Packraft 100 ourselves.

How intensively has the product been tested?

low

high 1 bar = 1-3 km paddled (first impressions)
2 bars = min. 1 day/ 2 half-day tours
3 bars = min. 4 tours
4 bars = min. 8 tours
5 bars = min. 12 tours (very intense)

Where have we tested the product?

Whitewater

Calm rivers

Lakes

First impressions and assembly

The Packraft is supplied with a transport bag, which not only makes a robust impression, but also fulfills several functions at once: transport bag, air pump and dry bag during the tour. Itiwit has already applied this concept to the Adventure 500, which we really like.

The roll closure allows the Packraft to be stowed in a space-saving manner. Excess air that remains in the packraft when the closure is rolled up can then be released via the valve on the front of the bag. This results in a securely packed Packraft in a maximally compressed state.

itiwit ultralite packraft decathlon
Transport bag, which also serves as a inflation and dry bag

Besides the packraft, the transport bag contains the seat, the pump hose and some self-adhesive repair patches. None of this is additionally packed in PVC film or a bag. We like this quite a bit because it means there is no unnecessary packaging waste.

The Packrafts assembly instructions are also sewn into the upper edge of the transport bag, which serves as a handy quick reference guide for on the go in addition to the actual instruction manual.

decathlon itiwit packraft 100 accessories
The transport bag contains the packraft, the seat and hose and a repair kit
itiwit packraft 100 folded pack size
Packraft rolled up
itiwit packraft 100 manual
Brief instructions on the transport bag

Decathlon advertises the light weight of the packraft and states a total weight of 2kg. Since the weight plays an important role in packrafting, we weighed the individual parts. The packraft itself weighs 1630g, the seat 300g, the pump bag 290g and the pump tube 60g. This gives a total weight of 2280 g and is thus slightly above the stated total weight 2 kg on the part of Decathlon. But even about 2.3 kg total weight is not much for a packraft. However, the pump bag with pump hose weighs more than usual inflation bags of Packrafts from other manufacturers. Due to the multifunctionality of the pump bag and the easy handling as a pump, it’s a real benefit.

The assembly of the Packraft is very simple and thanks to the ingenious pump bag, it is even easier for beginners with the Itiwit Packraft. First you have to unfold the Packraft. It is common for inflatable boats to have a compression strap around the boat to prevent it from rolling out on its own and to make it easier to stow away at the end. With the Itiwit Packraft, no additional compression strap was used, but the strap that is later used for seat attachment is also used as a compression strap. This is a small detail, but pretty well thought out. The weight saved is negligible. The real advantage of this implementation is that you cannot lose the strap, because it is firmly attached to the boat.

itiwit packraft assembly
Assembly of the packraft with the pump bag

Usually a packraft is inflated with a simple inflation bag, because this is very light and compact. An air pump would be impractical for a packraft, because it would quickly exceed the pack size of the packraft. The disadvantage of a inflation bag is only that the inflation with that requires some practice and habit. Thus, beginners often find it somewhat difficult to efficiently fill a packraft with air using a inflation bag.

Itiwit has come up with a good compromise between an inflation bag and an air pump for its packrafts. The transport bag serves as a pump bag during assembly. To do this, you open the valve at the bottom of the transport bag and attach the supplied pump hose. The other end of the pump hose is attached to the valve of the packraft.

Thanks to the air hose, the pump bag can be placed on the ground and used like a hand pump. You simply lean on the air-filled pump sack and pump air into the packraft. You roll the pump bag a little bit again and again, so that a sufficiently high air pressure is generated in the pump bag, which you can push in the packraft.

itiwit packraft 100 valve
Also, the valve makes a high-quality impression

You repeat this pumping process several times, more precisely according to the manual “10 – 12 times until the pump bag no longer allows it”. Usually with Packrafts (also with such Boston valves) you generate the final air pressure with your mouth or with a separate small hand pump. We use the Itiwit pump bag for this and apply small jerky impacts to the pump bag to get the air tube of the packraft nice and tight. So, from our point of view, it is not absolutely necessary to create the final air pressure with the mouth or with a small separate hand pump, as with other packraft. Here you should be careful not to create overpressure, because otherwise material damage can occur.

We therefore recommend that you create the final air pressure with your mouth or with your own puff during the first set-up, because this way you will not create overpressure. Then reach into the air tube to get a feeling of how the packraft feels with the correct air pressure. You can use this firmness as a guide later on when you want to create the final air pressure with the pump bag.

The bottom of the pump bag is much sturdier than a common inflation bag of many other packrafts, so you can put it on the ground without damaging it. Both the valve of the packraft and the seat cushion are high quality. Both valves have a check valve, so that the air can not escape when inflating.

itiwit packraft 100 seat
The seat is attached to the boat with a strap

After inflating the packraft and seat cushion (by mouth or 1-2 pushes with the pump bag), position the seat in the boat. When the packraft and seat are tightly inflated, the seat cushion sits fairly tightly in the packraft. Attach the seat to the boat via a loop on the bottom of the seat using the strap. Make sure you pull the strap tight so that the seat does not slip while paddling.

Compared to many other packrafts, the seat consists only of a seat cushion and comes without a backrest. Because the seat cushion is placed so far back in the interior of the boat, you can lean against the tube. Because the Packraft does not have an adjustable backrest, you have to take into account that the seat position cannot be adjusted individually. You can find out how well this works in practice and how comfortable the seat is in the section on experiences on the water.

itiwit packraft 100 seat fixed
The air tube of the packraft functions as a backrest

In terms of workmanship, the Itiwit Packraft 100 makes a very good impression for an entry-level model. You don’t have to make any compromise compared to the higher priced Itiwit Packraft Adventure 500. The boat is at least as well-made as the Itiwit Packraft Adventure 500. We could not find any weak points or flaws in the workmanship of our specimen. The material of the boat’s skin also feels high-quality and robust and rounds off the high-quality first impression of the Packraft.

The packraft itself is made of a coated nylon fabric. The fabric has a thickness of 420d (= denier) in the bottom and 210d in the side tube. These are typical values for packrafts in this segment. The outside of the side tube and the outside and inside of the bottom are coated with TPU (thermoplastic polyurethane), which has a high abrasion resistance and is also used in other brands of Packraft.

The inside of the side tube, which is not accessible, is coated with PU. If deeper scratches damage the outer coating, the tube is still waterproof and airtight due to the second inner coating and does not need to be patched. However, other manufacturers (e.g. Anfibio, MRS, Alpacka) do without this inner coating in order to preserve the elasticity of the carrier material (which is made of nylon or polyester) and thus achieve a higher tear resistance of the material.

decathlon ultralite itiwit packraft 100
Both the material and the workmanship of the Packraft are convincing.

On some packrafts, it is common for the underside of the bottom to overlap the side tube to further protect it from damage in the event of grounding. This concept is common practice, especially with packrafts for whitewater use. However, since the Itiwit Packraft 100 falls more into the category of ultralight packrafts, it is understandable that Decathlon has dispensed with it for this model.

decathlon itiwit packraft 100 review material
Underside of bottom of the Itiwit Packraft 100

Packrafts are available as open and closed (= with spray deck) boats. The Itiwit Packraft 100 is an open packraft. A spray deck is otherwise used as a splash guard or to attach a splash skirt to completely prevent splash water from entering and also protect the paddler from the cold. In addition, luggage can be easily attached to most spray decks. You will have to do without these advantages with the Itiwit Packraft 100. Decathlon’s Itiwit 100 is aimed primarily at beginners looking for an inexpensive packraft, and a spray deck would add to the price (as well as weight). In addition, recreational paddlers who use the packraft mainly in good weather in calmer and shallower waters can easily do without such a spray deck. Therefore, this design implementation of Decathlon is also well understandable with the Packraft.

The Packraft has a total of 4 day handles (two at the bow and two at the stern). Whether in a capsize, when pulling the Packraft to shore, when transferring two on river trips or when carrying the boat alone on the water on the shoulder, there is always a way to grip the Packraft properly. At the bow there are two additional loops to attach luggage on the bow. In connection with the two carrying handles, the luggage attachment on the bow works very well. So you can easily attach the pump bag, which also serves as a dry bag, there. Therefore, you can also transport some luggage with the Itiwit Packraft 100 without a spray deck.

decathlon itiwit packraft 100 carrying handles
Carrying handles allow easier handling of the boat

Review of the Itiwit Packraft 100 on the water

The Itiwit Packraft 100 can be carried well alone to water. To do this, you shoulder the packraft and can also use one of the carrying handles. Alternatively, you can carry the Packraft via the side tube. If you have loaded the packraft with a lot of luggage, it is still recommended to set up the packraft close to the water. If there are two of you, both people can easily carry the packraft with the carrying handles at the bow and stern.

itiwit packraft 100 tour review
The packraft can be carried to water well alone

The interior of the Itiwit Packraft does not look very spacious at first glance. We with a height of 186 and 189 cm / 6’1″ and 6’2″ can not fully stretch our legs even without shoes. Nevertheless, the Packraft offers enough space for us to sit. Due to the fact that it is cut wider and the air tube is less voluminous, you can bend your legs very well and paddle comfortably for a long time even in this position. We do not miss a footrest or thigh straps, because due to the shortness of the Packrafts you can also support yourself well on the bow of the packraft.

However, we also like to paddle with our neoprene socks in the summer. If you paddle with shoes or even hiking boots, as a tall paddler you will surely long for a bigger Packraft in the long run. Also, those who do not like to paddle with more bent legs, will find the bigger brother the Itiwit Packraft Adventure 500 more pleasing.

itiwit packraft 100 space footwell
Despite the shorter length, the packraft offers still enough space

Since the Itiwit Packraft 100 does not have a T-Zip for stowing luggage like the Itiwit Packraft Adventure 500, the luggage must be stowed on the boat itself or, if necessary, between the legs. However, this works out very well. Over the carry handles and loops on the bow, we attached our Ortlieb Gearpack 40 L and a small dry bag. While paddling this did not bother at all, because the side tube of the boat is high enough and the luggage rests on it. Thus, the legroom remains completely unrestricted.

Decathlon recommends the Itiwit 30 L backpack for the Packraft. This can not only be attached very well to the bow of the Packraft, but it is also well suited for transporting the Packraft. Inside the backpack is enough space to store the boat. With the help of the side straps, the paddle can also be attached. However, we prefer a packraft backpack with side mesh pockets for better stowage of the paddle.

itiwit packraft 100 luggage ortlieb
There is enough space for a day backpack, such the Ortlieb Gearpack 40 L
itiwit packraft 100 fixed gear backpack
Waterproof Itiwit Backpack 30 L
itiwit packraft 100 dry bag
Attachment of the backpack on the bow

The dry bag, which also serves as a inflation bag / air pump, can also be attached to the bow. However, since it can only be attached to the bow via the roll closure, it then hangs inside the boat. We find this rather impractical, as it restricts legroom. To attach it to the bow, there are no other attachment points on the dry bag. Therefore, we recommend a packraft such as the Ortlieb Gearpack or the Itiwit Backpack 30L, which has multiple attachment points to secure it to the bow using the 4 attachment loops.

Although the packraft does not have a backrest, we feel that the seating comfort is very good. So we do not miss a backrest. One finds with his lower back good hold on the air tube. The seat height is also comfortable, so that a clean paddle stroke can be performed. The seat also stays in position when paddling and does not slip.

In addition to space and seat comfort, the boat’s handling characteristics are, of course, another important aspect we’d like to discuss in more detail. Like many Packrafts, the Itiwit Packraft 100 feels most at home on gently flowing waters. With some current, you can make good progress with fewer as well as somewhat steeper paddle strokes, and paddling is fun. The maneuverability is very good due to the shortness and width and you navigate even through narrower passages or past obstacles safely and well.

On stagnant waters such as lakes, the usual weaknesses of packraft handling characteristics become apparent. Paddling too hard will cause the boat to sway left and right. Therefore, you should rather paddle steeper and less forcefully, but this leads to the fact that you naturally do not reach great speeds with the packraft. 3 – 3.5 kmh / 1.9 – 2.2 mph is a realistic average speed. Above 3.5 kmh / 2.2 mph, paddling becomes too inefficient because the packraft sways too much to the left and right. Due to its shortness, the Itiwit Packraft 100 is even more noticeable for its rather mediocre handling characteristics on such waters than the Itiwit Packraft Adventure 500, which is somewhat longer and narrower in design. Moreover, when you stop paddling, the boat drifts away immediately to the left or right. So it’s very easy to turn.

From our point of view, the most important thing when considering the driving characteristics of the Itiwit Packraft 100 are your own expectations and requirements. If I want to cover a long distance with such a compact boat and expect the best possible speeds, I will be disappointed. Most Packrafts are not designed for that (except for models like the MRS Nomad S1). However, if I primarily enjoy such a compact and lightweight boat, which I can take with me everywhere without much effort to always have the opportunity to take a small leisurely paddle tour, then I will also be very happy with the boat. Then it is also ok if the boat runs slowly on the lake. So you should use the strengths of a packraft in the first place to come to terms with the driving characteristics. Ideally, you also combine hiking with paddling to benefit from the lightness and compactness of the packraft.

itiwit packraft 100 review river tour
On easy flowing water the packraft performs well

The Itiwit Packraft 100 can also be a good choice for paddling beginners. It offers namely a high tipping stability. The voluminous air tube, the flat bottom and the high hull width ensure that it is very difficult to capsize with the Packraft. As a beginner you will feel safe right away in the packraft thanks to the high tipping stability and the good seating position.

As usual with open packrafts, splashing water gets on your clothes and into the interior on longer trips. Double paddles with drip rings provide some relief here, but keep only part of the splashing water away. So in the summer it is best to paddle barefoot or with neoprene socks and shorts. Since the seat cushion is quite high, you don’t have to worry that your buttocks will quickly get wet.

In the off-season we recommend you to wear at least rain pants or better a proper cold protection in the form of a dry suit. If you often paddle in the off-season, a packraft with a spray deck might suit you better (e.g. Anfibio Rebel 2K, nortik TrekRaft Expedition). This is because a spray deck serves as protection against splashing water, rain and cold. The Itiwit Packraft 100 cannot offer you this protection without a spray deck.

Upgrading the Itiwit Packraft with a fin

We have already mentioned that the Packraft is very easy to turn. To improve the handling characteristics, the use of one or more fins is common, especially for inflatable kayaks. For some packrafts, a fin is even offered in addition. The Itiwit Packraft 100 does not have a fin and also no fin holder to attach such a fin. However, such a fin holder can be retrofitted. For example, in the Packrafting Store there is a fin holder with fin, which can also be attached to the Itiwit Packraft.

decathlon itiwit packraft 100 fin
Attachment of a fin

Accordingly, we bought a fin with a fin holder and attached it to the underside of the packraft. In the process, the holder is permanently attached with a 2-component adhesive. Before use on the water, the fin is then simply pushed into the holder.

itiwit 100 packraft mounted fin
A fin ensures that the packraft drifts less

In terms of speed or straight-line paddling, the fin makes no noticeable difference. However, it does make a big difference in turning ease as soon as you stop paddling and drift. Without the fin, the boat drifts away to the side right away. With a fin, the boat stays on track and continues to glide straight ahead. Since you are not constantly paddling on the water, but also sometimes take small breaks to enjoy nature, drink something or take pictures, this improvement is a real plus. Therefore, we recommend the use of a fin on the packraft when the water is deep enough. Because if you are on a very shallow river, a fin is rather a hindrance, as you can get stuck with it.

Dismantling the packraft

Dismantling the Itiwit Packraft 100 is quick and easy, as usual with packrafts. You unscrew the valve from the thread of the packraft and release the air. A large part of the air already escapes by itself. The rest escapes during folding and rolling. On the seat, you open the valve. There is a push button here that you have to push in to be able to push the air out. Theoretically, you can leave the seat in the boat and fold the packraft that way. But we take it out and put it separately in the transport bag.

itiwit packraft 100 dismantle
Dismantling the packraft is easy and quick

First, fold the packraft lengthwise. Make sure that it is not wider than the transport bag. Then you can roll up the packraft from the front to the rear. Afterwards you can compress the Packraft a bit with the seat strap at the rear, which also serves as a compression belt. This will prevent the packraft from unrolling on its own.

When the packraft is folded narrowly, it fits perfectly in the carry bag along with accessories and can be compressed to the original pack size.

Sometimes you just want to transport the packraft to the car and dry and fold it at home in peace. Since the transport bag is generously sized and can be varied in size by its roll closure, it is no problem to pack the packraft even in a less well compressed state. The transport bag can be closed at the top like a conventional dry bag with roll closure and can be used as a handle for transport.

itiwit packraft folded transport
With the carrying handles the packraft can be carried well even rolled up

Strenghts and weaknesses of the Itiwit Packraft 100

The biggest strength of the Itiwit Packraft 100 is its attractive price-performance ratio, which makes packrafting affordable, especially for beginners. The easy assembly thanks to the pump bag is another aspect that beginners will surely enjoy. Although the packraft is offered cheaply by Decathlon, as a customer you do not have to make any compromises in terms of workmanship and material. We find that particularly good.

We could not find any major weaknesses in this packraft. With the name ultralight, with which Itiwit advertises, it may be noted that not the last gram of weight has been saved here by the pump/transport bag and the seat cushion to make it really as light as possible. Other manufacturers such as Anfibio optimize here even more in terms of weight.

Without a fin, the boat is also very easy to turn. As soon as you stop paddling, the boat turns to the left or right. However, this can be remedied by retrofitting a fin. Large paddlers should also consider whether the space in the boat will be sufficient for them in the long run.

Advantages

+ good workmanship + very good price-performance ratio + very easy and quick assembly due to the pump bag + pump bag can be used as transport and dry bag + sufficient carrying and safety handles available + good seating comfort + safe handling in calm waters (high tipping stability, high seating cushion, good maneuverability) + self-adhesive repair patches included

Disadvantages

– heavier than average equipment for an ultralight packraft (seat cushion and pack/pump bag) – very easy to turn without fin – when using shoes little legroom for tall paddlers in the long run – bottom of the side tube is little protected against high stresses – lack of attachment points on the pump/bladder bag

Conclusion on the Itiwit Packraft 100

With the Itiwit Packraft 100, Decathlon has brought a solid entry-level packraft onto the market, which is unparalleled at this price. Those who have so far given packrafts a wide berth due to the high investment costs, will find exactly the right model with the inexpensive Itiwit Packraft. It is focused on the essentials without big features to keep the price low. In addition, it is also light and compact with a total weight of about 2 kg / 4.4 lbs to benefit from the greatest advantages of a packraft. Precisely because Decathlon has not skimped on the material and workmanship, we can recommend the boat to the price-conscious beginner.

However, if you are willing to invest a little more in a packraft, you should definitely take a closer look at other packrafts and compare which boat best meets your requirements. For a little more money, Itiwit offers the Packraft Adventure 500, which also has a T-Zip for luggage stowage and is equipped with a front spray deck and thigh straps.