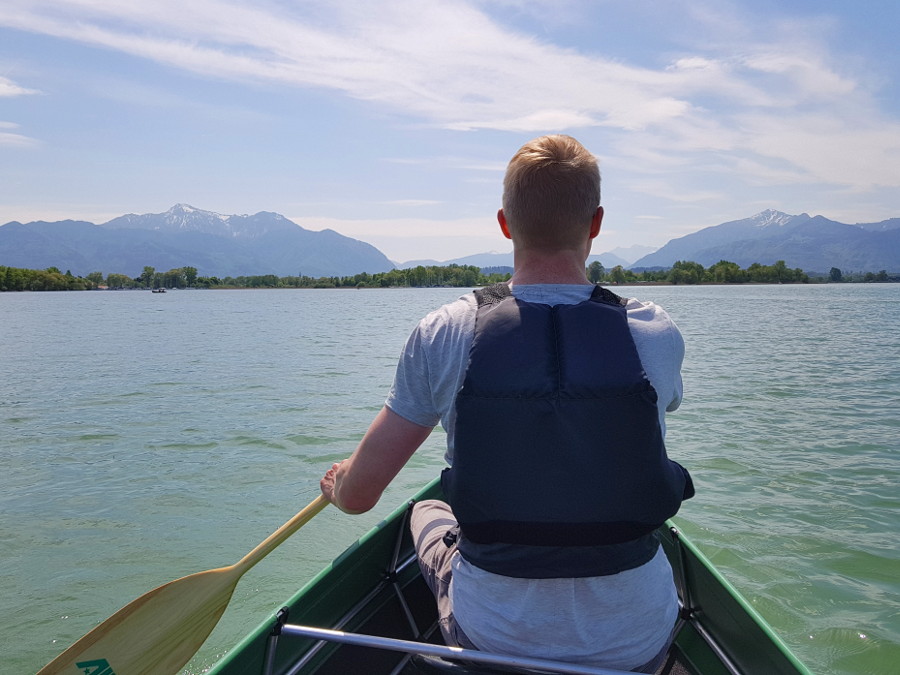
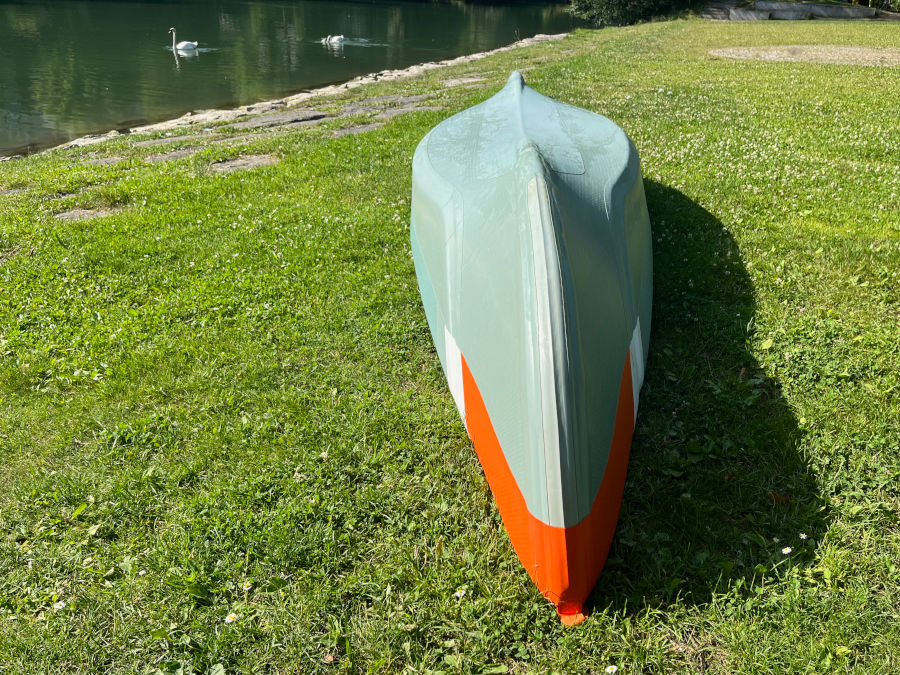
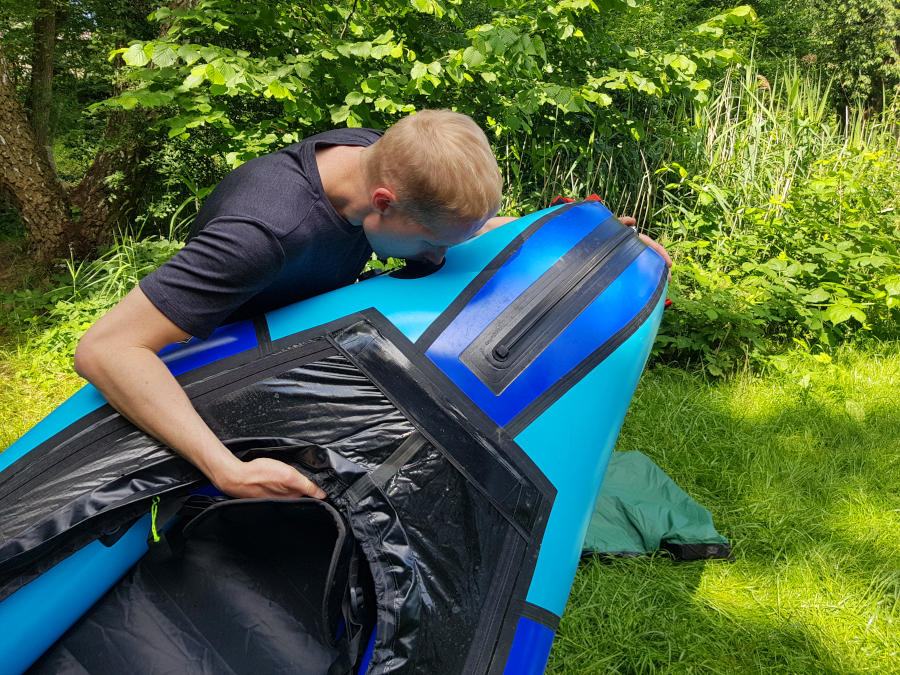
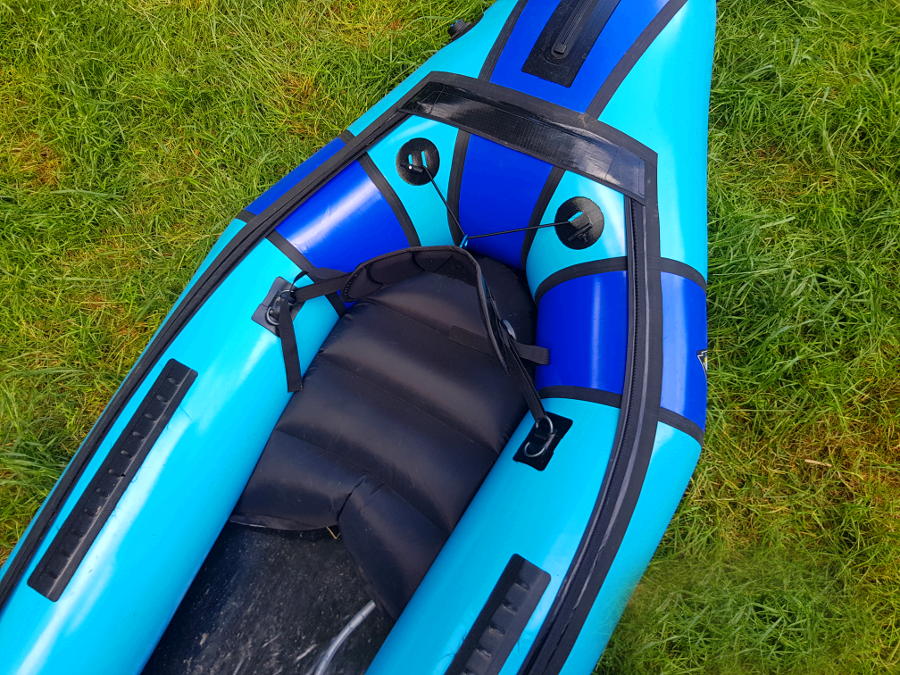
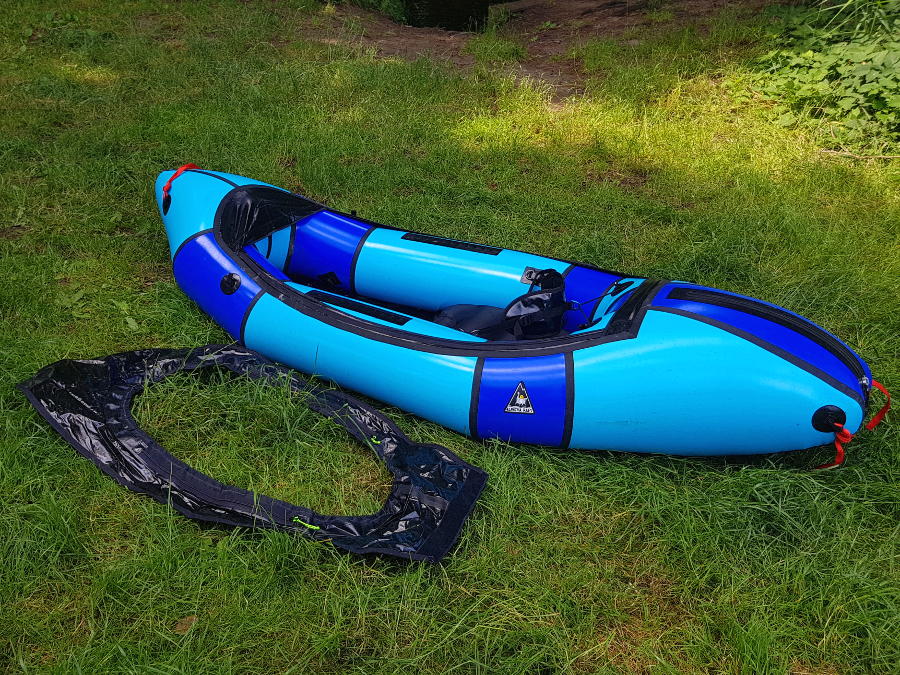
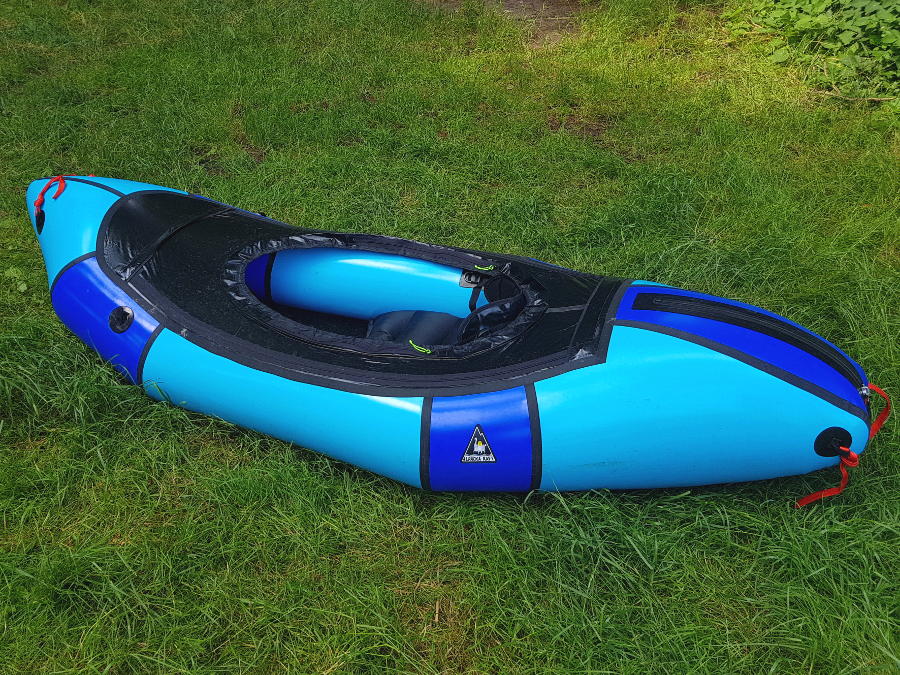
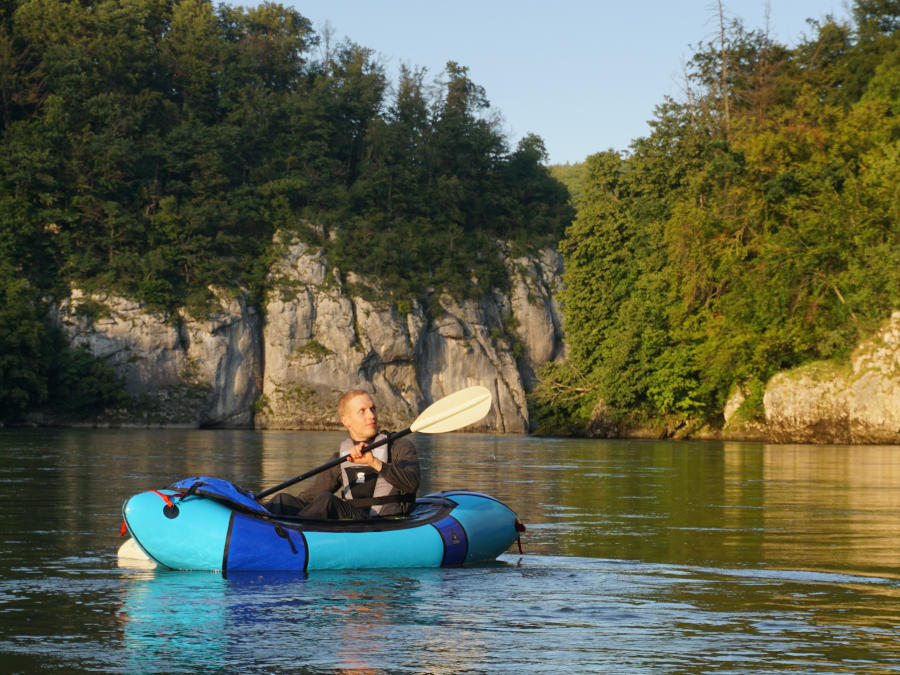
Oru Kayak Inlet Review

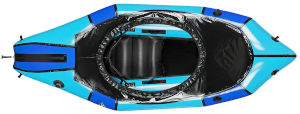
The Oru Kayak Inlet is a folding kayak, or more precisely an origami kayak. Such a kayak consists of a single sheet of plastic that is folded into a kayak. The manufacturers of such boats promise their customers a boat that is hardly inferior to the rigid hull version in terms of its performance on the water. The complicated and time-consuming assembly of typical folding boats is not an issue for the Oru kayak. Thanks to origami technology and it is supposed to be quick and easy.

Oru Kayak is the best-known manufacturer of origami boats and has been active on the market for over 10 years. We had the opportunity to extensively paddle and review the Oru Kayak Inlet, which is advertised as a recreational and beginner kayak. In this review we share our experience and impressions of the kayak.

Technical Specs

Max. paddlers:
Length:
Width:
Capacity:
Packed size:

1
295 cm | 9’8″
75 cm | 2’5″
125 kg | 396,8 lbs
107 x 25 x 46 cm |
42″ x 10″ x 18″

Material:

Plastic

Weight:

9 kg | 20 lbs

Produced in:

Mexico

Which model has been reviewed?

Oru Kayak from 2023

How did we organize the review?

The Oru Kayak Inlet was provided to us on a rental basis by the manufacturer Oru Kayak. Our review is independent of the manufacturer or store and reflects our own opinion of the boat.

How intensively has the product been tested?

low

high 1 bar = 1-3 km paddled (first impressions)
2 bars = min. 1 day/ 2 half-day tours
3 bars = min. 4 tours
4 bars = min. 8 tours
5 bars = min. 12 tours (very intense)

Where have we tested the product?

Whitewater

Calm rivers

Lakes

Table of Contents

Assembly and first impressions

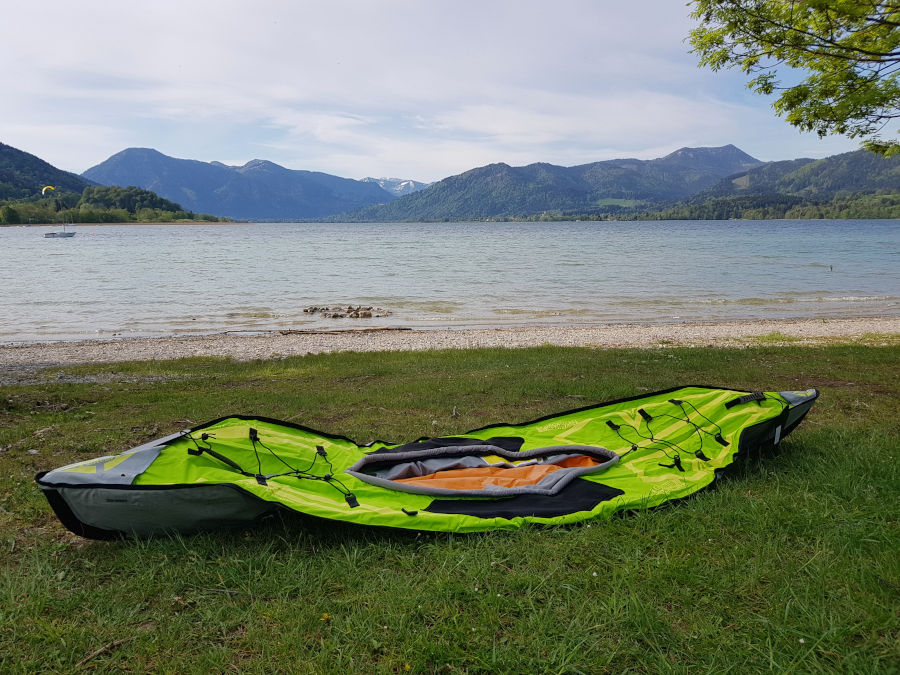
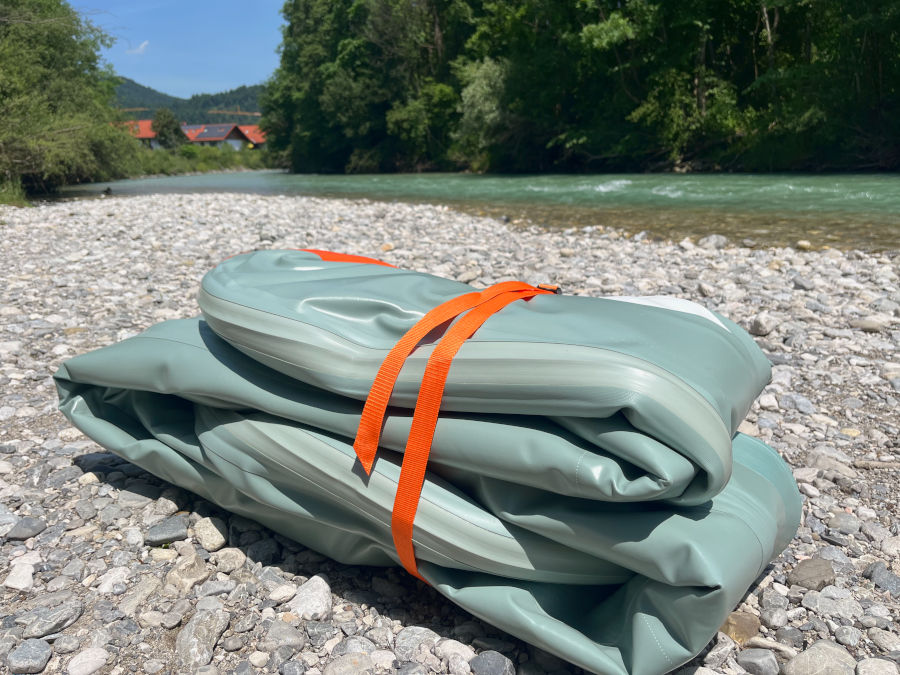
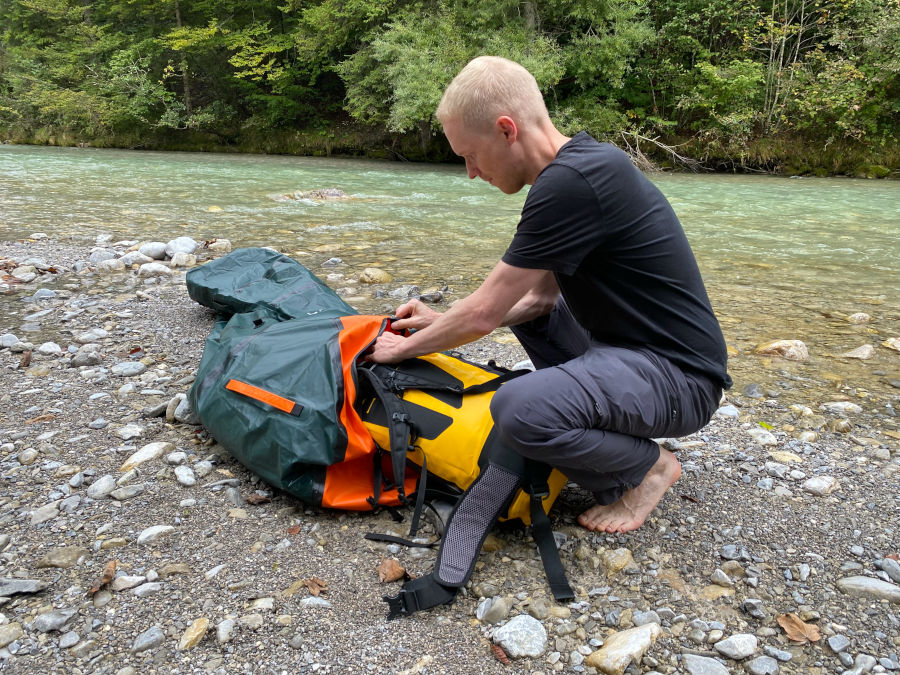
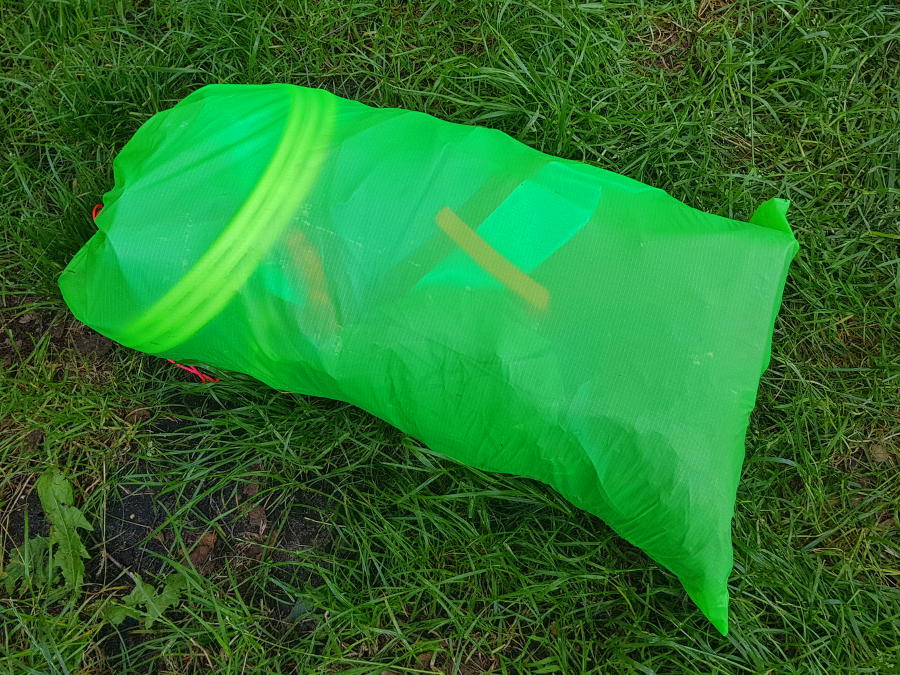
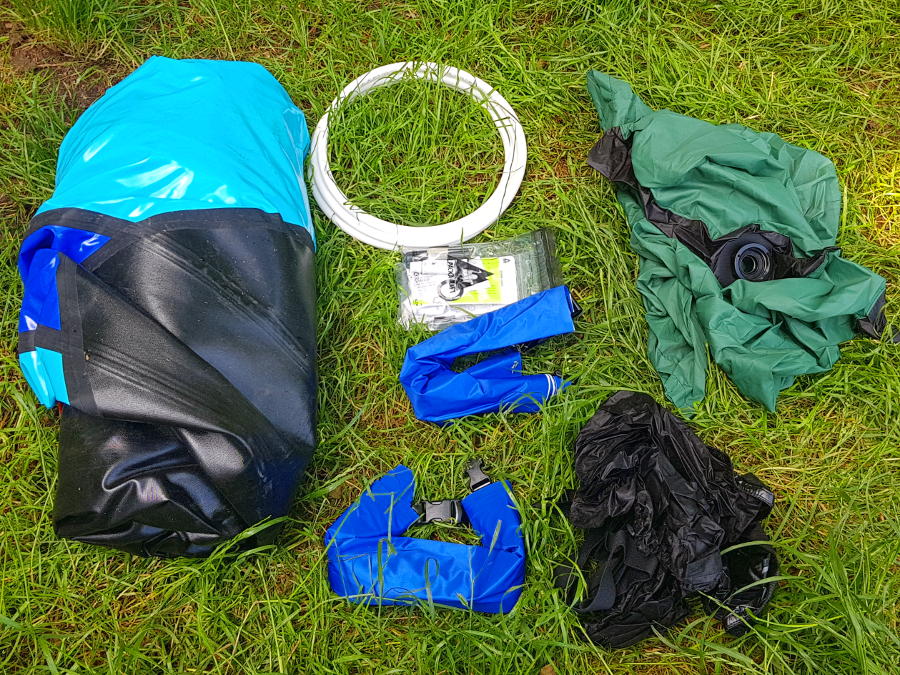
The Oru Kayak Inlet is characterized by its exceptional compactness and lightness for a folding kayak. When folded, it can be carried like a bag and is therefore very convenient to transport over short distances. Typical uses cases here are transportation by public transport or by car. It should be noted that only a 4 piece paddle would fit when the boat is folded. You would have to carry the life jacket and other equipment in the other hand or in a separate bag or backpack.

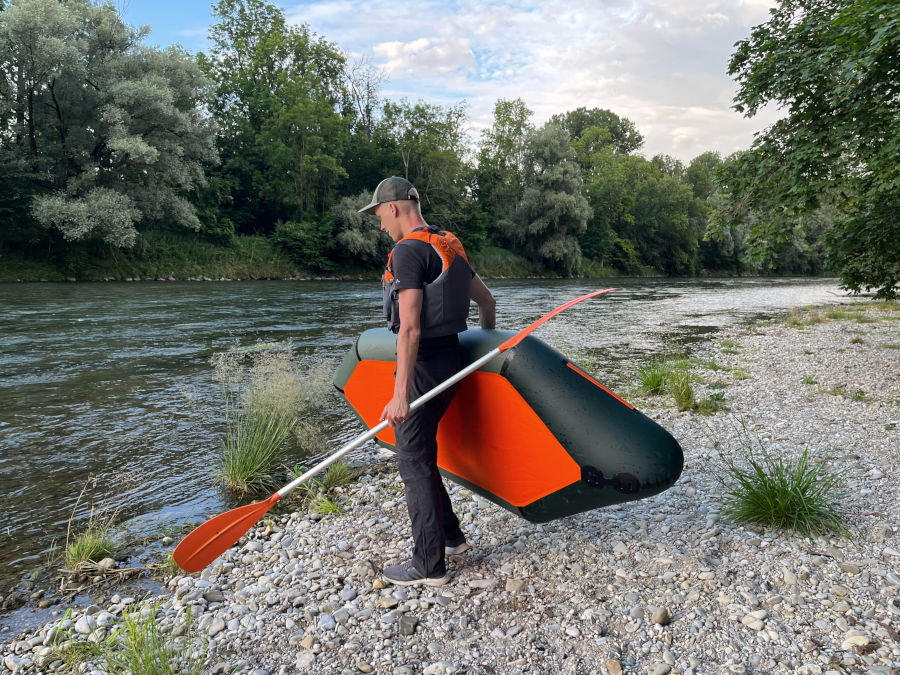
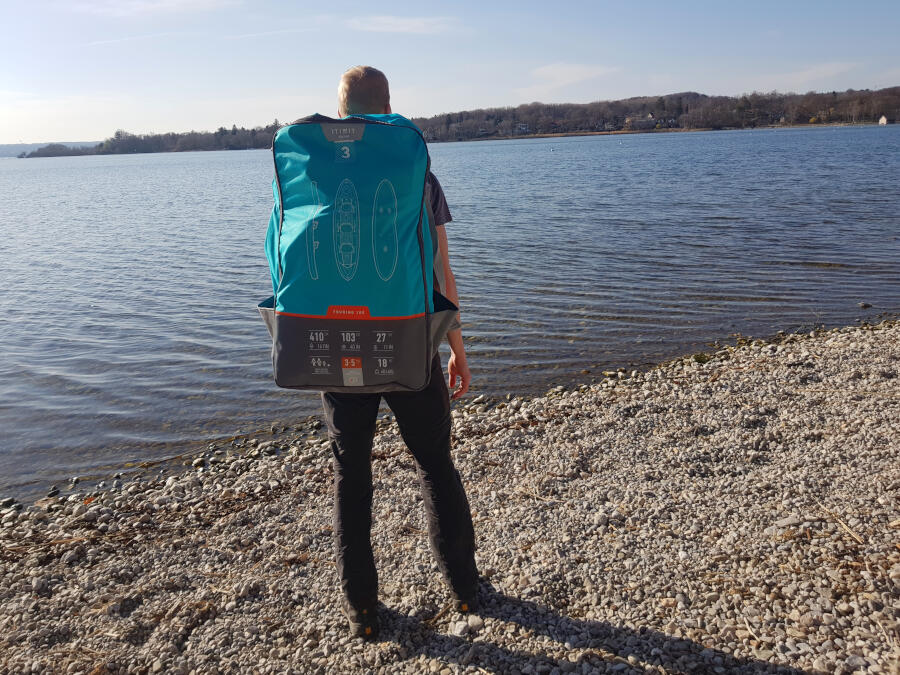
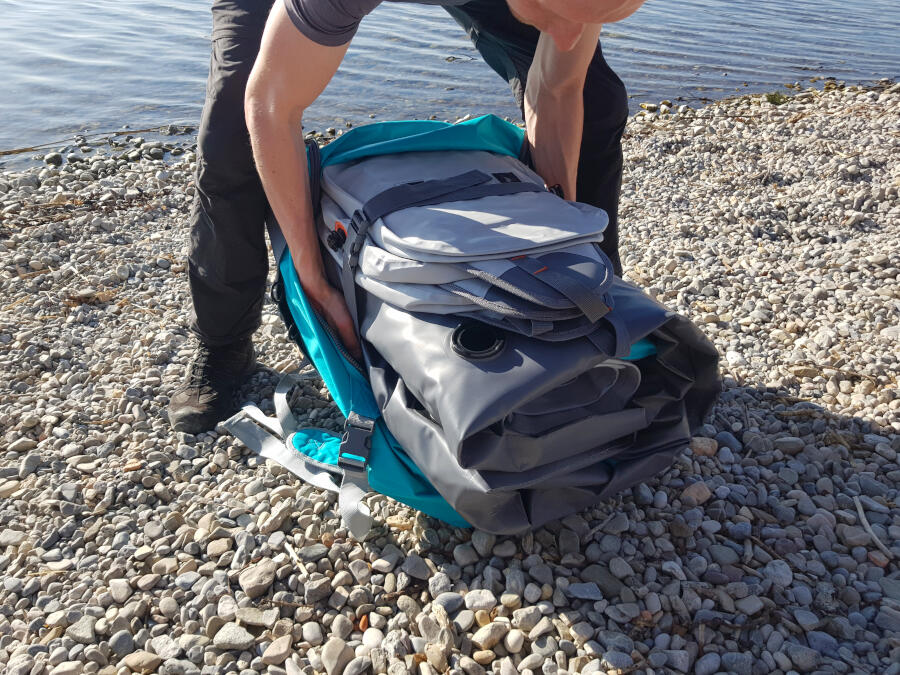
However, if you want to cover longer distances on foot with a portable boat, you will usually use a large backpack. Unfortunately, the Oru Kayak Inlet does not fit into any of the usual transport backpacks due to its packed size. Only transportation with a boat trolley would be conceivable for longer distances. So if you don’t want to use a boat trolley and definitely want to transport the boat on foot for longer distances, you should look for a lightweight inflatable kayak (e.g. Advanced Elements AdvancedFrame Ultralite) or packraft (e.g. Itiwit Packraft 500). These boats are much more compact and can be transported in a backpack.
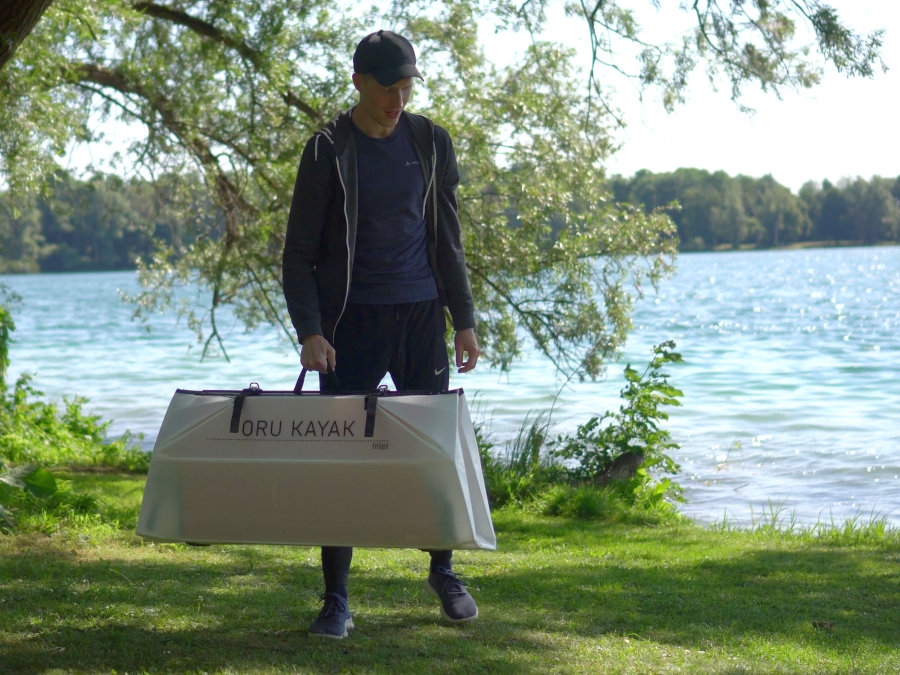
oru kayak inlet transport
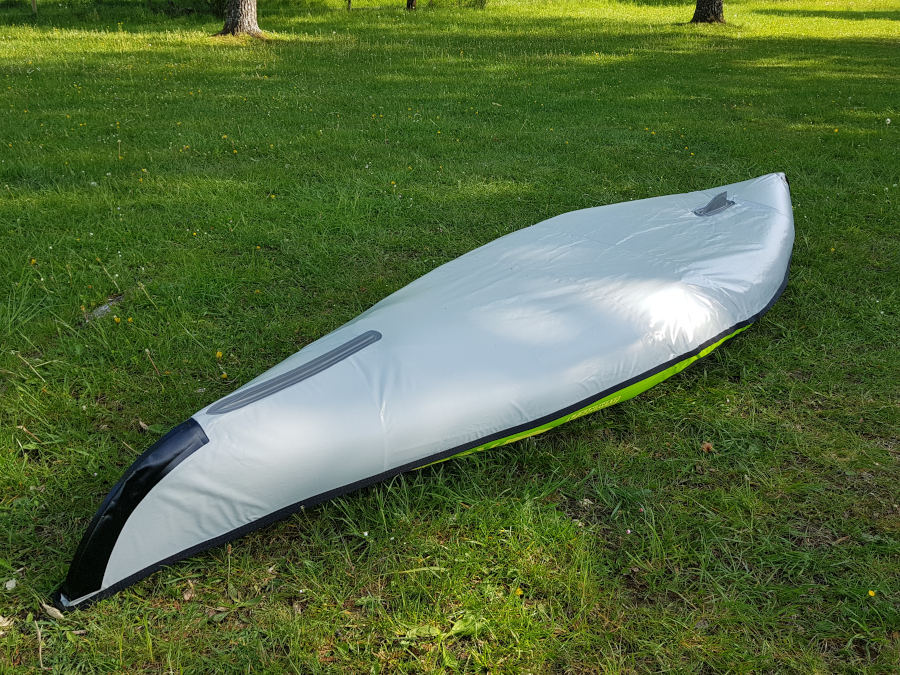
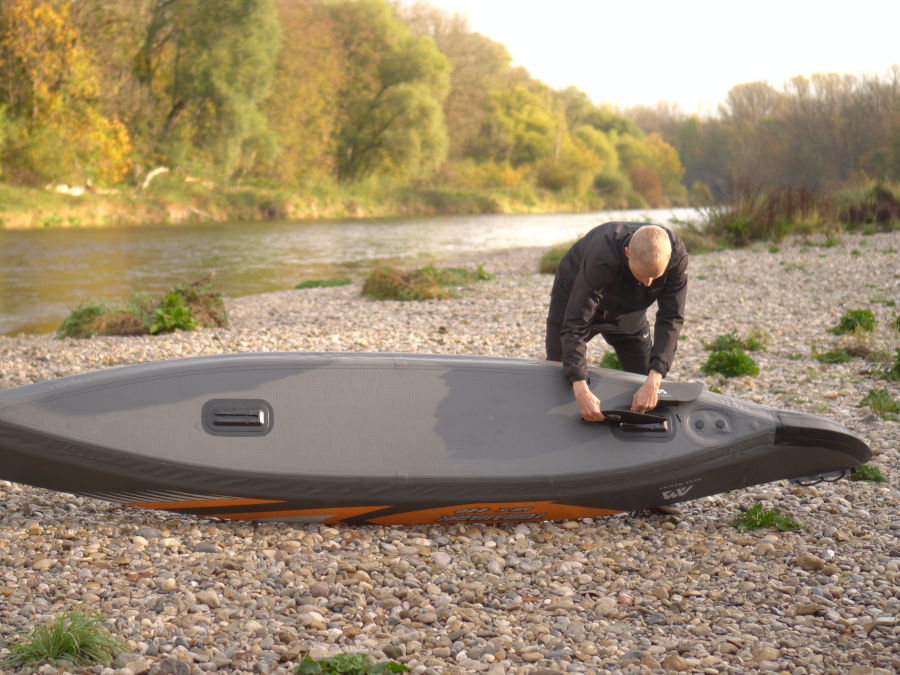
Oru Kayak Inlet when folded

When storing the boat, however, the folded boat as a bag is very practical. It can be conveniently stored in the cellar or in a larger cupboard or corner in the home.

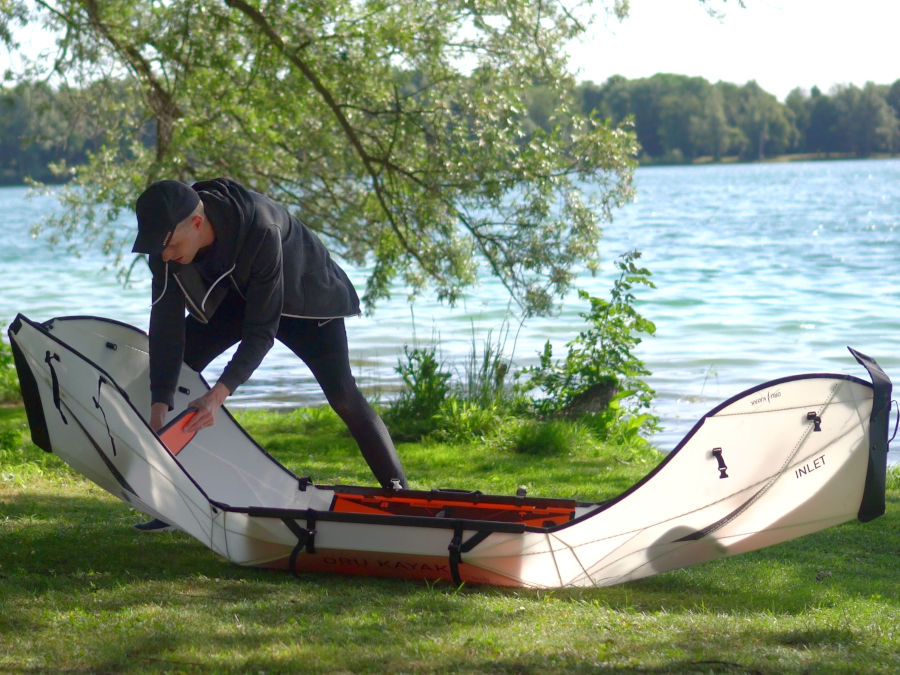
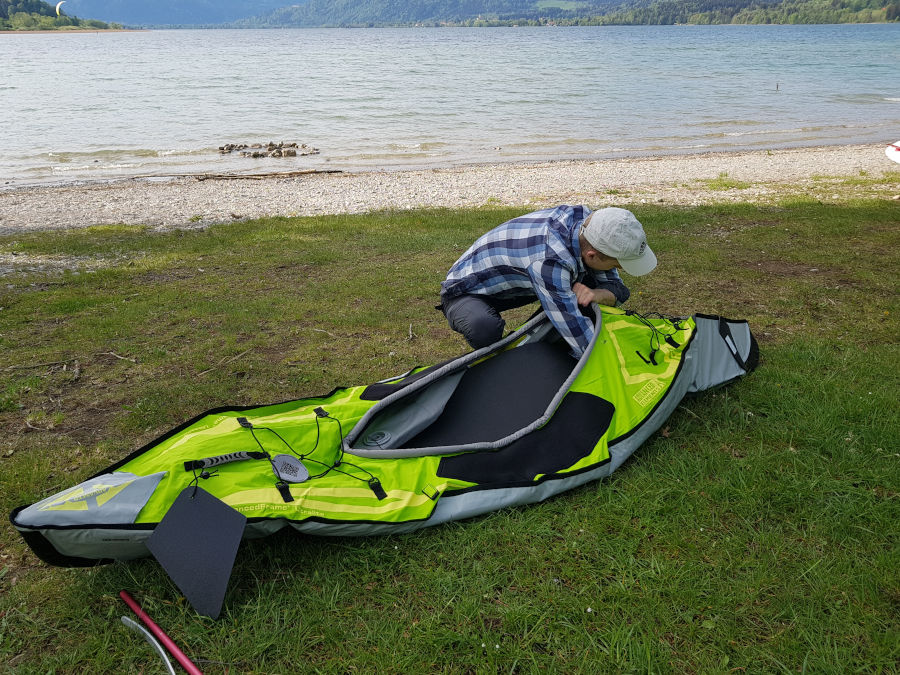
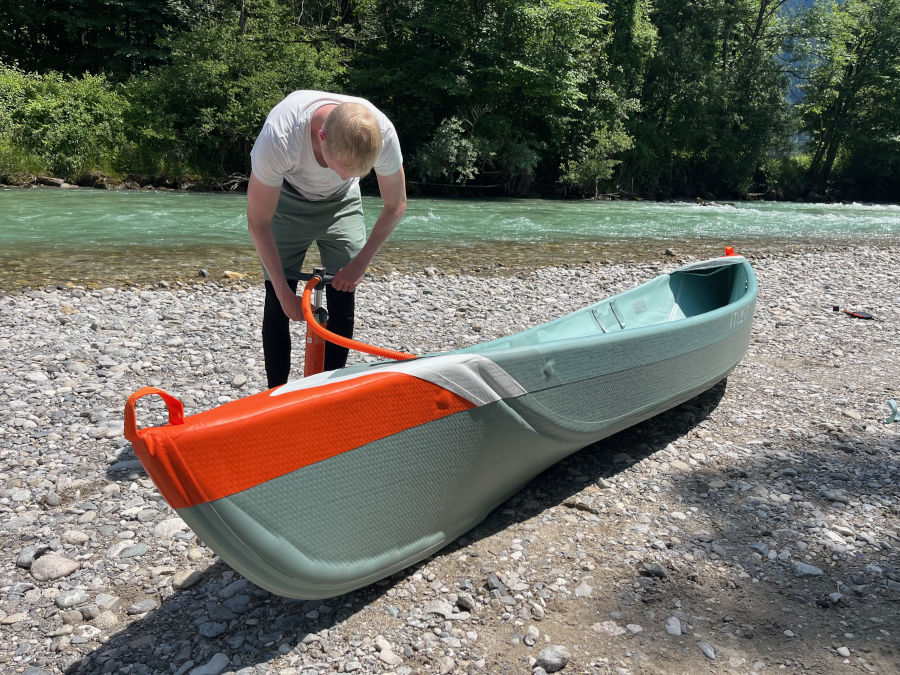
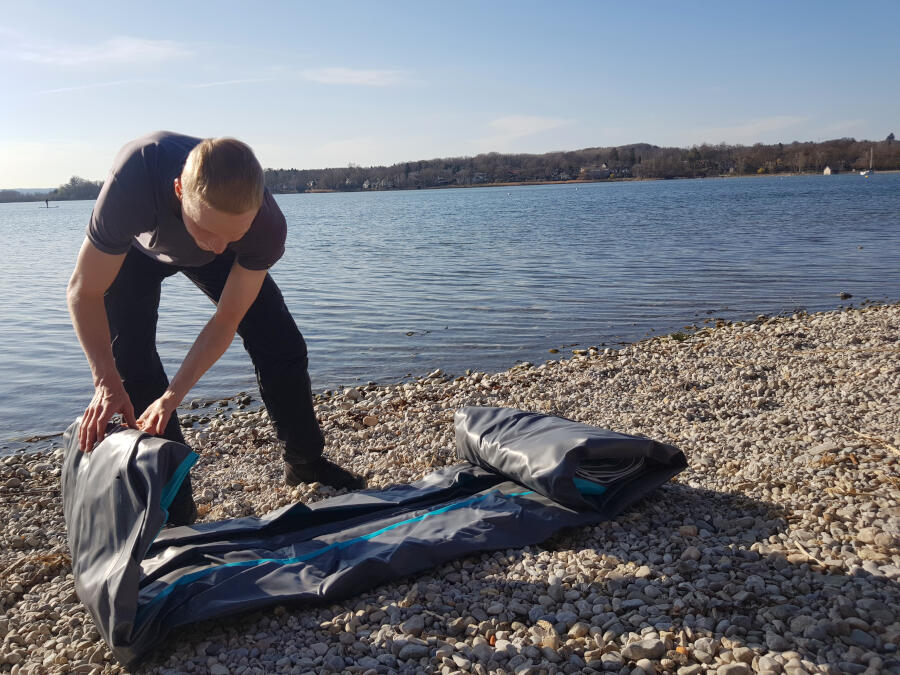
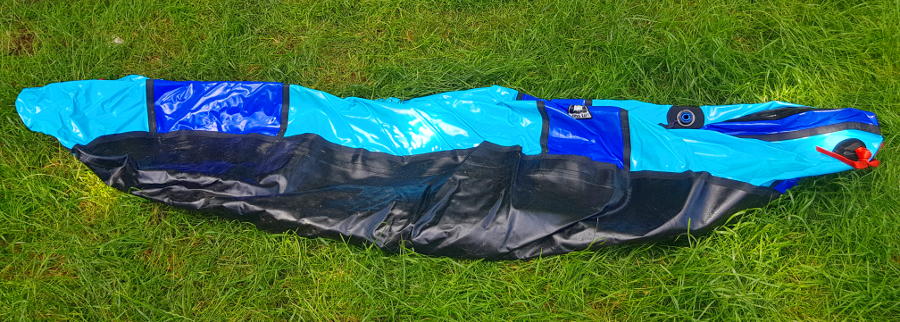
The first question that arises for us is: Can the Oru Kayak Inlet score over conventional folding kayaks thanks to its quick and easy set-up? The simple answer is yes. The kayak impressed us with its quick and easy set-up. If you’ve already set up the boat more than a few times, it’s actually really fun because it’s so quick and easy. A good and detailed description is included in the scope of delivery for the first assembly, which provides you with good support during the first assembly. It takes a little longer to set it up the first time, as you first have to familiarize yourself with the folding technique. At the beginning, you don’t have the confidence to fold the boat with full force. Over time, however, you learn that the material can withstand this effort without any problems. It only takes a few minutes and the manufacturer’s stated assembly time of 3 minutes is completely realistic.
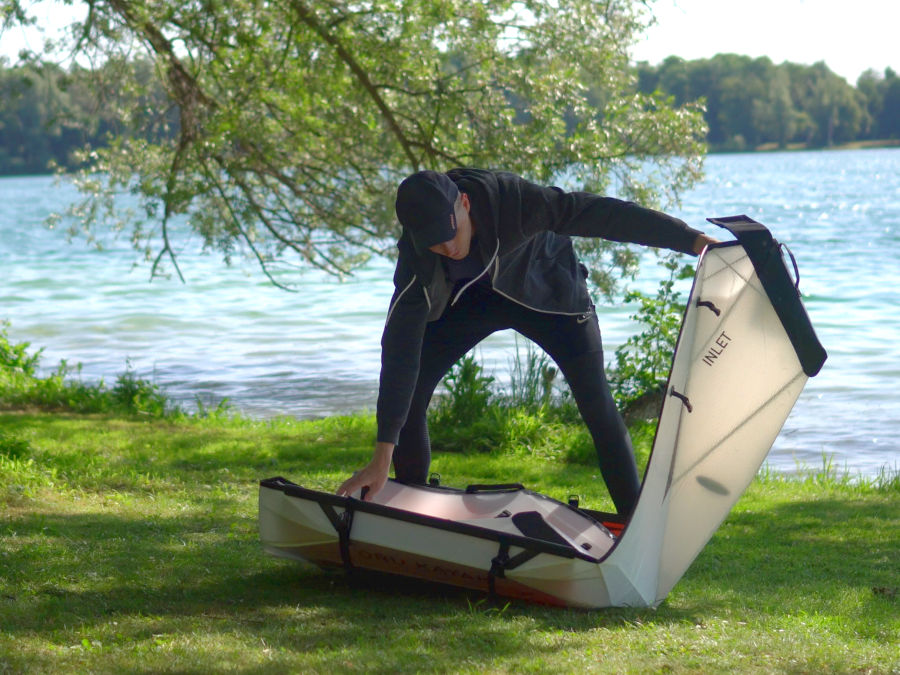
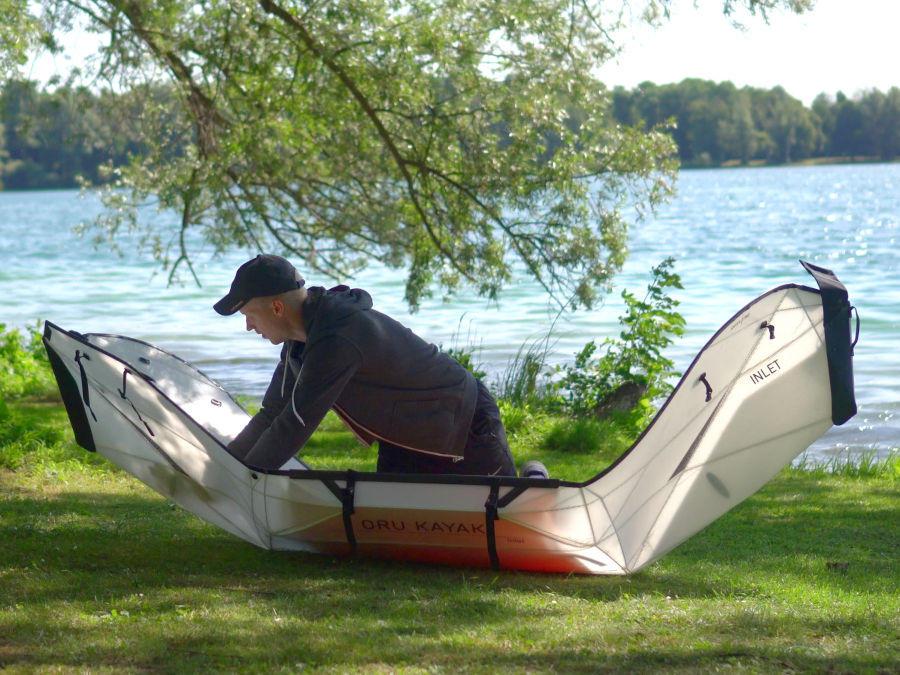
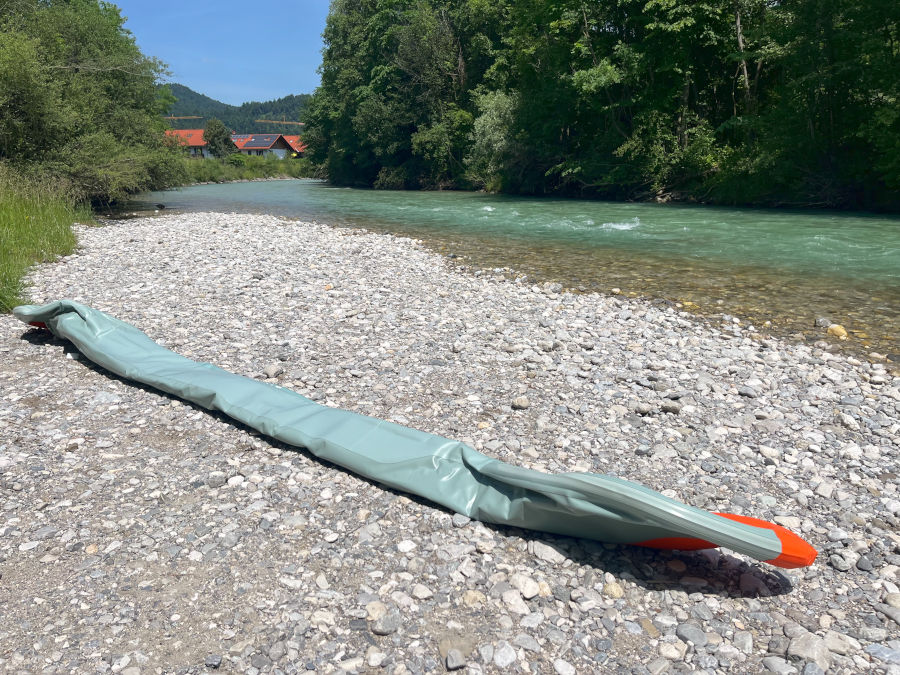
Unfolding the kayak
origami oru kayak dismantling
Folds on the designated lines
oru kayak inlet aufbau erfahrungen
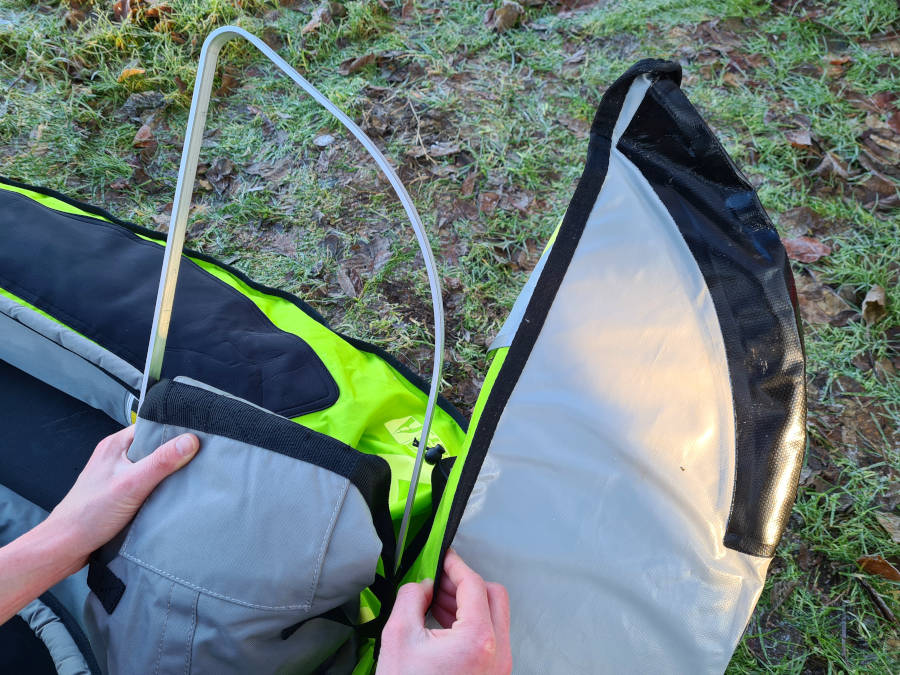
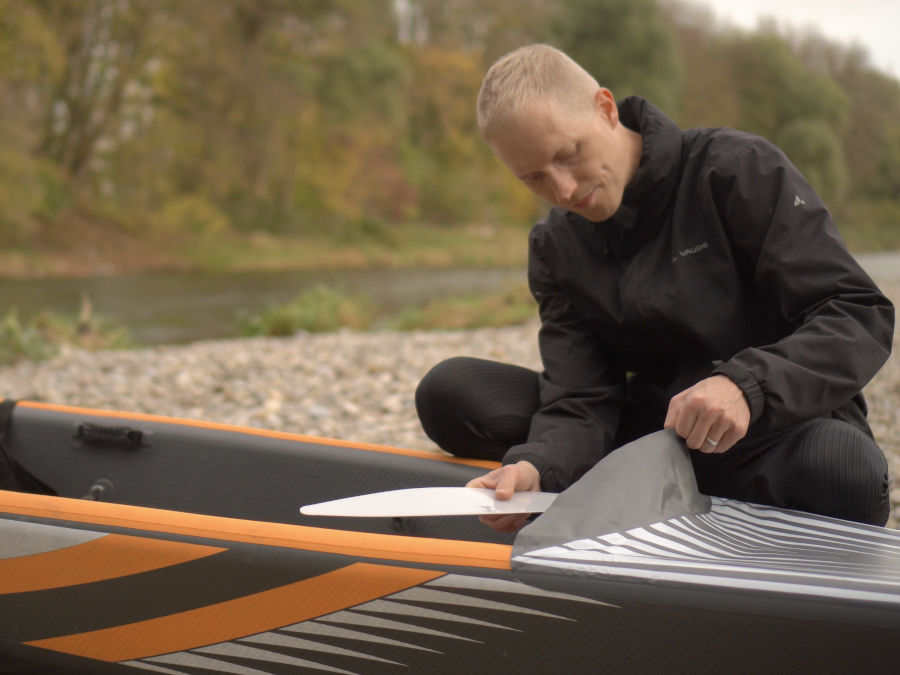
Inserting the bow plate

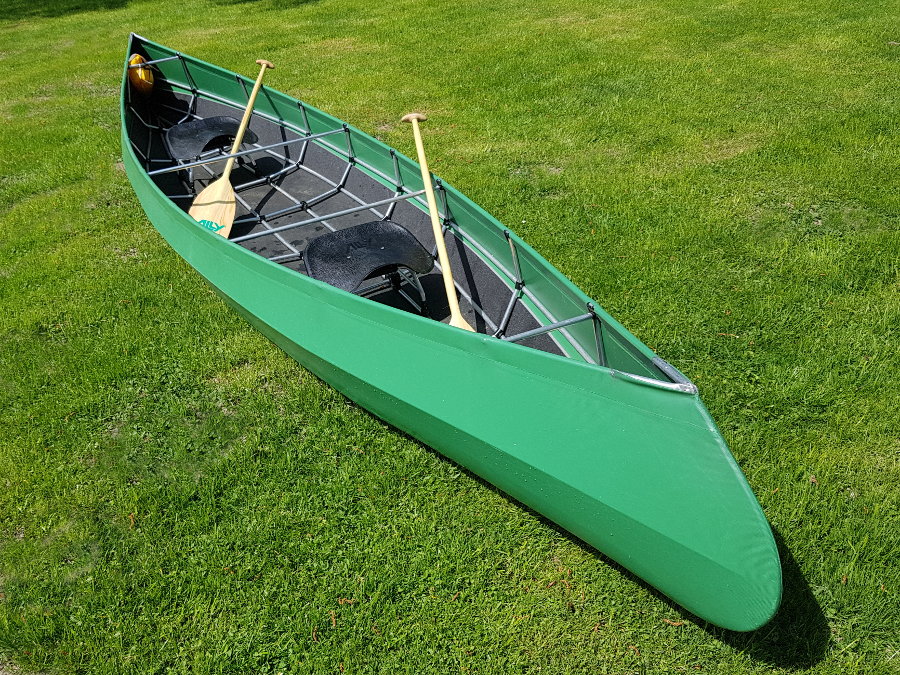
For the main structure of the boat, the main plate is first bent in the main folds to create the rough hull shape. Small plates are then inserted at the bow and stern. The bow plate is also used to attach the footrest suspension. As soon as these plates are correctly positioned, the main plate is folded further at the bow and stern and closed with click fasteners. This gives the kayak its final hull shape.
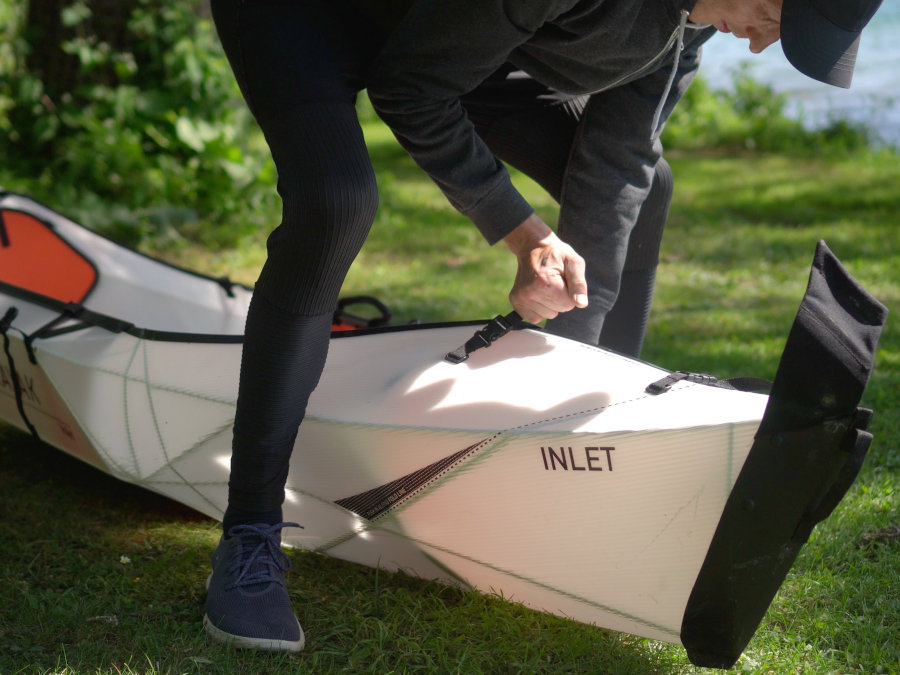
oru kayak inlet setup
Closing the click fasteners at the bow and stern

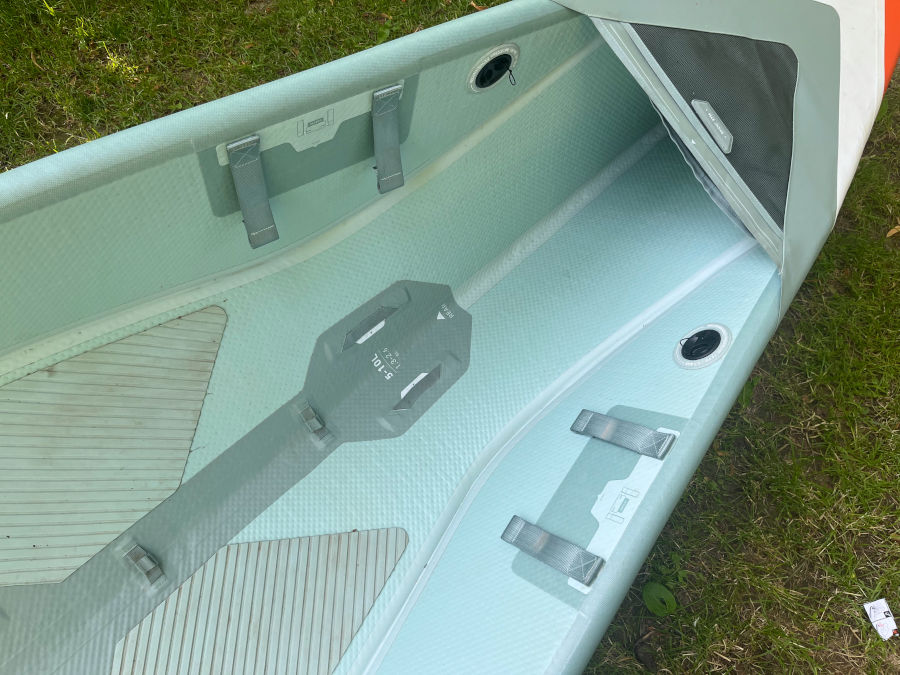
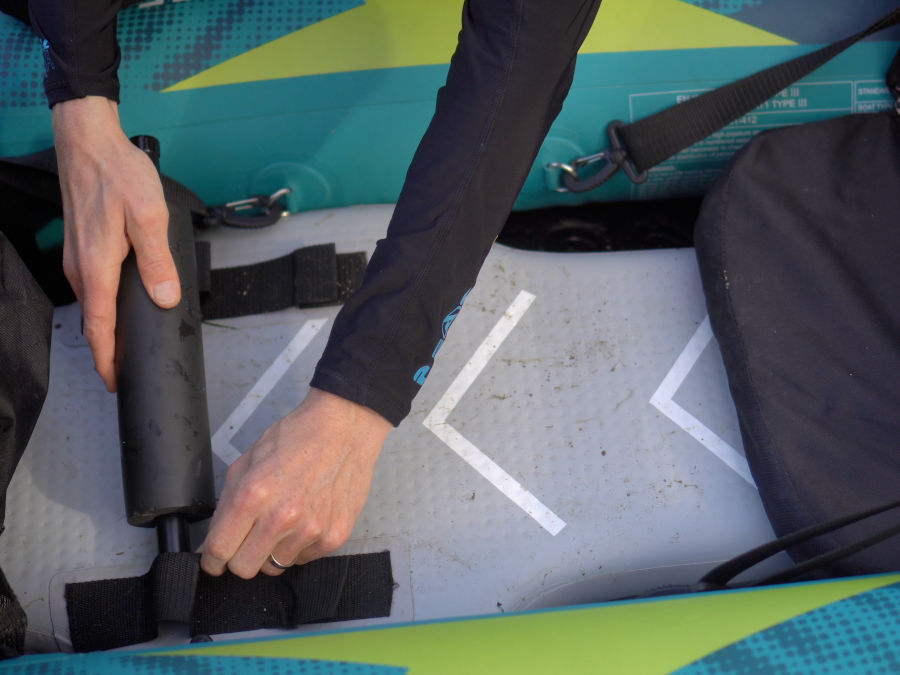
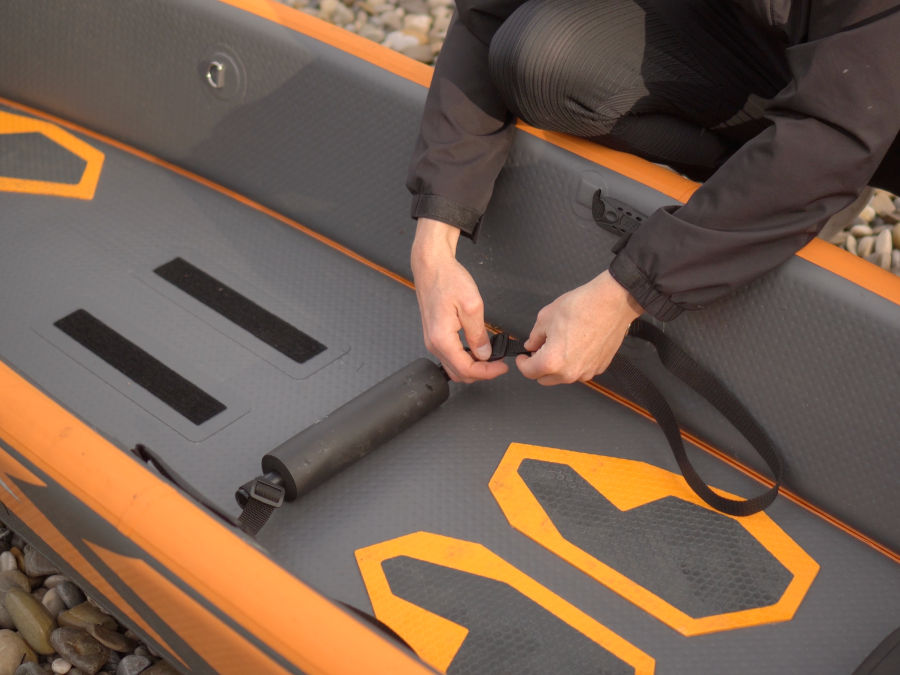
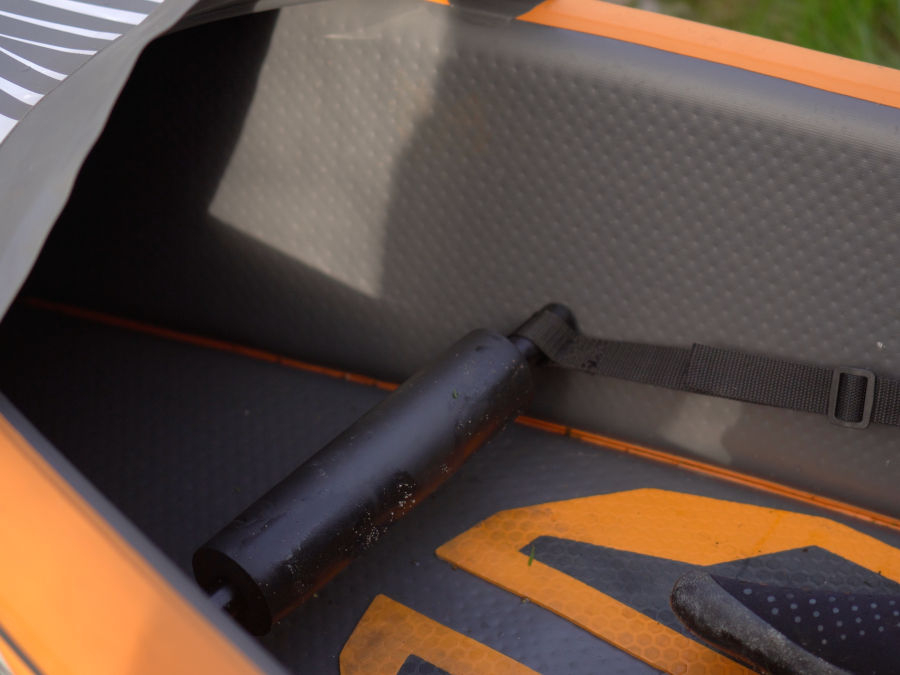
Finally, the footrest and seat are attached. The footrest is attached to the inside of the kayak using click fasteners. This also makes it very easy to adjust the position of the footrest.
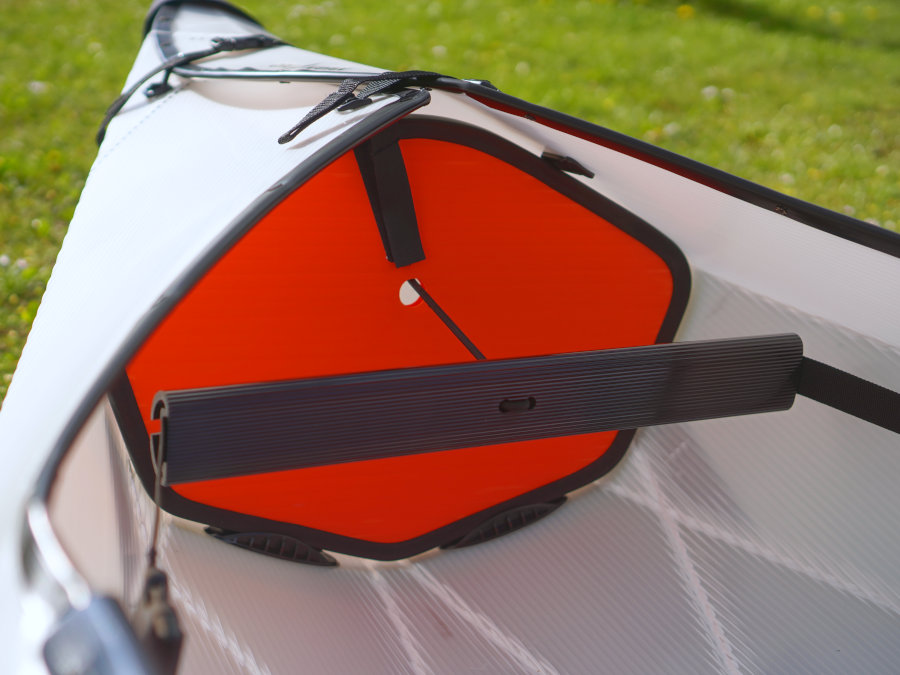
oru kayak inlet footrest
Footrest of the Oru Kayak Inlet

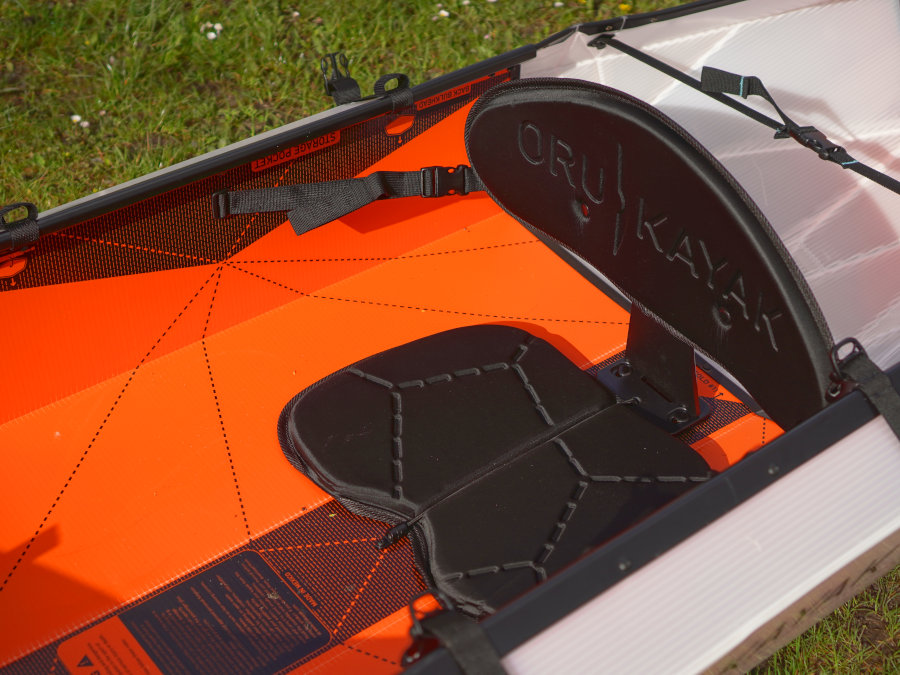
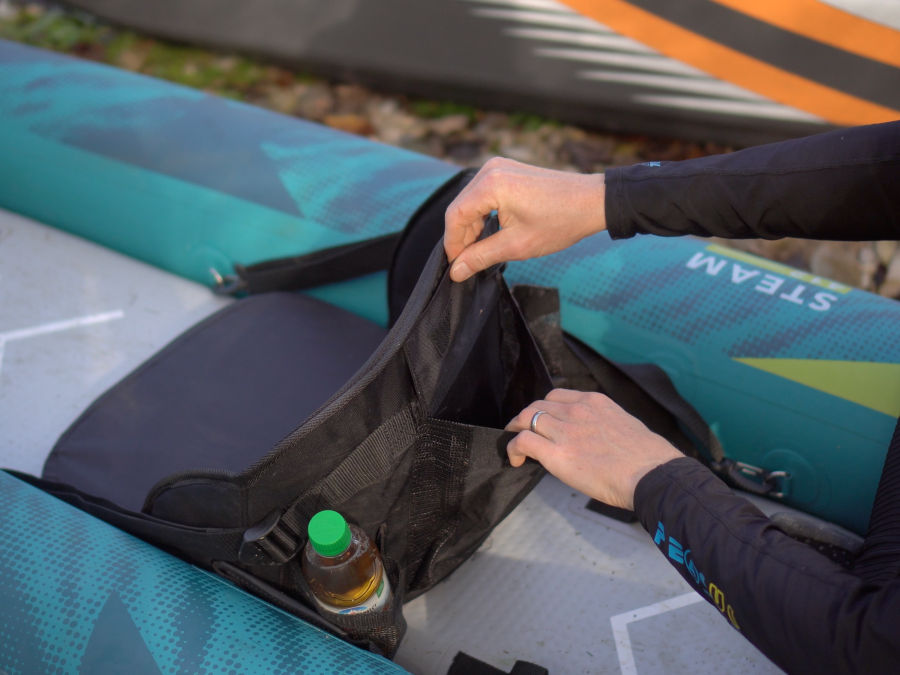
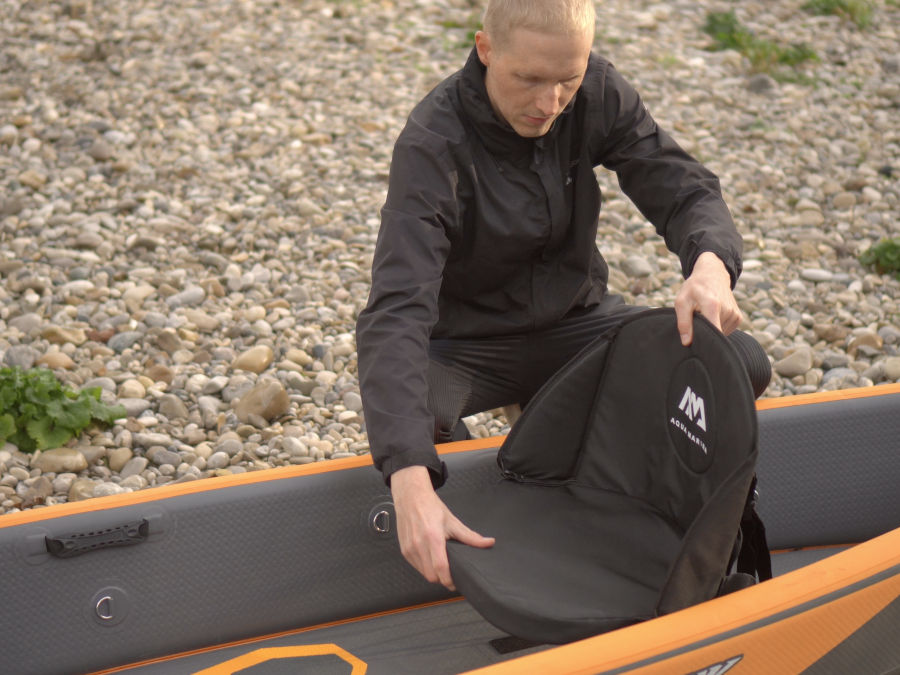
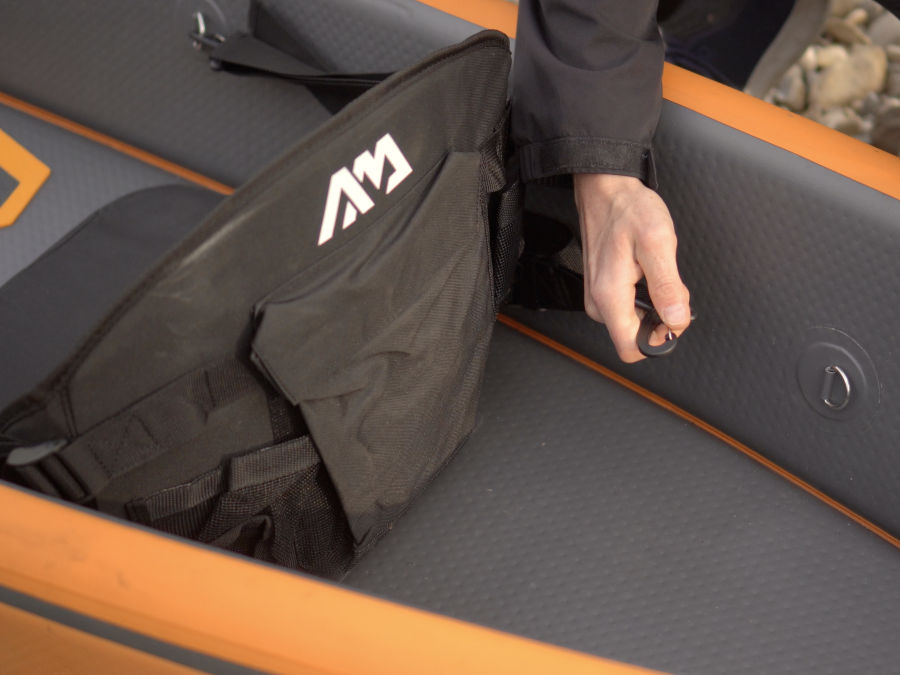
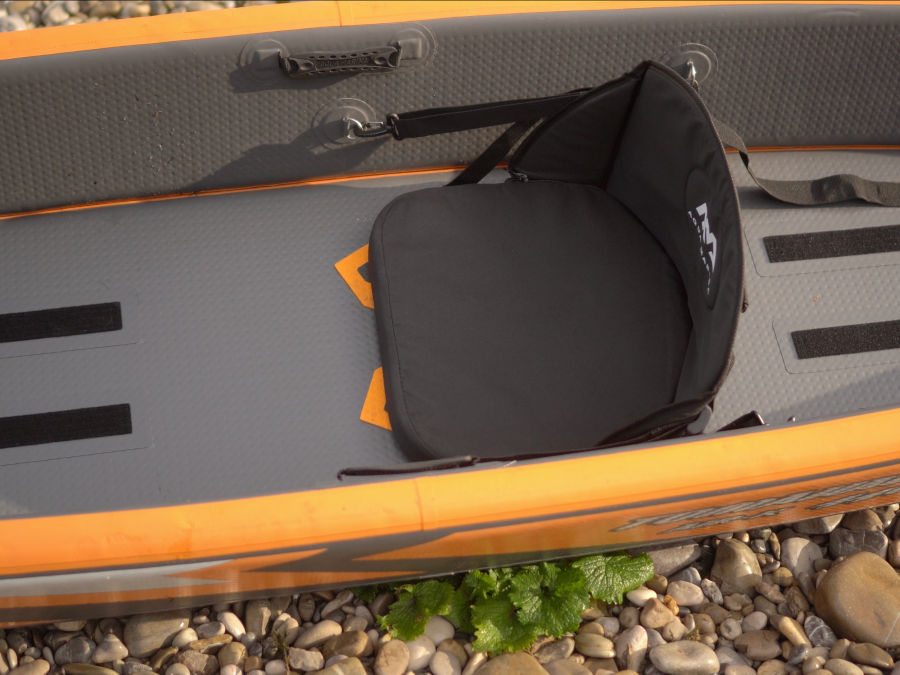
The seat cushion is attached to the floor with an elastic band and can therefore not slip when paddling. Behind the seat cushion there is a slot in the bottom of the boat into which the backrest is inserted. The backrest is also attached to the inside walls of the boat with click fasteners.
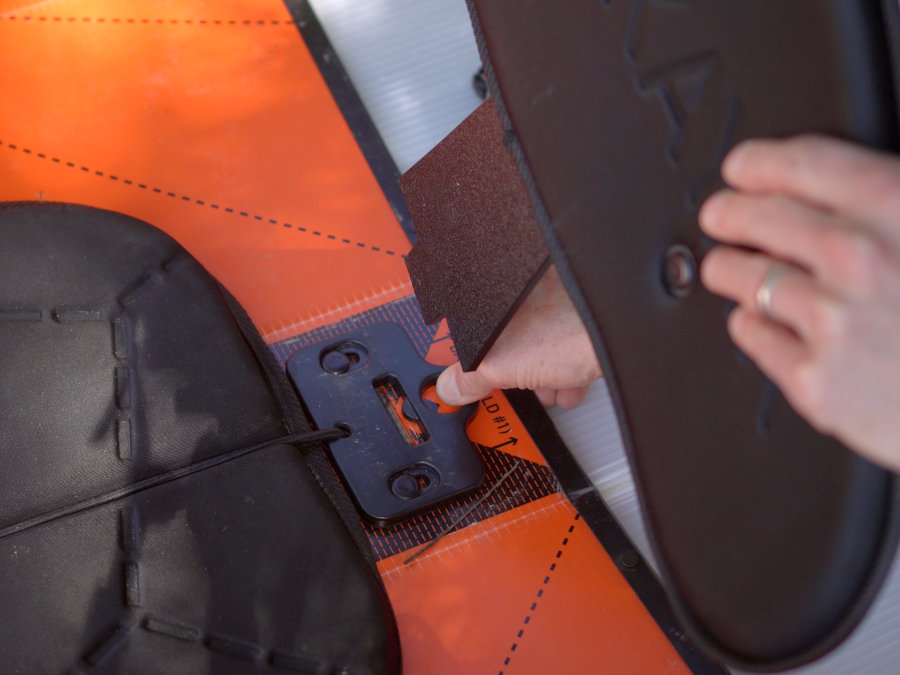
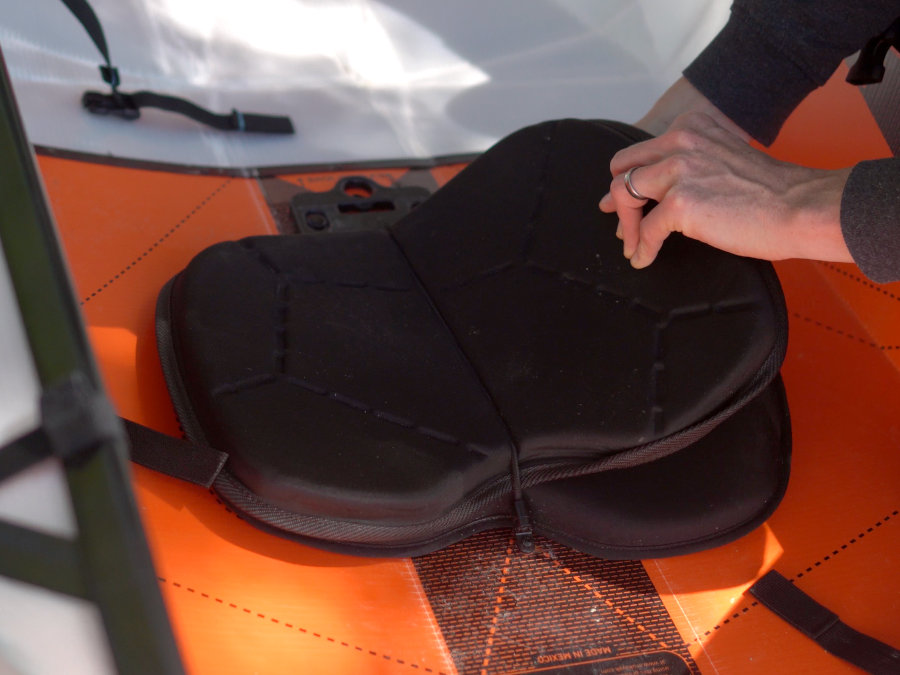
oru kayak inlet backrest
Anbringung der Rückenlehne
oru kayak seat wedge
The seat cushion is slid under an elastic band
oru kayak seat system
The seating system makes a well thought-out impression

Overall, the seating system makes a very good and well thought-out impression. However, it is immediately noticeable that the seat position in the boat is fixed and therefore cannot be moved backwards or forwards. Variable positioning of the seats is particularly common in inflatable kayaks and allows tall paddlers in particular to position the seat further back if necessary to gain more legroom. Compared to rigid hull boats and many other folding kayaks, however, it must be said that a fixed seating position is not a characteristic of Oru Kayak, but rather the norm. The manufacturer wants to ensure that there is an ideal weight distribution in the boat and that the boat lies on the water in such a way that it can perform optimally. However, the footrest can be easily moved backwards and forwards so that you can adjust it to the required leg length.

What is adjustable on the seat, however, is the backrest. This allows you to adjust the angle depending on how upright you want to sit when paddling. The height of the backrest can also be adjusted. This allows you to choose whether you want to position the backrest in the lower or middle back area. As the backrest is quite narrow, a highback life jacket (with a high-positioned buoyancy chamber on the back) is generally recommended.
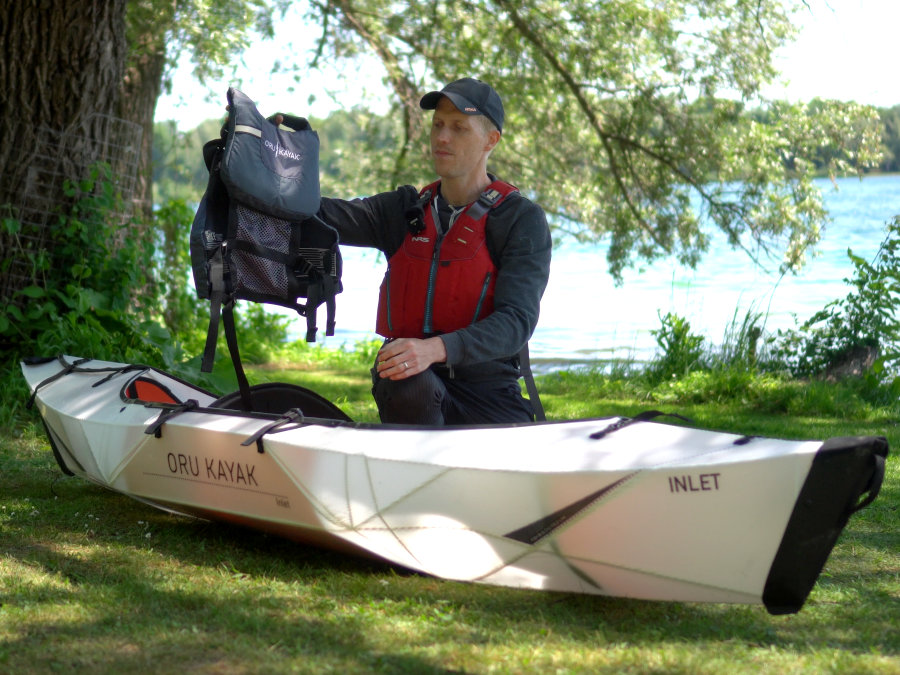
oru kayak life jacket
The most comfortable way to paddle is with a highback life jacket

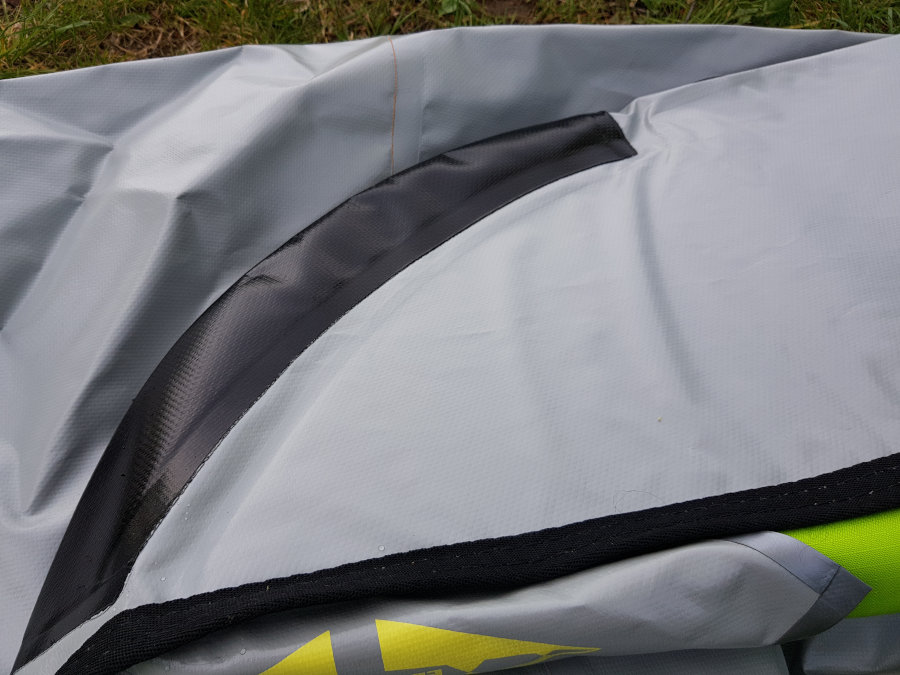
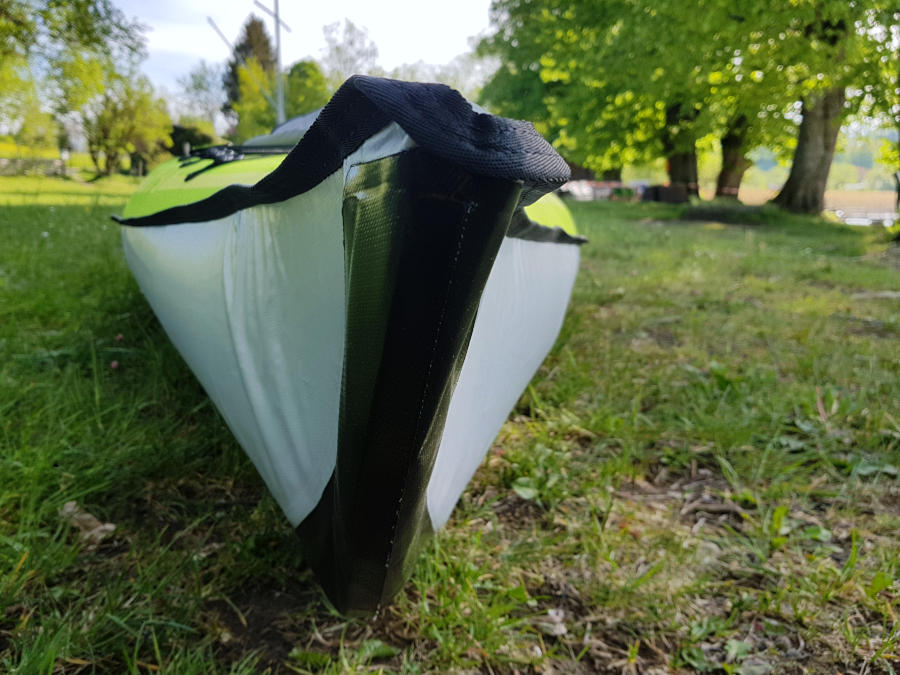
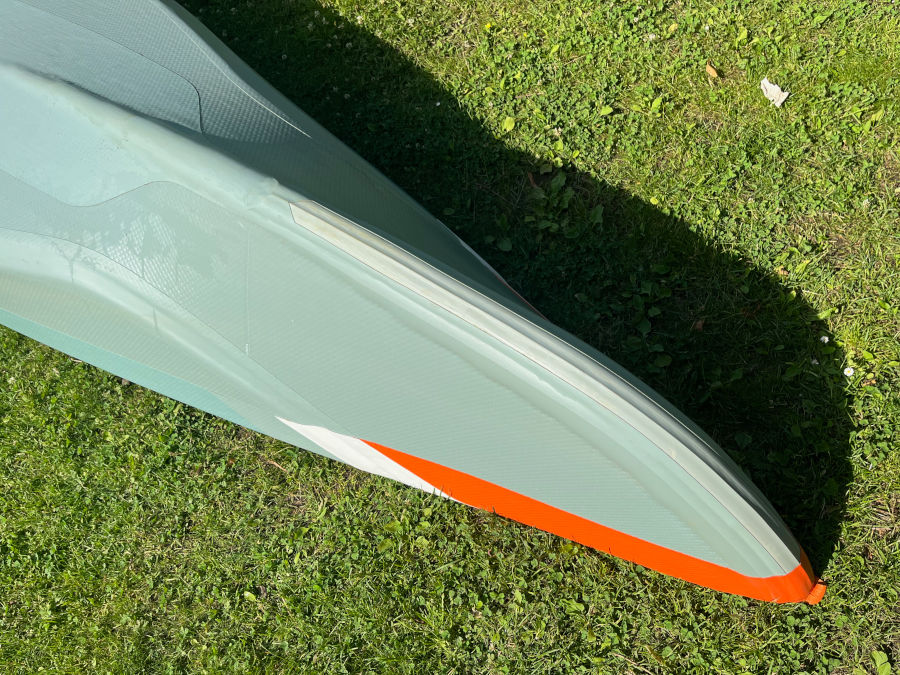
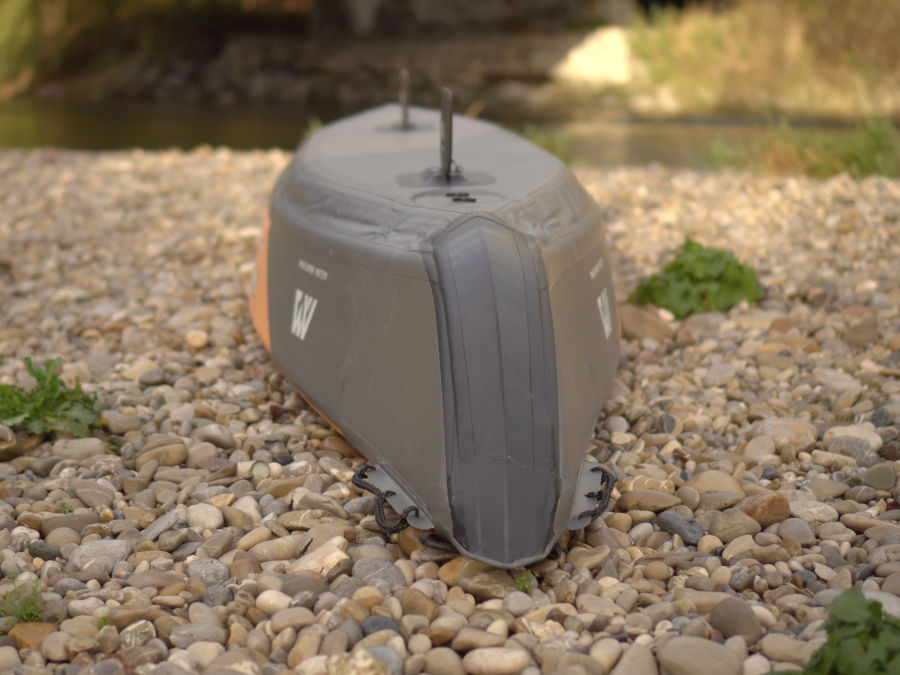
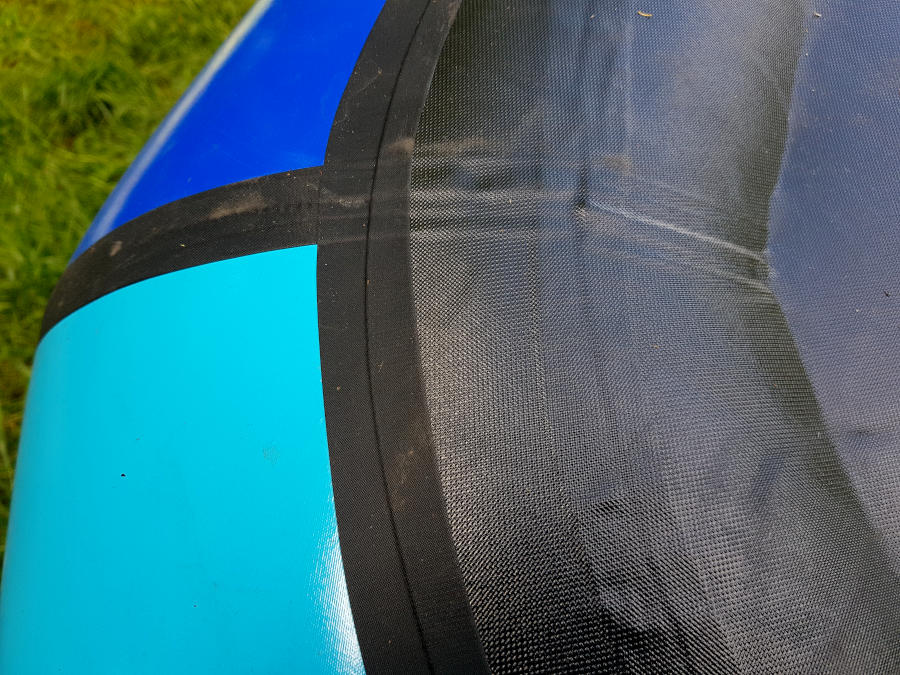
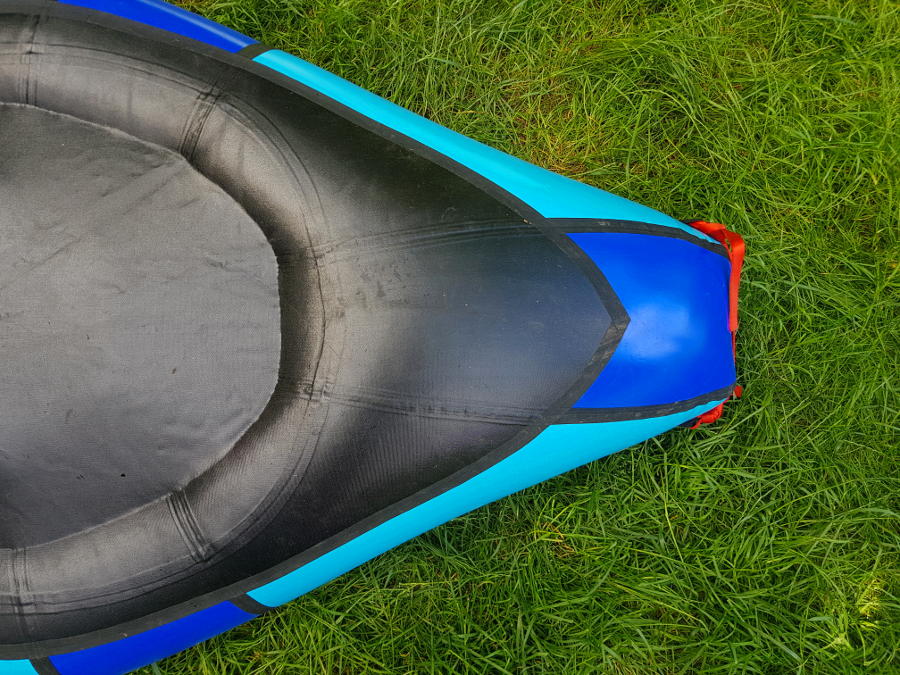
Apart from the good seating system, all other details on the boat also appear well thought out and of high quality. For example, the material edges are protected with additional strips and the bow and stern have been fitted with an additional plastic cap to prevent material damage in the event of minor collisions.
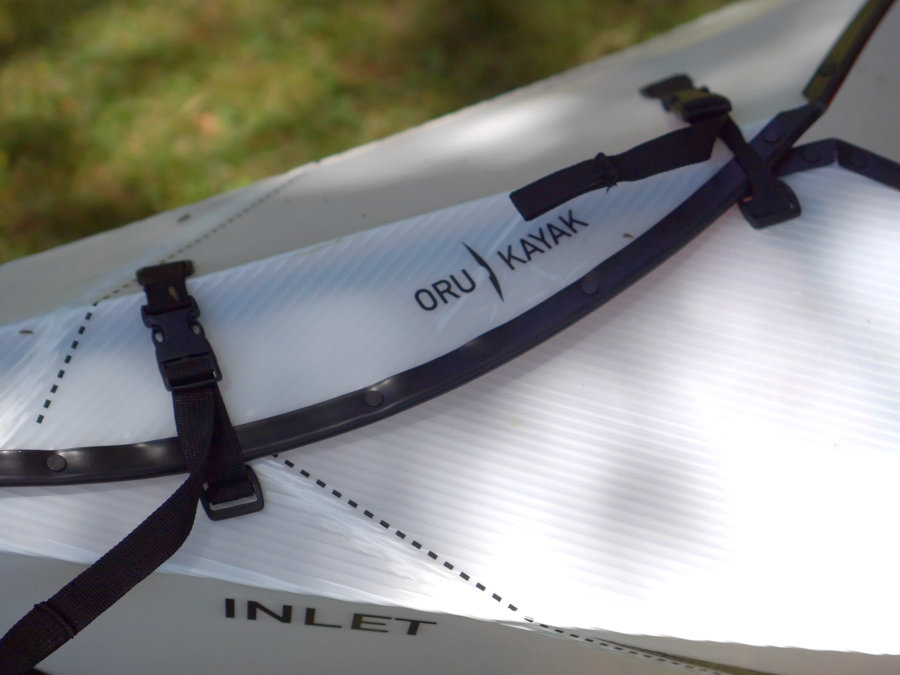
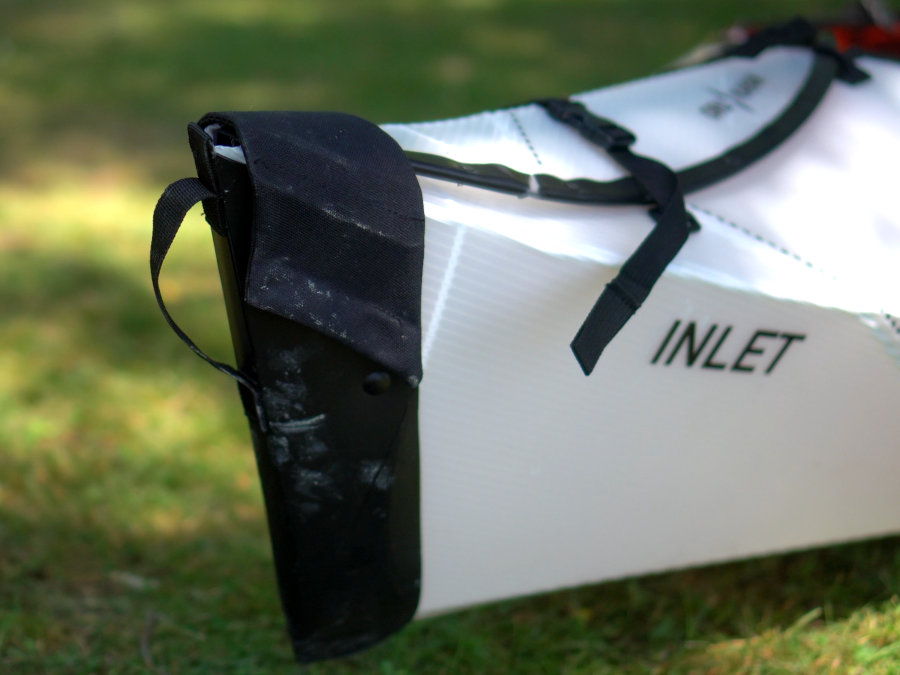
oru kayak inlet quality
Stips protect the edges of the material
oru kayak folding kayak quality
Plastic caps additionally protect the bow and stern

The same applies to the overall material of the boat. It looks robust and gives the impression that it will last a very long time. Only the folding edges are the parts of the boat that have the potential to damage the quickest due to folding. Fortunately, the manufacturer states that the boat can be folded up to 20,000 times without any problems. This is more often than you would ever do in recreational use and therefore eliminates this concern in advance.

However, we cannot judge how well the boat would tolerate major collisions or too frequent grounding over time. In our use, pulling over pebble banks did not leave any marks. Nevertheless, you should bear in mind that this is a recreational kayak. This means that the Oru Kayak Inlet is primarily intended for use in shallow, calm and sufficiently deep water. If you want to paddle in white water, this boat is not the right choice (due to the many groundings and possible collisions).
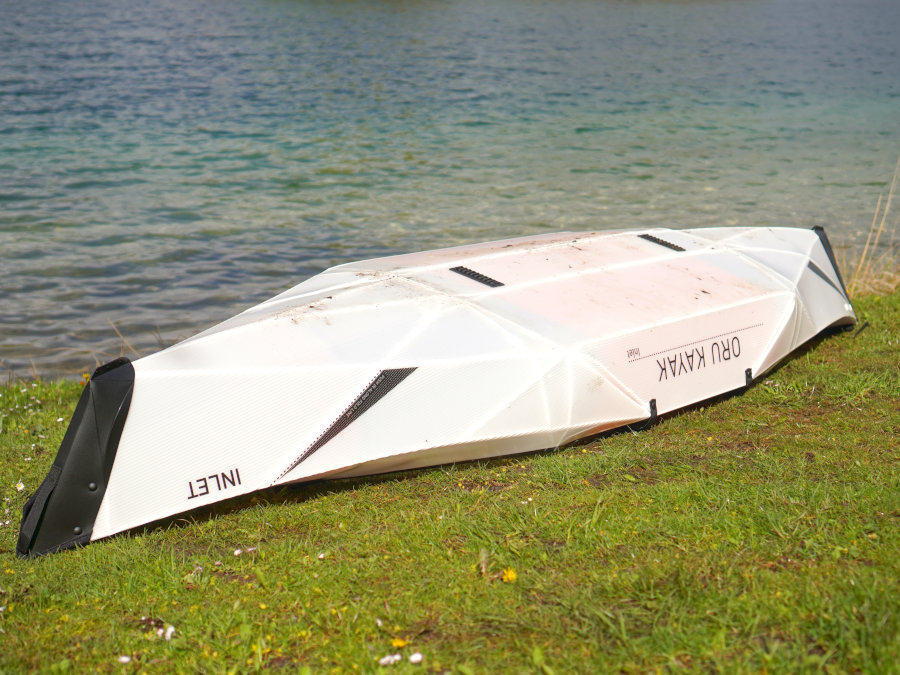
oru kayak folding kayak material
Overall, the material makes a robust impression

Rewiev on the water of the Oru Kayak Inlet

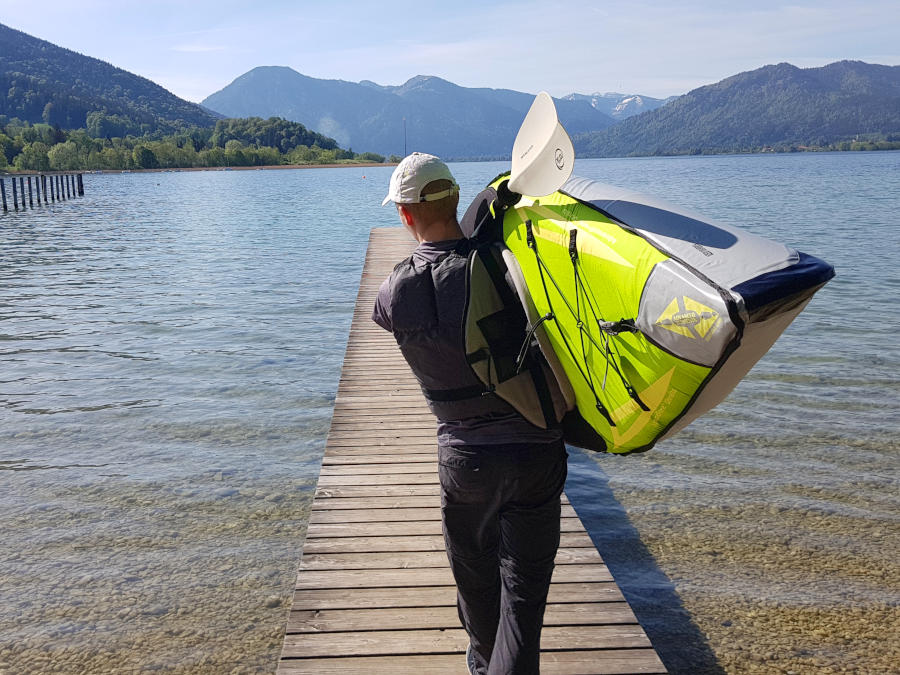
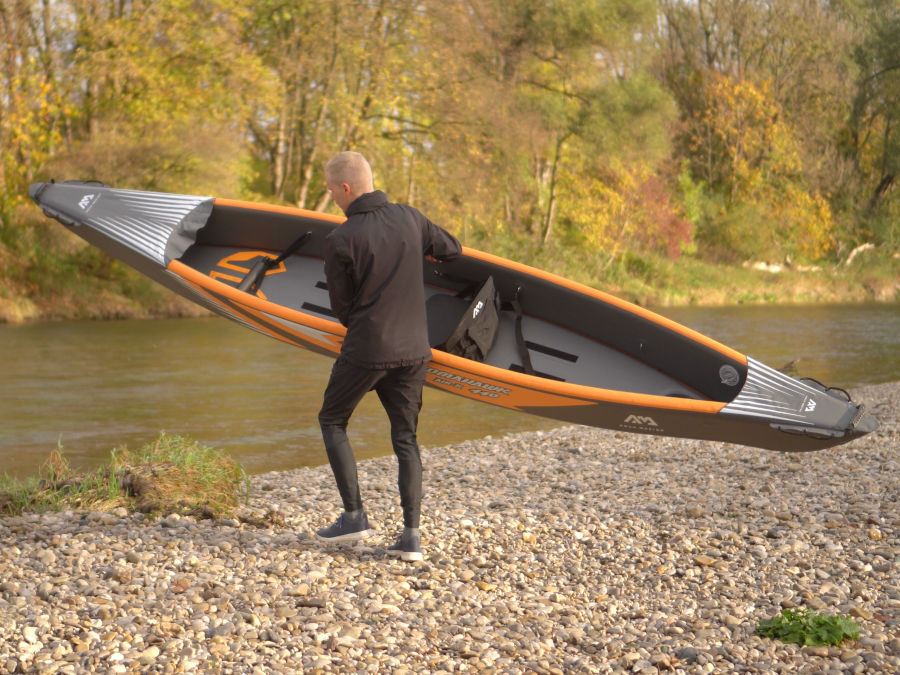
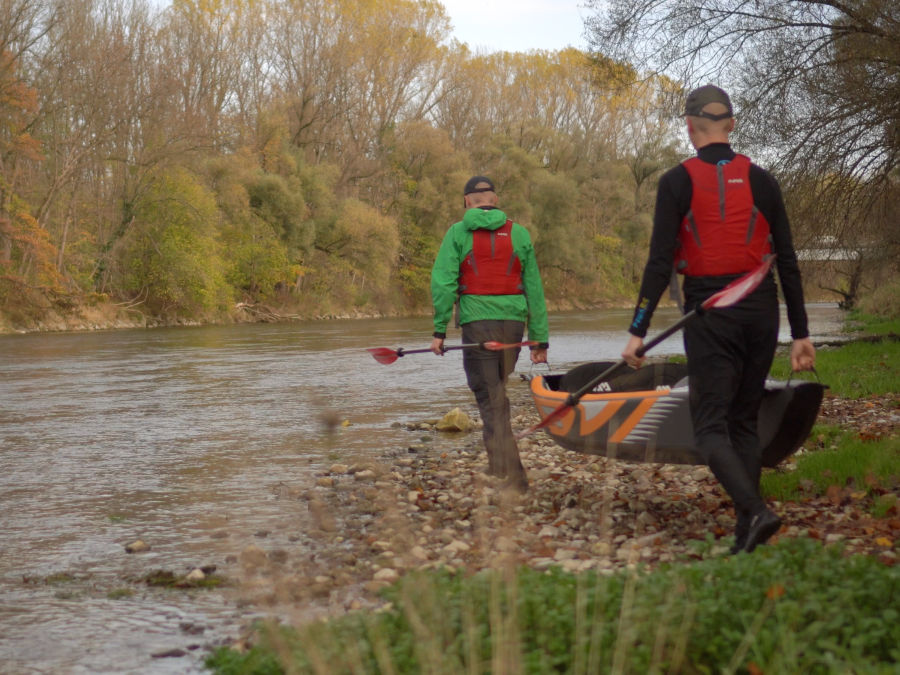
The low weight not only pays off when transporting the boat, but also when you want to carry it to the water. You can carry the 20 lbs (9 kg) kayak without any help, even when assembled. This is a real advantage over many other folding kayaks, which are significantly heavier.

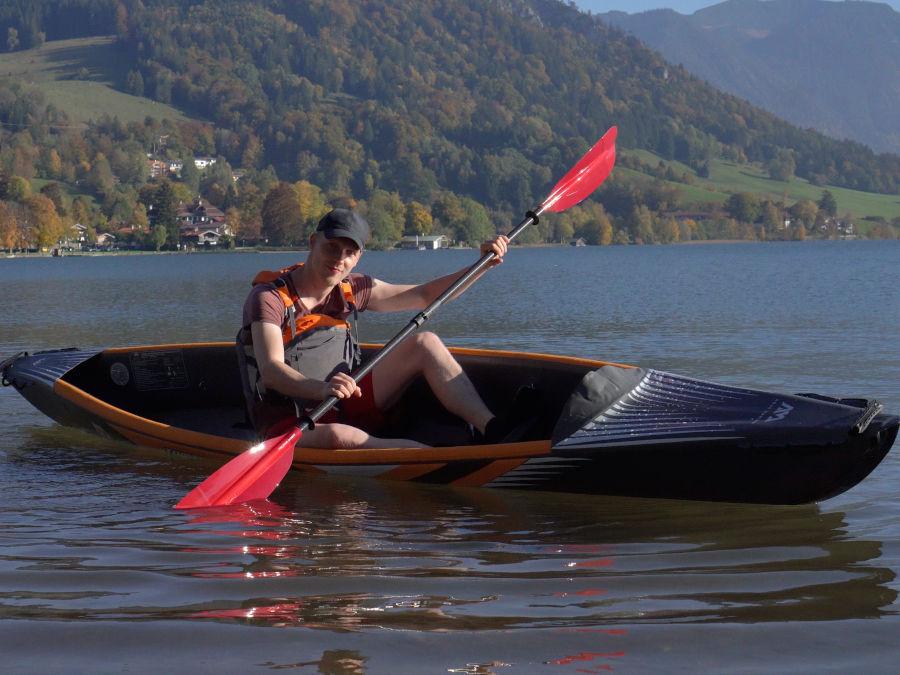
The fact that the kayak is primarily aimed at beginners and recreational paddlers is also revealed by the boat’s wide cockpit opening. This makes it very easy to get in and out. This open design also gives you maximum freedom of movement on the water.
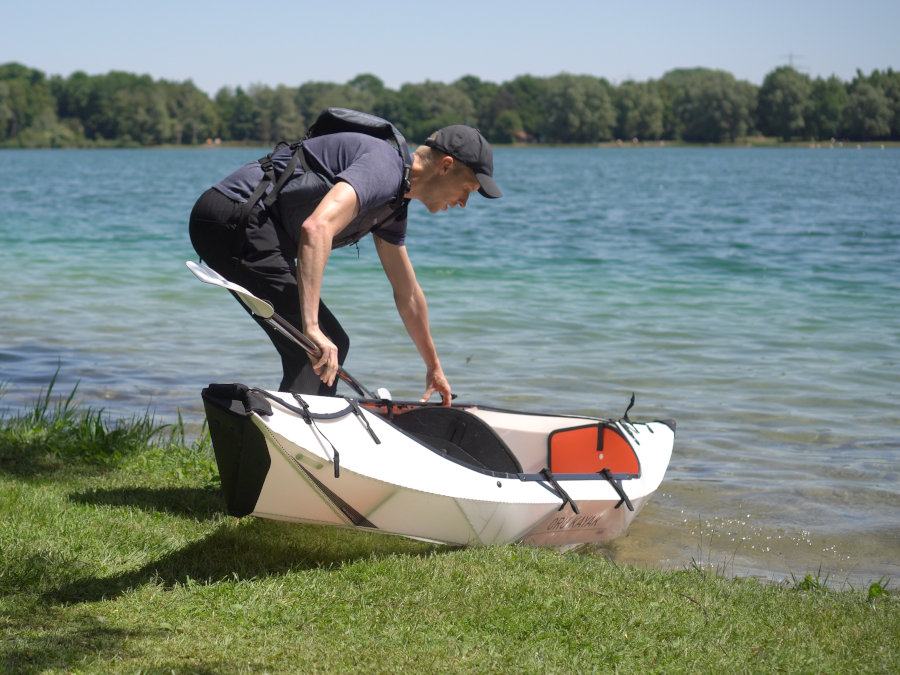
folding kayak oru kayak inlet experience
The kayak is very easy to carry

As a beginner and recreational kayak, the boat must also perform well in terms of tipping stability. Thanks to the flat and wide hull shape, the Oru Kayak Inlet is also fully convincing here. The boat feels very stable when getting in and out of the water and we never once had the feeling that we would capsize while paddling.

However, if you are used to paddling with inflatable kayaks, which are very stable on the water due to the wide side tubes and every hasty movement is balanced out immediately by the side tubes, you will have to get used to it a little. In the Oru Kayak Inlet, you notice the movements much more, but you soon realize that it is very difficult to reach the tipping point with the boat. Because once you lean to the side, you realize how well the boat is balancing it out
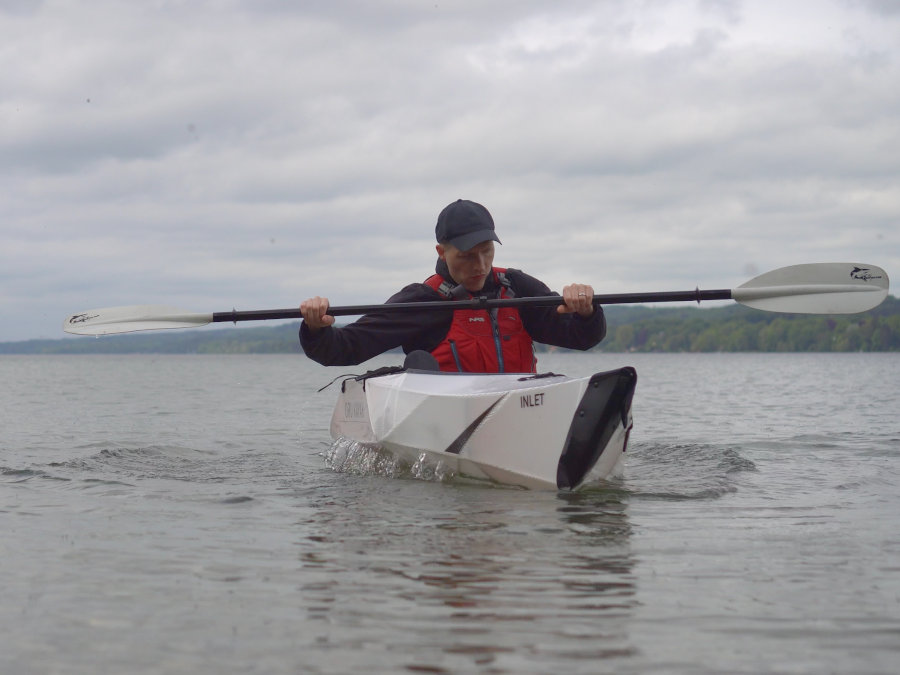
oru kayak tipping stability
The Oru Kayak Inlet is very stable against tipping

However, you should not forget that a very stable kayak cannot be the fastest kayak and that you have to compromise on performance on the water. But that should be fine for a recreational kayak.

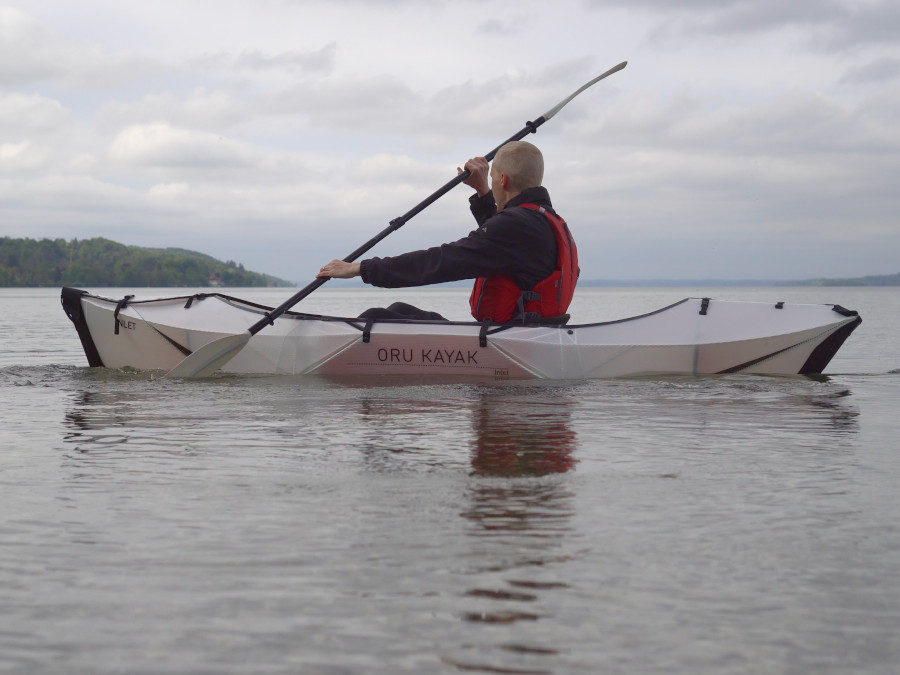
However, the exciting question is how good the balance is between tipping stability and driving characteristics. And with the Oru Kayak Inlet, the folding boat technology pays off. Although the boat is quite short, thanks to its design it sits very nicely in the water and can make good use of its hull length. The shaped ends of the bow and stern also ensure good handling characteristics. This means that the kayak accelerates well for its length of just 9’8” (295 cm).

Typical for the dimensions of the kayak (short and rather wide) is the very good maneuverability. This means that the boat can be turned very easily and just a few paddle strokes are enough to change course. For us, this makes the kayak also a good choice for calm rivers that have sufficient draught but can also be narrower at times. The straight-line stability is also impressive, even without a fin. The kayak holds its course well and even if you stop paddling, it doesn’t immediately drift to one side.
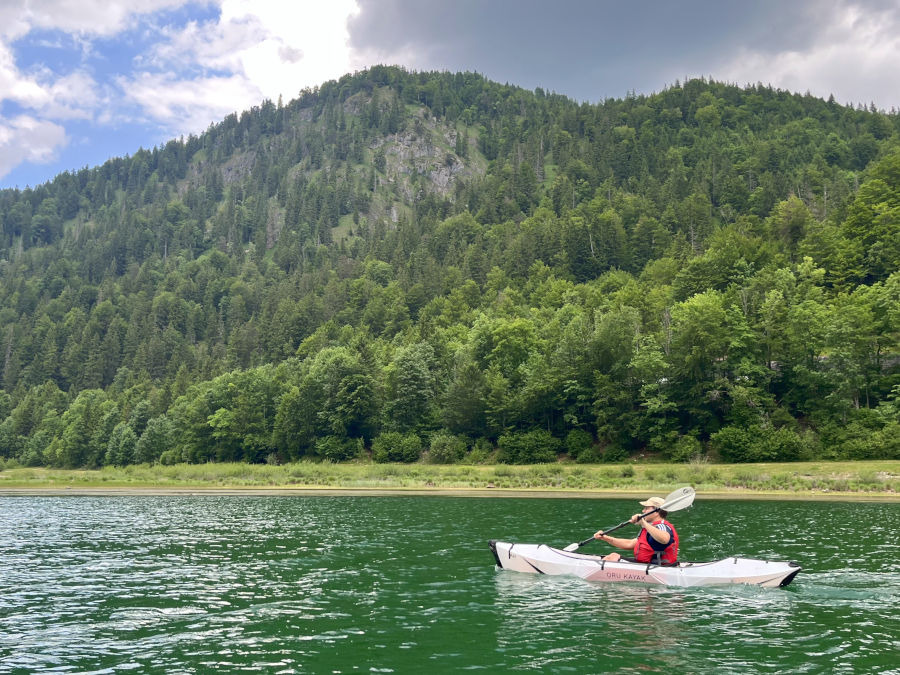
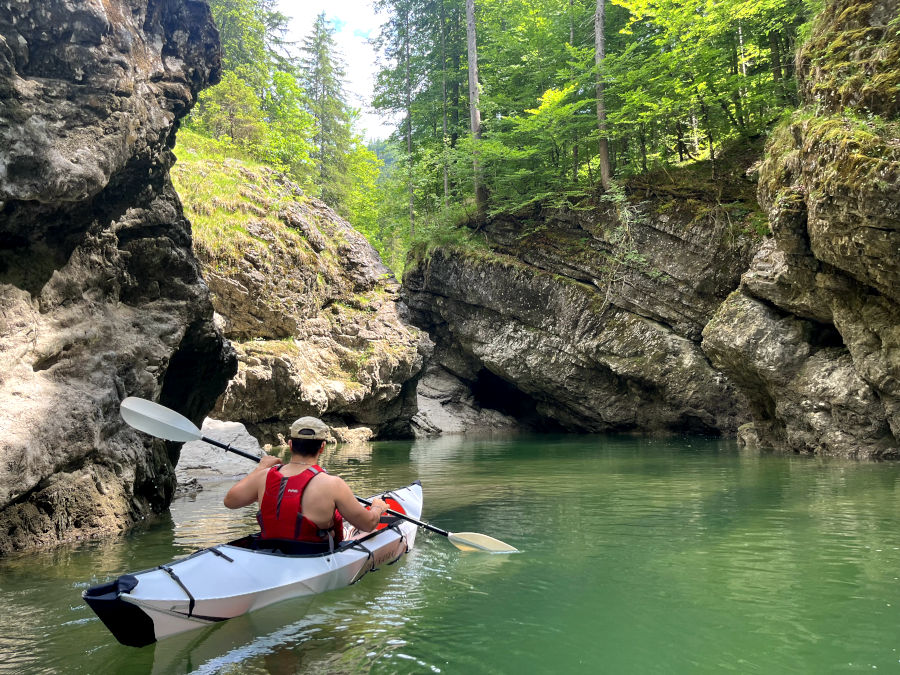
oru kayak inlet test
The boat is great fun for recreational use
oru inlet folding kayak test
The kayak is very maneuverable
oru kayak review
The kayak also has a good straight line chracteristic

Overall, we would attest to the kayak’s good driving characteristics and solid speed for recreational use. You shouldn’t expect any speed miracles from such a boat. If you want to be sportier and faster on the water, you should take a look at the Oru Kayak Beach LT or Bay ST, for example, which are significantly longer and narrower and can therefore perform even better on the water.

However, due to the wide cockpit opening at the bow, some spray water quickly gets into the boat. In a good swell, the front canopy would not keep much water out. And even if you paddle longer tours, depending on your paddling technique, some water quickly collects in the boat. The flat seat cushion means you can quickly end up sitting in the water. This may not be a problem in summer when paddling in swimwear, but otherwise it can be annoying. Here we recommend using the additional seat pad from Oru Kayak. This allows you to sit a little higher and not get wet so quickly. If Oru Kayak had made the cockpit opening smaller, the model would look too much like the manufacturer’s other models and lose its recreational character. The design decision is therefore understandable, but you should be aware of the disadvantages.
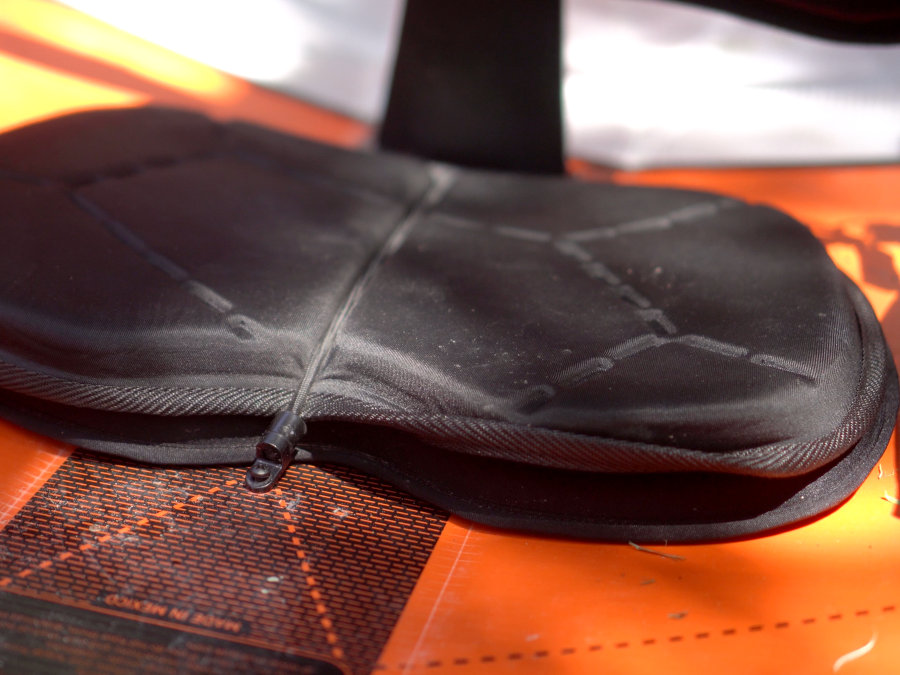
oru kayak inlet comfort
Thanks to the optional seat pad, you won’t get wet quickly

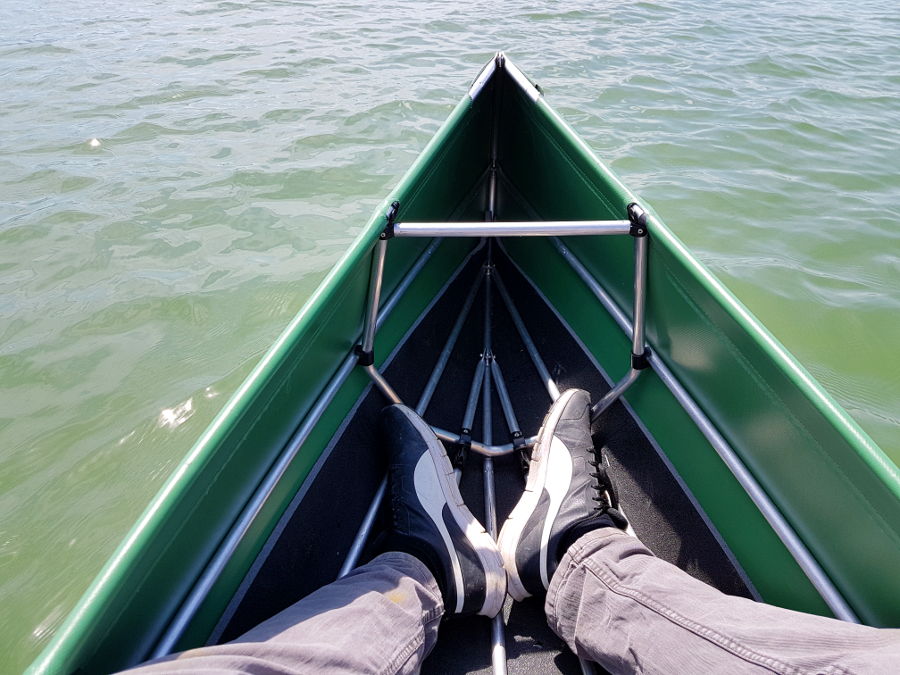
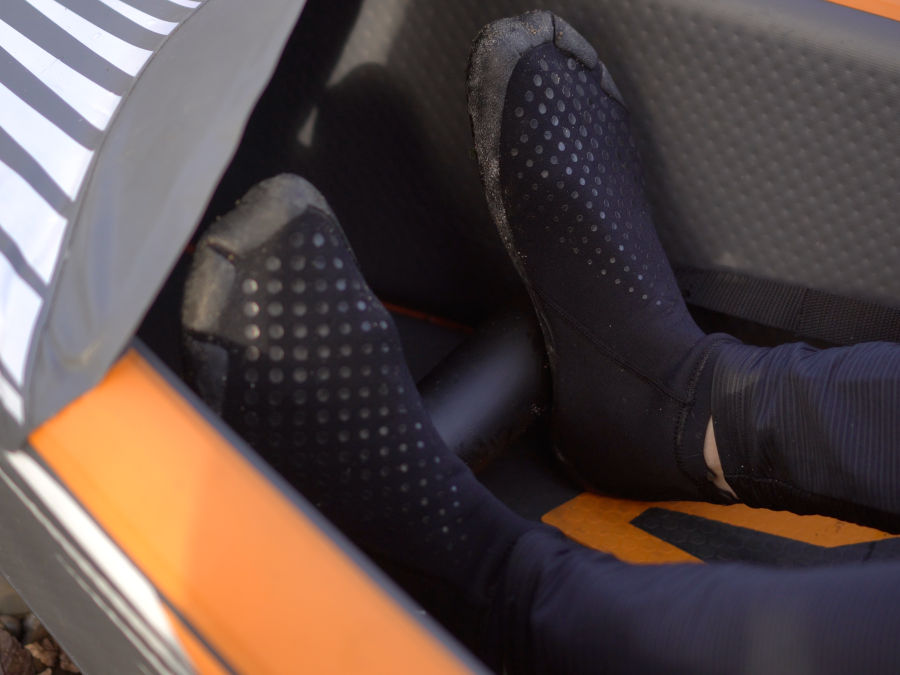
In addition to the handling characteristics and tipping stability, the space and seating comfort are of course also crucial for a recreational kayak. As mentioned at the beginning, the position of the seat cushion is fixed. However, as the footrest is variably adjustable, the interior also offers enough space for tall paddlers, as it can be adjusted according to the space required.
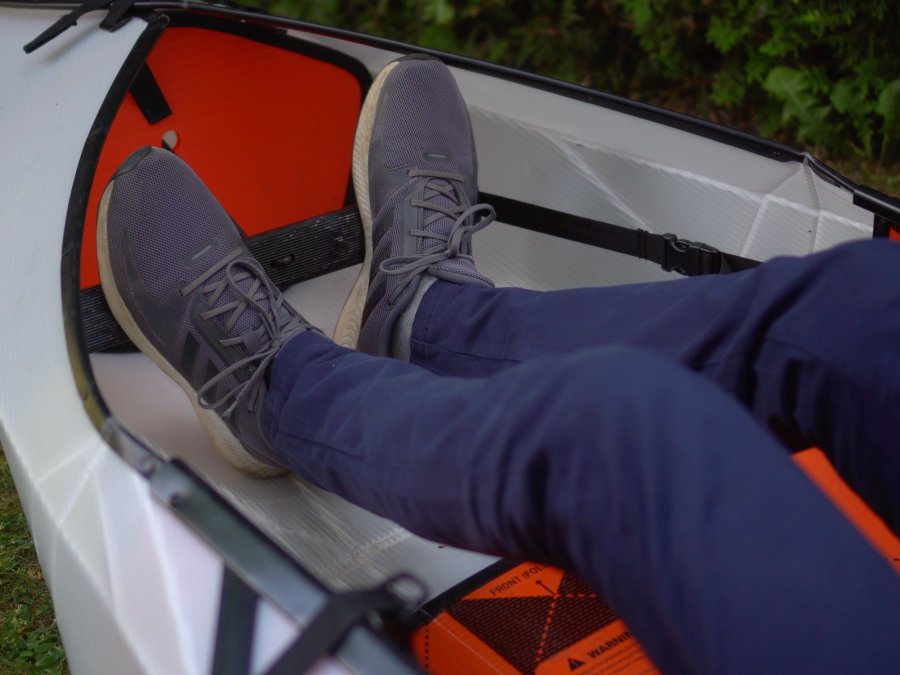
oru kayak legroom
The Oru Kayak Inlet also offers enough legroom for tall paddlers

The manufacturer recommends the inlet for people with a maximum height of 6’2” (188 cm). This is a good guideline, but we believe that you can also be a little taller for the boat. In the end, the decisive factor here is probably not only your overall height, but also the length of your legs.

The boat not only offers sufficient space for the paddler in length, but also in width. It is even possible to sit cross-legged and paddle. I even paddled in the Oru Kayak Inlet with my daughter. I was able to sit her between my legs and we sat very comfortably and I was able to paddle without any problems. I folded a towel several times so that she could sit on it without immediately getting wet if splash water collected inside. I can well imagine that some dog owners (depending on the size of the dog) who would like to take their four-legged friend paddling with them will also make a good decision with the Oru Kayak Inlet.
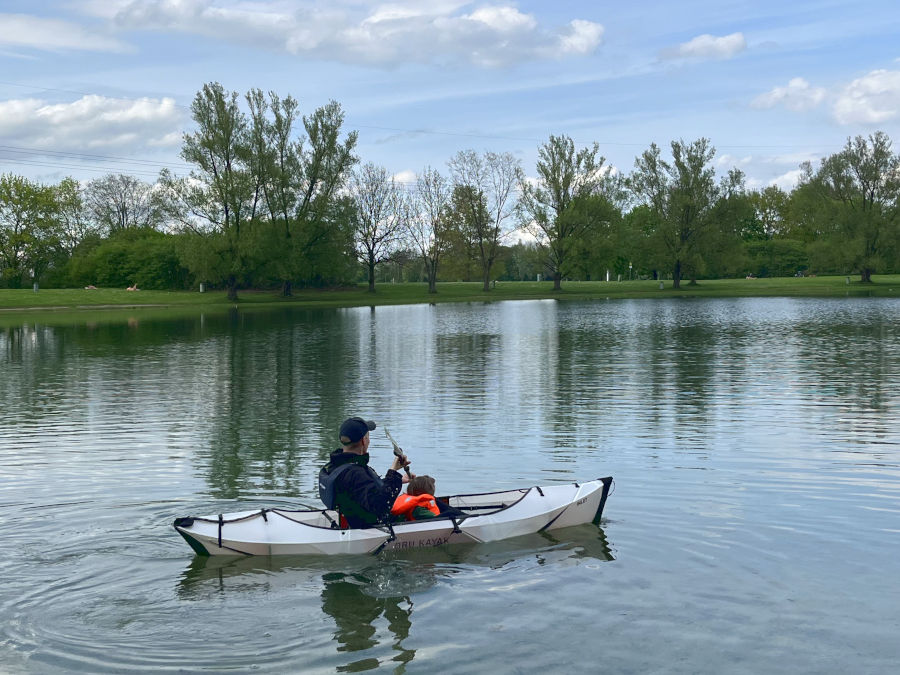
oru kayak paddling with child
It is possible to take a small child with you without any problems

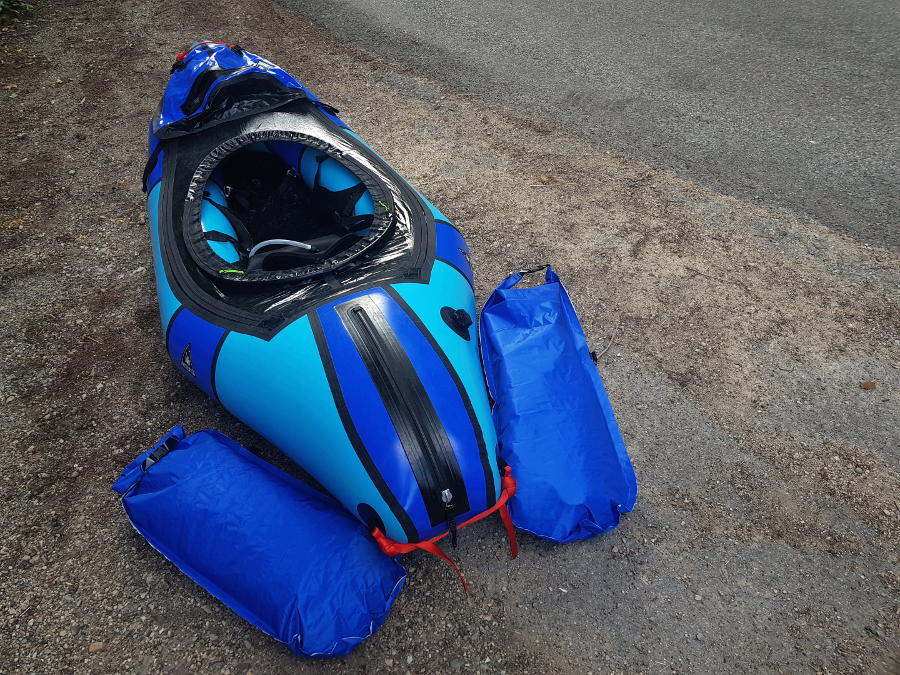
In terms of space for luggage, the options are rather limited. There is still enough space behind the seat for a small to medium-sized dry bag. However, there is no more space or options for stowing luggage. Therefore, you won’t be able to go on multi-day trips with the kayak, only day trips. But that’s perfectly fine for a recreational kayak. Nevertheless, a small luggage net on the bow would have been very practical. This would have made it possible to attach a small dry bag so that you could easily access important items while paddling.

Disassembly the Oru Kayak Inlet

Dismantling the boat is just as easy as setting it up, if not easier and faster. This is because no great effort is required to dismantle the boat. You open the buckles, take out the bow and stern plates and remove the seat system and footrest. The kayak is then folded back into a bag and secured with the buckles so that it stays in shape.

It is definitely advisable to wipe the boat dry with a towel after paddling. As the boat is unfolded, this is also very easy to do as, unlike a conventional rigid-hull or inflatable kayak, you have no problem getting into any hard-to-reach corners or tight places. At home, I always open the buckles so that the boat is slightly open and even the last bit of water has a chance to dry off.

Strengths and weaknesses of the Oru Kayak Inlet

The greatest strength of such an original kayak is undoubtedly the combination of good handling characteristics, easy transportability as a foldable bag and uncomplicated assembly and disassembly. The only major disadvantage of the boat is that water quickly collects in the interior and the low seat cushion means you quickly end up sitting in the water. However, this can be remedied with an additional seat pad. All other weaknesses are more due to the construction of a leisure kayak and do not carry too much weight in the overall rating.

Advantages

very easy to assemble and disassemble + low boat weight + can be carried as a bag when folded + well thought-out concept and details + robust material + good workmanship + good legroom + good driving characteristics for a recreational kayak + good tipping stability + wide cockpit opening allows easy entry and exit + good seating system + very good footrest

Disadvantages

high-priced entry-level kayak – little splash protection due to wide cockpit opening – no possibility to attach luggage to the canopy at the bow and stern – thin seat cushion offers little protection against water in the boat – large pack size compared to other portable 1-seater kayaks

Conclusion on the Oru Kayak Inlet

The Oru Kayak Inlet is a successful recreational kayak for beginners but also for experienced paddlers who are looking for a portable and lightweight second boat for an uncomplicated and leisurely paddle tour on an afternoon. The manufacturer keeps all its promises with this boat. The rather annoying disadvantages of rigid hull kayaks (high transportation costs and high space requirements for storage), typical folding kayaks (high weight, time-consuming assembly and disassembly) and inflatable kayaks (compromises in driving characteristics and high susceptibility to wind) are eliminated with the origami kayak. The Oru Kayak Inlet really impressed us in recreational use and gave us a lot of fun on the water. Anyone who is prepared to spend around €1000 on such an innovative boat in the recreational segment will certainly not be disappointed in the end. Above all, it is a recommendation for all those who have held back from buying a portable boat due to the disadvantages of other boat types mentioned above.
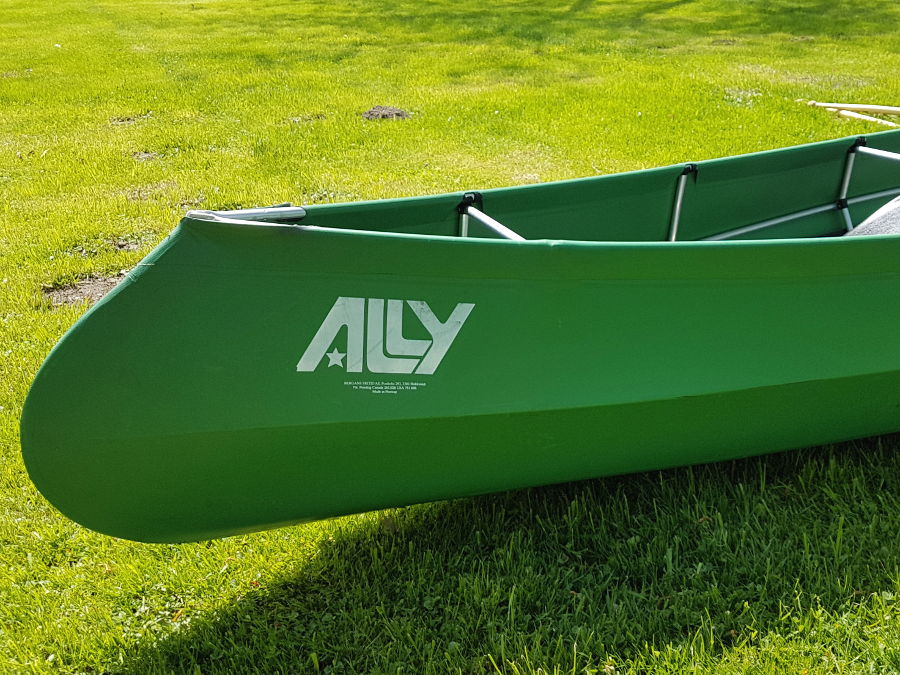
Ally 16.5 Canoe Review

The Norwegian outdoor manufacturer Bergans, which owns the Ally brand, promotes the Ally 16.5 DR as the world’s best-selling folding canoe. Anyone who has ever been paddling in Norway will certainly have seen an Ally boat on the water. There the Ally canoes are very popular. We had the chance to paddle an Ally canoe at a boat fair and can say in advance that we had a lot of fun paddling the canoe.

ally canoe 165

Technical Specs

Max. paddlers:
Length:
Width:
Capacity:
Packed size:
Material:

2
500 cm | 16’4”
90 cm | 3′
380 kg | 838 lbs
110 x 42,5 x 50 cm | 3’6” x 1’4” x 1’6”
fiberglass reinforced PVC (boat skin)
aluminium (frame)

Weight:
Produced in:

20 kg | 44.1 lbs
Norway

Which model has been reviewed?

Ally 16.5 DR from 2020

How did we organize the review?

The review was created in the context of an outdoor fair.

How intensively has the product been tested?

low

high 1 bar = 1-3 km paddled (first impressions)
2 bars = min. 1 day/ 2 half-day tours
3 bars = min. 4 tours
4 bars = min. 8 tours
5 bars = min. 12 tours (very intense)

Where have we tested the product?

Whitewater

Calm rivers

Lakes

Table of Contents

First impressions and assembly

Since we have reviewed the boat in the context of a boat show, we could not assemble and disassemble it ourselves. Therefore, we can not provide our own experience here. The information about the assembly is based on research and the exchange with the manufacturer. According to the manufacturer, it takes about 25 minutes to set up. At the beginning, however, you will have to plan considerably more time. Especially with new Ally boats, the aluminum tubes do not yet go into each other so easily and that is why a rubber mallet is also included.

The Ally 16.5 consists of a total of 4 parts: Boat skin, foam floor, plug frame frame and seats. The boat skin is made of glass fiber reinforced PVC coated material. This is said to be particularly resistant and UV-resistant. Nevertheless, the boat skin can be damaged by razor-sharp stones or very sharp branches. In general, however, the material can withstand a relatively high level of stress. In the case of minor to medium damage, it can be repaired even with the included repair kit.

ally boat
The design of the Ally looks modern and sporty

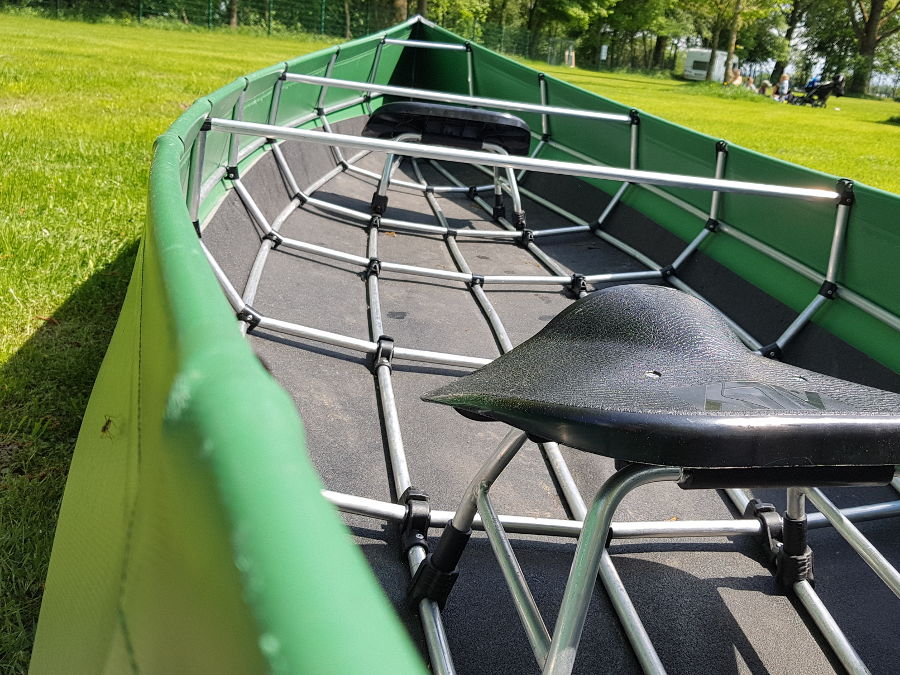
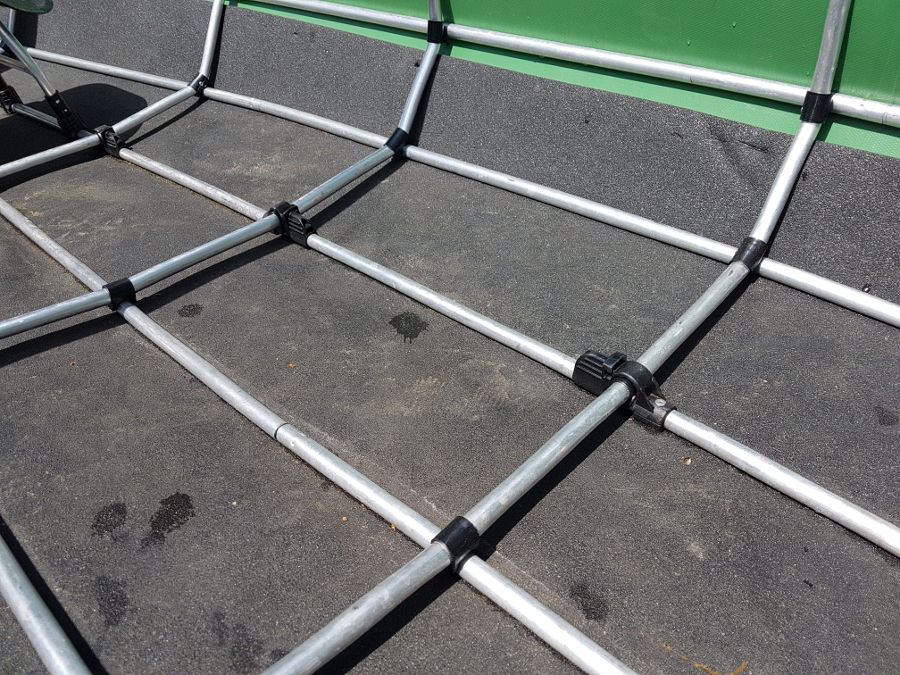
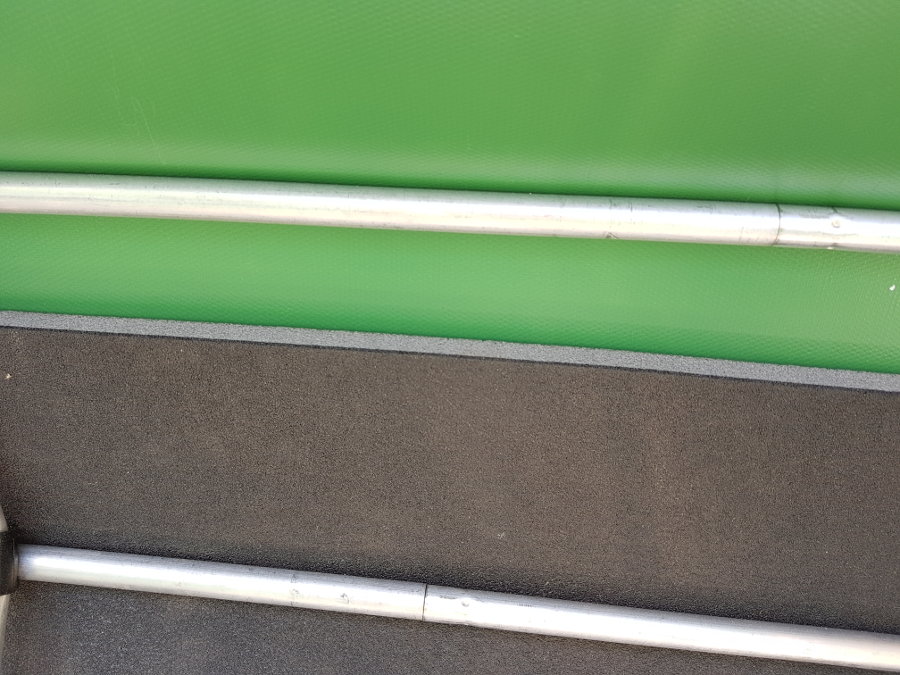
The foam floor, which is placed between the plug-in frame and the boat skin, provides the necessary buoyancy. The aluminum poles are simply plugged together using a rubber cord inside, just like tent poles. The cross braces are attached to the longitudinal poles via plastic click fasteners.

ally folding canoe
The canoe is stretched by a plug-in frame
folding canoe floor
Longitudinal and transverse struts are connected by click fasteners
ally canoe material
The foam floor provides the necessary buoyancy

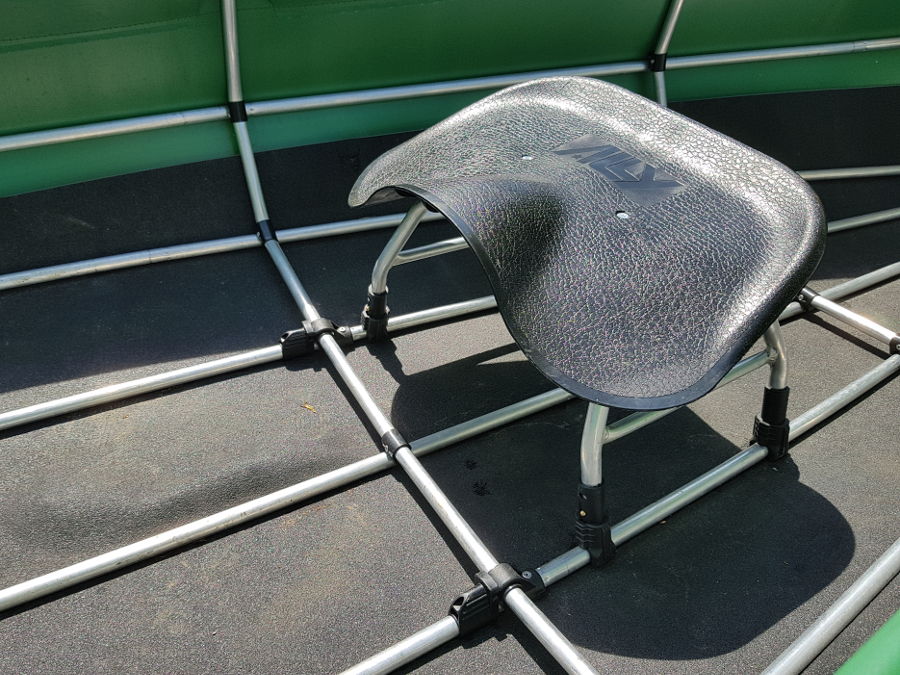
At the click fasteners then also come the seats. These are not only adjustable in height and inclination, but can also be flexibly placed inside the boat. They are not only hooked into the interior of the boat, but are firmly locked to the frame, which in any case provides more seating stability.

The boat is ideally paddled by 2 people, which makes it easiest to paddle and still leaves plenty of room for luggage. Experienced paddlers can also paddle canoes solo without any problems. For this, you simply mount one seat less in the boat. In the scope of delivery are only 2 seats, but by buying another seat it can also be paddled by 3 adults. For families, the canoe is also suitable, because it can accommodate 2 adults and 2 children without any problems. Even in this combination, enough luggage can still be taken along. It is amazing how much can be stowed in the bow and stern alone.

ally canoe 165 review
The seat are fixed to the floor
ally folding canoe
The seats are adjustable in height and inclination

The keel line of the boat is only slightly curved, which allows the manufacturer to promise good straight running characteristics. It should always be taken into account that the boat with the best straight line cannot be the most maneuverable boat. Nevertheless, thanks to the collapsing bow and stern, the boat has a pretty good maneuverability.

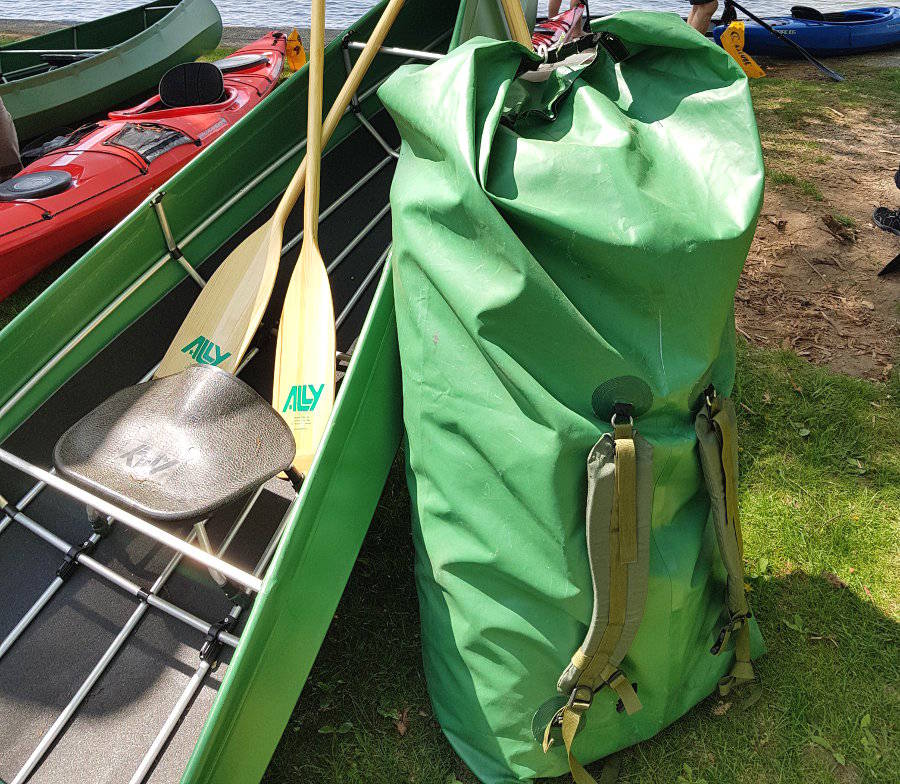
Included with the boat is a backpack for transporting and storing the boat. The padded shoulder straps and chest strap definitely make it easier to carry. Nevertheless, the boat weighs 20 kg and at least paddles and life jackets must be added as equipment. This is a weight that should not be underestimated, as we also found out when we put it on for a test run. Short tours on foot should not be a problem. Longer walks with the backpack, however, would undoubtedly be quite energy-sapping and sweaty.

ally canoe backpack
The scope of delivery also includes a backpack for transport and storage

Review of the Ally 16.5 canoe on the water

Right from the start, we immediately noticed the low weight of the assembled boat, which is very comfortable to carry and also easy to put in the water from landing stages. Due to the frame of aluminum tubes in the interior, you can quickly ask yourself whether you have to be particularly careful when entering the boat, for example, not to step on the connectors. However, this concern is unjustified, because you can step anywhere in the boat without any problems.

We paddled the boat in good conditions, sunny and little wind, which is actually how you imagine the perfect day for a paddling trip.

We really enjoyed paddling the Ally 16.5 DR on the lake. You are immediately amazed at how good the handling characteristics of a folding boat can be. Thanks to the only slightly curved keel line, we also had no problem getting the boat in a good straight line. The big advantage over inflatable canoes, besides the better handling characteristics, is undoubtedly the better executability of the paddling technique. With classical inflatable canoes, you have the wide side tubes where you can’t use the paddle as close to the boat and accordingly have to adjust your paddling technique a bit.

ally boat experience
The driving characteristics of the Ally were really convincing

After a few powerful paddle strokes, we were not only positively surprised at how quickly the boat picks up speed. Although the Ally Tour 16.5 is not the fastest model according to the manufacturer, we had the impression that we could travel faster with the boat than with a rigid hull canoe.

Even in small or larger waves, you are on the safe side with a folding canoe. Due to the flexibility of the hull, the boat literally winds over the waves without really losing shape. Especially in white water you would not have the classic impacts in the stern and bow. As a result, less water gets into the inside of the boat than in any solid hull variants, and it stays dry longer even in stronger swells. Another advantage that arises here is that strong movements in the boat are not immediately transferred completely to the end and the boat remains quite stable. This is especially advantageous if you have your dog or children to sit in front.

ally canoe 165 hull
The driving characteristics of the Ally were really convincing

The Ally Tour 16.5 with a length of 5 m will never be as maneuverable as a 2 m whitewater kayak. When we paddled the Ally, we already noticed that the canoe takes a little time to react. Still, it is relatively maneuverable for a canoe. Since the maneuverability is largely determined by the keel jump, the folding boat can be influenced by the seating position and loading. In whitewater, you should therefore load the middle of the boat in order to have a stronger keel jump. When paddling on lakes, you should distribute the luggage evenly in the stern and bow in order to have a straight keel line and thus benefit from optimal straight running.

Since the maneuverability is largely determined by the keel jump, the folding boat can be influenced by the seating position and loading. In whitewater, you should therefore load the middle of the boat in order to have a stronger keel jump. When touring on lakes, you should distribute the luggage evenly in the stern and bow in order to have a straight keel line and thus benefit from optimal straight running.

Especially in stronger winds, the boat would offer a large attack surface and limit maneuverability and speed. It makes sense here to purchase spray covers that also protect you in the rain. Because just with a large Canadian you will probably undertake tours lasting several days, where you can not completely assess the weather beforehand.

The makers of Lappland-Tour.de are also on the road with an Ally Tour 16.5 and give in an article interesting tips to improve the durability. It is also positive that spare parts can be reordered from the manufacturer.

folding canoe
The Ally 16.5 DR makes a high-quality impression both visually and on the water

Strengths and Weaknesses

The great strength of the Ally Tour 16.5 are its driving characteristics and its flexible use. If you are willing to invest more for a high-quality folding boat and have patience for the assembly, especially in the beginning, you will not find many other disadvantages of the boat.

Advantages

very good driving characteristics + suitable for both lakes and white water + stable construction + variable seating positions + plenty of space inside + also suitable for tours lasting several weeks + backpack already included in delivery

Disadvantages

– high purchase price – time-consuming assembly – new Ally boats are tough to assemble – sharp tube ends – boat with little load is quite susceptible to wind

Conclusion on the Ally 16.5 Canoe

Ally canoe is exactly the right choice for those who have neither car for transportation nor enough space at home to buy a rigid hull boat, but still want to enjoy the canoeing hobby. Thanks to the folding technology, Ally canoes have very good stiffness and come very close to the driving characteristics of a rigid hull boat.

The boat is ideal for longer trips with a lot of luggage on lakes as well as on calm to wild rivers. Classical use cases of such a canoe are for example for tours in remote areas. For the small afternoon tour, however, certainly the more time-consuming assembly and disassembly is a disadvantage to consider. Here, potentially interested buyers should also inform themselves about the inflatable alternative of other manufacturers. These do not have quite as good driving characteristics as folding canoes, but they are much faster and easier to assemble.

In any case, the boat convinced us of its behavior on the water and we are sure that we would like to paddle it again in the future.

Advanced Elements AdvancedFrame Ultralite Review

advanced elements ultralite kayaking tour

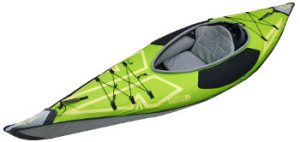
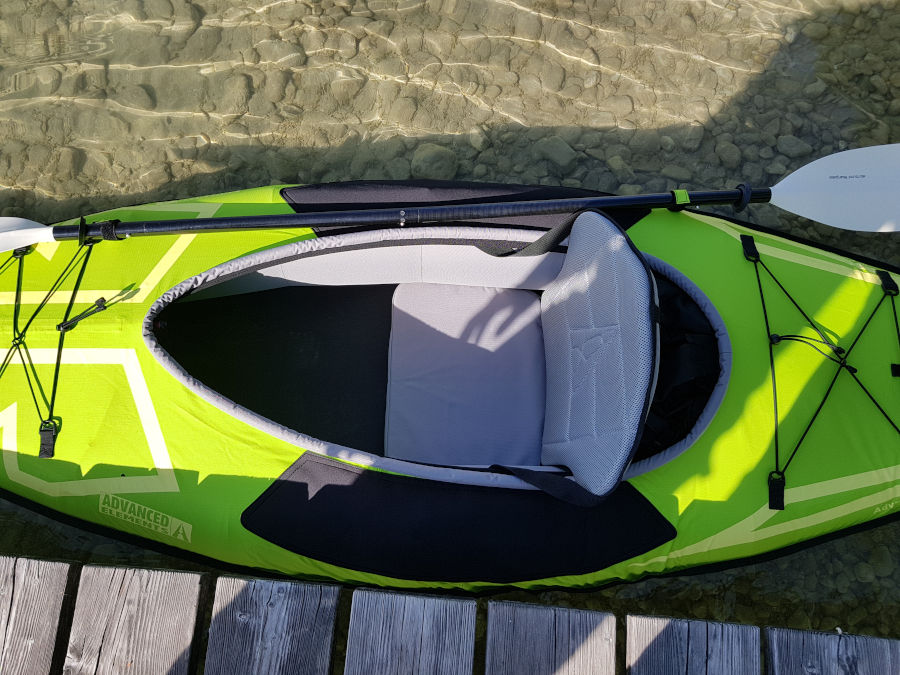
The AdvancedFramce Ultralite of the American brand Advanced Elements is a very light and compact 1-person kayak. The manufacturer is known for its inflatable kayaks with particularly good driving characteristics. How well the Ultralite kayak performs on the water and whether it convinced us as a kayak, we tell you in the following review.

advanced elements advancedframe ultralite

Technical Specs

Max. paddlers:
Length:
Width:
Capacity:
Packed size:
Material:

1
318 cm | 10’4”
81 cm | 2’7”
102 kg | 225 lbs
79 x 45 x 15 cm |
2’6” x 1’5” x 5”
ripstop fabric (deck)
polyurethane Tarpaulin (floor)
polyurethane (chambers)

Weight:
Pressure:
Produced in:

7.2 kg | 15.9 lbs
0.12 bar | 1.7 PSI
China

Which model has been reviewed?

Advanced Elements AdvancedFrame Ultralite from 2020

How did we organize the review?

The Advanced Elements AdvancedFrame was provided to us by OutEquip, the European distributor of Advanced Elements. Our review is independent of the manufacturer or distributor and reflects our own opinion of the boat.

How intensively has the product been tested?

low

high 1 bar = 1-3 km paddled (first impressions)
2 bars = min. 1 day/ 2 half-day tours
3 bars = min. 4 tours
4 bars = min. 8 tours
5 bars = min. 12 tours (very intense)

Where have we tested the product?

Whitewater

Calm rivers

Lakes

First impressions and assembly

In the past, we had already tested the classical AdvancedFrame kayak from Advanced Elements and have often been on tours with it. It has convinced us of its driving characteristics and the quality of workmanship very much. However, the high weight and the large pack size for a 1-person kayak was a pain point for us. This was probably the case for many other paddlers who do not only transport the kayak in the trunk of the car. It is precisely for this target group that the manufacturer offers its AdvancedFrame kayak in a lighter version, which weighs more than half less. In order to be able to compare both boats with each other, we also had the classic AdvancedFrame with us during the review and could thus compare it directly on the water.

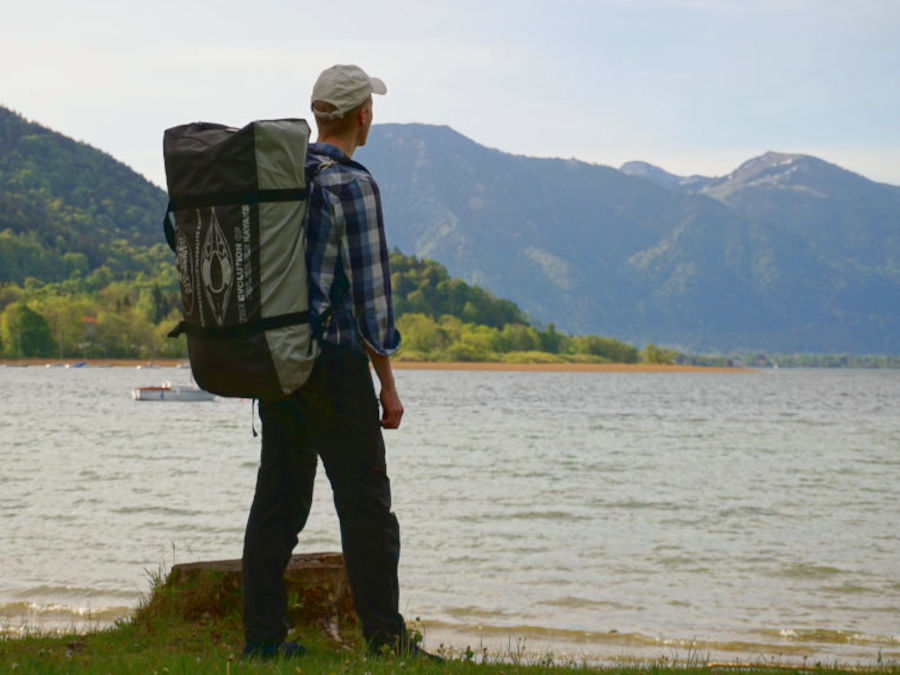
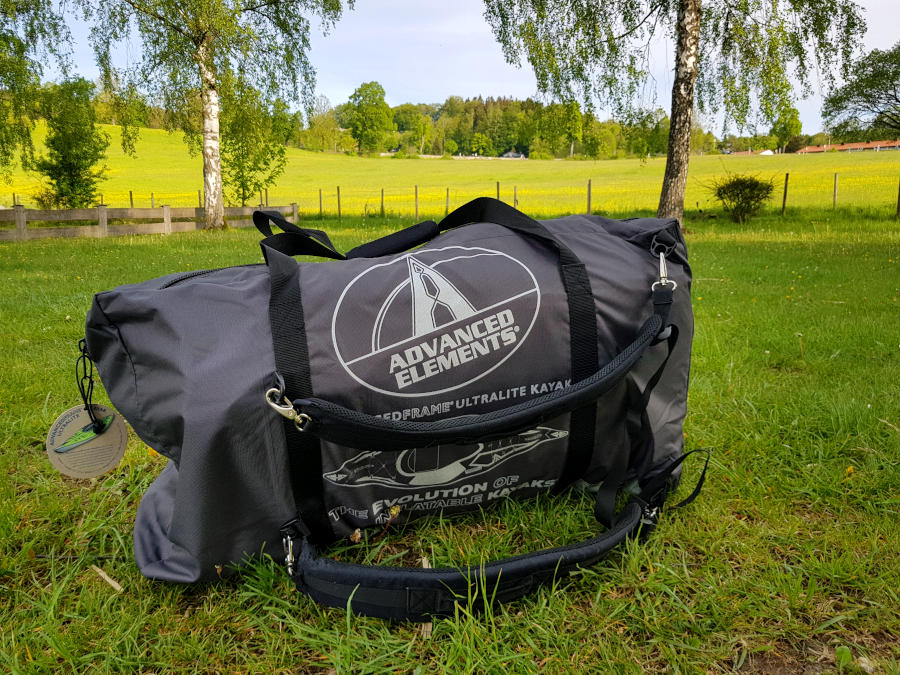
The first difference is already noticeable in the bag. The Ultralite version not only has carrying handles, but also shoulder straps, so that the bag can be carried on the back. The AdvancedFrame Convertible Elite 2-person kayak also comes with such a bag, which we have used very often. At first glance, it seems practical that you can remove the shoulder straps via carabiners, but that’s exactly where the weak point lies. The carabiners lie exactly on the shoulders and when carried for a long time, this is disturbing or even painful./

inflatable kayak advanced elements backpack
A suitable transport backpack is already included
backpack kayak advanced elements
The bag can be carried by hand as well
advanced elements ultralite setup
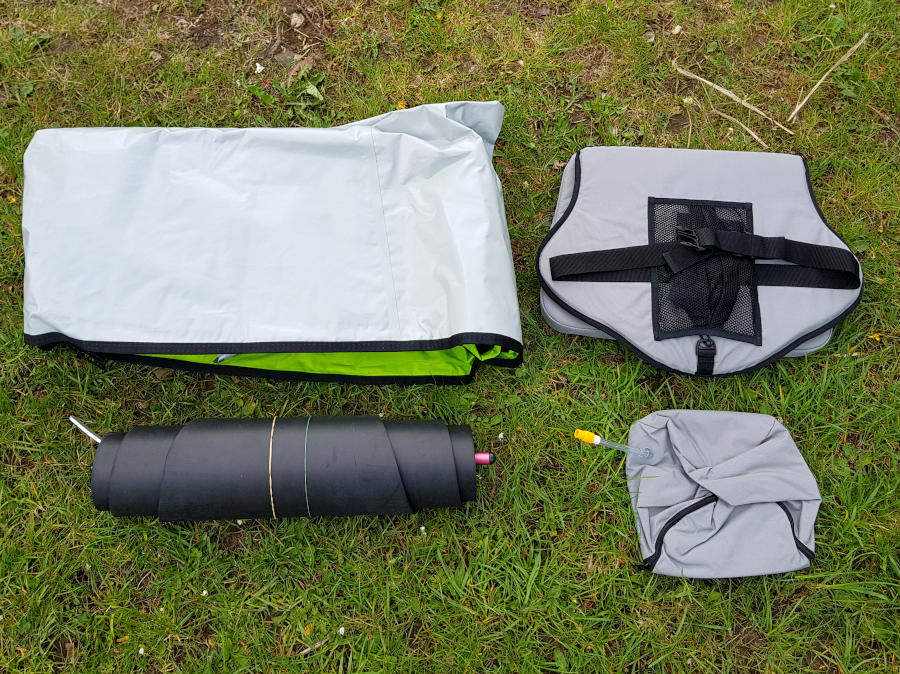
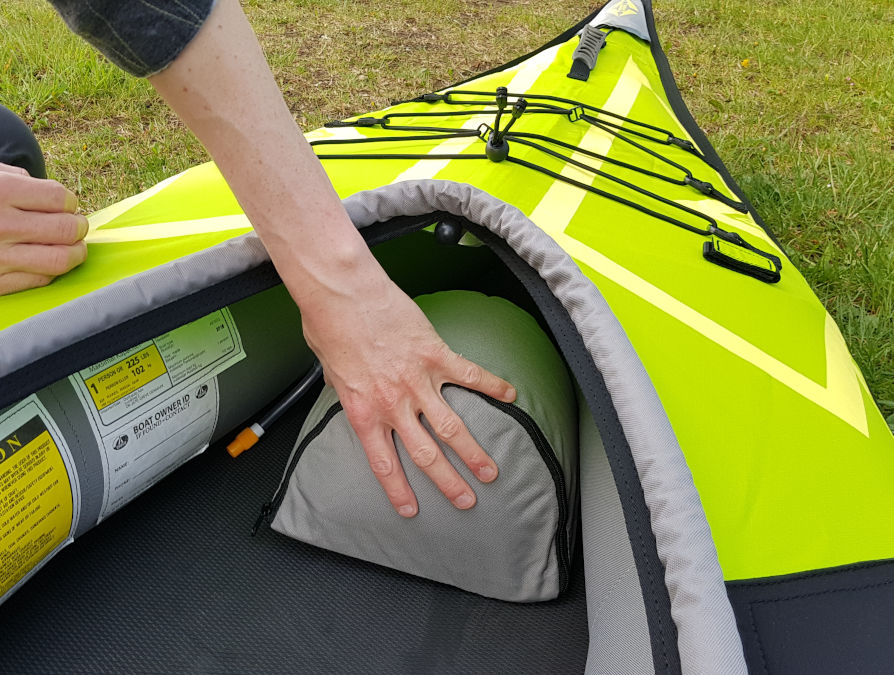
Boat, foam floor, seat and foot brace

Nevertheless, we also know that many other manufacturers do not even include a bag with a backpack system, but only a small carrying bag. Therefore, a bag designed for the boat is a big plus if it is already included. The bag itself contains the boat, the seat, the inflatable foot brace, the foam floor and two small aluminum elements to stretch the front deck. There is also room for paddles and an air pump for inflatables in the bag, but these must be purchased separately.

advanced elements advancedframe construction
Built-in aluminum ribs define the bow and stern
advancedframe ultralite material
The material is significantly thinner than that of the classic AdvancedFrame

In order to achieve a weight saving of almost 10 kg for the boat, the manufacturer must have worked on the materials. For example, the deck is made of a 300D ripstop fabric instead of a 600D ripstop fabric.

When unpacking, we also notice that the boat skin is clearly thinner than compared to the classical AdvancedFrame kayak. However, the boat skin is definitely much more robust than that of inexpensive entry-level inflatable kayaks (e.g. Intex or Sevylor).

A second big weight saving comes from the floor foam. Typically, most Advanced Elements boats have an additional air or drop-stitch chamber for the floor. However, the Ultralite uses a floor foam that strongly resembles a yoga mat. This is rolled out and inserted into the kayak floor. To do this, you lift the side chambers a bit and push them down. By inflating the side chambers, the floor foam finds its hold and can no longer slip. We found the insertion of the floor foam very simple and well designed.

advanced elements ultralite unboxing
The unfolded kayak
advanced elements advancedframe assembly
The floor foam is very easy to insert
inflating advanced elements kayak
The two side chambers are inflated with a pump

To get the boat into shape, the two separate side chambers are inflated. In the classical AdvancedFrame kayaks, there are not two side tubes, but an inner and outer tube. The air tubes are additionally protected by a nylon cover. The side tubes can be removed from the boat for drying or cleaning and in case of repair.

After the two side tubes are inflated, most of the assembly is already done. Then the front deck is stretched by two aluminum elements. The rail is inserted crosswise and the rod is inserted lengthwise under the deck. The stretched deck gives you more legroom, and when you attach luggage to the bow, the luggage doesn’t press the deck down.

advanced elements valve
Valve of the air chambers
advanced elements ultralite kayak deck
Two aluminum elements support the front deck.

Last but not least, the seat is attached to the boat. This can be positioned variably in the boat. Those who are smaller can position the seat further forward and thus have more space behind the seat for additional luggage. Taller paddlers like us, on the other hand, will position the seat as far back as possible to have enough room for the legs. The seat cushion is pressed firmly on the floor under the side tubes. Thus, the seat then lies really firmly in the boat and can not slip while paddling. Finally, the back of the seat is attached to the side tubes by two click fasteners. This makes it very easy to vary the position of the backrest. On the back of the backrest is a small pocket in which smaller items such as sunscreen and co. find space.

advanced elements ultralite seat
The backrest is attached to the side tubes and can be adjusted individually
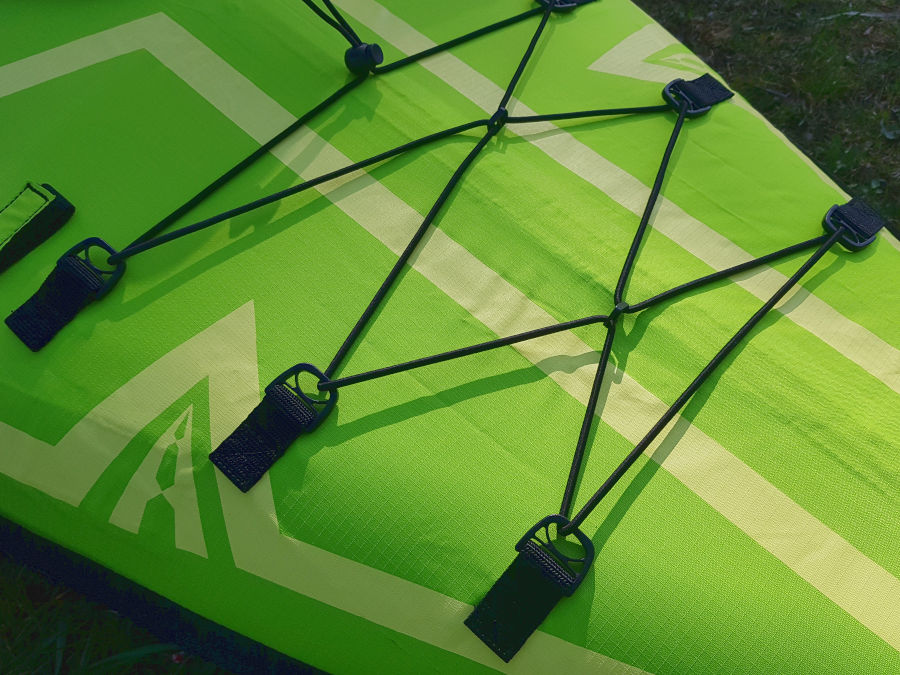
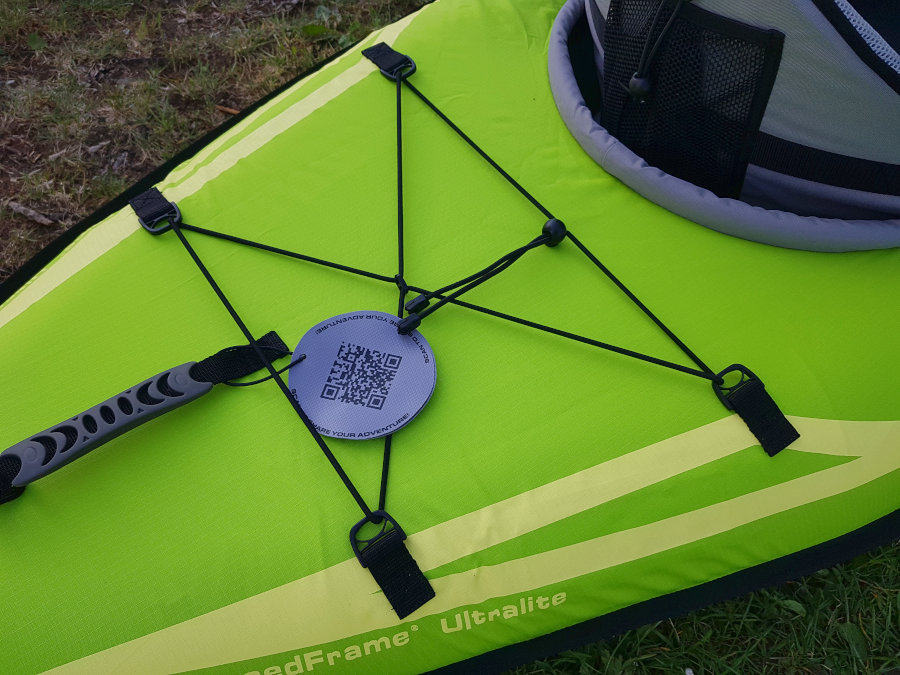
advanced elements deck bungee net
On the bow is a bungee lacing for luggage
inflatable kayak deck
There is also a smaller bungee lacing on the stern

We also really like the bungee lacing on the stern and bow. This makes it very easy to attach luggage and equipment to the boat and everything is quickly at hand. The manufacturer did not include a zipper on the front deck. This would allow quick access to the inside of the boat for cleaning and drying. However, when paddling the other AdvancedFrames with bow zipper, we found that they are water-permeable. Thus, in stronger waves often came a little water into the boat interior. With the Ultralite, this can no longer happen.

The included footrest is inflated by mouth and can be pushed under the deck into the bow. Of course, it is not obligatory to use it, but we are curious how it can be paddled with this foot brace on the water.

The foot brace and placed under the deck
inflatable kayak foot brace
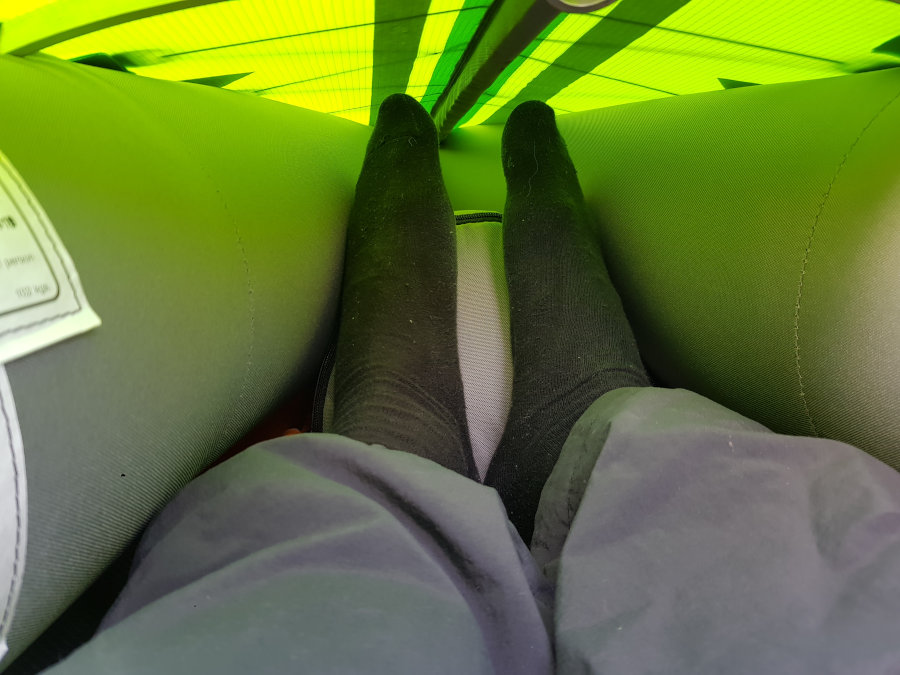
The foot brace is also well suited for tall people.

After the boat is fully assembled, let’s take a look at the bottom. For an inflatable kayak, the bow and stern are very nicely shaped. By using the aluminum ribs in the bow and stern, the ends of the kayak are very pointed. This promises good driving characteristics, as the water can thus be cut. A non-removable fin at the stern and a keel strip at the bow should further improve the tracking stability of the boat. The fin is very flat, so that the probability of grounding remains minimal.

advanced ultralite bow
The kayak has a well-shaped bow and stern
inflatable kayak hull
Hull of the kayak
advanced elements boat fin
Non-removable fin at the stern of the kayak

Review of the Advanced Elements Ultralite on the water

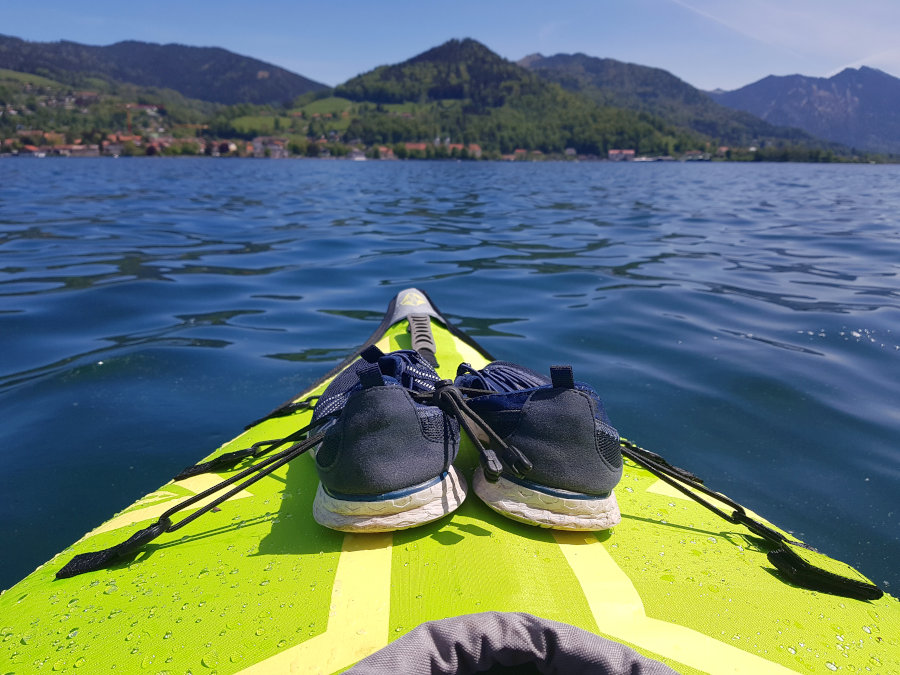
Since the boat is very light, it can be carried to the water without much effort and very comfortably. Just as convenient and easy to get into the boat thanks to the wide opening in the deck. Tall people have no difficulty getting their legs under the deck and thus the entry is not a shaky affair for paddling beginners. The front luggage net is also ideal for fastening shoes or a dry bag right at the start.

advanced elements ultralite
The kayak is very easy to carry to water
ultralite kayak entry
Thanks to the large opening it’s easy to get it
paddling advanced elements boat
The front bungee lacing provides ideal space for shoes

The use of a floor chamber is very common in inflatable kayaks, but it has been replaced by a floor mat in the Ultralite to reduce weight. In our opinion, this is also very well done, because the boat still seems stable and the floor foam also insulates well from the cold. Although we sat barefoot in the boat and the water was very cold that day, we had no cold feet. On the other hand, the very flexible floor makes you feel every little wave or grounding. This may take a little getting used to at the beginning, but we quickly got used to it.

advanced elements kayak comparison
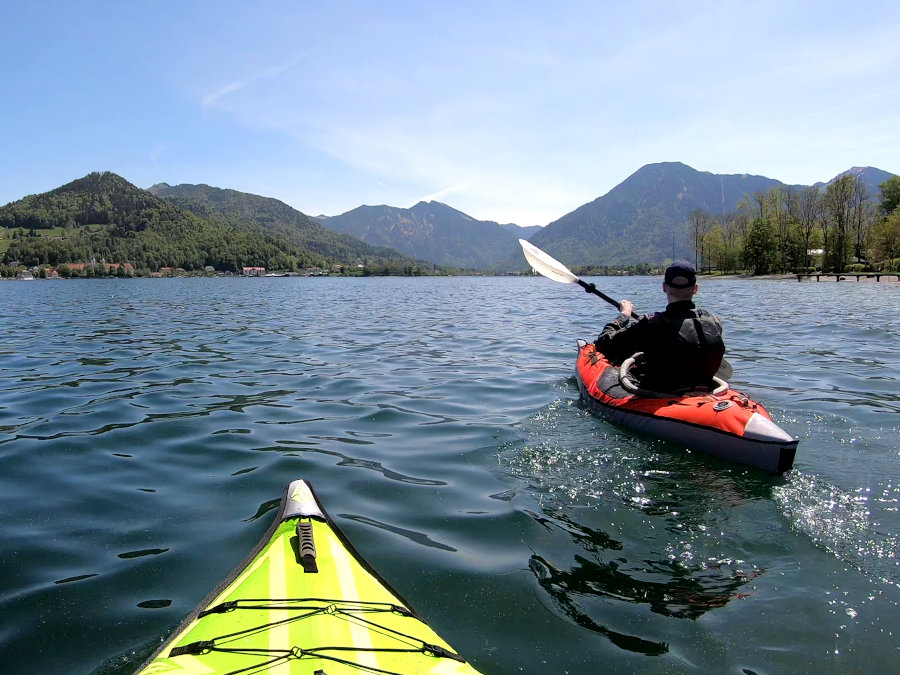
The classical AdvancedFrame is significantly faster with BackBone

In terms of paddling, the AdvancedFrame Ultralite is a lot of fun right from the start. It has the usual good driving characteristics that we are used to from other boats of the manufacturer. It keeps its track well and we move forward quite quickly. During leisurely paddling, we measured a speed of 4.7 km/h (7.6 mph). If you paddle faster, you can reach a speed of up to 6 km/h (9.7 mph). Above this speed, however, a bow wave forms and paddling becomes more inefficient. The maneuverability of the kayak is fine. Course changes are effortless. But a 180° turn requires considerably more paddle strokes.

With the classical Advanced Elements AdvancedFrame with backbone, we reached a speed of 5.5 km/h (8.9 mph) on the same day during leisurely paddling. When paddling fast, we were able to measure up to 7.5 km/h (12.1 mph). We felt it clearly that the Ultralite is slower, but the Ultralite doesn’t feel like a slow boat. If you’re paddling alone and the one km/h more or less doesn’t matter to you, you’ll be happy with the speed. However, if you are paddling with someone else who has a longer kayak, you will have a hard time keeping up.

Compared to the classic AdvancedFrame, the AdvancedFrame Ultralite cannot be upgraded with a BackBone or drop-stitch floor.

kayak
For leisurely lake and river trips with good water depth, the kayak is well suited

Thanks to the closed construction of the kayak, you are well protected from splashing water. However, if a little water gets into the boat, the raised seat cushion pays off. Many kayaks (like the classical AdvancedFrame) use only a thin seat cushion for the seat and thus you sit faster in the wet. The seat is very comfortable even after long paddling and gives very good support. Likewise, we have come to appreciate the foot brace. With the right positioning of the seat and foot brace, you sit very well in the boat.

We see the AdvancedFrame Ultralite primarily for use on lakes and calm rivers with sufficient water levels. The boat is aimed at day-trip paddlers who want to get on the water quickly and easily for a leisurely tour. For ambitious sport paddlers who want to cover a lot of distance or go on multi-day tours, the Advanced Element AdvancedFrame Convertible Elite is recommended, which is longer and therefore faster and offers more space for luggage.

Regarding the whitewater suitability of the boat, the manufacturer specifies whitewater class 2. We haven’t tried that ourselves yet, and wouldn’t. The boat’s skin seems too fragile for that, and in addition, the fin and the front keel strip cannot be removed. If you get stuck with it, the boat skin could get broken.

kayak tour advanced elements
The foot brace supports really well while paddling

Dismantling the kayak

Dismantling the boat is very simple and fast. Simply let out the air and pump out the rest. Then it is folded again and fits in the bag without any problems. In most cases, however, you will not get around to unpack the boat again at home and let it dry. Especially the nylon covers can not be wiped completely dry and need time to dry in the air. You should never store the boat in a wet or moist condition for a long period of time, as this can lead to mold growth.

advanced elements advancedframe air chambers
The air tubes can be removed from the kayak together with the cover

Strengths and Weaknesses

The Ultralite’s greatest strength is its light weight combined with an integrated deck. In addition, it is easy to paddle on the water. In favor of the weight, the boat skin is significantly thinner and only coated on one side, in contrast to the classical AdvancedFrame. On a river trip with rapids, we had the first unsightly scratches in the boat skin. Therefore, the kayak should only be used for tours with sufficient water depth. Another weakness of the boat that cannot be ignored is the long drying time due to the nylon cover. Especially on long tours (a lot of getting in and out of the boat during breaks and portages) and river tours with small rapids, water gets into the boat and the cover gets soaked with water. Good that you can remove the nylon cover with tube, so that everything can dry reasonably.

advanced elements ultralite quality
There are a few scratches on the boat skin
advanced elements advancedframe ultralite cockpit
Soaked nylon cover after a day trip

Advantages

+ very light + very stable against tilting + very useful bungee lacing on bow and stern + comfortable seat and practical foot brace + good workmanship + air chambers are replaceable + good tracking stability + reliable splash protection when paddling in calm waters due to the integrated deck

Disadvantages

– long drying time due to the nylon material -uncomfortable transport bag – boat skin is sensitive to ground contact (thin and one-sided coated boat skin) – no splash skirt can be attached to the seat hatch – large seat hatch lets in a lot of water during rapids and waves – not suitable for heavy persons

Conclusion on the Advanced Elements AdvancedFrame Ultralite

With the Ultralite, Advanced Elements addresses a target group that wants to transport and paddle their boat to the nearest lake or river without a car and without heavy carrying. And the manufacturer has succeeded in this, as long as there is sufficient water depth. We don’t consider the Ultralite kayak suitable for whitewater and shallow rivers with a lot of grounding. If you keep this in mind, you can have a lot of fun on the water with the kayak and will appreciate the good driving characteristics considering the low weight. For small or even extensive day trips, the Advanced Elements Ultralite is a very good choice.

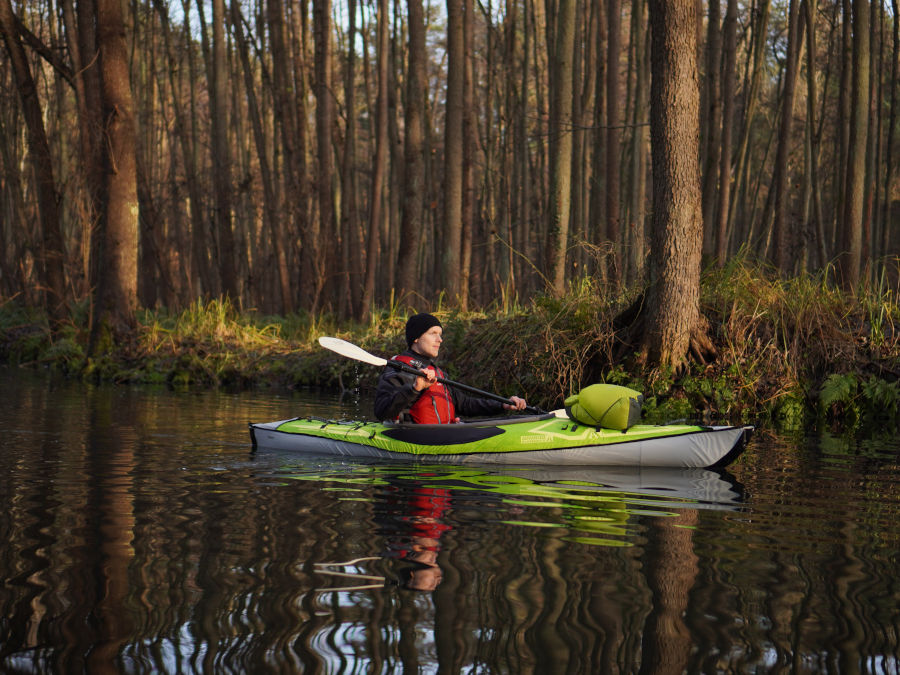
advanced elements ultralite kayaking tour
The AdvancedFrame Ultralite does not like ground contact

Itiwit Packraft 100 Review

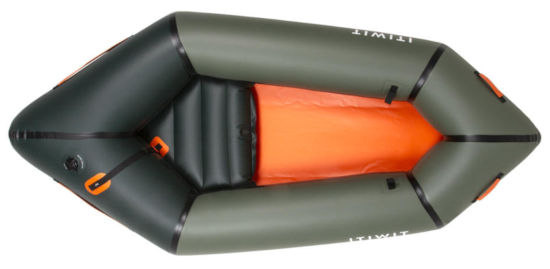
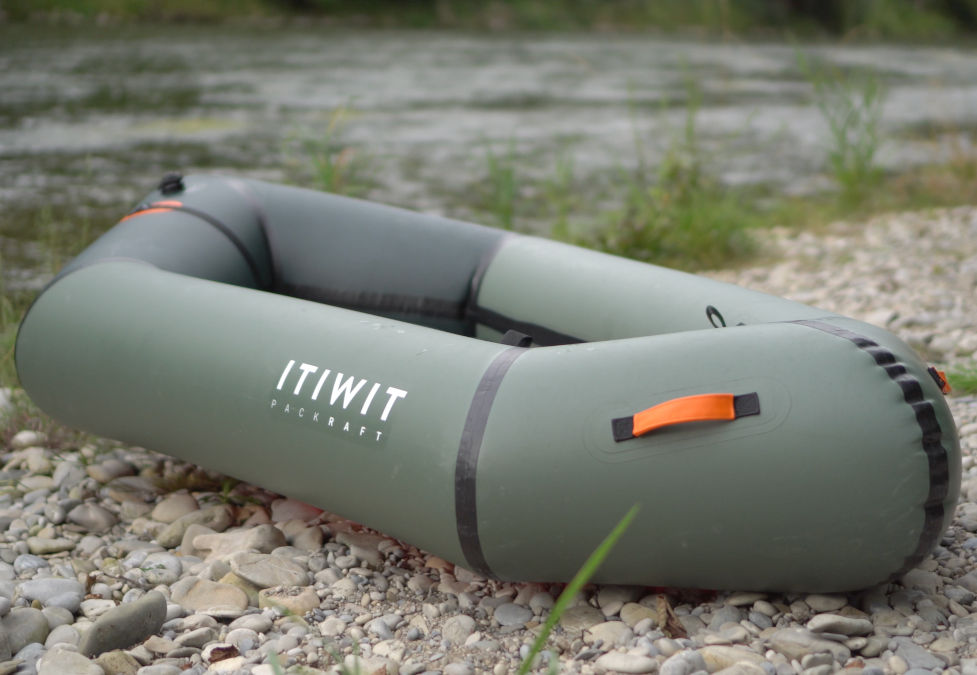
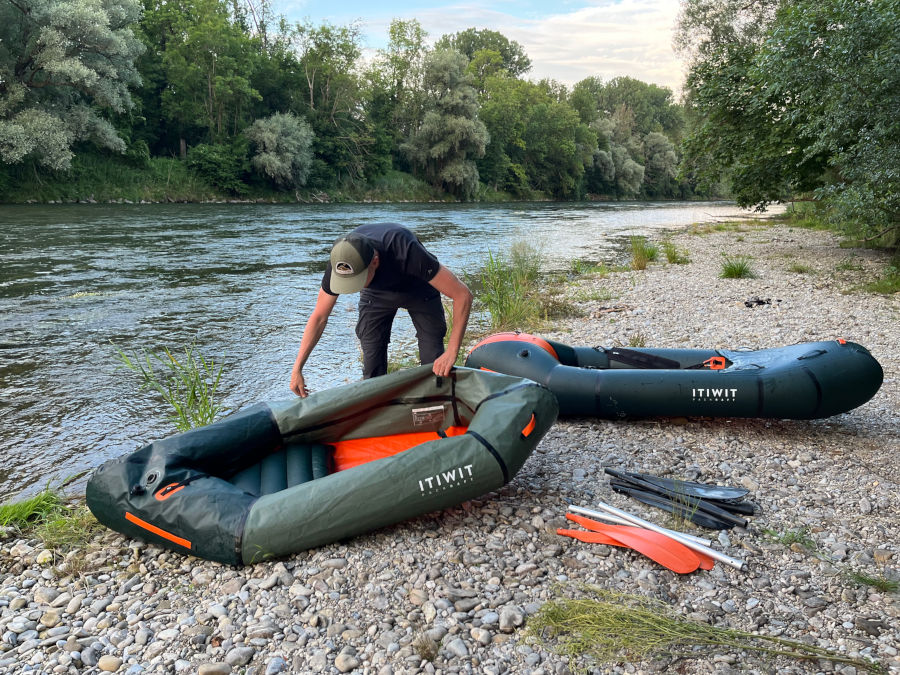
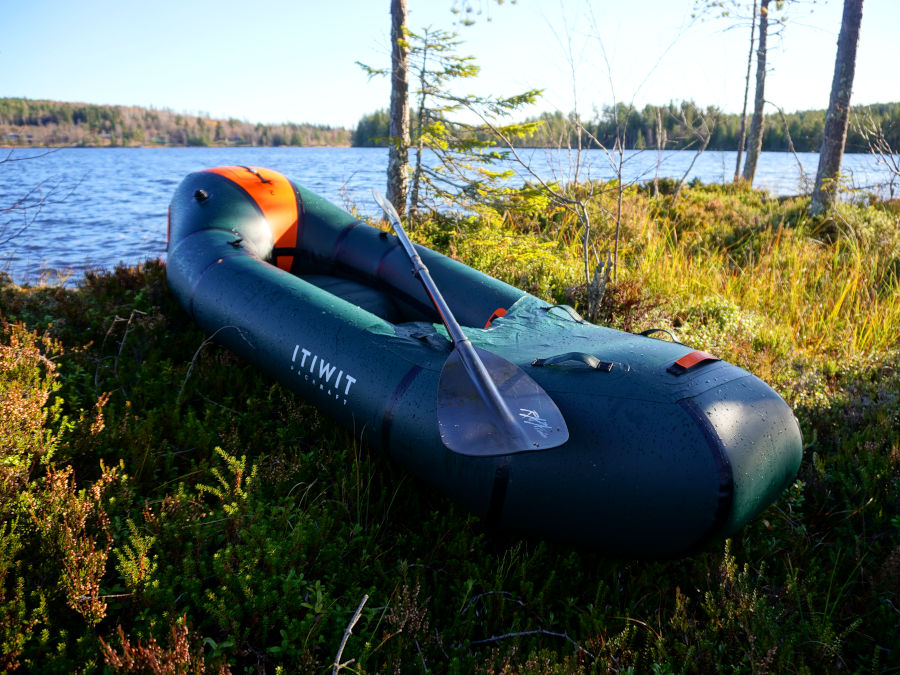
Decathlon entered the packrafting segment with the Itiwit Packraft 500 at the end of 2021. Now, with the Itiwit Packraft 100, another model has appeared, which is aimed more at beginners, both in terms of price and equipment. In this review you will find out what the new Packraft from Decathlon has to offer and what experience we have already gained with this packraft.

itiwit-packraft-100

Technical Specs

Max. paddlers:
Length:
Width:
Capacity:
Packed size:
Material:

1
205 cm | 6’7”
95 cm | 3’1″
110 kg | 242.5 lbs
25 x 40 cm | 8” x 1’3”
TPU/PU coated nylon

Weight (Boat):
Weight (Complete):
Produced in:

1.8 kg | 4 lbs
2.0 kg | 4.4 lbs
China

Which model has been reviewed?

Itiwit Packraft 100 from 2022

How did we organize the review?

We have purchased the Itiwit Packraft 100 ourselves.

How intensively has the product been tested?

low

high 1 bar = 1-3 km paddled (first impressions)
2 bars = min. 1 day/ 2 half-day tours
3 bars = min. 4 tours
4 bars = min. 8 tours
5 bars = min. 12 tours (very intense)

Where have we tested the product?

Whitewater

Calm rivers

Lakes

First impressions and assembly

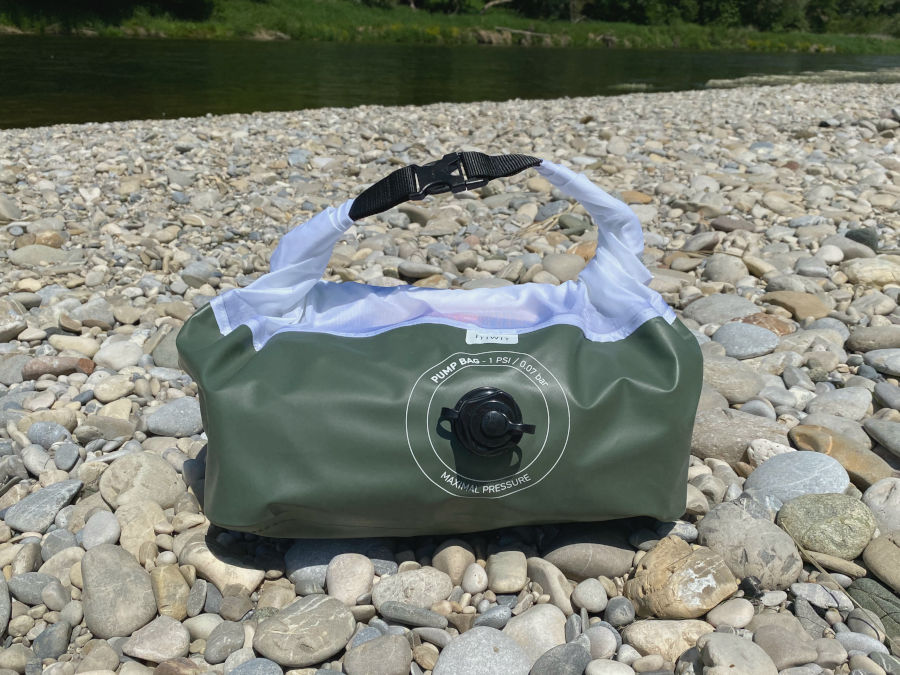
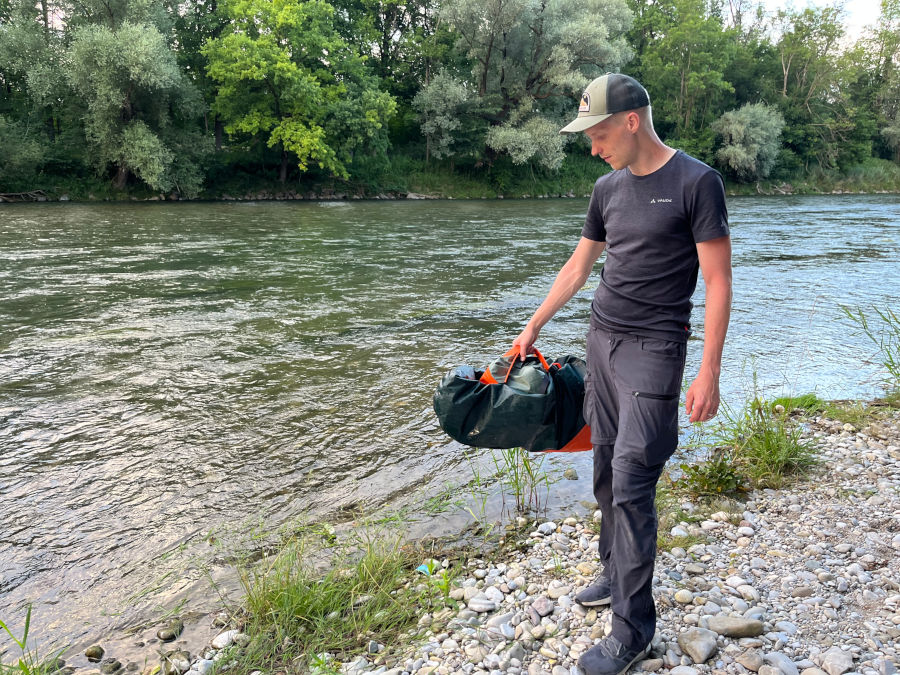
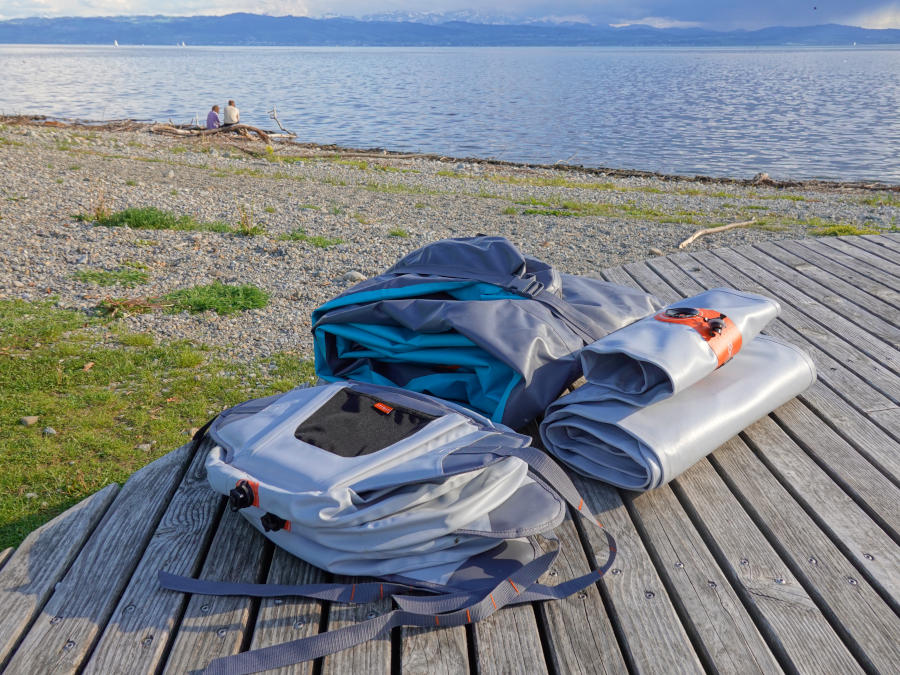
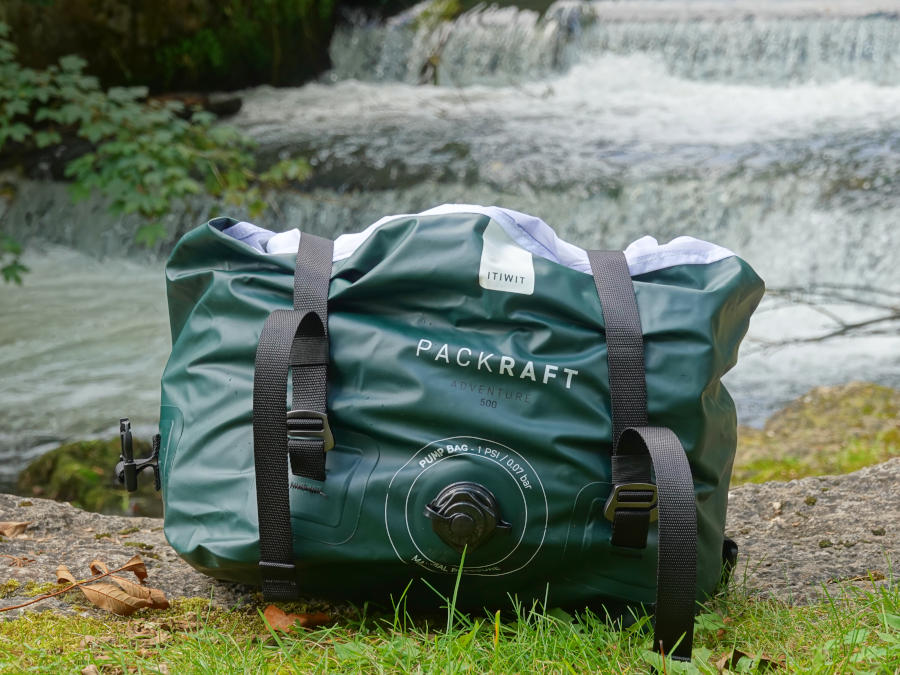
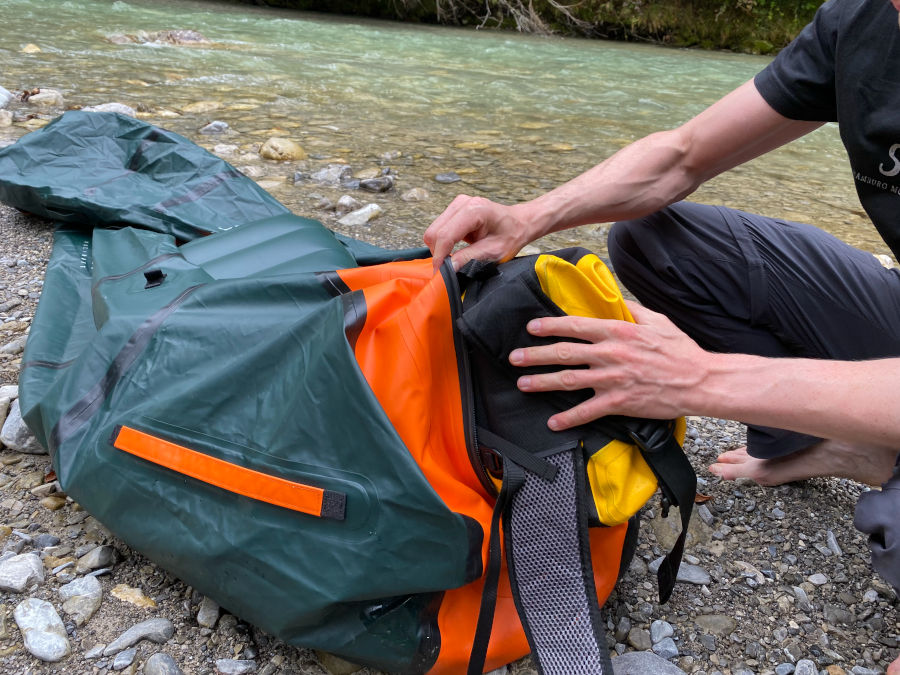
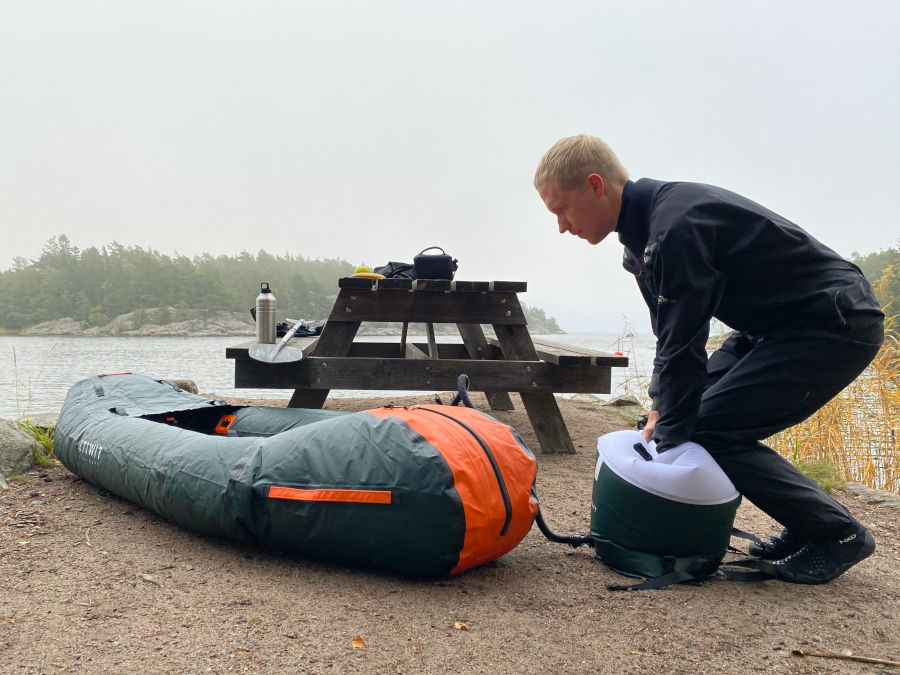
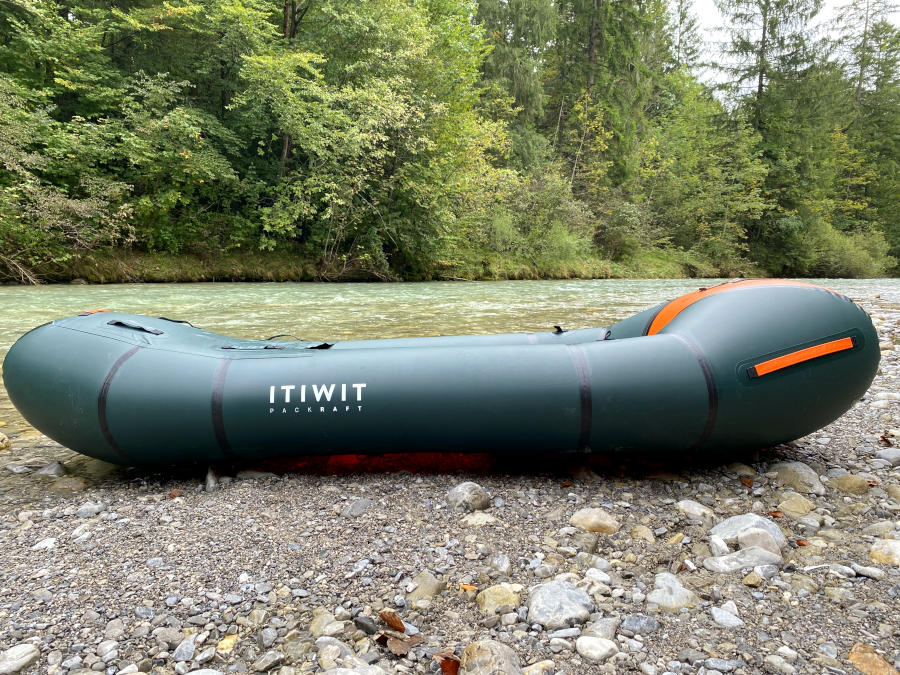
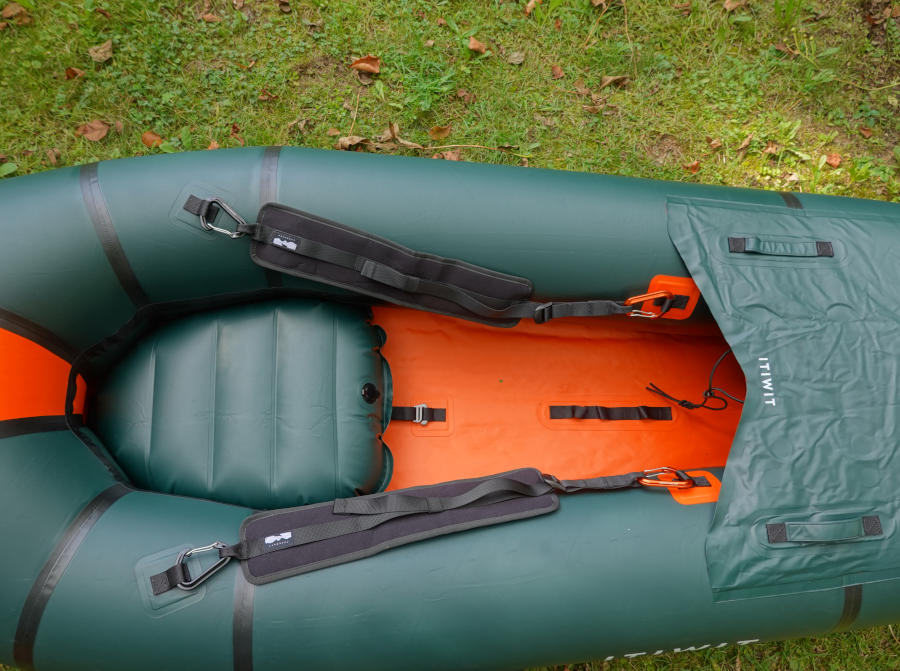
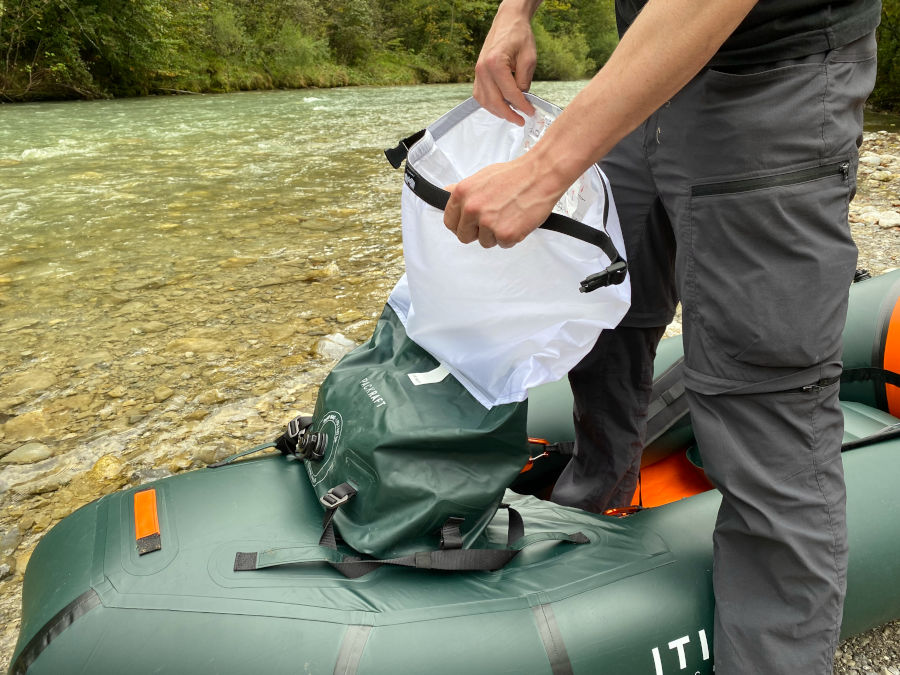
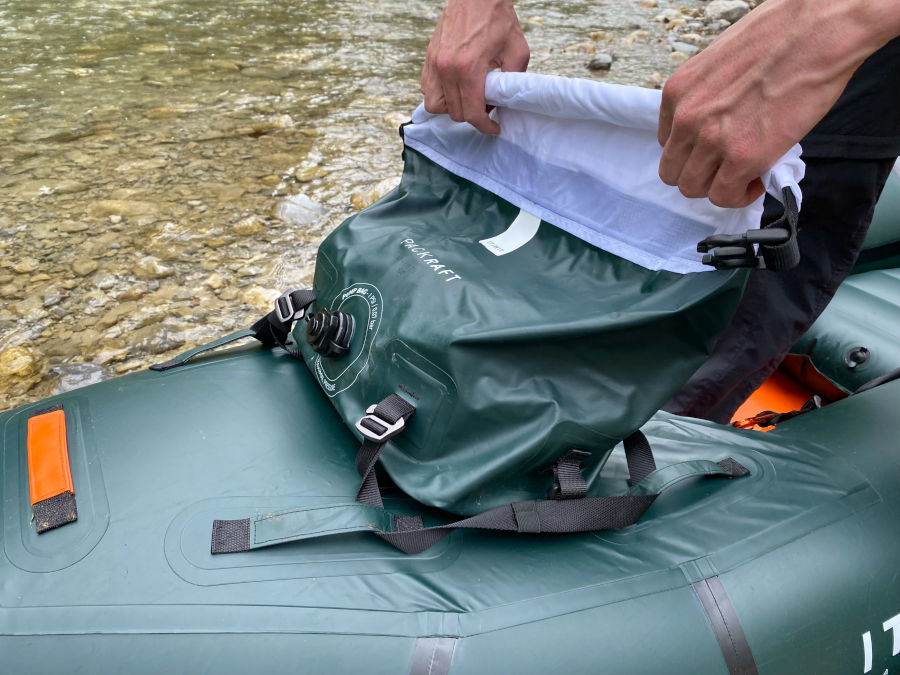
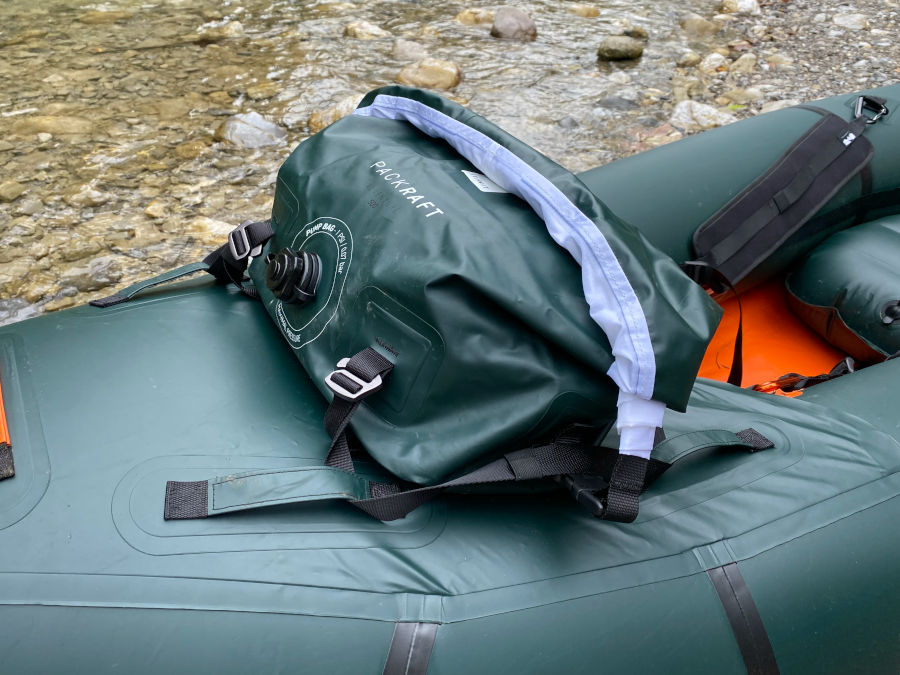
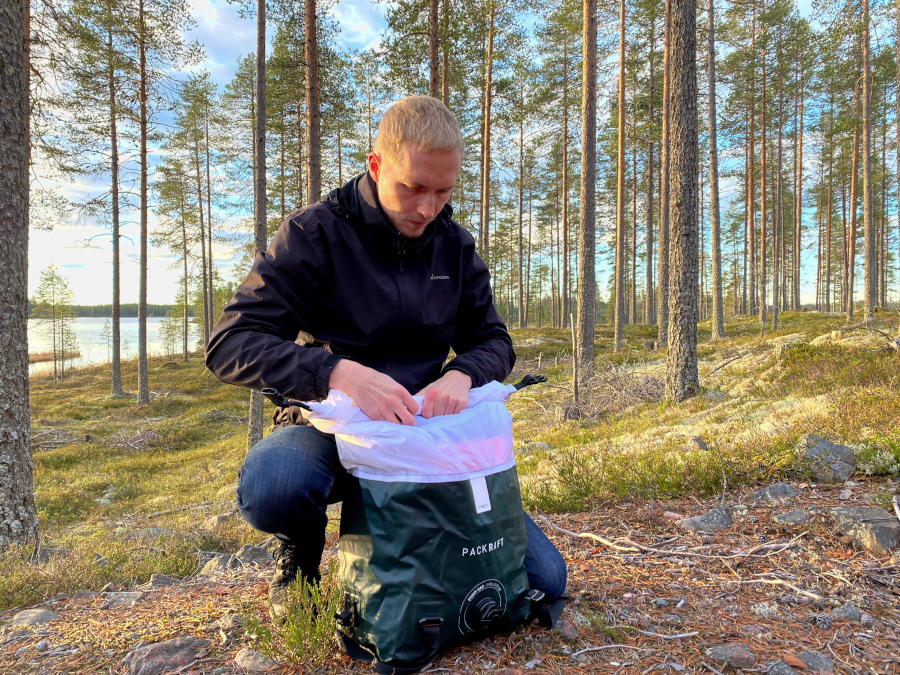
The Packraft is supplied with a transport bag, which not only makes a robust impression, but also fulfills several functions at once: transport bag, air pump and dry bag during the tour. Itiwit has already applied this concept to the Adventure 500, which we really like.

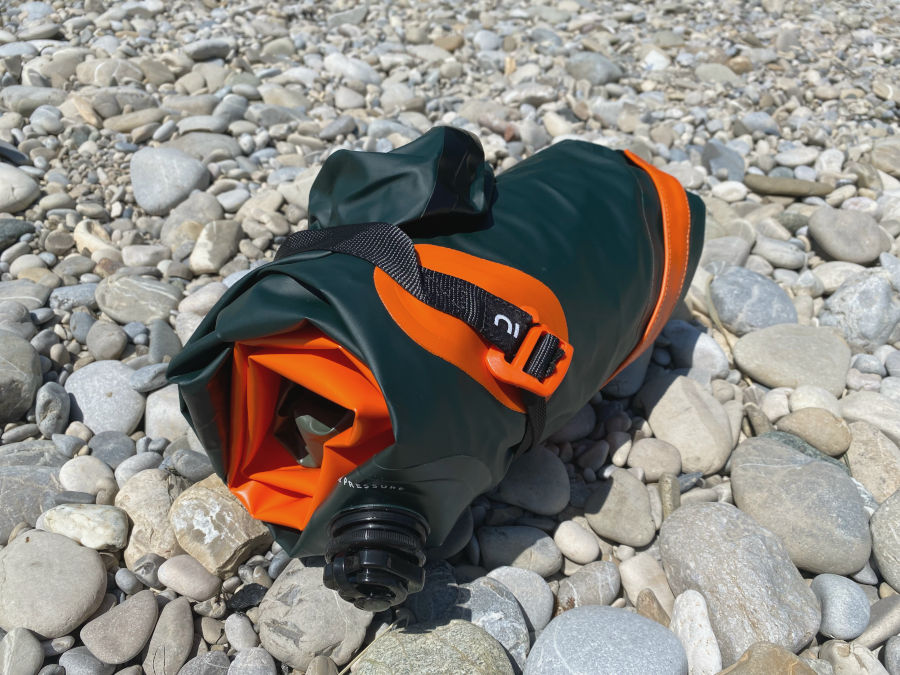
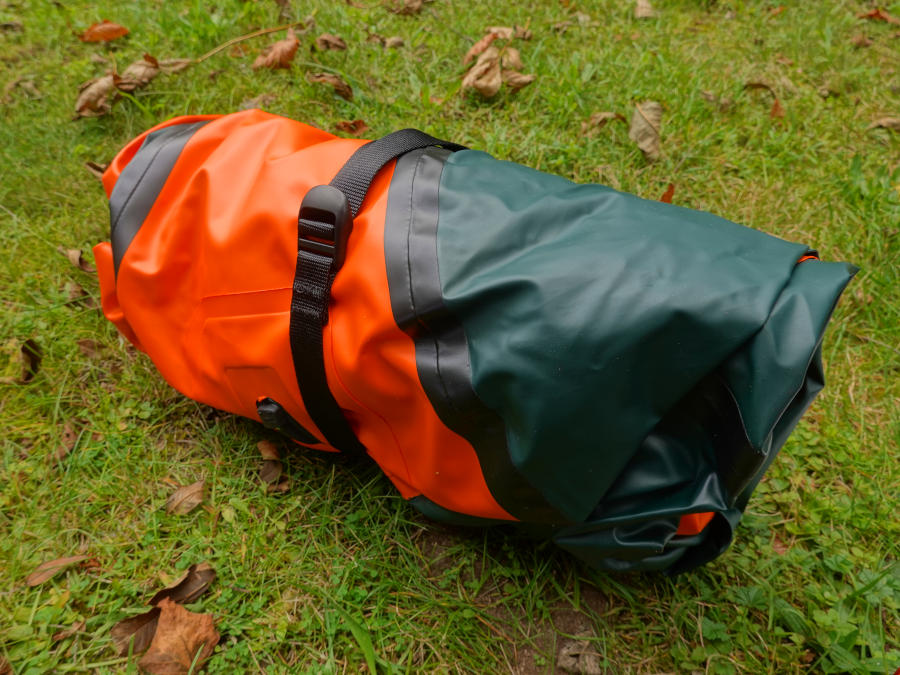
The roll closure allows the Packraft to be stowed in a space-saving manner. Excess air that remains in the packraft when the closure is rolled up can then be released via the valve on the front of the bag. This results in a securely packed Packraft in a maximally compressed state.

itiwit ultralite packraft decathlon
Transport bag, which also serves as a inflation and dry bag

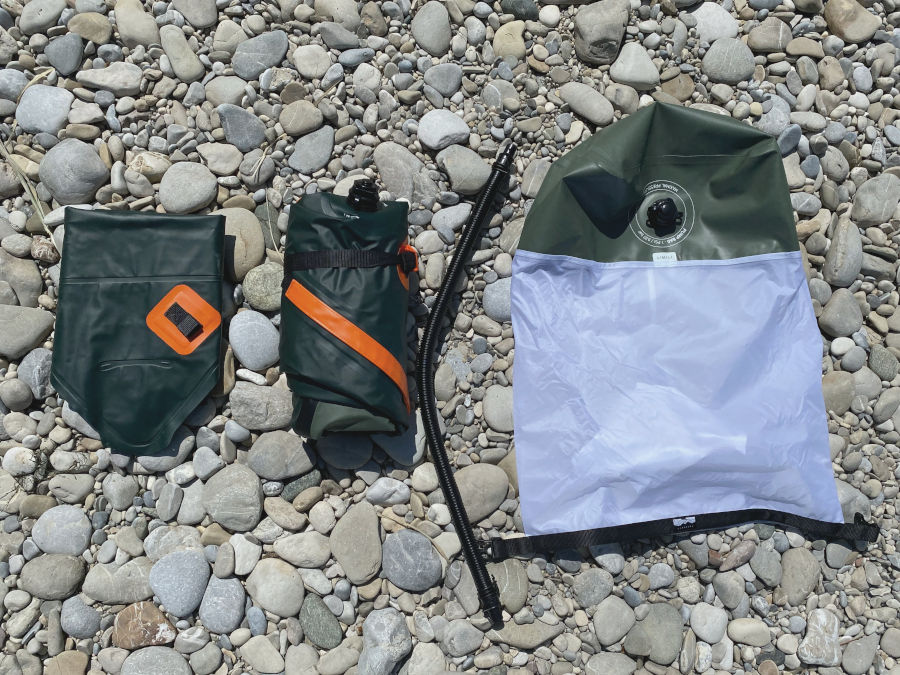
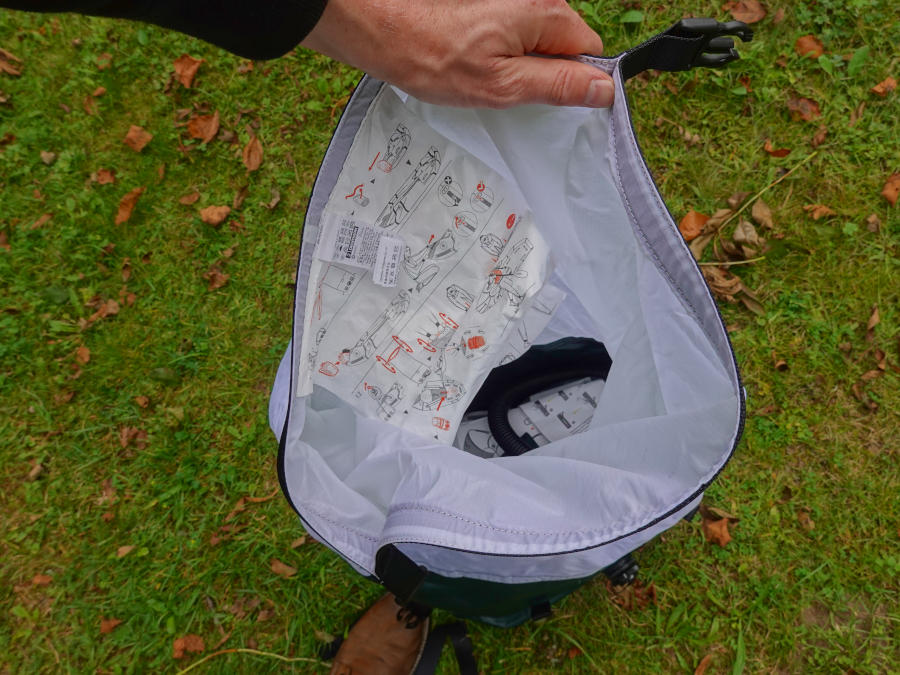
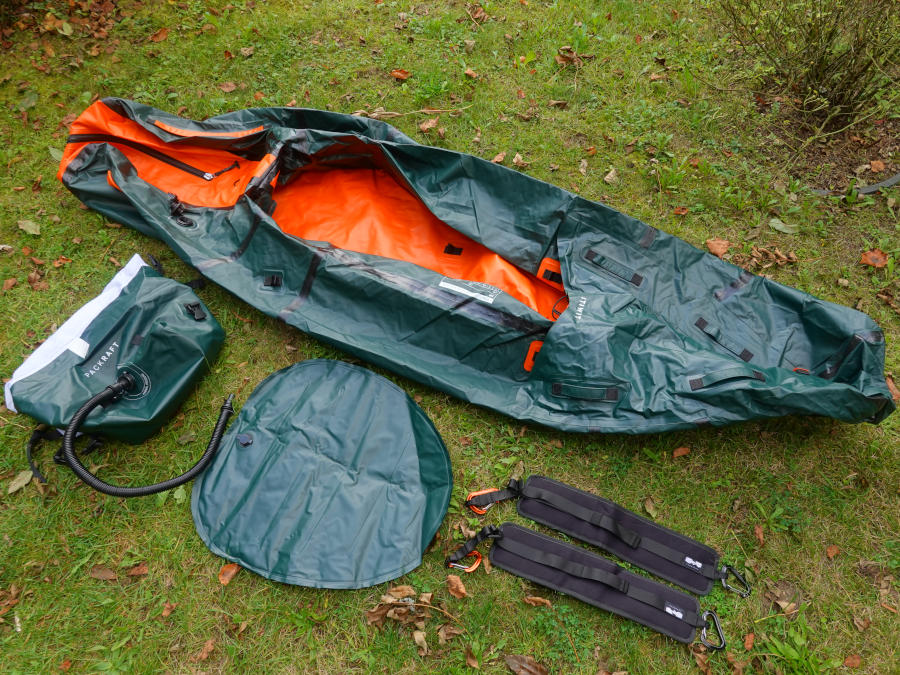
Besides the packraft, the transport bag contains the seat, the pump hose and some self-adhesive repair patches. None of this is additionally packed in PVC film or a bag. We like this quite a bit because it means there is no unnecessary packaging waste.

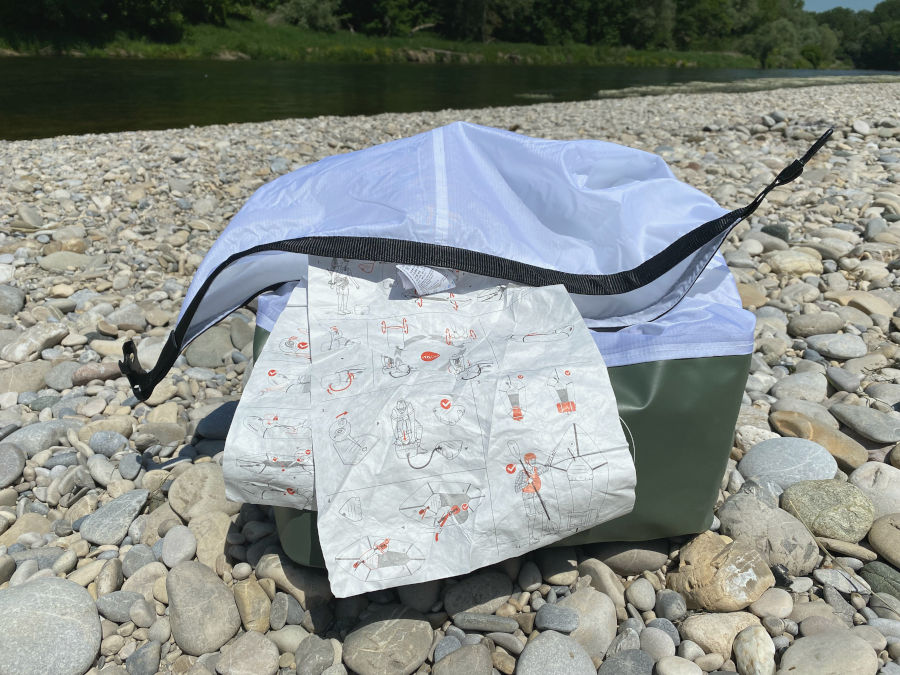
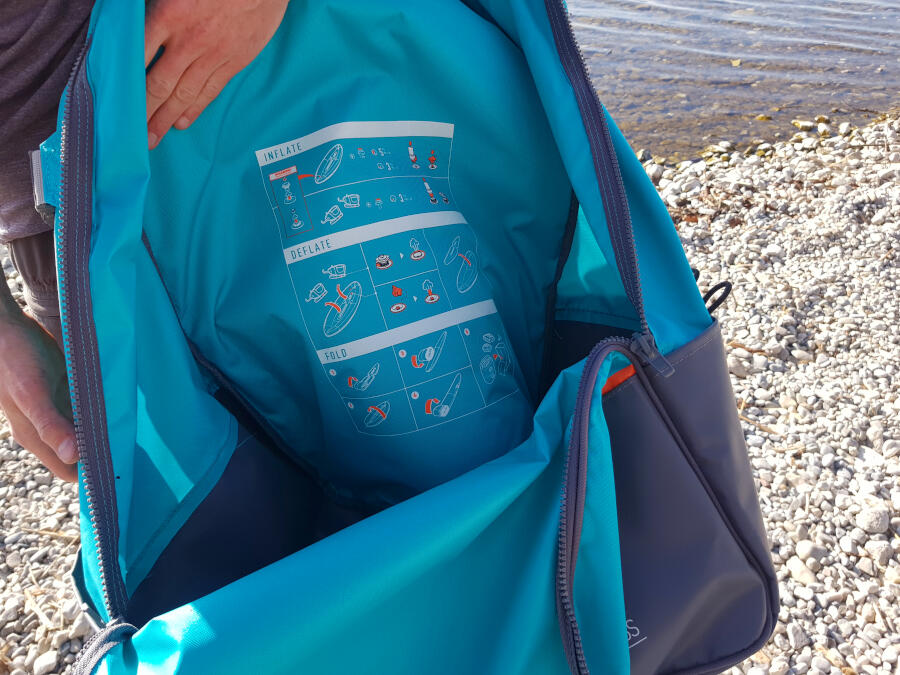
The Packrafts assembly instructions are also sewn into the upper edge of the transport bag, which serves as a handy quick reference guide for on the go in addition to the actual instruction manual.

decathlon itiwit packraft 100 accessories
The transport bag contains the packraft, the seat and hose and a repair kit
itiwit packraft 100 folded pack size
Packraft rolled up
itiwit packraft 100 manual
Brief instructions on the transport bag

Decathlon advertises the light weight of the packraft and states a total weight of 2kg. Since the weight plays an important role in packrafting, we weighed the individual parts. The packraft itself weighs 1630g, the seat 300g, the pump bag 290g and the pump tube 60g. This gives a total weight of 2280 g and is thus slightly above the stated total weight 2 kg on the part of Decathlon. But even about 2.3 kg total weight is not much for a packraft. However, the pump bag with pump hose weighs more than usual inflation bags of Packrafts from other manufacturers. Due to the multifunctionality of the pump bag and the easy handling as a pump, it’s a real benefit.

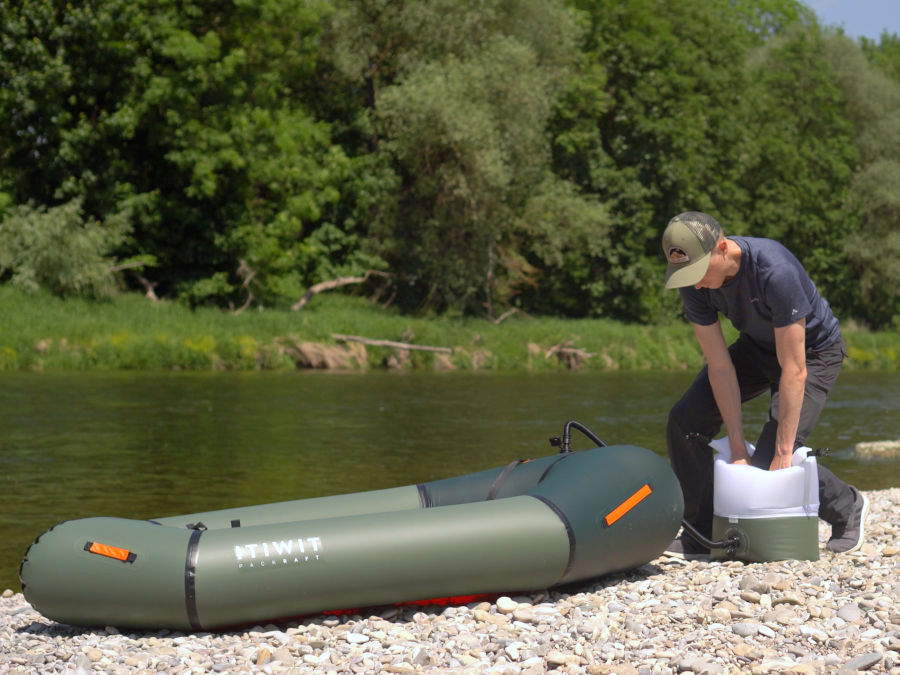
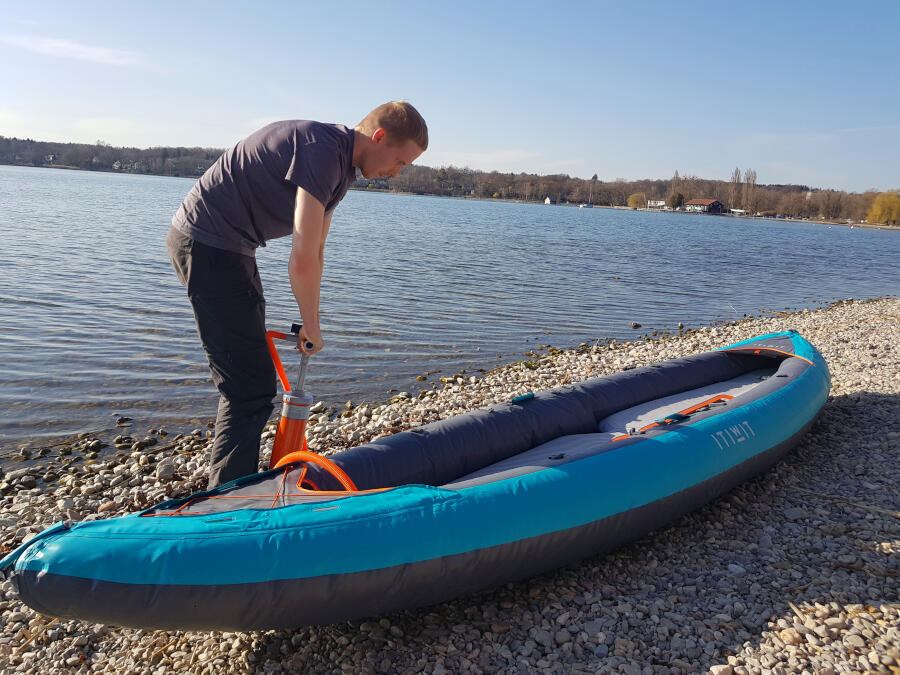
The assembly of the Packraft is very simple and thanks to the ingenious pump bag, it is even easier for beginners with the Itiwit Packraft. First you have to unfold the Packraft. It is common for inflatable boats to have a compression strap around the boat to prevent it from rolling out on its own and to make it easier to stow away at the end. With the Itiwit Packraft, no additional compression strap was used, but the strap that is later used for seat attachment is also used as a compression strap. This is a small detail, but pretty well thought out. The weight saved is negligible. The real advantage of this implementation is that you cannot lose the strap, because it is firmly attached to the boat.

itiwit packraft assembly
Assembly of the packraft with the pump bag

Usually a packraft is inflated with a simple inflation bag, because this is very light and compact. An air pump would be impractical for a packraft, because it would quickly exceed the pack size of the packraft. The disadvantage of a inflation bag is only that the inflation with that requires some practice and habit. Thus, beginners often find it somewhat difficult to efficiently fill a packraft with air using a inflation bag.

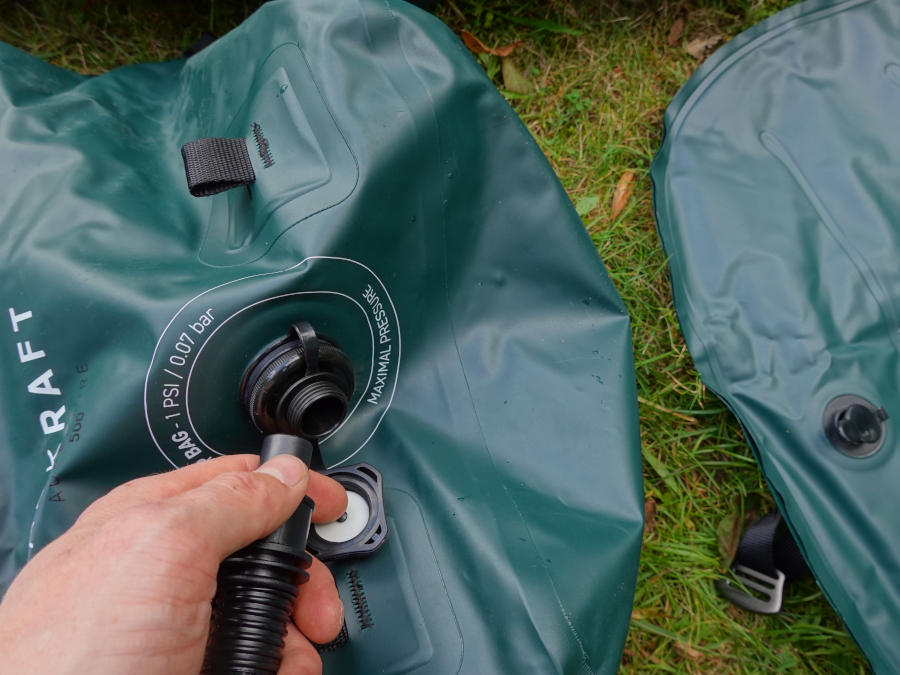
Itiwit has come up with a good compromise between an inflation bag and an air pump for its packrafts. The transport bag serves as a pump bag during assembly. To do this, you open the valve at the bottom of the transport bag and attach the supplied pump hose. The other end of the pump hose is attached to the valve of the packraft.

Thanks to the air hose, the pump bag can be placed on the ground and used like a hand pump. You simply lean on the air-filled pump sack and pump air into the packraft. You roll the pump bag a little bit again and again, so that a sufficiently high air pressure is generated in the pump bag, which you can push in the packraft.

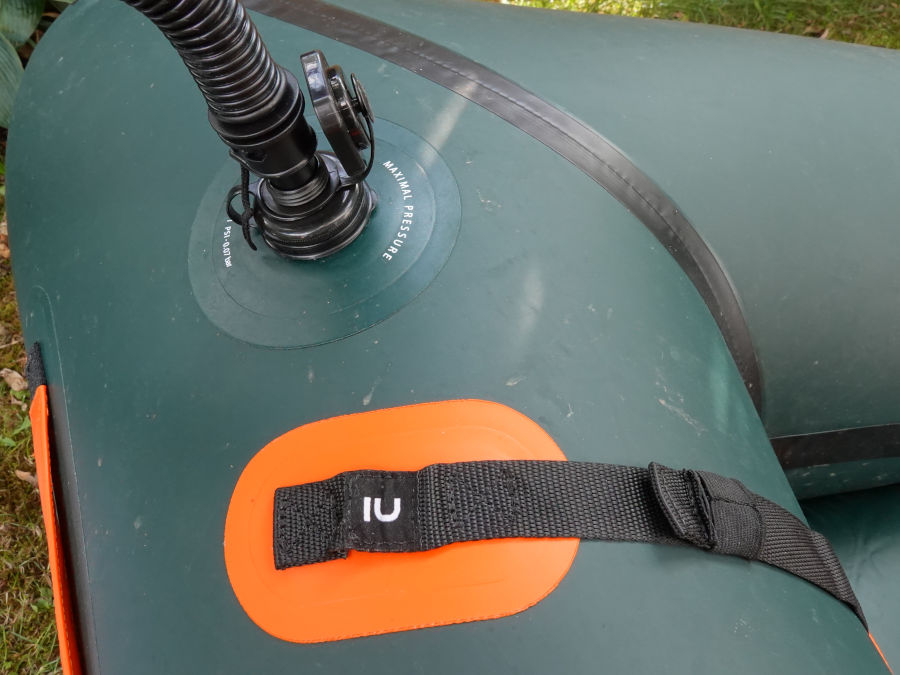
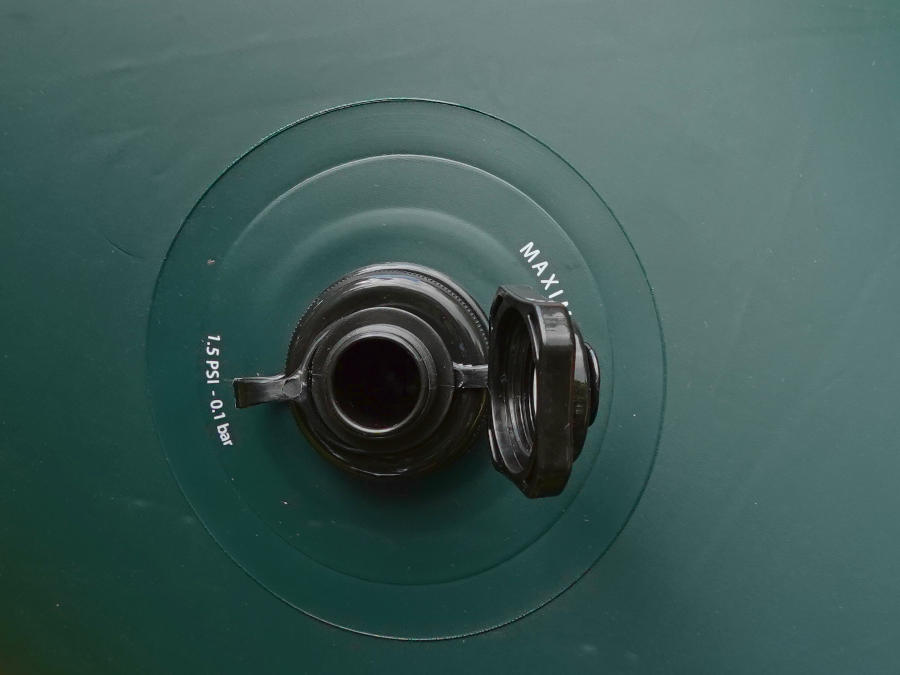
itiwit packraft 100 valve
Also, the valve makes a high-quality impression

You repeat this pumping process several times, more precisely according to the manual “10 – 12 times until the pump bag no longer allows it”. Usually with Packrafts (also with such Boston valves) you generate the final air pressure with your mouth or with a separate small hand pump. We use the Itiwit pump bag for this and apply small jerky impacts to the pump bag to get the air tube of the packraft nice and tight. So, from our point of view, it is not absolutely necessary to create the final air pressure with the mouth or with a small separate hand pump, as with other packraft. Here you should be careful not to create overpressure, because otherwise material damage can occur.

We therefore recommend that you create the final air pressure with your mouth or with your own puff during the first set-up, because this way you will not create overpressure. Then reach into the air tube to get a feeling of how the packraft feels with the correct air pressure. You can use this firmness as a guide later on when you want to create the final air pressure with the pump bag.

The bottom of the pump bag is much sturdier than a common inflation bag of many other packrafts, so you can put it on the ground without damaging it. Both the valve of the packraft and the seat cushion are high quality. Both valves have a check valve, so that the air can not escape when inflating.

itiwit packraft 100 seat
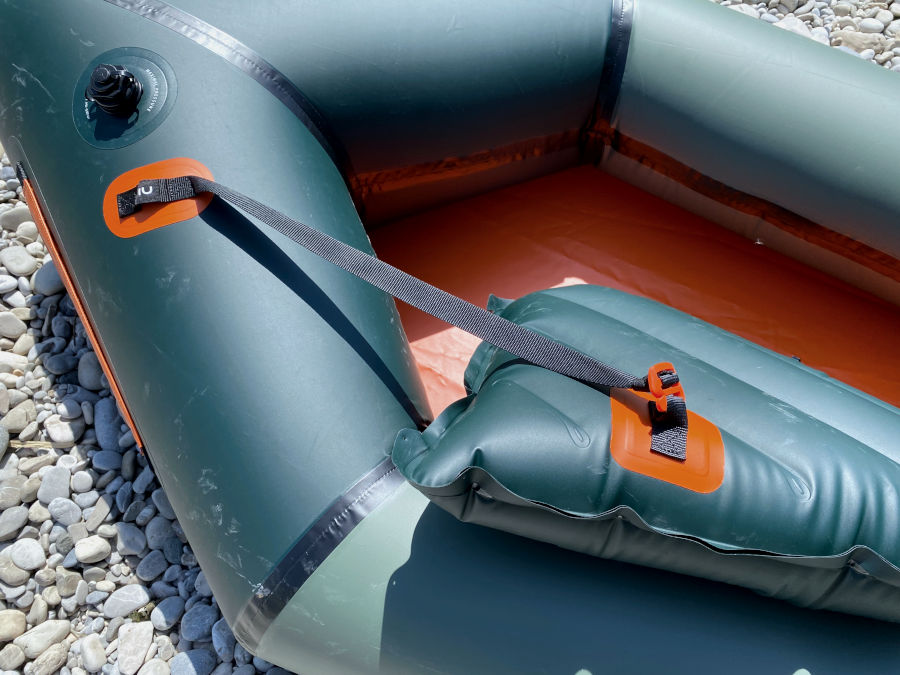
The seat is attached to the boat with a strap

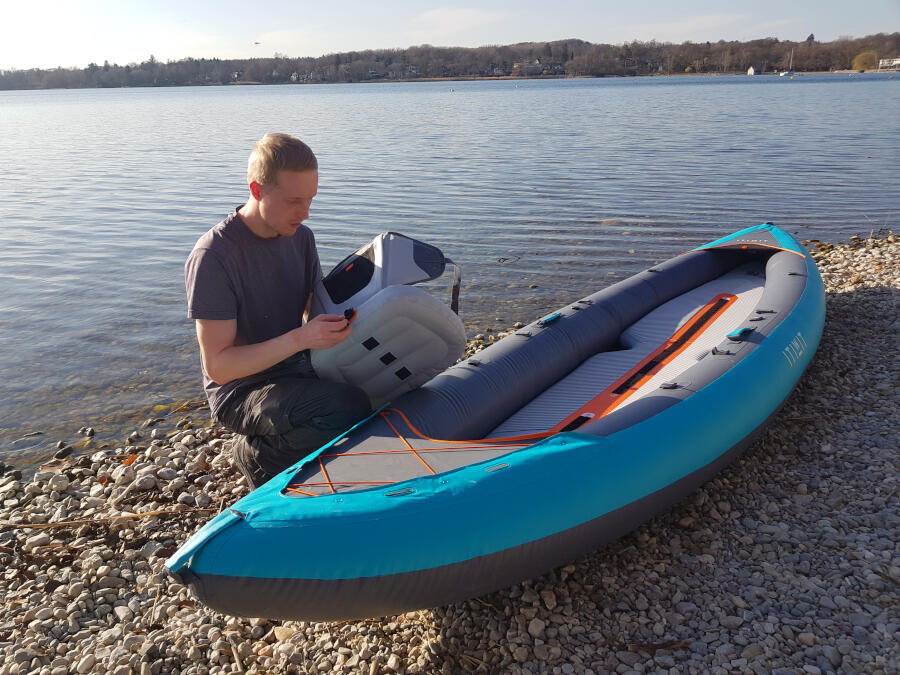
After inflating the packraft and seat cushion (by mouth or 1-2 pushes with the pump bag), position the seat in the boat. When the packraft and seat are tightly inflated, the seat cushion sits fairly tightly in the packraft. Attach the seat to the boat via a loop on the bottom of the seat using the strap. Make sure you pull the strap tight so that the seat does not slip while paddling.

Compared to many other packrafts, the seat consists only of a seat cushion and comes without a backrest. Because the seat cushion is placed so far back in the interior of the boat, you can lean against the tube. Because the Packraft does not have an adjustable backrest, you have to take into account that the seat position cannot be adjusted individually. You can find out how well this works in practice and how comfortable the seat is in the section on experiences on the water.

itiwit packraft 100 seat fixed
The air tube of the packraft functions as a backrest

In terms of workmanship, the Itiwit Packraft 100 makes a very good impression for an entry-level model. You don’t have to make any compromise compared to the higher priced Itiwit Packraft Adventure 500. The boat is at least as well-made as the Itiwit Packraft Adventure 500. We could not find any weak points or flaws in the workmanship of our specimen. The material of the boat’s skin also feels high-quality and robust and rounds off the high-quality first impression of the Packraft.

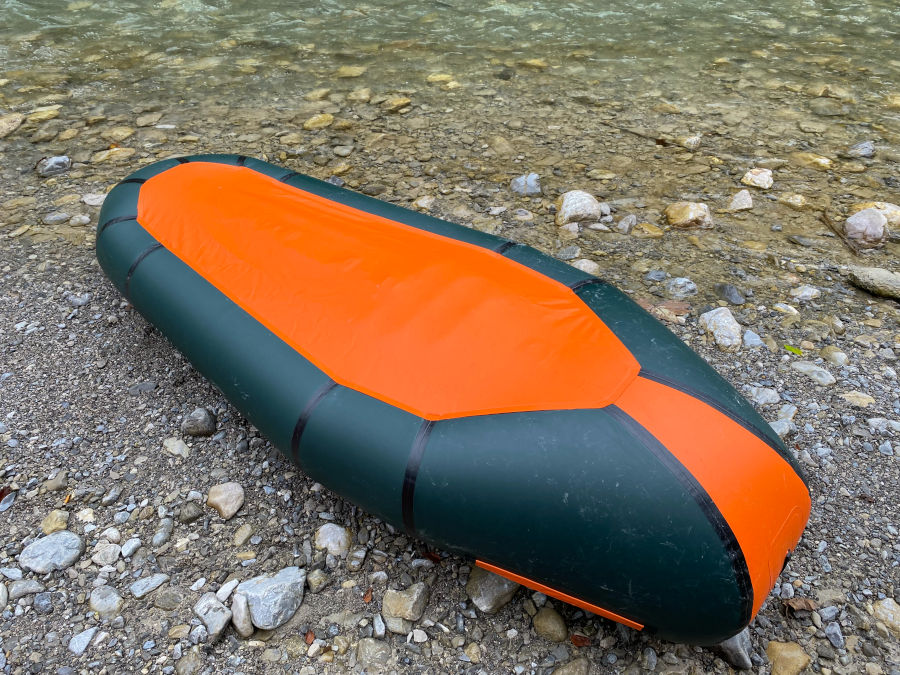
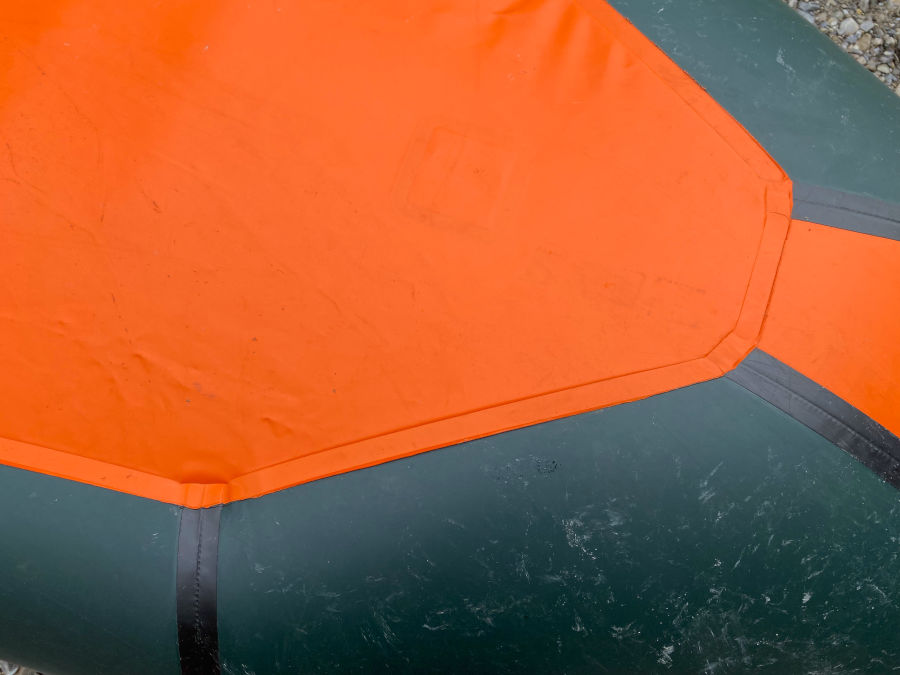
The packraft itself is made of a coated nylon fabric. The fabric has a thickness of 420d (= denier) in the bottom and 210d in the side tube. These are typical values for packrafts in this segment. The outside of the side tube and the outside and inside of the bottom are coated with TPU (thermoplastic polyurethane), which has a high abrasion resistance and is also used in other brands of Packraft.

The inside of the side tube, which is not accessible, is coated with PU. If deeper scratches damage the outer coating, the tube is still waterproof and airtight due to the second inner coating and does not need to be patched. However, other manufacturers (e.g. Anfibio, MRS, Alpacka) do without this inner coating in order to preserve the elasticity of the carrier material (which is made of nylon or polyester) and thus achieve a higher tear resistance of the material.

decathlon ultralite itiwit packraft 100
Both the material and the workmanship of the Packraft are convincing.

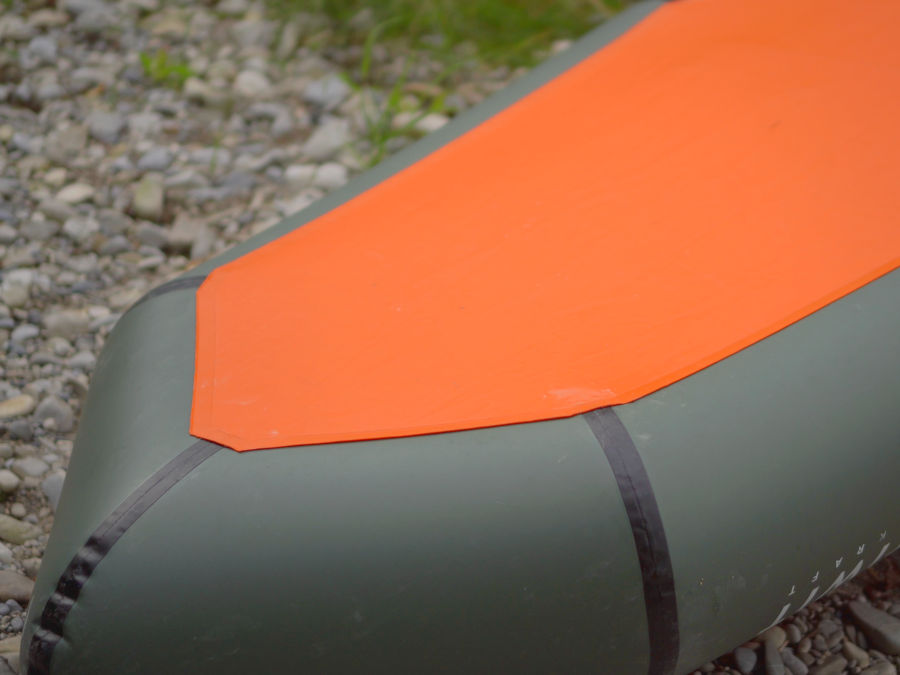
On some packrafts, it is common for the underside of the bottom to overlap the side tube to further protect it from damage in the event of grounding. This concept is common practice, especially with packrafts for whitewater use. However, since the Itiwit Packraft 100 falls more into the category of ultralight packrafts, it is understandable that Decathlon has dispensed with it for this model.

decathlon itiwit packraft 100 review material
Underside of bottom of the Itiwit Packraft 100

Packrafts are available as open and closed (= with spray deck) boats. The Itiwit Packraft 100 is an open packraft. A spray deck is otherwise used as a splash guard or to attach a splash skirt to completely prevent splash water from entering and also protect the paddler from the cold. In addition, luggage can be easily attached to most spray decks. You will have to do without these advantages with the Itiwit Packraft 100. Decathlon’s Itiwit 100 is aimed primarily at beginners looking for an inexpensive packraft, and a spray deck would add to the price (as well as weight). In addition, recreational paddlers who use the packraft mainly in good weather in calmer and shallower waters can easily do without such a spray deck. Therefore, this design implementation of Decathlon is also well understandable with the Packraft.

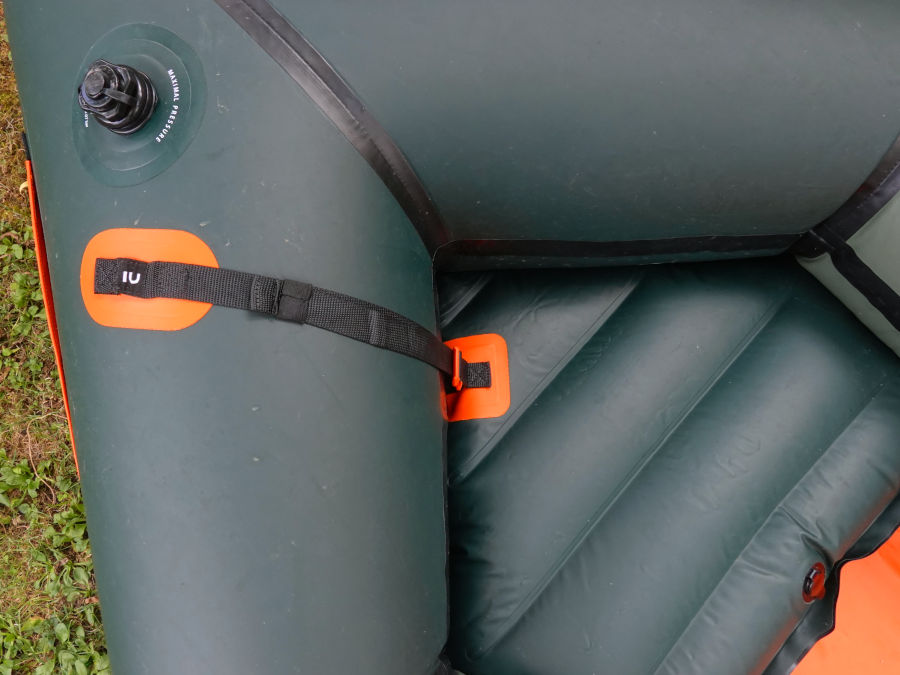
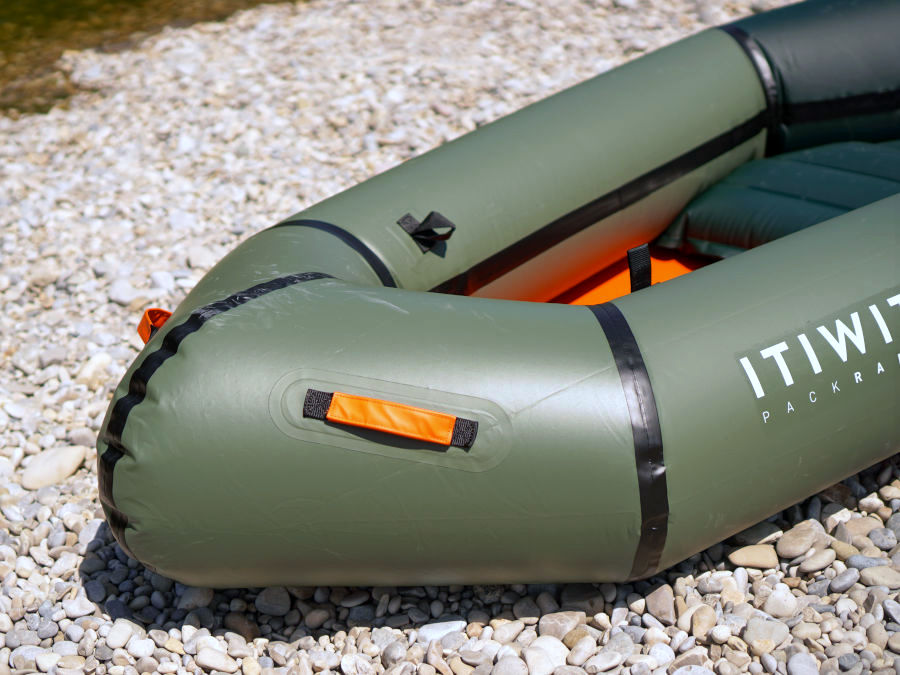
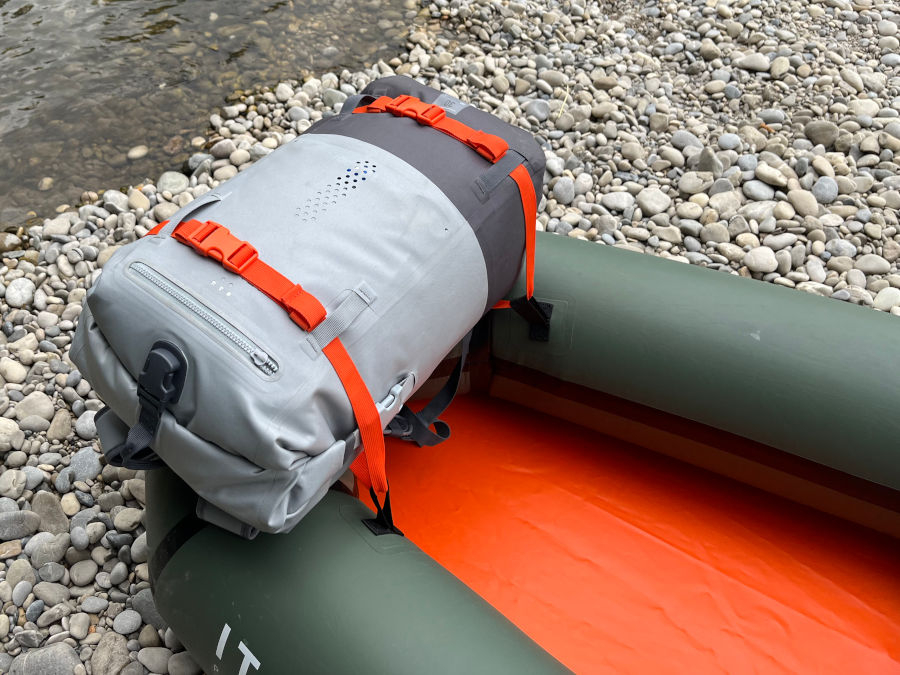
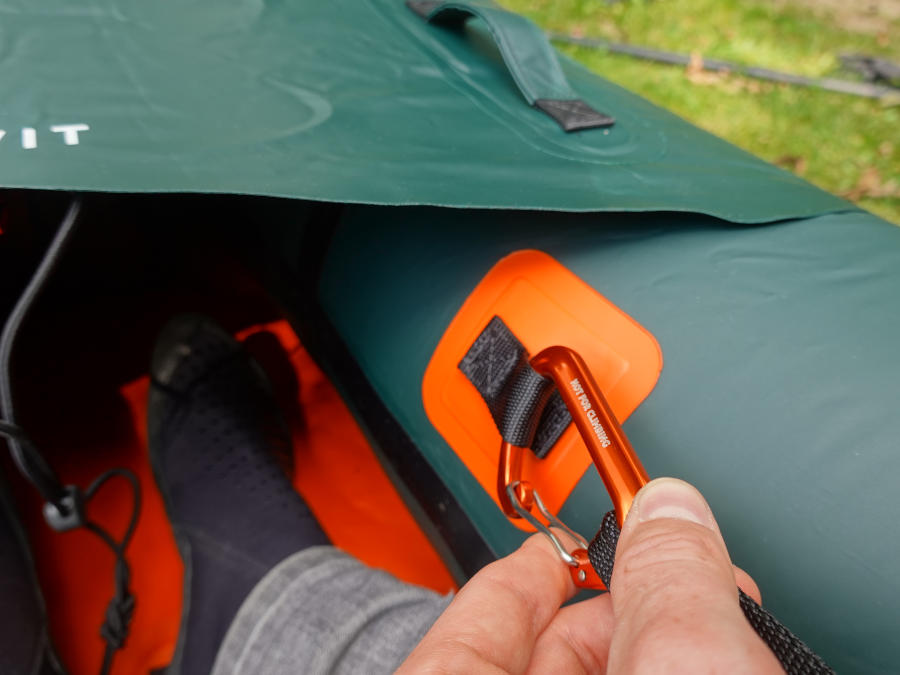
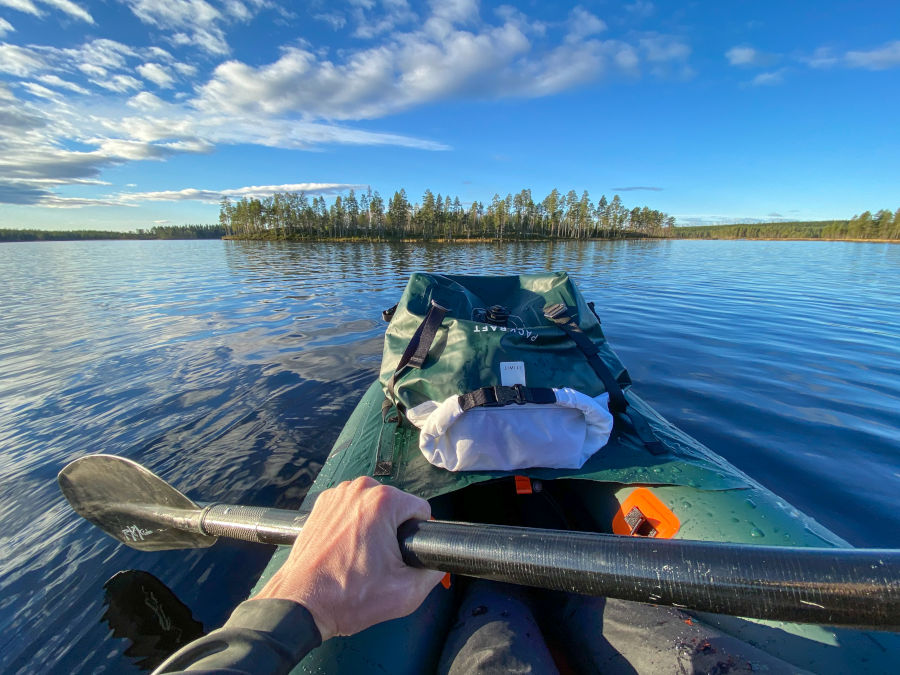
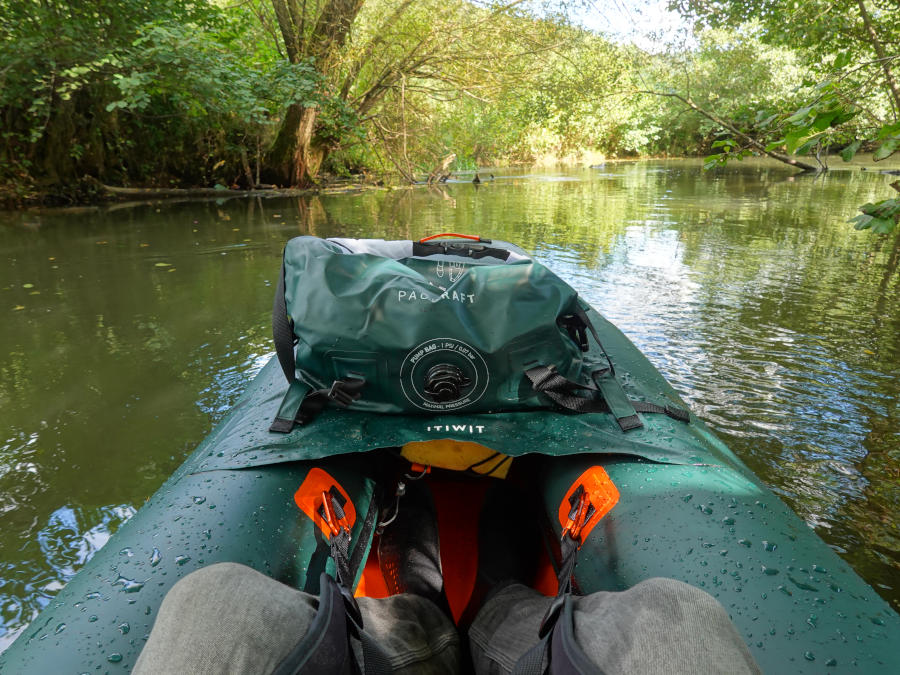
The Packraft has a total of 4 day handles (two at the bow and two at the stern). Whether in a capsize, when pulling the Packraft to shore, when transferring two on river trips or when carrying the boat alone on the water on the shoulder, there is always a way to grip the Packraft properly. At the bow there are two additional loops to attach luggage on the bow. In connection with the two carrying handles, the luggage attachment on the bow works very well. So you can easily attach the pump bag, which also serves as a dry bag, there. Therefore, you can also transport some luggage with the Itiwit Packraft 100 without a spray deck.

decathlon itiwit packraft 100 carrying handles
Carrying handles allow easier handling of the boat

Review of the Itiwit Packraft 100 on the water

The Itiwit Packraft 100 can be carried well alone to water. To do this, you shoulder the packraft and can also use one of the carrying handles. Alternatively, you can carry the Packraft via the side tube. If you have loaded the packraft with a lot of luggage, it is still recommended to set up the packraft close to the water. If there are two of you, both people can easily carry the packraft with the carrying handles at the bow and stern.

itiwit packraft 100 tour review
The packraft can be carried to water well alone

The interior of the Itiwit Packraft does not look very spacious at first glance. We with a height of 186 and 189 cm / 6’1″ and 6’2″ can not fully stretch our legs even without shoes. Nevertheless, the Packraft offers enough space for us to sit. Due to the fact that it is cut wider and the air tube is less voluminous, you can bend your legs very well and paddle comfortably for a long time even in this position. We do not miss a footrest or thigh straps, because due to the shortness of the Packrafts you can also support yourself well on the bow of the packraft.

However, we also like to paddle with our neoprene socks in the summer. If you paddle with shoes or even hiking boots, as a tall paddler you will surely long for a bigger Packraft in the long run. Also, those who do not like to paddle with more bent legs, will find the bigger brother the Itiwit Packraft Adventure 500 more pleasing.

itiwit packraft 100 space footwell
Despite the shorter length, the packraft offers still enough space

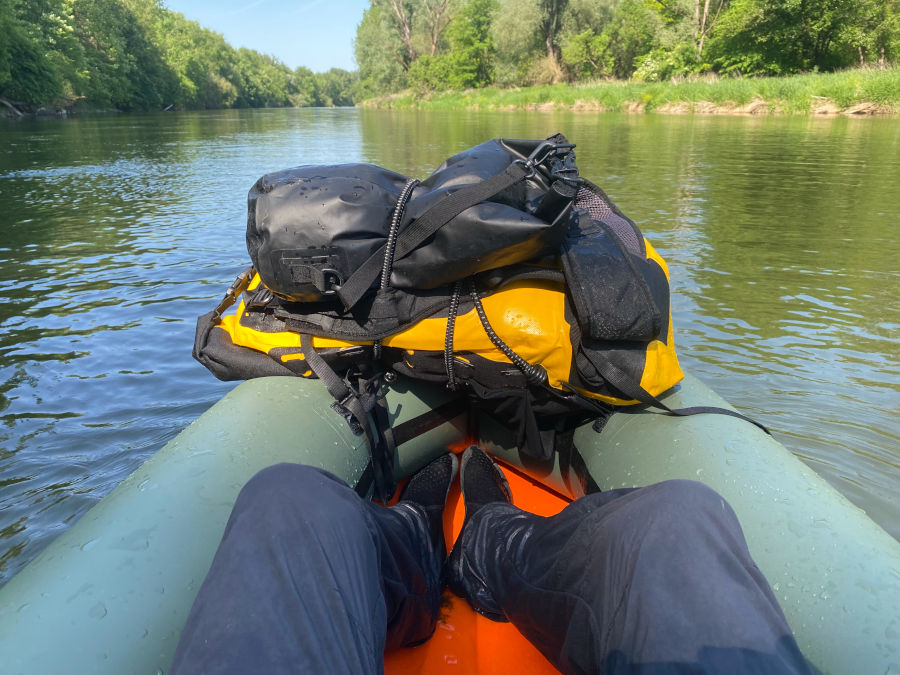
Since the Itiwit Packraft 100 does not have a T-Zip for stowing luggage like the Itiwit Packraft Adventure 500, the luggage must be stowed on the boat itself or, if necessary, between the legs. However, this works out very well. Over the carry handles and loops on the bow, we attached our Ortlieb Gearpack 40 L and a small dry bag. While paddling this did not bother at all, because the side tube of the boat is high enough and the luggage rests on it. Thus, the legroom remains completely unrestricted.

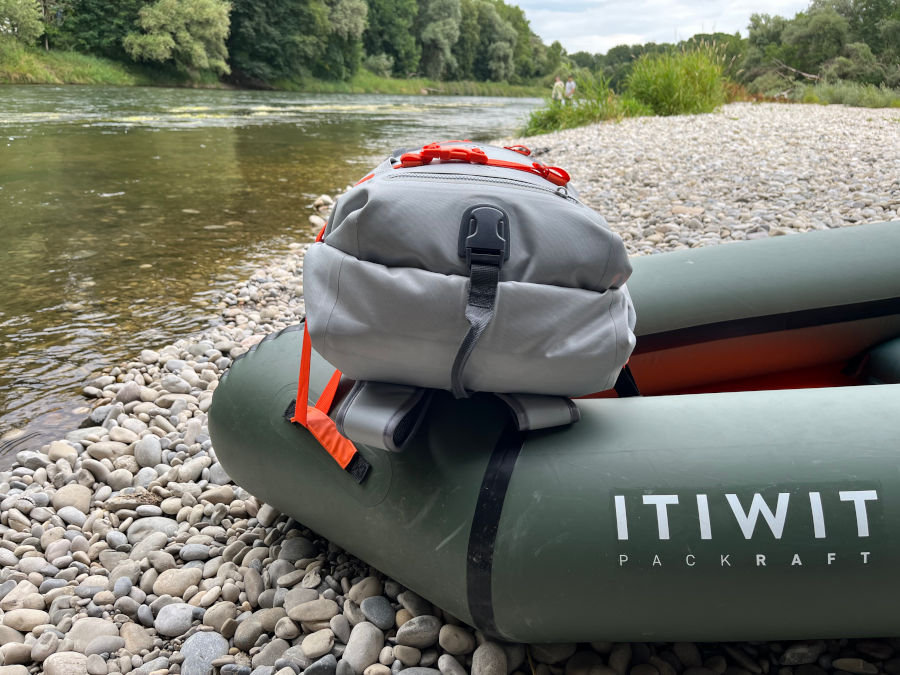
Decathlon recommends the Itiwit 30 L backpack for the Packraft. This can not only be attached very well to the bow of the Packraft, but it is also well suited for transporting the Packraft. Inside the backpack is enough space to store the boat. With the help of the side straps, the paddle can also be attached. However, we prefer a packraft backpack with side mesh pockets for better stowage of the paddle.

itiwit packraft 100 luggage ortlieb
There is enough space for a day backpack, such the Ortlieb Gearpack 40 L
itiwit packraft 100 fixed gear backpack
Waterproof Itiwit Backpack 30 L
itiwit packraft 100 dry bag
Attachment of the backpack on the bow

The dry bag, which also serves as a inflation bag / air pump, can also be attached to the bow. However, since it can only be attached to the bow via the roll closure, it then hangs inside the boat. We find this rather impractical, as it restricts legroom. To attach it to the bow, there are no other attachment points on the dry bag. Therefore, we recommend a packraft such as the Ortlieb Gearpack or the Itiwit Backpack 30L, which has multiple attachment points to secure it to the bow using the 4 attachment loops.

Although the packraft does not have a backrest, we feel that the seating comfort is very good. So we do not miss a backrest. One finds with his lower back good hold on the air tube. The seat height is also comfortable, so that a clean paddle stroke can be performed. The seat also stays in position when paddling and does not slip.

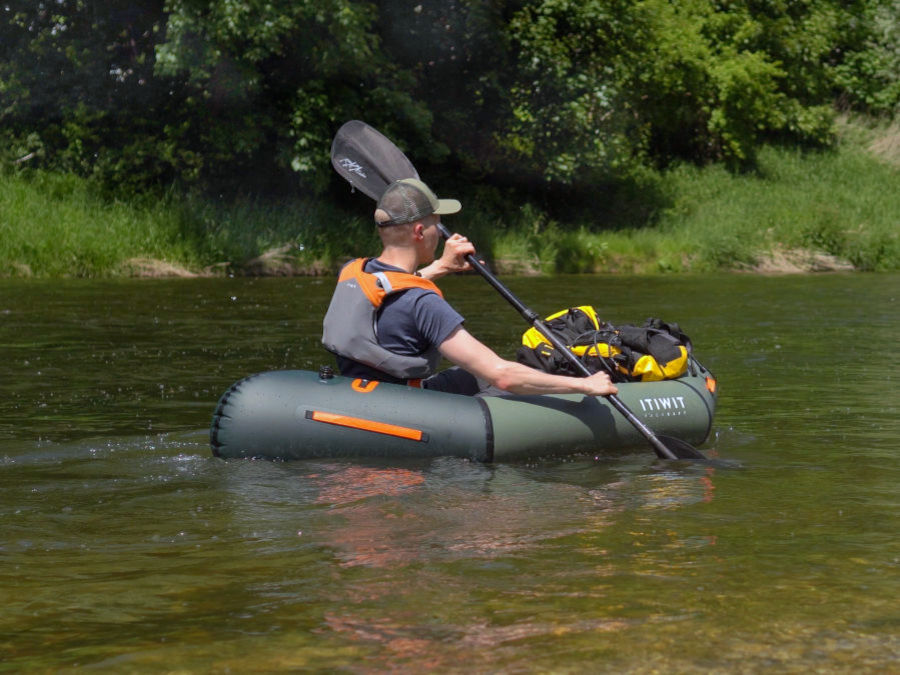
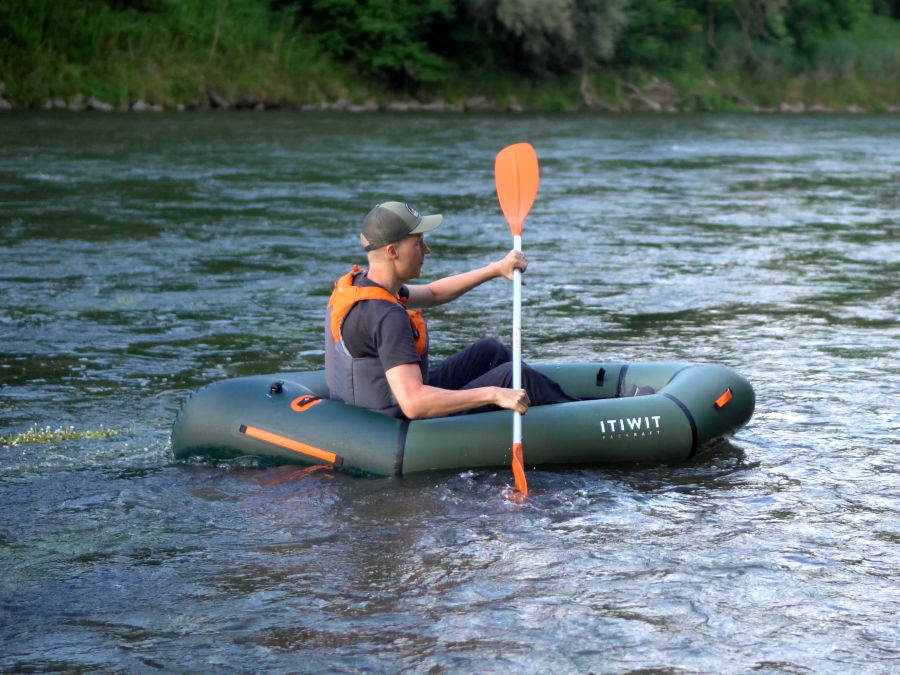
In addition to space and seat comfort, the boat’s handling characteristics are, of course, another important aspect we’d like to discuss in more detail. Like many Packrafts, the Itiwit Packraft 100 feels most at home on gently flowing waters. With some current, you can make good progress with fewer as well as somewhat steeper paddle strokes, and paddling is fun. The maneuverability is very good due to the shortness and width and you navigate even through narrower passages or past obstacles safely and well.

On stagnant waters such as lakes, the usual weaknesses of packraft handling characteristics become apparent. Paddling too hard will cause the boat to sway left and right. Therefore, you should rather paddle steeper and less forcefully, but this leads to the fact that you naturally do not reach great speeds with the packraft. 3 – 3.5 kmh / 1.9 – 2.2 mph is a realistic average speed. Above 3.5 kmh / 2.2 mph, paddling becomes too inefficient because the packraft sways too much to the left and right. Due to its shortness, the Itiwit Packraft 100 is even more noticeable for its rather mediocre handling characteristics on such waters than the Itiwit Packraft Adventure 500, which is somewhat longer and narrower in design. Moreover, when you stop paddling, the boat drifts away immediately to the left or right. So it’s very easy to turn.

From our point of view, the most important thing when considering the driving characteristics of the Itiwit Packraft 100 are your own expectations and requirements. If I want to cover a long distance with such a compact boat and expect the best possible speeds, I will be disappointed. Most Packrafts are not designed for that (except for models like the MRS Nomad S1). However, if I primarily enjoy such a compact and lightweight boat, which I can take with me everywhere without much effort to always have the opportunity to take a small leisurely paddle tour, then I will also be very happy with the boat. Then it is also ok if the boat runs slowly on the lake. So you should use the strengths of a packraft in the first place to come to terms with the driving characteristics. Ideally, you also combine hiking with paddling to benefit from the lightness and compactness of the packraft.

itiwit packraft 100 review river tour
On easy flowing water the packraft performs well

The Itiwit Packraft 100 can also be a good choice for paddling beginners. It offers namely a high tipping stability. The voluminous air tube, the flat bottom and the high hull width ensure that it is very difficult to capsize with the Packraft. As a beginner you will feel safe right away in the packraft thanks to the high tipping stability and the good seating position.

As usual with open packrafts, splashing water gets on your clothes and into the interior on longer trips. Double paddles with drip rings provide some relief here, but keep only part of the splashing water away. So in the summer it is best to paddle barefoot or with neoprene socks and shorts. Since the seat cushion is quite high, you don’t have to worry that your buttocks will quickly get wet.

In the off-season we recommend you to wear at least rain pants or better a proper cold protection in the form of a dry suit. If you often paddle in the off-season, a packraft with a spray deck might suit you better (e.g. Anfibio Rebel 2K, nortik TrekRaft Expedition). This is because a spray deck serves as protection against splashing water, rain and cold. The Itiwit Packraft 100 cannot offer you this protection without a spray deck.

Upgrading the Itiwit Packraft with a fin

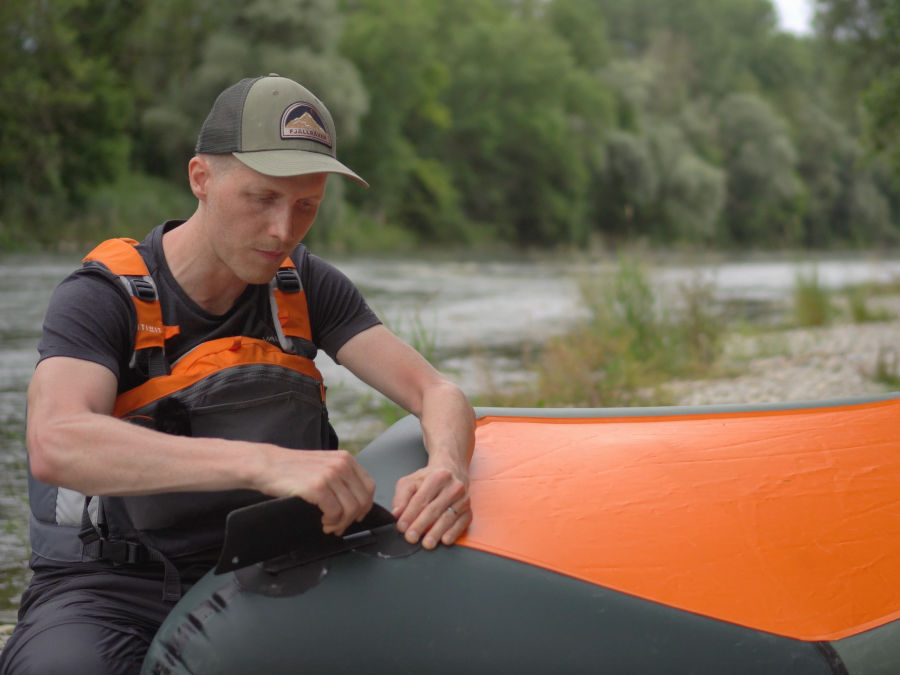
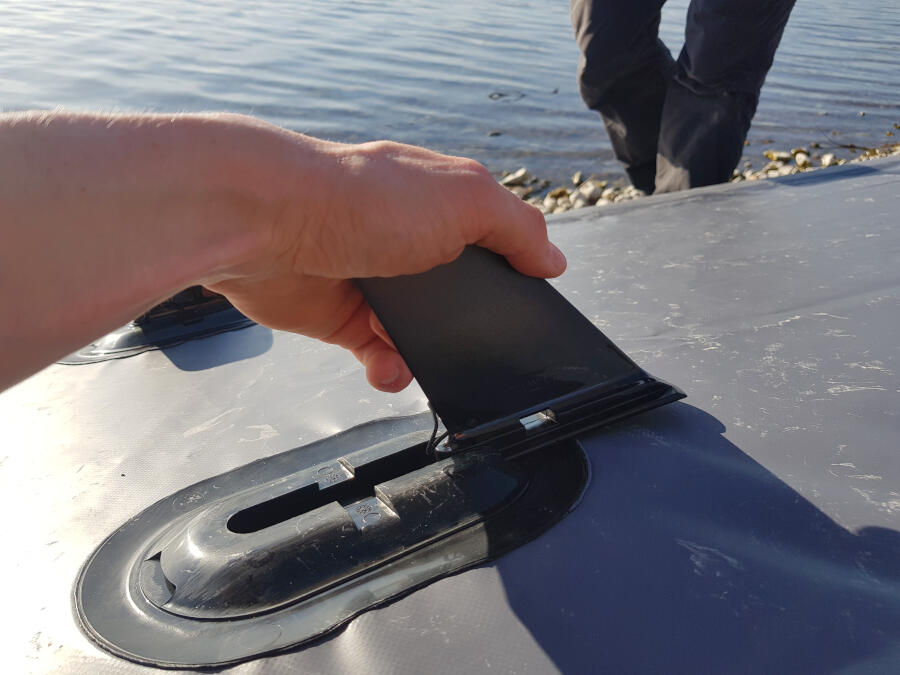
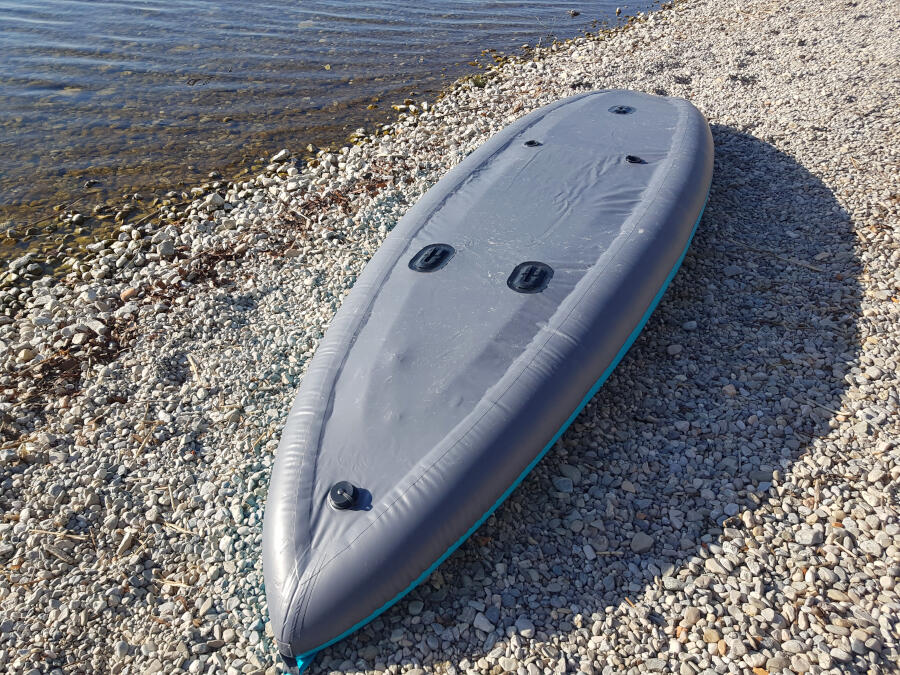
We have already mentioned that the Packraft is very easy to turn. To improve the handling characteristics, the use of one or more fins is common, especially for inflatable kayaks. For some packrafts, a fin is even offered in addition. The Itiwit Packraft 100 does not have a fin and also no fin holder to attach such a fin. However, such a fin holder can be retrofitted. For example, in the Packrafting Store there is a fin holder with fin, which can also be attached to the Itiwit Packraft.

decathlon itiwit packraft 100 fin
Attachment of a fin

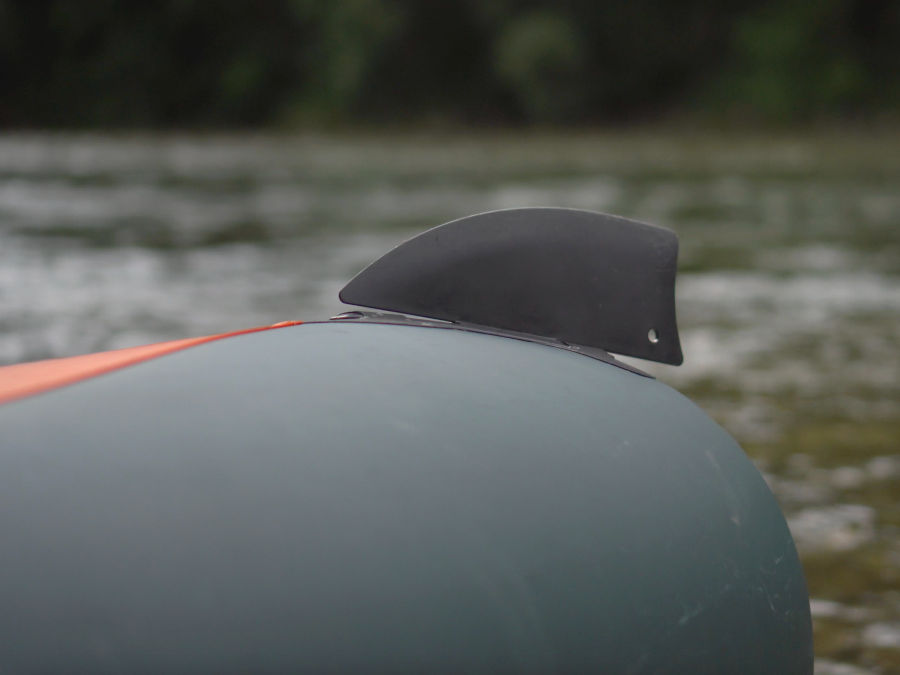
Accordingly, we bought a fin with a fin holder and attached it to the underside of the packraft. In the process, the holder is permanently attached with a 2-component adhesive. Before use on the water, the fin is then simply pushed into the holder.
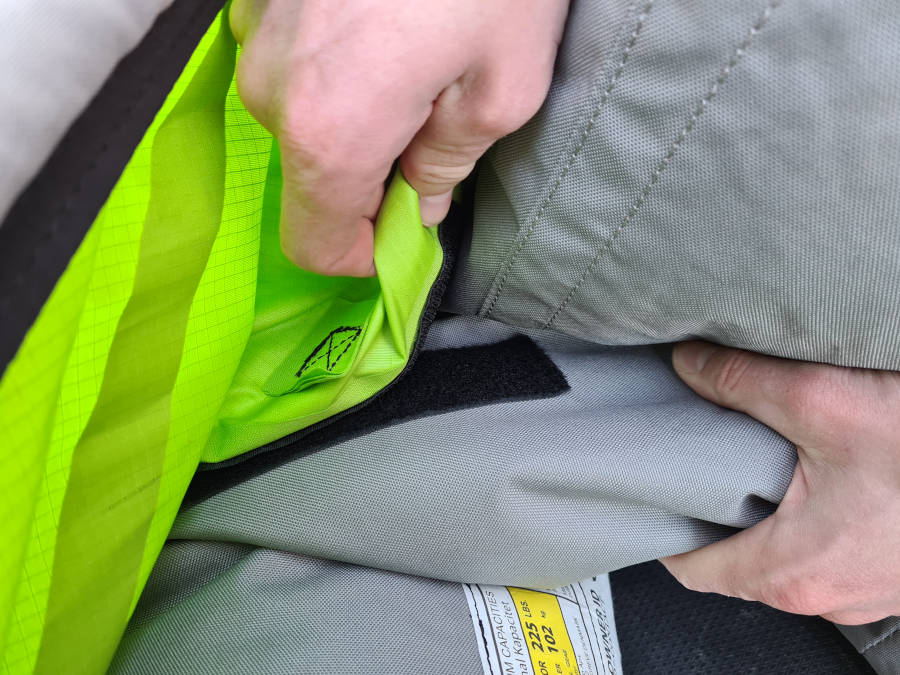
itiwit 100 packraft mounted fin
A fin ensures that the packraft drifts less

In terms of speed or straight-line paddling, the fin makes no noticeable difference. However, it does make a big difference in turning ease as soon as you stop paddling and drift. Without the fin, the boat drifts away to the side right away. With a fin, the boat stays on track and continues to glide straight ahead. Since you are not constantly paddling on the water, but also sometimes take small breaks to enjoy nature, drink something or take pictures, this improvement is a real plus. Therefore, we recommend the use of a fin on the packraft when the water is deep enough. Because if you are on a very shallow river, a fin is rather a hindrance, as you can get stuck with it.
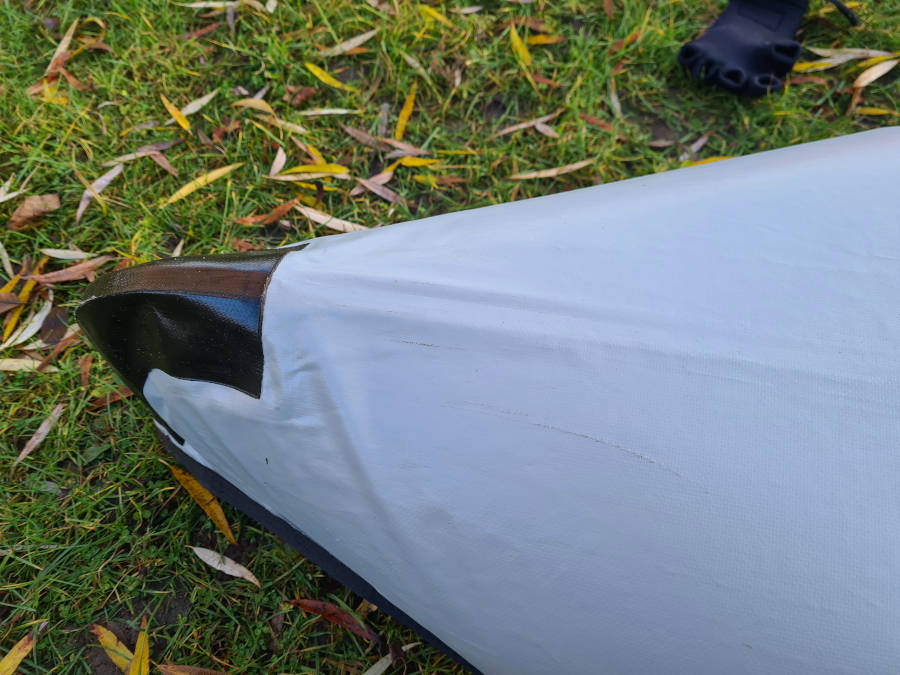
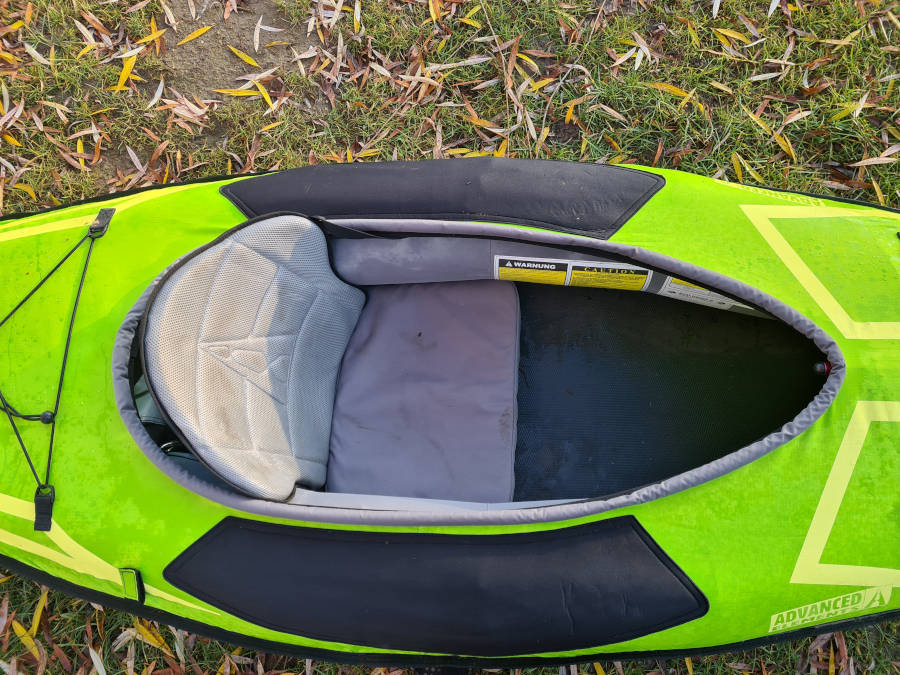
Dismantling the packraft

Dismantling the Itiwit Packraft 100 is quick and easy, as usual with packrafts. You unscrew the valve from the thread of the packraft and release the air. A large part of the air already escapes by itself. The rest escapes during folding and rolling. On the seat, you open the valve. There is a push button here that you have to push in to be able to push the air out. Theoretically, you can leave the seat in the boat and fold the packraft that way. But we take it out and put it separately in the transport bag.
itiwit packraft 100 dismantle
Dismantling the packraft is easy and quick

First, fold the packraft lengthwise. Make sure that it is not wider than the transport bag. Then you can roll up the packraft from the front to the rear. Afterwards you can compress the Packraft a bit with the seat strap at the rear, which also serves as a compression belt. This will prevent the packraft from unrolling on its own.
When the packraft is folded narrowly, it fits perfectly in the carry bag along with accessories and can be compressed to the original pack size.

Sometimes you just want to transport the packraft to the car and dry and fold it at home in peace. Since the transport bag is generously sized and can be varied in size by its roll closure, it is no problem to pack the packraft even in a less well compressed state. The transport bag can be closed at the top like a conventional dry bag with roll closure and can be used as a handle for transport.

itiwit packraft folded transport
With the carrying handles the packraft can be carried well even rolled up

Strenghts and weaknesses of the Itiwit Packraft 100

The biggest strength of the Itiwit Packraft 100 is its attractive price-performance ratio, which makes packrafting affordable, especially for beginners. The easy assembly thanks to the pump bag is another aspect that beginners will surely enjoy. Although the packraft is offered cheaply by Decathlon, as a customer you do not have to make any compromises in terms of workmanship and material. We find that particularly good.

We could not find any major weaknesses in this packraft. With the name ultralight, with which Itiwit advertises, it may be noted that not the last gram of weight has been saved here by the pump/transport bag and the seat cushion to make it really as light as possible. Other manufacturers such as Anfibio optimize here even more in terms of weight.

Without a fin, the boat is also very easy to turn. As soon as you stop paddling, the boat turns to the left or right. However, this can be remedied by retrofitting a fin. Large paddlers should also consider whether the space in the boat will be sufficient for them in the long run.

Advantages

+ good workmanship + very good price-performance ratio + very easy and quick assembly due to the pump bag + pump bag can be used as transport and dry bag + sufficient carrying and safety handles available + good seating comfort + safe handling in calm waters (high tipping stability, high seating cushion, good maneuverability) + self-adhesive repair patches included

Disadvantages

– heavier than average equipment for an ultralight packraft (seat cushion and pack/pump bag) – very easy to turn without fin – when using shoes little legroom for tall paddlers in the long run – bottom of the side tube is little protected against high stresses – lack of attachment points on the pump/bladder bag

Conclusion on the Itiwit Packraft 100

With the Itiwit Packraft 100, Decathlon has brought a solid entry-level packraft onto the market, which is unparalleled at this price. Those who have so far given packrafts a wide berth due to the high investment costs, will find exactly the right model with the inexpensive Itiwit Packraft. It is focused on the essentials without big features to keep the price low. In addition, it is also light and compact with a total weight of about 2 kg / 4.4 lbs to benefit from the greatest advantages of a packraft. Precisely because Decathlon has not skimped on the material and workmanship, we can recommend the boat to the price-conscious beginner.

However, if you are willing to invest a little more in a packraft, you should definitely take a closer look at other packrafts and compare which boat best meets your requirements. For a little more money, Itiwit offers the Packraft Adventure 500, which also has a T-Zip for luggage stowage and is equipped with a front spray deck and thigh straps.

Itiwit x500 canoe review

The itiwit canoe x500 is a full drop stitch canoe from Decathlon. The x500 is a canoe with two benches and a large seat cushion in the center, i.e. for two adults and two children. So far, there are only a few reviews on the web about such drop-stitch canoes. We had the opportunity to test this drop-stitch canoe extensively and would like to share our experiences with you in this review.

itiwit decathlon canoe

Technical Specs

Max. paddlers:
Length:
Width:
Capacity:
Packed size:
Material:

2 + 2
510 cm | 16’7”
100 cm | 3’3″
250 kg | 551.2 lbs
100 x 45 x 38 cm | 3’3” x 1’5” x 1’2″
Drop-Stitch with PVC coating

Weight:
Pressure:
Produced in:

32 kg | 70.5 lbs
0.7 bar | 10 PSI
China

Which model has been reviewed?

Itiwit x500 canoe from 2022

How did we organize the review?

The Itiwit x500 was provided to us by Decathlon, a French manufacturer and distributor of sports equipment and clothing. Itiwit is a brand for the paddle sport of Decathlon. Our review is independent of the manufacturer or shop and reflects our own opinion of the boat.

How intensively has the product been tested?

low

high 1 bar = 1-3 km paddled (first impressions)
2 bars = min. 1 day/ 2 half-day tours
3 bars = min. 4 tours
4 bars = min. 8 tours
5 bars = min. 12 tours (very intense)

Where have we tested the product?

Whitewater

Calm rivers

Lakes

Table of Contents

First impressions and assembly

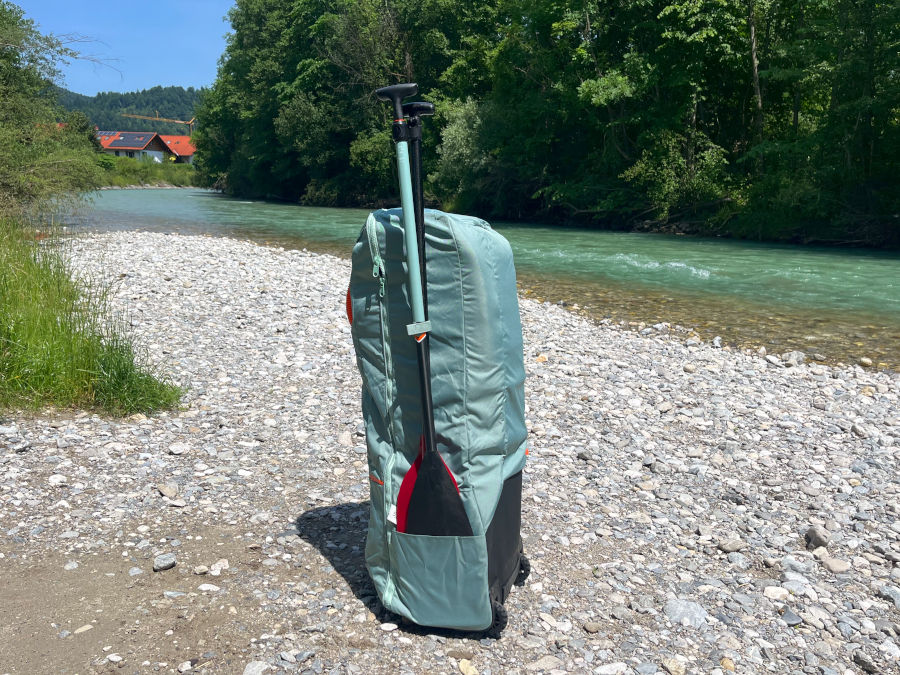
Included with the Itiwit canoe is a trolley, more precisely, this is a transport bag with wheels. This rolling function is also necessary, because the canoe with 32kg weight on the back would hardly be transportable. The bag makes a solid impression and has several well-padded carrying handles, so that the bag can also be loaded by two.

itiwit decathlon canoe trolley
Trolley included
itiwit canoe trolley wheels
Wheels of the trolley / transport bag

The canoe itself is compressed with a packing strap and folded several times. To assemble, the canoe is unfolded and the three separate air chambers are inflated one after the other to 10 PSI or 0.7 bar. The air chambers are inflated via spring valves that are easy to operate. They are similar to the valves of other high-quality inflatable canoes (e.g. Gumotex Palava, Gumotex Scout, Grabner Adventure).

For the assembly we used the Itiwit high pressure pump. There is also a successor to the pump that we recommend for this canoe, as this pump has a deflate function (more on this in the Dismantling section). Both of these air pumps are double action pumps. The first 5 PSI is pumped up with double stroke, meaning that air is pushed into the air chamber both when the piston is pushed down and when it is pulled up. Above 0.5 PSI, the double-stroke function is deactivated, so that air is only pumped into the chamber when pushing down. This is because the higher the pressure, the more difficult it is to raise the piston of the pump if air is still being pushed into the chamber at the same time. With the double stroke pump, the canoe was pumped up very quickly without much effort. Here, the thin drop-stitch air chambers are advantageous, as they require more pressure but less volume of air.

itiwit canoe x500 pack size
Itiwit canoe x500 folded
itiwit x500 canoe unfolded length
Itiwit canoe unfolded
itiwit decathlon inflation canoe
Inflating the canoe

You can see two dents on one side chamber and another dent on the other side chamber. This is completely normal, because the valves are located there. To install the valves in manufacturing process, the threads of the drop stitch material must be cut at these points.

What is Drop-Stitch?

With the Drop-Stitch technology, the upper and lower inner walls of the air chamber are additionally woven with nylon threads. This is the only way to achieve a significantly higher air pressure than with air chambers without the tangled nylon threads. The air chamber thus achieves very good dimensional stability and rigidity. The Drop-Stitch technology is very common for SUP boards (Stand Paddling Boards) and is used more and more for inflatable kayaks. Learn more about this type of inflatable boats, in our buyer’s guide for Drop-Stitch kayaks.

The lower hull is additionally reinforced with PVC in the middle and rubber-like keel strips in the bow and stern areas to protect them from grounding in low water and when landing on the shore in the most stressed areas. In addition, under the keel strips at the bow and stern, there is an incorporated plastic strip inside the boat, which stiffens the area more and creates a sleeker bow and stern. It serves both as a tracking profile and to minimize water resistance when paddling.

The drop stitch material is made of polyester on the inside, which forms the threads for the drop stitch. The polyester is coated with PVC on the outside. How strong the PVC is, we can not say and could not find any information about it at Decathlon. Overall, the hull and interior is cleanly processed and glued.

itiwit decathlon canoe hull
bow shape of the Itiwit x500 canoe
itiwit decathlon canoe bow shape
Keel strip on the bow

The canoe has small spray covers at the bow and stern, but without any luggage net. Instead, there is plenty of room for luggage in the interior with many fastening options on the bottom. In the photo below, you can see again how thin the side walls are and how much the interior of the Itiwit x500 canoe resembles that of a rigid hull canoe.

There are also small mesh pockets for small items incorporated into the spray covers. In the front and in the back there is a plain carrying handle for transporting the assembled canoe.

itiwit canoe decathlon interior review
Interior of the canoe, with the bench seats installed

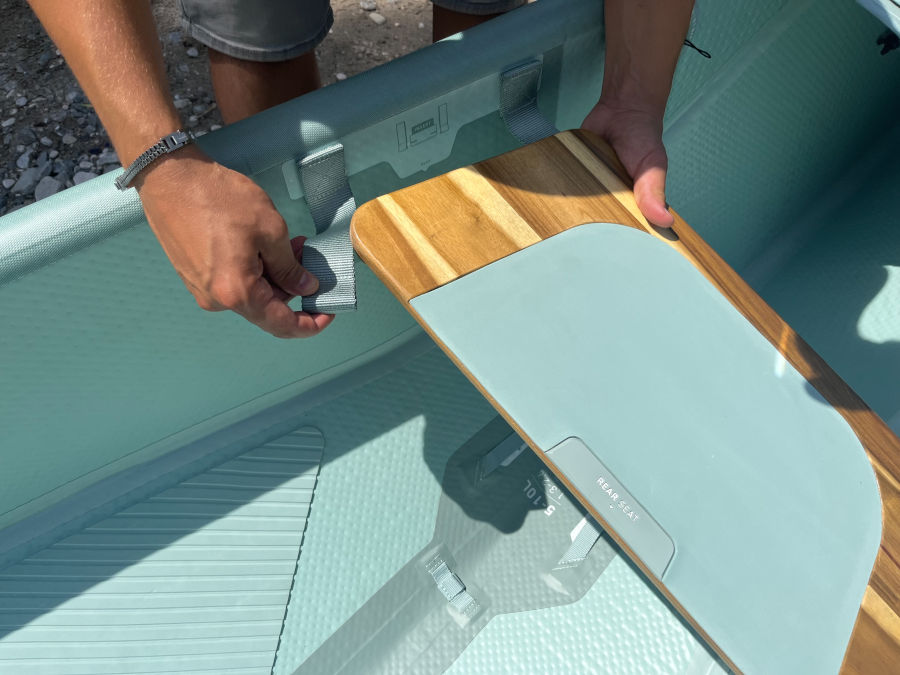
After inflation, the only thing missing are the two bench seats and, as needed, the seat cushion for the children, which is firmly glued to the interior of the boat. The two bench seats are hooked into the front and back of the boat. Once you understand the principle, the bench seats are easy to hook in.

Compared to other inflatable canoes (e.g. Gumotex Palava, Gumotex Scout or Grabner Adventure) the positions of the bench seats are fixed. The bench seats are marked accordingly with “Rear Seat” and “Front Seat”, because they have a different width. The rear seat board (own weight of 1.55 kg / 3.4 lbs) has an average width of 52 cm / 1’7″ and the front seat board (own weight of 1.05 kg / 2.3 lbs) of 68 cm. Both have a depth of 25 cm / 8″. In addition, the seat boards have a foam insert in the middle as a kind of padding for the seat. The neatly finished bench seats are made of acacia wood and give the canoe an overall high-quality impression.

In addition, there are grooved treads in the interior in the area of the seat boards, as a kind of anti-slip function and additional protection of the drop-stitch material (for example, if you have kicked a sharp stone in the sole of your shoe).

itiwit decathlon canoe seat bench installation
Installation of the seat bench

Those paddling with children can inflate the drop-stitch air chamber in the center of the interior. It serves as a low bench seat for small children. The seat cushion is firmly glued to the floor chamber and thus cannot be removed. For children, this seating position seems ideal, as they sit lower and thus safer in the boat. Unfortunately, there is no third suspension in the middle for an additional seat bench (as in the Gumotex Palava, Scout, Grabner Adventure). So this canoe is a family canoe with small children or a canoe for camping trips of several days. However, there are drop-stitch canoes with three bench seats on the market (e.g. Verano CanCan, Extasea), but we haven’t paddled them ourselves yet.

Overall, the Itiwit Canoe x500 makes a very quality impression. It is very spacious, quick and easy to assemble and cleanly finished. We are curious to see how the canoe performs on and off the water.

Transportation of the canoe

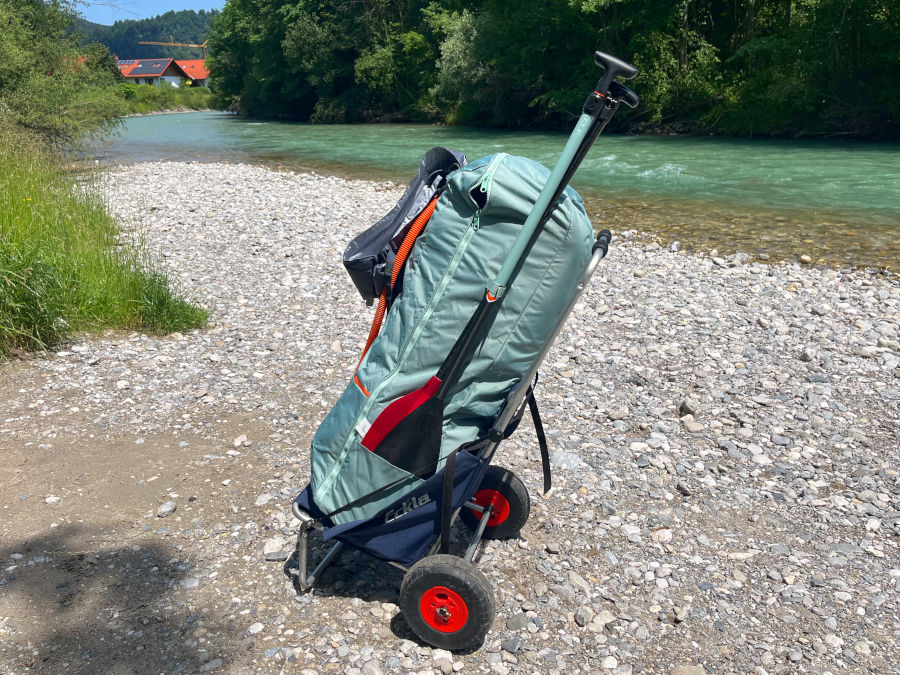
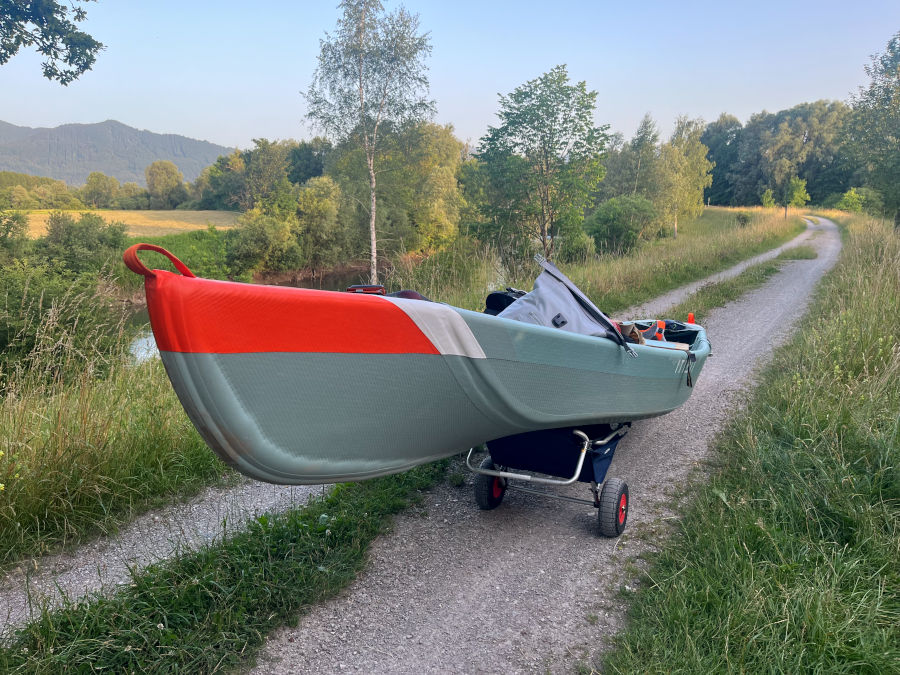
On the way to the station and to the shore, the transport bag proved to be practical but not comfortable. The weight of the boat is too high for a transport bag with rolling function. After not even 5 minutes you have enough to push or pull the canoe and you get “long arms”. It works much better if a proper transport cart (e.g. Eckla Beach Rolley) is used in addition. With such a transport trolley, the transport also succeeds very well over a longer period of time.

The included transport bag with roll function is in our view especially suitable for users who want to roll the canoe only a few meters between home and car or from the parking to the lake or river nearby. Practical as with any Itiwit boat backpack is the holder for the air pump and the side pocket for the paddles on the outside of the bag.

itiwit canoe eckla beach trolley
The best way to transport the canoe is with a canoe transport cart

The instructions state that the assembled canoe should only be transported without luggage. We immediately felt when we wanted to carry the loaded canoe just a few meters to put it in the water. It immediately bends and the sidewalls lean outward. You only lift the bow and stern, so to speak, and the actual hull of the boat stays on the ground. So, to avoid damaging the boat, it was a case of unloading again, positioning it in shallow water and reloading. This is where the limitations of drop-stitch become apparent. A hard shell canoe could be lifted easily with enough muscle power. So you have to load the boat on the dock or in shallow water on the shore. Because in the loaded state you get the Itiwit canoe x500 as good as hardly moved.

itiwit canoe decathlon transport
Transferring the Itiwit canoe x500 with a canoe cart

The following has proven to be useful when transferring canoes on river trips at weirs and larger bottom ramps. Unload the canoe and put it on a canoe trolley. In the middle of the canoe, under which is directly the canoe cart, we then put the luggage back into the boat. So we didn’t have to transport the canoe from A to B first and then laboriously catch up with the luggage. Here we can already say, a canoe trolley makes double sense for the canoe, for the transport in the dismantled condition and for tranferring on river tours. Even unloaded a canoe cart is a real benefit because the Itiwit x500 canoe is pretty heavy and unwieldy.

Review of the Itiwit x500 canoe on the water

The experiences described are based on paddling with two people, including on a 3-day tour with camping gear in light whitewater, on a alpin lake and calm river sections. Paddling with one or two children, for which the canoe is advertised among other things, is not covered by this test.

Paddling performance and stability

We paddled with the Extrasea and the Itiwit canoe paddle. Both can be adjusted in length, and are thus optimally adaptable to one’s own needs (body size and boat).

From the running characteristics it resembles that of a hard shell canoe. The Itiwit canoe has a good straight running. However, depending on how both paddlers are used to paddle together, it may be necessary for the rear paddler to correct the course somewhat (for example, by using the paddle at the end of the stroke as a rudder).

decathlon itiwit canoe review lake tour
The Itiwit x500 has good running characteristics for an inflatable canoe

In terms of speed, the Itiwit canoe cannot compete with a folding or hard shell canoe. If you paddle leisurely, you come to about 4.5 kmh / 2.8 mph. The maximum speed is 7.5 – 8 kmh / 4.7 – 5 mph, and both paddlers have to paddle vigorously and with a high frequency. You can feel the resistance of the water clearly at the bow. Paddling alone is possible, e.g. with J-stroke. On calm waters, however, progress is slow.

The rear bench seat is positioned sufficiently far back so that the rear paddler can easily correct the course or maneuver past obstacles early on rivers. If you have a good command of the bow stroke and the steering stroke, you will be able to maneuver the canoe safely even on fast-flowing rivers. When turning, however, you immediately notice the length and inertia of the canoe. It takes some more strokes of the paddle to turn it 180 degrees. However, this is common with large canoes.

itiwit canoe white water review
Itiwit x500 canoe has a sufficiently high tipping stability

At the beginning, the Itiwit x500 canoe feels slightly tippy, but lies securely on the water. The tipping stability is lower than the Itiwit x100+ but significantly higher than the Itiwit x500 kayak. On a 3-day canoe trip including light whitewater portion we had no situation where we almost capsized.

Seat comfort

Although the seat boards have a fixed position (like a hard shell canoe), the positions of the seat boards are well chosen. Each paddler has enough space and legroom. The seat height is also well chosen from our point of view.

decathlon itiwit x500 canoe review
The bench seats have a good height

Unfortunately, the seat boards are only hooked in and not secured against loss. So in the event of a capsize, a board can get lost, which would be annoying. When paddling, however, we did not have the problem that a seat board had come loose from the suspension. We sat on the seat boards (76 kg / 167.5 lbs and 85 kg / 187.4 lbs) safely and stably, even though they are only hooked onto straps. Paddling in a kneeling position is also well possible. Also, the attachment of the suspension loops on the boat wall are attached high quality.

itiwit canoe seat cushion comfort
On long tours, a seat cushion is recommended for improved seating comfort

The upholstery of the seat boards, on the other hand, has only a very small effect on comfort. For example, the padding of the seat boards of the Gumotex Palava or Scout is much better. On longer trips of several hours, we recommend using a small seat cushion with the Itiwit canoe. We have used a flat inflatable seat cushion for this purpose, which significantly increases the seating comfort and thus allows comfortable sitting throughout the day.

Luggage load and attachment

The disadvantage of previous inflatable canoes was the limited load space due to the voluminous side air chambers, which significantly reduce the interior space. This disadvantage is eliminated by the use of Drop-Stitch, because thin side walls are possible with this material.

A small disadvantage of Drop-Stitch compared to classic air chambers is the lower air buoyancy, so that for this canoe there is a maximum payload of 250 kg / 551 lbs. Classic inflatable canoes manage a payload of up to 450 kg / 992 lbs.

decathlon itiwit x500 canoe tour review
A drop stitch canoe offers a very generous interior space
itiwit x500 canoe space interior
very much space, e.g. for a multi-day tour
inflatable canoe interior space
Classic inflatable canoes offer significantly less interior space

The outer appearance of the Itiwit canoe is almost identical to that of a hard shell canoe. Due to the thin side walls, you have as much space in the Itiwit canoe as in a conventional hard shell or folding canoe. It is no problem to stow a folded boat trolley or a large backpack in the interior. In addition, there are numerous attachment loops in the interior for securing luggage. For larger luggage we use 3m long tension straps with clamp lock and rubber cover, with which bulky luggage can be secured to the floor very well. For small luggage (e.g. for the attachment of Itiwit luggage canisters) the canoe already comes with two tension straps.

itiwit x500 fixing gear
Fastening the luggage to the floor
itiwit x500 canoe storage compartment
No luggage net but small luggage compartments at the bow and stern
itiwit canoe spray deck bow
Another storage compartment below the mesh pocket

There are also stowage options on and under the spraydeck at the bow and stern to store small utensils (e.g. bars, sunscreen, small towel, etc.) that should be quickly at hand on the water. However, valuables should not be stowed there, as the pockets are not completely closable. It is a pity that there is not a single D-ring in the bow and stern to securely fasten a small dry bag.

Dismantling the Itiwit x500 canoe

Even if the boat skin can be wiped dry, the carrying handles and the luggage loops in the interior are soaked after a long tour with a lot of getting in and out (e.g. during transfers or breaks) and must be allowed to air dry. If you have taken your canoe through rapids, you may also have wetness in the interior. This is because at the top of the boat, where the carrying handles are located, it is not completely sealed. On the other hand, if you’re doing quiet river or lake recreational tours and don’t put the canoe in the water from steep bank, you won’t have to expect water ingress around the carry handles.

In addition, the carrying handles and the light interior are quite susceptible to dirt. The drop stitch material is very easy to clean of dirt. Dirty discolorations remain on the carrying handles and the grooved treads in the interior (we have not yet tried a clean scrubbing with soap).

itiwit x500 canoe inner
Moisture under the spray deck covers
itiwit x500 canoe carry handle
carry handle on the bow
itiwit canoe decathlon interior review
Not everything in the interior is easy to wipe dry and clean

For dismantling, the canoe must be folded exactly as described in the manual and the remaining air must be pressed out of the air chambers or, ideally, pumped out with the correct air pump (e.g. Itiwit high-pressure pump with deflation function), because otherwise the canoe will not fit the transport bag. Markings on the boat skin “Fold here” help to fold the boat in the right place. It is best to fold it in pairs. Alone, it takes even more patience and practice to get it back into the bag.

Strengths and weaknesses of the Itiwit x500 canoe

Classic inflatable canoes have the disadvantage of less space. Folding canoes require a much longer assembly. hard shell canoes require sufficient space at home for storage and cannot be transported by public transport. These disadvantages no longer exist with the Itiwit canoe, which is its greatest strength. It can be transported without much effort, quickly assembled and offers a spacious interior.

The running characteristics are good, but do not come close to those of a hard shell or folding canoe. The canoe is still well transportable with the included transport bag with roll function, but still heavy at 32 kg for a portable boat. For longer transport distances and transfers on river tours, we recommend the use of a canoe trolley. It is also a pity that no third bench seat can be mounted optionally. Thus, using the canoe with three adults is out of the question.

decathlon itiwiti drop stitch canoe
A nice canoe for multi-day trips for two or family trips

Advantages

+ very fast and easy assembly + good workmanship + very spacious interior + bench seat for children included + many fastening loops in the interior for securing luggage + good running characteristics for an inflatable canoe + small luggage compartments at the bow and stern + bag with roll function included + high-quality benches + good price-performance ratio + bottom of the hull as well as bow and stern additionally reinforced

Disadvantages

– foam padding of the seat boards have only a small effect on the seating comfort – seat boards are only hooked in and are therefore not secured against loss – dirt-prone interior – uncomfortable transport despite rolling bag – packing requires an air pump with deflate function and some practice – not designed as a 3-person canoe although the canoe would be large enough (because no possibility to attach a 3rd bench and limit the load to 250 kg)

itiwit canoe drop stitch camping trip
On a camping trip for several days with the Itiwit canoe x500

Conclusion on the Itiwit x500 canoe

Decathlon has succeeded with the Itiwit canoe x500 a nice canoe for family trips and multi-day canoe trips with camping. It offers a lot of space inside. Just load everything in without having to play Tetris. Large luggage can be fixed well in the interior without disturbing the paddlers. So nothing stands in the way of a family trip or camping trip lasting several days.

It is a real pity that the canoe cannot be equipped with an optional third bench seat in the middle. If necessary, the construction of the canoe does not even allow a bench seat for another person to be hooked into the widest, most unstable part of the canoe. The bench would have to be almost a meter wide. In addition, with three adults and luggage, the load limit of 250 kg would quickly be reached.

However, anyone paddling with children will be all the more pleased with the low bench seat in the form of another air chamber that is permanently integrated into the boat. The children sit much more securely in the boat than on a suspended bench seat. For families who like to travel with a canoe, the Itiwit canoe x500 is thus a good choice. Thanks to the quick assembly, you are on the water very quickly. When not in use, the canoe takes up hardly any space for storage at home.

If you don’t need the middle seat, you can leave it uninflated and stow luggage there unimpeded. For one-day tours for two, however, we would personally use a classic inflatable canoe, which are more compact and sometimes cheaper and, depending on the model, even more robust.

Aqua Marina Steam 412 Review

aqua marina steam carrying

The Aqua Marina Steam 412 is an inflatable kayak with drop-stitch floor. This is the new edition of the Aqua Marina Steam 412 from 2022. Compared to its previous model, not only the color scheme has changed, but also the width, capacity, spray covers and much more. The manufacturer even speaks of improved running characteristics.

For a 2-person drop-stitch kayak in the upper entry-level segment, it has a decent length of over 4m, has a footrest for both paddlers and two large fins. These are all aspects that should speak for good running characteristics. In addition to that, space and seating comfort are also crucial. In this review, we are interested in whether the inflatable kayak is more than just a beginner’s boat, i.e. whether you can also paddle longer tours with it in the summer and if it’s also an option for beginners with higher demands.

aqua marina steam 412

Technical Specs

Max. paddlers:
Length:
Width:
Capacity:
Packed size:

2
412 cm | 13’5”
90 cm | 35″
180 kg | 396,8 lbs
88 x 59 x 30 cm |
2’9” x 1’9” x 1′

Material:

Polyester & PVC (sides),
Drop-Stitch & PVC (floor)

Weight:
Pressure:

15.5 kg | 34.2 lbs
0.1 bar | 1.45 PSI (sides),
0.3 bar | 4.35 PSI (floor)

Produced in:

China

Which model has been reviewed?

Aqua Marina Steam 412 from 2022

How did we organize the review?

The Aqua Marina Tomahawk was provided to us on a rental basis by Arts-Outdoors, a store and online shop for outdoor gear. Our review is independent of the manufacturer or store and reflects our own opinion of the boat.

How intensively has the product been tested?

low

high 1 bar = 1-3 km paddled (first impressions)
2 bars = min. 1 day/ 2 half-day tours
3 bars = min. 4 tours
4 bars = min. 8 tours
5 bars = min. 12 tours (very intense)

Where have we tested the product?

Whitewater

Calm rivers

Lakes

Table of Contents

Assembly and first impressions

The Aqua Marina Steam 412 makes a pretty compact impression when packed. On the other hand, the foam seats are quite bulky. The package includes a compact air pump with an integrated pressure gauge, a 10-liter dry bag, two large directional fins, repair materials, a water guard for the bow, a valve wrench and a solid transport backpack.

In total, the kayak with accessories weighs 15.5 kg (34.2 lbs) and can be easily transported in the included transport backpack. The backpack has padded shoulder straps, a simple chest and hip belt, and a large mesh pocket on the side for paddles or other accessories. The very simple waist strap is unnecessary in our view, as it is only a narrow strap and the click closure is pretty uncomfortable. Even without using the waist or chest strap, the kayak is very comfortable to carry in the included backpack. The side mesh pocket is nicely sized to fit two double paddles without squeezing.

If you pack the kayak well, you can easily fit the air pump and optionally two life jackets in the backpack. The backpack could be a little more robust overall from the material. After the second paddling tour, there was already a small hole in the fabric, which will be unavoidable in the long run. The previous model only came in a simple carrying bag, so that the perfectly fitting transport backpack alone is a really good upgrade.

aqua marina steam transport backpack
A transport backpack is already included.

To assemble the kayak, we first start by inserting the Drop-Stitch floor into the boat. The Drop-Stitch floor is quite narrow and has two cut-outs on both sides. The cut-outs are a good guide to whether the drop-stitch floor is positioned correctly in the boat. The cut-outs are there to expose the drain openings. However, on sea and calm river trips, the drain holes remain closed.

aqua marina steam kayak unfolded
The drop-stitch floor is a separate element
aqua marina steam drop stitch floor
Before inflating the floor needs to be inserted
aqua marina steam unfolded
Kayak with the inserted floor

What is Drop-Stitch?

With drop stitch technology, the upper and lower inner walls of the air chamber are additionally interwoven with textile threads. This makes it possible to achieve a significantly higher air pressure than with air chambers without the interwoven threads. The air chamber thus achieves very high form stability and rigidity. The drop stitch technology is very common in SUP boards (stand paddling boards) and is used more and more in inflatable kayaks. Learn more about it in our article about drop-stitch kayaks.

We noticed that the drop stitch is not glued cleanly in some places. Small unsightly spots where the glue is not clean are often found on boats produced in China and are not functionally critical. Nevertheless, these spots on our test model are clearly more than what we know. Even if it should not have any functional effects, this is a pity for a new product.

aqua marina steam 412 drain valves
Closed drain openings on the floor
aqua marina steam kayak workmanship
Unclean finishing on the drop stitch base

Now the side chambers can be inflated. The valves are spring valves. When inflating, the pin must stick out. Then the valve adapter of the air pump can be screwed on. The air chamber is quickly inflated, as it requires only 0.1 bar (1.45 PSI) and has a smaller diameter compared to other inflatable boats.

After the two side chambers are inflated, the drop stitch air chamber follows. This is also quickly inflated. The drop stitch is inflated to 0.3 bar (4.35 PSI), which is not much for a drop stitch air chamber.

Although a little air escapes from the pump during inflation and the double stroke pump is quite small, inflation was very quick and easy.

aqua marina steam inflation
Inflating the kayak with the included air pump
aqua marina steam air pump gauge
Pressure gauge for measuring the air pressure
aqua marina steam kayak drop stitch valves
There are a total of 3 spring valves

Admittedly, the air pressure of the air chambers for an inflatable kayak with an insertable drop-stitch floor is lower than average. The cheaper Itiwit x100+ even holds 0.2 bar (2.9 PSI) in the side chambers and 0.35 bar (5.1 PSI) in the drop-stitch floor. The lower air pressure in the Aqua Marina Steam, especially the air pressure in the side chambers, makes a noticeable difference on the dimensional stability and stiffness of the kayak. Compared to the drop-stitch floor, the rest of the hull with its side chambers has a very good finish.

aqua marina steam drop stitch kayak spray guard
Water guard, which stretches the spraydeck of the bow

For additional protection against waves that would otherwise come splashing into the boat from the front, the front spraydeck can be stretched with a plastic part as a kind of wave/water guard. If then a wave comes on the bow, the water does not run into the interior but sideways off.

aqua marina steam kayak seat
Inserting the seats
aqua marina steam boat seat adjusting
Attaching the seat with carabiner

Then the seats are inserted into the boat. To do this, the seats are fixed to the floor using Velcro. The backrest is attached to D-rings on the side chambers with four carabiners. The D-rings make a high-quality impression and are double reinforced on the side chamber. The advantage of the carabiners is that you don’t have to adjust the straps again on the next trip.

The upper straps of the backrest are attached to the side chambers in front of the seat and the lower straps are attached to the side chambers behind the seat. This way, the backrest cannot fold forward or backward. The upper straps can also be used to readjust the individual position of the backrest.

The footrests are already mounted in the interior. We try it out and we (1.89 m / 6’22” and 1.76 m / 5’77”) immediately notice that for us the distance between seat and footrest is clearly too small on both seats. Both footrests have two positions, and the footrests are already attached to the outer tabs. So we could only move the footrests closer to us, which doesn’t help.

aqua marina steam kayak space front
Maximum legroom with footrest (front)
aqua marina steam kayak rear
Maximum legroom with footrest (rear)
aqua marina steam footwell foot brace
Removal of the footrest

So we place both seats much further back in the boat to create more space, because there is still enough room behind the second seat. However, the problem now is that the upper straps of the backrests are not long enough. We checked the manual again to make sure we installed the seats correctly. Also, the straps of both seats have the same length, so they have not been switched either. If we attached the lower straps of the backrest (which are actually a bit longer) in the front, the backrest would barely provide any support.

That is pretty annoying. A few more attachment loops on the floor for the footrest and longer straps on the backrest would have solved the problem. Presumably, the kayak was designed for markets where people are much smaller. So, without further ado, we decide not to use the footrests and remove them.

At the back of each seat there is a small pocket and two mesh pockets in the form of a drink holder, which is very practical for a leisurely tour in the summer.

aqua marina pocket seat
Cup holder and small pocket on the backrest

After that, we mount the two fins on the bottom of the kayak, which should provide a better straight running characteristics. Do not mount the fins on the boat until you are done with the seats and footrests.

aqua marina steam fin mounting
Plugging in the direction fin

In the photo you can see how narrow the drop-stitch floor is. You can also see that the kayak has a high rocker. In addition, both the bow and stern have plastic caps to better protect the kayak in case of collisions.

aqua marina steam kayak hull
Hull of the Aqua Marina Steam 412

Furthermore, the Aqua Marina Steam 412 has a total of 4 carrying handles, one each at the bow and stern as well as centrally on the side chambers. This allows you to carry the kayak both alone and with another to the water. If you want to store some luggage (e.g. the included 10 liter dry bag), you can use the luggage net at the stern.

aqua marina steam capacity
Luggage stowage
aqua marina steam dry bag
10 liter dry bag (included)

Furthermore, the Aqua Marina Steam 412 has a total of 4 carrying handles, one each at the bow and stern and centrally on the side tubes. This allows one to carry the kayak both alone and in pairs to the water.

aqua marina steam carrying
Das Aqua Marina Steam 412 lässt sich zu zweit
aqua marina steam transport to water alone
… and also transport well alone to water

Rewiev on the water of the Aqua Marina Steam

The entry is easy and turns out to be pleasant and safe due to the firm drop-stitch floor, even if it is “only” 0.3 bar (4.35 PSI). However, the two fins ensure that the boat must be placed in parallel with the shore. With the bow to the shore it works less well, because otherwise you would get stuck with the front fin. When landing on the shore, you should also keep in mind not to paddle the kayak directly onto the shore, otherwise you will touch the ground. Rather, position the kayak in parallel just before landing and then get out. Alternatively, you could leave out the front fin. However, we are interested in the paddling characteristics with the two fins.

aqua marina steam 412 space
There is not much legroom for tall people

Our first tour with the Aqua Marina Steam takes place on a cloudy and slightly rainy day on a lake. After a short time we are positively surprised by the driving characteristics. Although the kayak has a high rocker, it runs well for a kayak in this price range. We have the feeling that we are making good progress on the lake. Speeds between 5.7 (3.5 mph) and 6.2 km/h (3.85 mph) are no problem with a normal paddle stroke.

We also like the straight running characteristics quite a lot. The kayak runs much better straight than expected. When both stop paddling, it doesn’t drift right away. It takes a while and drifts only slowly. This is where the two large fins make a difference. Despite good straight running, the maneuverability on the lake is also good. The kayak can be maneuvered easily and quickly. In terms of handling characteristics, it offers more than the Itiwit x100+ 2-seater.

aqua marina inflatable kayak review
Paddling the Aqua Marina Steam 412 on a lake

The paddler in the back does not miss the footrest when paddling, as he can rest well on the backrest of the front seat without disturbing the other paddler. Nevertheless, there could be more legroom. Tall people (I sat in the back at 1.89 m and had the seat positioned as far back as possible) have to angle their legs too much. Unless the front person is shorter, so the front seat can be positioned further forward.

For the front paddler, a footrest would definitely be a nice feature on a longer trip, especially since you expect to be able to use a footrest when you buy the kayak. This only works if you’re shorter. If both paddlers are perhaps only 1.60 m (5’25”), it could probably work. Of course, in the end, it depends primarily on seat length, not height. If the use of a footrest is important to you, sit at home to test it before you go out on the water. However, for small leisurely paddling trips (with 2-3 h of paddling), you can safely do without a footrest, especially since the footrest is also just a kind of bar.

Although we had only small waves on the lake, the one or other wave came in the front side of the boat. What is noticeable is that the side walls are quite low. Probably, this is a possible reason why the one or other small wave came into the interior faster. Fortunately, the water in the boat gathers under the drop-stitch floor and in the cut-outs where the drain openings are located. So you don’t have water standing directly in the boat. In addition, the seat cushions are thick enough that you wouldn’t be sitting with your bottom right in the wet. Also, the seats stay in place and do not slip away. Overall, the seats offer a good seating comfort, especially the backrest gives a good support when paddling.

aqua marina kayak experience
Paddling the Aqua Marina Steam on a river
air pressure aqua marina steam 412
Soft side chambers
aqua marina kayak weight
The spray skirt hold well and tightly to the coaming.

On a river tour, we were convinced by the kayak’s tipping stability. Although it is not as stable as the Itiwit x100+, it still offers a sufficiently high tipping stability, so that even beginners feel comfortable in the Aqua Marina Steam.

We were particularly struck by the kayak’s low stiffness. If you lean on the side tubes to sit properly in the seat, the air chambers give way quite a bit on the one hand, and on the other hand you push the boat apart a bit. This is only known from cheaper boats, but not from drop-stitch kayaks. The kayak also sagged during the transfers due to the low air pressure. There are other reasons for this: First, the air pressure decreases in cold water and second, there was some water in the boat because some splash water got into the boat. With a Gumotex boat with similar dimensions (e.g. Gumotex Solar or Gumotex Swing 2, both with 0.2 bar / 2.9 PSI in the side chambers and in the bottom chamber) we never had the problem that during a transfer the boat sags to the bottom.

It is a pity that the narrow insertable drop-stitch floor is not attached to the actual boat hull (e.g. via two straps as on the Itiwit x100+). So we noticed that in the event of a capsize or too much water in the boat, the drop-stitch floor can be pushed up and come loose.

On river trips with low water levels, where unsightly groundings are to be expected more often, it is better not to attach the fins. Otherwise there is a risk that your kayak will often touch down or even get stuck. This happened on a river tour with the Aqua Marina Steam. The consequence is that you have to get out. One fin even broke off on the Aqua Marina Steam. This shows that the fin is made of a plastic that is too inelastic.

aqua marina steam broken fin
broken fin

Meanwhile, many 2-person inflatable kayaks can be reconfigured so that you can paddle the kayak very well alone. Aqua Marina does not offer this option. Rightly so! Because there are no separate attachment points for the footrest and seat for the 1-person configuration. Nevertheless, it was possible to attach the backrest so that it provides sufficient support while paddling. We definitely miss a footrest here then. Also, the kayak has more rocker, the waterline is shorter and the running characteristics decrease noticeably. The kayak is not designed for this, but you can still take it for a leisurely short paddle tour. However, we personally wouldn’t want to paddle with it for more than half an hour or at most an hour in this configuration (unless you let yourself drift down a river with just a few paddle strokes).

aqua marina steam 1 person configuration
The Aqua Marina Steam 412 is not designed for single usages
aqua marina steam 412 single use solo
Nevertheless, it can also be paddled alone for short distances

The Aqua Marina Steam has, among other things, the rocker and the many drain plugs to be able to use it better in white water. The kayak is even advertised for use up to whitewater level 3, to possibly suggest a higher value!? The kayak has in any case a sufficiently high tilt stability (but less than compared to the Itiwit x100+), but personally we would not paddle with the kayak in white water level 3. For white water level 3 it needs thigh straps and reasonable foot support, where not the heels but the balls of the feet can be put on. A self-bailer function through the numerous drain openings is in our view not yet an argument to be able to use the kayak safely in WW3. In addition, the narrow drop-stitch floor is only inserted in the boat and is not attached anywhere. In the event of a capsize, it could come loose. Last but not least, it should not be forgotten that whitewater has a very low water temperature most of the time. The side chambers would become even softer due to the low water temperature, so reinflation is necessary.

Dismantling the Aqua Marina Steam 412

The kayak is as easy and quick to dismantle as it is to assemble. The boat is easy to wipe dry and put back together. It went without problems everything back into the transport backpack.

aqua marina steam dry
Drying the interior

Water, which stands in the interior of the boat, can be very easily emptied via the drain plug in the stern or bow. If the seats are wet, they must be dried in the air.

Strengths and weaknesses of the Aqua Marina Steam

We liked the simple and quick assembly as well as the running characteristics best. The running characteristics are not comparable with an Itiwit x500, nortik scubi 1 XL or Advanced Elements AdvancedFrame Convertible Elite, but they are better than expected for this price range.

We were disappointed by the positioning of the seats and footrests. In addition, we would have expected a higher stiffness for a kayak in this price range, because the side chambers allow only 0.1 bar (1.45 PSI).

Advantages

+ good running characteristics (good speed, nice straight running in this price range, good maneuverability) + sure-footed when entering due to the insertable drop-stitch floor + compact air pump with integrated pressure gauge included + very quick and easy assembly/disassembly + good seats + numerous carrying handles and luggage net with cord for lashing luggage + good transport backpack included + bow and stern additionally protected

Disadvantages

Low stiffness (among other things because of side chamber only up to 0.1 bar (1.45 PSI) and narrow drop-stitch floor) – seats can only be positioned in the boat to a limited extent (thus little legroom for large paddlers) – despite splash guard panel, little splash water protection due to low side walls – footrests can only be used by small people – drop-stitch floor partially glued uncleanly – seats must dry separately and cannot simply be wiped dry – not very useful as a 1-person kayak – directional fins break easily with intensive ground contact – unsuitable as a whitewater kayak (up to whitewater level 3 as specified) from our point of view (no reasonable support via footrests and thigh straps, insertable drop-stitch floor is not fixed to the hull, . ..) – Locking caps of the drain plugs can quickly open during transfers

aqua marina steam 412 drop stitch kayak review
Aqua Marina Steam 412

Conclusion on the Aqua Marina Steam Drop-Stitch kayak

With the rocker and the drain plugs, as well as the longer design and the two large fins, Aqua Marina wanted to bring a real all-rounder to the market with the Steam 412, which can be used both for white water and for lakes and calm rivers. The driving characteristics of the kayak convinced us for this price range in calm waters. In white water, we would use the kayak only up to white water level 1, despite the steering option. Unfortunately, it is not an all-rounder in terms of seat configuration (i.e. reconfigurable as a 1-seater kayak), as the separate attachment points for seat and footrest in the boat are missing.

What also disappointed us is the positioning of the seats and footrests in the 2-person configuration, which is what the kayak is actually intended for. The footrests can’t be positioned far enough forward, and the backrest straps are too short to place the seats far enough back. So the use of the footrest is reserved for shorter people. This is actually a pity, because there would be enough room for two tall adults in the inflatable kayak. If you only want to go on short, leisurely tours, the lack of a footrest won’t bother you. On the other hand, those who plan extended day trips should not neglect this aspect.

Also, we would have expected a kayak with an insertable drop-stitch floor to have a higher overall steadiness. The side chambers are quite soft at 0.1 bar (1.45 PSI). Even a kayak (e.g. Itiwit Touring) with 0.1 bar (1.45 PSI) and a polyester shell makes a more stable impression overall. The hull is overall cleanly glued. However, we could determine a few unclean glued joints at some points of the drop-stitch bottom.

Aqua Marina Tomahawk Review

aqua marina tomahawk kayaking review lake

The Aqua Marina Tomahawk Air-K 440 is an open 2-person full drop stitch kayak, i.e. both the bottom and the side chambers are made of drop stitch material. The construction method makes the kayak look like a hardshell kayak, because you won’t find voluminous air chambers in the Tomahawk. Aqua Marina is not the only brand of full drop-stitch kayaks, as full drop-stitch kayaks have been on the market for several years and in recent years this type of inflatable kayak has become increasingly popular. Among the Aqua Marina kayaks, the Tomahawk is one of the most popular kayaks of the brand. We have tested the Aqua Marina Tomahawk and would like to share our experiences with you in this review.

aqua marina tomahawk kayak

Technical Specs

Max. paddlers:
Length:
Width:
Capacity:
Packed size:

2
440 cm | 14’4”
78 cm | 2’6″
210 kg | 44.8 lbs
100 x 60 x 33cm |
3’3” x 2” x 1’1”

Material:

Drop-stitch material
with PVC coating

Weight:
Pressure:
Produced in:

20.3 kg | 44.8 lbs
0.68 bar | 10 PSI
China

Which model has been reviewed?

Aqua Marina Tomahawk Air-K 440 from 2022

How did we organize the review?

The Aqua Marina Tomahawk was provided to us on a rental basis by Arts-Outdoors, a store and online shop for outdoor gear. Our review is independent of the manufacturer or store and reflects our own opinion of the boat.

How intensively has the product been tested?

low

high 1 bar = 1-3 km paddled (first impressions)
2 bars = min. 1 day/ 2 half-day tours
3 bars = min. 4 tours
4 bars = min. 8 tours
5 bars = min. 12 tours (very intense)

Where have we tested the product?

Whitewater

Calm rivers

Lakes

Table of Contents

First impressions and assembly

The kayak is supplied with a transport backpack. The big advantage is not only that you do not have to buy an additional transport bag, but that you already have a bag that is perfectly suited for the boat.

The backpack of the Aqua Marina Tomahawk can be opened all around via a zipper. This large opening ensures that you can easily pack and unpack backpack. On one side of the backpack there is also a side pocket. Such side pockets are good for stowing multi-part paddles (paddles are not included in the package and must be purchased extra). Unfortunately, only one four-piece paddle fits in the side pocket of the Tomahawk backpack. The second must be stowed in the main compartment or in a separate bag. The shoulder straps of the backpack are lightly padded. For the storage of the kayak and short transport distances, the backpack is more than enough. However, if the way to the next station is longer than 10 minutes, we would have liked a hip belt and more padded shoulder straps due to the high weight. For example, the backpack from the Aqua Marina Steam is better padded, although the Steam is lighter. Overall, the backpack is a nice addition from the manufacturer. However, if you want to transport the boat over longer distances on your back, you are probably better off with a higher-quality backpack.

aqua marina air-k 440 transport bag kayak review
Supplied transport backpack
aqua marina tomahawk drop stitch kayak pack size
Pack size of the kayak
aqua marina tomahawk inflatable kayak
In total, the kayak is 4.4m long

The Aqua Marina Tomahawk, almost like any full drop-stitch kayak, is quite bulky and heavy with its PVC coating (the Tahe Breeze is an exception in the segment with a simple PVC coating). For example, a Gumotex Seawave made of polyester coated with rubber with similar dimensions is much more compact and partly lighter than a full drop-stitch kayak.

Unpacked, the Aqua Marina Tomahawk appears with a length of 4.40 m pretty long, slim dimensioned and streamlined. From the first impression, the drop stitch kayak makes a high-quality impression. The Drop-Stitch material consists of a polyester fabric and 2 PVC layers as a coating.

In addition to the transport backpack, there is a high-pressure air pump with an integrated pressure gauge in the scope of delivery. It has a single and double action function. You use the double action function at the beginning, whereby you pump air into the air chambers during both the downward and upward movement. This way you quickly get maximum air within minimum time into the chambers. When you have reached a certain high air pressure, pumping with the Double Action function quickly becomes exhausting. Then switch to the Single Action function. With this function, only air is pumped into the air chambers during downward movement, and pumping becomes easier again when the air pressure is high. In addition, two solid kayak seats, two footrests, two fins, a valve wrench and repair materials are included in the package.

The Tomahawk consists of 3 separate air chambers, each has a spring valve. The valve cap is unscrewed, the pin of the spring is pushed out and the adapter of the air pump is put on. After that the pumping starts. You can read the air pressure directly from the pressure gauge on the air pump during inflation. Each air chamber must be pumped up to 0.68 bar / 10 PSI, which is a common value for a full drop-stitch kayak. Inflating is really easy and fast. Without much effort, the inflatable kayak with its flat air chambers is inflated after a very short time. The side chambers and the bottom have a thickness of 7 cm when inflated.

aqua marina tomahawk drop stitch kayak inflate review
The high pressure pump is already included in the scope of delivery
aqua marina kayak valves inflating
The kayak has 3 valves
aqua marina tomahawk air pumpe pressure gauge
The air pump has a pressure gauge

Now that the boat is inflated, the seats are placed into the boat. These are solid seats. The seat cushion is attached to the Velcro strip, which is located on the floor inside the boat. This is to prevent the seat cushion from slipping while paddling on the water. The backrest is attached to D-rings on the side chambers with four carabiners. The D-rings make a high-quality impression and are double reinforced on the side chamber. The advantage of the carabiners is that you do not have to adjust the straps again on the next kayak tour.

The upper straps of the backrest are attached to the side chambers in front of the seat and the lower straps are attached to the side chambers behind the seat. This prevents the backrest from folding forward or backward. The upper straps can also be used to readjust the individual position of the backrest. In addition, there is a small simple pocket at the back of the backrest for storing utensils, such as sunscreen or snacks (not waterproof and also not completely closable. Items can be lost in the event of a capsize).

aqua marina tomahawk drop stitch kayak assembly
Inserting the seats
aqua marina tomahawk mounting seat
Mounting the backrest

Once the seats are positioned, the next step is to install the footrests, which do not differ for the front and rear seats. Both footrests have two straps each, which are threaded through the D-rings on the side chambers. The straps are then closed via a bar buckle or ladder buckle and adjusted in terms of length. We especially find adjusting the length of the straps via the bar buckles cumbersome and annoying. 

It is also noticeable that some space in the bow is wasted as potential footwell. The footrest is too wide and the bow too narrow to position the footrest further into the bow. We (1.86 and 1.89) therefore had to move the front and rear seat significantly backwards, so that both paddlers have enough space. Of course, you give away some space in the stern to store luggage and equipment.

aqua marina tomahawk foot brace kayak
Attaching the footrest
aqua marina tomahawk foot brace 2 persons
Max. position for the front footrest
aqua marina tomahawk kayak foot brace
Correctly adjusted footrest

After the seats and footrests have been adjusted to suit your needs, the fins can be slid into the two slide-in boxes provided on the underside of the boat and secured with a cotter pin. The fins are relatively heavy compared to fins of other air kayaks.

A directional fin provides better straight-line tracking and is very common on inflatable kayaks, but two fins of this size are rare to find. We are curious to see how good the straight running of the Aqua Marina Tomahawk will be.

For additional protection against waves that would otherwise slosh into the boat from the front, the front spraydeck can be stretched with a plastic part as a kind of wave/water deflector. If then a wave comes on the bow, the water does not run into the interior.

aqua marina tomahawk full drop stitch kayak fin skeg mounting
Mounting the fins
aqua marina tomahawk kayak water splash guard
Inserting the water splash guard
aqua marina tomahawk drop stitch kayak review
Kayak hull

A hard-shell element is incorporated at the end of the bow and stern respectively, shaping the ends of the kayak well and protecting the air chambers in case of contact with shore or rocks. 

Besides the carrying handles and the safety loops at the bow and stern, there is unfortunately no luggage net or similar. Many inflatable kayaks with an open cockpit (e.g. Tahe Breeze, Aqua Marina Steam, Gumotex Solar, Itiwit x100+, …) have a luggage net at the stern to securely attach luggage so that it does not take up space in the interior. Unfortunately, the Tomahawk does not have such a luggage net. The spraydeck at the stern of the Tomahawk is also quite small. This at least has the advantage of stowing a larger backpack or pack behind the second seat and making it easier to get into the corners when drying. For stowing luggage inside, some manufacturers like to work with D-rings on the floor so that the luggage can be secured. But even for such features to secure luggage, you look for the Aqua Marina Tomahawk in vain.

aqua marina tomahawk kayak review drop stitch 1 person
Tomahawk Air-K 440 as 1-person configuration

Although Aqua Marina advertises the 1-person configuration on the Air-K 440, the kayak is only half-heartedly designed for this configuration. For the 1-person configuration, there are no Velcro strips and no additional D-rings to secure the seat in the center of the interior. Instead, the D-rings of the 2-person configuration are used. We’ll go into how well this works on the water in the section below.

Review of the Aqua Marina Tomahawk on the water

The Aqua Marina Tomahawk has a total of four carrying handles. The carrying handles at the bow and stern are ideal for transporting the kayak to the water or transferring the kayak in pairs on river tours. More than lightly loaded (small daypack in the boat) we would not carry the boat with the handles, however.

If you are traveling alone, you can use the carrying handles in the middle on the inside of the side walls. This shows how unwieldy such a long boat can be. Nevertheless, the handles are absolutely sufficient to put the Tomahawk alone at short distance into the water. 

aqua marina tomahawk kayak single transport
Carrying handles in the middle
aqua marina tomahawk air-k 440 kayak transporting
Carrying handles at the bow and stern

Due to the open cockpit, entry is very easy. The two directional fins can be annoying on the shore. If you get in too shallow water, they tend to stick to the ground, so that you can’t get off the spot. This is partly because the fins are pretty long and there is a fin in the front as well as in the back. It is better to place the boat in the water sideways to the shore or to enter via landing stage. Alternatively, you can also leave a fin off so that the entry on the shore works better.

aqua marina tomahawk kayak review stability
Despite tippiness, the kayak has a late capsize point

When paddling the Tomahawk, it is immediately noticeable at the beginning that it feels very tippy at first, as if it would tip over at the next movement. If you trust the boat and give it some time, you will be rewarded. The drop-stitch kayak is tippy, but the stability of the kayak on the water is much higher than felt at the beginning and the actual capsize point comes very late. We have challenged several capsizes on summer tours. We were surprised how late the kayak actually capsizes then. Before it tips over, it literally continues on the sidewall. If you’re fit or athletic, you’ll also manage to get out of the water back into the kayak without any problems. 

If you are timid, you will not like the Tomahawk. There are much more stable inflatable kayaks on the market (e.g. Aqua Marina Steam 412, Advanced Elements Advanced Frame Convertible, Itiwit x100+ 2-seater, Gumotex Thaya, …). This aspect should not be neglected in a 2-person kayak. If you want to paddle with your partner or friends who may have never paddled before, it is easier to win them to the new activity if they feel safety and comfort at the beginning. Also, in a 2-person kayak, there are always two people who need to find the right balance together. Finding this joint balance is more important in a tippier kayak than in, for example, an Itiwit x100+ or Gumotex Thaya, which hardly tilt at all when there are unsteady movements in the boat.

aqua marina tomahawk kayaking review lake
Very good gliding properties and good straight running

Speeds of 6 to 7 km/h during leisurely paddling for two are possible without any problems. The kayak accelerates very well and has a good glide with only a very small bow wave. Overall, the trim of the kayak is really good on the water and forms a nice long waterline. 

With the two fins, the straight line runout is also very good. If both people stop paddling, the kayak does not drift, but keeps track. These are definitely ideal conditions for a relaxed and yet speedy tours, where the kayak continues to run straight even during a short break.

aqua marina tomahawk river tour kayaking
On small and shallow rivers we wouldn’t use the fins

On large rivers and lakes with sufficient depth and space, the two fins are a real gain. On small rivers, however, the kayak with two fins would be too little maneuverable for us. Here we would use only one fin at most. On rivers with obstacles, we would not use a fin at all, because the fin is too rigid and the risk of getting stucked or the fin breaking away is too high. This happened to us on the Aqua Marina Steam on a river tour, which has the same fins and slide-in boxes on the bottom. Other manufacturers like Gumotex have a fin attachment that allows the fin to bend to the side. With the Tomahawk, however, this is not possible, because the fin is in a fixed insertion rail. 

aqua marina tomahawk kayak loading capacity
Air pump and transport backpack (shoes, food, drink, daypack) stowed in the back

For multi-day trips, we think the Tomahawk lacks space for luggage and protection from splashing water, light rain and cold. Here, other inflatable boats are clearly ahead (e.g. Verano California Duo*, Gumotex Seawave or Rush 2, Advanced Elements Advanced Frame Convertible Elite, nortik scubi 2 XL). If you still want to take the Tomahawk on multi-day trips in summer, you should take the 3-person kayak Tomahawk Air-C 478*, which is 38 cm longer. However, it should be noted at this point that the Air-C 478 has no footrests. For use by three people, footrests are probably not even necessary. Due to the short interior space for 3 people, the front person rests his feet in the bow and the rear people against the backrest of the front paddler.

aqua marina tomahawk drop-stitch kayak 440 1 person
Optional thigh straps
aqua marina tomahawk kayak dropstitch
Optional foot brace

When paddling the kayak alone, the trim on the water remains amazingly good despite the boat’s length thanks to the drop-stitch technology, so that even as a solo paddler you can make very good progress on the water in the Tomahawk Air-K 440. The maneuverability with two fins is only moderate for a 1-person kayak. 

Space is more than enough for one paddler and luggage in the 1-person configuration in the Tomahawk Air-K 440. The large transport backpack can be placed in the back behind the seat. The unused D-rings can be used to attach the backpack or additional dry bags. 

In the 1-person configuration, the footrest is indispensable to find sufficient support in the boat. The footrest is fine or better than nothing, but proper footrests such as with the Itiwit x500 would have been a great feature to allow the kayak to be paddled more cleanly. The aspect that the seat cushion is not attached to the floor via a Velcro strip in the 1 configuration proves to be practically uncritical.

Dismantling the boat

Dismantling the boat is quite simple. Water standing in the interior of the boat is very easy to drain through the drain holes in the stern. If the seats are wet, they must be dried in the air. 

The kayak is dismantled as quickly as it is assembled. It is easy to wipe dry and put back together. If you fold it neatly, the kayak goes back into the transport backpack without any problems. The backpack is sufficiently large dimensioned to still stow the air pump or life jackets. 

aqua marina tomahawk drain opening
Drain holes in the stern

Strengths and Weaknesses

We liked the glide and straight line performance best for an inflatable kayak with a full drop stitch construction in this price range. Nevertheless, the Tomahawk does have a few weaknesses that you should be aware of before buying. 

Advantages

+ spacious transport backpack included + high pressure air pump included + comfortable seats + good running characteristics and very good straight running with two fins + enough space for two large paddlers + solid workmanship + very easy and fast assembly and disassembly

Disadvantages

– moderate footrests (difficult to adjust) – seats have to dry separately and can’t be simply wiped dry – very tippy at the beginning (especially in the 2-person configuration) – directional fins break easily when touching the ground intensively – no luggage net (few stowage and fastening options for luggage) – low splash protection (no possibility to close the cockpit)

Conclusion on the Aqua Marina Tomahawk

The Aqua Marina Tomahawk is a classic full drop-stitch kayak that is ideal for half-day to day trips on calm waters in the summer. It is aimed at recreational paddlers who accept a certain tippiness in favor of better running characteristics. Due to the good gliding characteristics and the good straight running, it allows a speedy progress with comfortable paddle strokes. The solid workmanship, the slim construction and the drop-stitch chambers give the kayak a high value. 

aqua marina tomahawk review paddling
With the Tomahawk Air-K 440 on a lake in Southern Germany

Although the Aqua Marina Tomahawk Air-K 440 has a length of 4.40 m, there is little space / options for stowing or attaching luggage. A small 10 liter pack can be stowed in the front in the bow and the large transport backpack (with some content) and the air pump in the stern. For multi-day trips this would be too little. Therefore, we see the kayak primarily as a kayak for day trips.

Itiwit X100+ 3 Person Kayak Review

itiwit inflatable kayak review

The Itiwit x100+ is an inflatable kayak with a drop-stitch floor from Decathlon, which is aimed at beginners and occasional paddlers for paddling short tours on the water and leisurely half-day trips. It is not the only inflatable kayak from Decathlon. We’ve already had the chance to test the Itiwit Touring 2/1-seater, the Itiwit x100+ 2-seater, and the sporty Itiwit x500. Compared to the popular Itiwit Touring series, the x100+ is a significant development. It costs more, but offers clear advantages from our point of view. Find out more details about the kayak and how we liked the x100+ 3 seater as a 1-, 2- and 3-person kayak on the water in this review.

itiwit x100 3 seater kayak

Technical Specs

Max. paddlers:
Length:
Width:
Capacity:
Packed size:
Material:
Weight:
Pressure:

3
410 cm | 11’1”
102 cm | 3’3”
245 kg | 540 lbs
43 x 20 cm | 1’4” x 7”
PVC Tarpaulin, Polyester
18 kg | 39.7 lbs
0.2 bar | 3 PSI (sides),
0.35 bar | 5 PSI (floor)

Produced in:

China

Which model has been reviewed?

Itiwit x100+ 3 seater from 2021

How did we organize the review?

The Itiwit x100+ was provided to us by Decathlon, a French manufacturer and distributor of sports equipment and clothing. Itiwit is a brand for the paddle sport of Decathlon. Our review is independent of the manufacturer or shop and reflects our own opinion of the boat.

How intensively has the product been tested?

low

high 1 bar = 1-3 km paddled (first impressions)
2 bars = min. 1 day/ 2 half-day tours
3 bars = min. 4 tours
4 bars = min. 8 tours
5 bars = min. 12 tours (very intense)

Where have we tested the product?

Whitewater

Calm rivers

Lakes

Table of Contents

First impressions and assembly

The boat weighs 18 kg and can be transported comfortably over short distances to the water or train station with the included backpack. The backpack has wide shoulder straps and two side pockets where the paddles can be inserted. In addition, the lower part of the backpack is waterproof, so a wet boat in the backpack does not soak the backpack.

itiwit x100 3 seater backpack
The boat is quite heavy, but can be carried comfortably in a backpack over short distances
itiwit x100 dimensions
The backpack has a large opening
itiwit kayak bag
Additional quick manual

As with all transport backpacks for kayaks from Itiwit, we like the large all-around zipper opening, which makes packing and unpacking the boat much easier. Included are repair materials, patches (for short term and quick repair of holes), a compression strap, three fins for better straight running characteristics, a valve wrench for retightening the valves and an inflation connector for the air pump.

An air pump and double paddles are not included, which is completely understandable for the price. Double paddles in a cheap complete set (e.g. Intex Challenger K2, Intex Excursion Pro, Bestway Hydro-Force Ventura or Sevylor Adventure Plus) have never been able to convince us so far. Both paddles and an air pump can be purchased at Decathlon or elsewhere.

The assembly of the kayak is very simple. On the inside of the backpack there is even a short picture instruction for the assembly, which is very helpful if you sometimes do not have the instructions with you or want to quickly check a step. The boat is first rolled out completely. The inflatable kayak has two side chambers and a separated drop-stitch floor, each inflatable via its own valve. The valves are high quality spring valves that are easy to operate. On the valves there is a label to which maximum air pressure the air chamber may be inflated and which one should be inflated first, second and so on.

The gray Drop-Stitch floor is inflated to 0.35 bar. 0.35 bar is not much for Drop-Stitch, but it is enough to get a sufficiently firm kayak floor. The inflated floor is placed in the boat. In the front and in the back of the boat there is a strap, so that the Drop-Stitch floor is firmly fixed to the boat and cannot slip.

What is Drop-Stitch?

With the Drop-Stitch technology, the upper and lower inner walls of the air chamber are additionally woven with nylon threads. This is the only way to achieve a significantly higher air pressure than with air chambers without the tangled nylon threads. The air chamber thus achieves very good dimensional stability and rigidity. The Drop-Stitch technology is very common for SUP boards (Stand Paddling Boards) and is used more and more for inflatable kayaks. Learn more about this type of inflatable boats, in our buyer’s guide for Drop-Stitch kayaks.

itiwit x100 3 seater assembly
Unfolding the kayak
itiwit kayak drop stitch floor
Boat and separated drop-stitch floor
itiwit x100 pockets
Attaching the drop-stitch floor

The side chambers are inflated up to 0.2 bar. Considering the price, this pressure is a really good value for air chambers without drop-stitch technology. Thus, the kayak not only has a solid bottom due to the drop-stitch floor but also an overall form-stable hull, which makes a much higher quality impression compared to Intex or Sevylor boats.

Lately, we have been using the Quechua electric pump for inflating inflatable boats, which is powered by a rechargeable battery. The boat’s included valve connector fits the electric pump perfectly. The electric pump manages to fill most of the air chamber with air. We then create the final air pressure with a double-action pump. This means 2/3 to 3/4 fewer strokes are needed with the double stroke pump. This is a very pleasant comfort, especially on hot summer days.

itiwit electric pump kayak
Inflating with an electric pump
air pump itiwit kayak
The kayak has three air chambers
assembly itiwit x100 3 seater
Inflating the kayak with a double-action pump from Itiwit

After the kayak is fully inflated, mount the 3 small fins on the bottom of the kayak. Each of the fins is inserted into its fin tray and secured with a cotter pin. Fins are common on inflatable kayaks to improve straight-line stability. This is because, compared to rigid kayaks, inflatable kayaks float on the water rather than in it due to their high air buoyancy.

Due to the small size of the individual fins, the Itiwit x100 has a shallow draught even with fins. This has the advantage that you can already enter the boat in shallow water and groundings are reduced in general.

itiwit kayak skeg
Mounting the fins

When looking at the bottom of the inflatable kayak you easily see that it’s is designed for maximum stability. The bottom is very flat, almost like a board. In addition, the side tubes are mounted very low, so that the kayak has a maximum width on the water surface. This is good for tipping stability but disadvantageous for the performance on the water.

In addition, there are two drain openings in the center right and left. These can be opened from the inside to drain water standing in the boat during a break on the shore. In the stern and bow there is also a drain opening, which are intended for draining the boat before dismantling.

itiwit x100 3 persons kayak hull
Drain valves at the bow, stern and in the middle of the kayak.

The seat cushions of the seats are inflated via a small Boston valve with an air pump or inflated with your mouth. So you can decide the hardness of the seat cushion yourself. As with the other Itiwit kayaks, the seat has a good height. On the one hand, it makes sitting in the boat much more comfortable and on the other hand, you do not sit immediately in the wet, if water comes into the boat.

itiwit x100 seat
Inflating the seat cushion
itiwit x100 manual how to
Placing the seat in the kayak
itiwit kayak seat adjustment
Attaching the backrest

A 20-30 liter dry bag can be attached on the stern with the bungee cord. There is also room for a larger backpack behind the third seat. This is then no longer completely on the stern, but hangs partly then inside the boat.

itiwit kayak space for luggage
Thanks to the bungee cord on the stern you can easily store a dry bag

Review on the water of the Itiwit x100+ 3 seater

The Itiwit x100+ is a 3-person kayak that can also be reconfigured as a 2- or 1-person kayak. We tested all three configurations on the water. The side and front and rear carry handles make the inflatable kayak easy to carry alone or with someone else to the water.

On the water, the kayak has a very high tipping stability in all 3 configurations, making it ideal for paddling beginners. Due to the firm drop-stitch floor the entry and exit is very easy, because the floor hardly gives way compared to traditional inflatable kayaks without drop-stitch floor.

itiwit x100 3 seater kayak
Itiwit x100+ 3 seater as 3 person kayak
itiwit kayak 2 or 3
… as 2 person kayak
inflatable kayak itiwit solo paddling
as 1 person kayak

The Itiwit X100+ 3 seater as 1 person kayak

In the 1-person configuration, the rocker of the kayak (the curved part in the bottom of the kayak hull that connects the bow with the stern.) is the biggest, so the waterline is much smaller than the actual length of the kayak. The water position of the boat is significantly worse compared to the 2 and 3-person configuration, as you can see for yourself in the photos below.

Also, like the Itiwit Touring 2-seater or Itiwit x100+ 2-seater, it lacks a footrest if you seriously want to paddle the kayak alone for a longer distance. On rivers, where you want to float down for the most part, paddling from time to time a bit and otherwise just correcting the direction, it may still work. On standing water, we recommend the Itiwit x100+ 3-seater as a 1-person kayak only if you occasionally want to go on a small leisurely paddling tour, i.e. where staying and relaxing on the water is the focus.

itiwit x100 3 seater inflatable kayak
If you want to paddle the kayak mainly alone, you are better off with another inflatable kayak

The Gumotex Solar (2+1 person kayak with the same boat length) works much better as a 1-person kayak. You can paddle it solo without any problems and reach a good speed.

The Itiwit x100+ in the 1-person configuration feels quite bulky and unwieldy on the water. The paddle stroke should not be too strong, so that the tracking while paddling still remains in an acceptable range.

The Itiwit X100+ 3 seater as 2 person kayak

With 2 people, the kayak can be paddled much better. However, we have the feeling that you sit quite far from each other, ie the front paddler sits quite far forward and the rear paddler quite far back. This puts weight on the stern and bow, so the kayak lies better in the water and creates a longer waterline.

Nonetheless, we would have liked longer seat side straps and a continuous Velcro strip on the bottom so you can place the seats more variably in the boat. The Velcro strip for attaching the seat cushions to the floor would do the job. This is because the person behind has a lot of legroom, which he cannot use in most cases, and the person in front still has enough legroom, but much less.

When paddling with another person, the straight running characteristic is alright. However, if you stop paddling, the boat drifts quickly. A speed of 4.8 to 5.5 km/h (3 – 3,4 mph) is possible on average, depending of course on your own paddle stroke, the double paddles themselves, the weight distribution and the weather conditions.

itiwit inflatable kayak review
It can be well paddled by two people

The Itiwit X100+ 3 seater as 3 person kayak

Although the kayak is quite short for a 3-person kayak with a length of 410 cm, paddling with 3 people works quite well. We (189 cm / 76 kg, 186 cm / 74 kg, 174 cm / 82 kg) did not have enough space to stretch out our legs slightly bent. 

Still, the interior of the kayak is wide enough so that you can sit well in a slight cross-legged position. Since the seat cushion is high enough, sitting or paddling cross-legged for several hours is not uncomfortable. Alternatively, you sit in the boat with your legs strongly bent. Regardless of the seating position, we and friends of ours see the Itiwit x100 as a kayak to use for a short and relaxing afternoon trip (2-3 hours).

3 person inflatable kayak
Paddling the Itiwit x100+ 3 seater close to the max. load

When paddling with three people, it is quite possible for the rear paddler to steer the boat alone. On a lake or very calm river, at least two people should paddle to make reasonable progress. However, on rivers with noticeable current, it is also sufficient for the rear paddler to do some paddling and steer with good foresight, meanwhile the front people mostly relax and enjoy their time on the water. This was much more relaxing for the rear paddler in that case than if all three people were paddling.

When all three people are paddling, the paddlers need to be well synchronized. Otherwise, the rear paddler must not only steer but also constantly compensate for the uneven paddle strokes of the front paddlers. Due to the short boat length for a 3-man kayak, paddlers with their double-bladed paddles will quickly get in each other’s way if they are not paddling in sync. Three paddlers can reach 5.6 km/h (3,5 mph), up to a maximum of 6.1 km/h (3,8 mph). Please consider these values only as rough reference values.

itiwit x100 kayak river
Paddling the kayak with three people

The side cutouts in the middle of the drop stitch floor (where the drain holes are) have proven to be very practical. If a little more water comes into the boat, the water mainly accumulates there and the bottom remains free of water. In addition, the seat cushions are nice and high, so in most cases the seat remains dry.

Also super handy are the pockets on the bow and on the backrests. This gives every paddler the opportunity to store a snack and a drinks bottle within easy reach.

Itiwit x100+ 2 seater vs 3 seater

Itiwit x100+ is available in 2, 3 and 4 seater versions. The kayaks differ in price, weight, dimensions, load capacity and color. Otherwise, the two kayaks are identical in terms of tipping stability, material, air pressure and features.

itiwit x100 review 2 vs 3 seater
Itiwit x100+ as a 2 seater (yellow) and 3 seater (blue)

If you are looking for a 3-person kayak, the decision between the two models is already made. But how does it look if you want to paddle the kayak only alone or with another person? Should you buy the 2-seater or better the 3-seater?

The 3-seater has a 50 kg higher load capacity (i.e. 245 kg instead of 195 kg), which means that the paddlers can weigh more and at the same time still carry some extra stuff. There is also significantly more room to stretch your legs in the 45 cm longer 3-seater, especially for the rear paddler. In addition, you have the possibility to place one or two large bags in the middle without disturbing the paddling. For two, the 3-seater is about 0.5 km/h (0,3 mph) faster and drifts less when you stop paddling.

Only because of the slightly better driving characteristics, however, we would not advise the 3-seater. If you really want to have noticeably better driving characteristics, you should rather buy another kayak like the Gumotex Solar (same boat length), which can be paddled very well both alone and with another paddler.

The Itiwit x100+ 3-seater is recommended if you really want to use it as a 3-person kayak, or at least have that option. Also, the 3-seater is recommended if you need a higher load capacity. Then the slightly better driving characteristics are a nice side effect. In the end, from our point of view, both are inflatable kayaks for paddling beginners who are looking for an inflatable kayak with a robust boat skin and high tipping stability.

Dismantling the Itiwit x100+

The big advantage with the Itiwit x100+ over an Itiwit Touring 3-seater is that it is much faster to dismantle. The seats and the drop-stitch floor are removed from the boat. If there is water in the kayak, you can drain it through the screw-on drain holes. Afterwards, the inflatable kayak can be easily wiped dry with a towel. Since the boat is designed very open, you can reach everywhere with the towel.

itiwit kayak quality
The kayak has a high rocker
drain valve itiwit kayak
Drain opening at the stern
inflatable kayak itiwit decathlon
Dismantled kayak

During dry wiping, we again took a closer look at the bondings. Here we had to find processing problems last year with the Itiwit x100+ 2-seater. The bottom was not cleanly glued to the side tubes. This did not affect the functionality of the kayak, but is still not nice for a new product.

It’s a real pity that we found workmanship issues in this area on this one as well. It’s a pity because the bottom is sometimes the most heavily used area and otherwise the boat is cleanly finished overall. When wiping dry the crevices between the floor and the side tubes, which were still filled with air, it sounded like Velcro was coming loose. Most likely it was the bonding. In the following photos you can see this place where the bonding came loose.

itiwit x100 repair
Unclean glueing between bottom and side chambers

The next time we dismantle, we will let the air out completely and then wipe it dry. This puts less stress on the bonding. A stable bonding should still put it away without problems. When asked at Decathlon, the manufacturer told us that such a thing is not normal and can not assure us whether it has an impact on the durability. On the next tour, it had no effect on the functionality and the adhesions did not loosen further. Nevertheless, we advise you to check the adhesions when buying the boat.

Strengths and weaknesses of Itiwit x100+

The Itiwit x100+ is one of the most tip stable inflatable kayaks we have paddled and offers a high level of features for the price (3rd seat included, good seating comfort, drop stitch floor). Overall, the kayak has a good finish. Only the gluing between the floor and the side tubes have small defects. We had the same defect last year when testing the Itiwit x100+ 2-seater.

The material is robust and if the bonding on the inside of the bottom was clean, we could not complain. Nevertheless, the kayak does not come close to the high quality of a Gumotex or Advanced Elements kayak. In the entry-level segment (eg Sevylor, Intex, …), however, the Itiwit x100 offers much more in terms of workmanship and robustness.

Advantages

very easy assembly and dismantling + spacious interior + very high tipping stability + robust boat skin + high air pressure and thus very good stiffness for a boat in this price range + safe entry and exit through drop-stitch floor + Third seat already included + high seat cushion and good seating comfort + replaceable drop-stitch floor + high recreational value (paddling with family or friends) + useful features (paddle holder, side carrying handles, bungee cord on the bow to store luggage, bag on the backrest, …) + transport backpack included + suitable as a bathing boat (due to the high tipping stability entry out of the water is possible) + spare parts can be ordered separately

Disadvantages

wider and flatter hull and therefore slower – the bottom with the side tubes was not sufficiently or improperly glued for our model (so far no effect on the functionality of the kayak) – moderate driving characteristics – least suitable as a 1-person kayak – in 2-person configuration, the two seats can only be variably placed in the boat to a limited extent

Conflusion on the Itiwit x100+ 3 seater

From our point of view, Decathlon has done a lot right with the Itiwit x100+ and developed an inflatable kayak that clearly stands out from the inexpensive inflatable kayaks from Intex, Sevylor and Bestway and, with the drop-stitch floor, offers real added value in this price range.

The x100+ is significantly more dimensionally stable due to the drop-stitch floor and the higher air pressure of the side tubes, it has a significantly more robust boat skin (which can also be repaired if damaged), it has a higher seating comfort due to the high seat cushions and stable backrests, it is more tilt-resistant and it can be easily wiped dry after the tour. In terms of driving characteristics (especially speed, tracking stability, gliding characteristics), the x100+ offers no significant advantages over the boats from Intex, Sevylor and Co.

If you are looking for a kayak with great driving characteristics, which can be used for long day trips (> 20 km), regardless of whether alone, with another paddler or two other paddlers, should take a closer look at other inflatable kayaks from manufacturers like Advanced Elements or Gumotex.

decathlon itiwit x100 3 seater review
Itiwit x100+ 3 seater

Although the inflatable kayak offers the least space as a 3-person kayak, we liked this configuration the best. It’s just great to have the option to go paddling in a kayak with two other friends for a nice leisurely paddle together. This is also a great way for families with a child to spend time together on the water. Because of the high tipping stability, you can quickly convince friends and family members to come along for a paddle tour. For families with small children, the very high tipping stability is a real plus in terms of safety.

As a 2-person kayak, the Itiwit x100+ 3-seater makes sense especially if you need the higher payload capacity and the extra space for luggage. It is an advantage that you can also paddle the boat as a 1-person kayak. For small and leisurely paddling trips it may be sufficient. However, if you want to go on tours alone with it more often, you won’t do yourself any favors with the boat. The kayak is not designed for that.

Itiwit Packraft Adventure 500 Review

The Itiwit Adventure 500 is a packraft from Decathlon that comes with interesting features and at an attractive price. Compared to traditional inflatable boats, with a packraft you can combine, for example, hiking or mountain biking with paddling. A packraft weighs no more than 4 kg (8.8 lbs) and can easily be stowed in a hiking backpack. Packrafts are in general not new, but still a niche in outdoor sports. They are pretty expensive, so many are quickly deterred from packrafting because of the high price.

Decathlon has now set itself the goal of making the entry into packrafting more affordable with the Itiwit Packraft. In this review, we would like to go into the details of the packraft, what it offers for the price and for which purposes we see the packraft well and less well suited. The review is based on our experience with many different packrafts from other manufacturers over the past few years, and the experience we have already gained with the Itiwit packraft.

itiwit-decathlon-packraft

Technical Specs

Max. paddlers:
Length:
Width:
Capacity:
Packed size:

1
230 cm | 7’5”
90 cm | 3′
125 kg | 276 lbs
40 x 30 x 25 cm |
1’3” x 1′ x 8”

Material:
Weight (Boat):
Weight (Complete)
Produced in:

TPU/PU coated nylon
2.5 kg | 5.5 lbs
3.8 kg | 8.4 lbs
China

Which model has been reviewed?

Itiwit Packraft Adventure 500 from 2021

How did we organize the review?

The Itiwit Packraft Adventure 500 was provided to us by Decathlon, a French manufacturer and retailer of sports equipment and clothing. Itiwit is Decathlon’s own brand for water sports. Our review is independent of the manufacturer or store and reflects our own opinion of the boat.

How intensively has the product been tested?

low

high 1 bar = 1-3 km paddled (first impressions)
2 bars = min. 1 day/ 2 half-day tours
3 bars = min. 4 tours
4 bars = min. 8 tours
5 bars = min. 12 tours (very intense)

Where have we tested the product?

Whitewater

Calm rivers

Lakes

Table of Contents

First impressions and assembly

The packraft comes in a robust transport bag, which is compressed with two packing straps. The pack size and weight of the packraft including accessories is comparable to other Packrafts. The packing straps are sufficiently dimensioned so that you can attach the transport bag to a hiking backpack or to the handlebar of a bike.

In addition to the packraft, the transport bag contains the seat, thigh straps, pump tube and some self-adhesive repair patches. None of this is packed in a PVC film or bag. We really like that. So there is no unnecessary trash.

The packrafts assembly instructions are also sewn into the top edge of the transport bag, which serves as a handy quick reference guide for when you’re on the go, in addition to the actual instruction manual.

itiwit packraft dimensions folded
Transport bag, which also serves as a inflation and dry bag
decathlon packraft manual
user manual attached in the bag
itiwit packraft size
The folded Itiwit packraft

In total, the complete packraft, including transport bag and accessories, weighs 3.8kg according to the manufacturer. We measured the boat and the individual parts ourselves, since weight plays a major role in packrafting.

The packraft itself weighs only 2.5 kg (5.5 lbs). However, you also need to consider the thigh straps with 400g (0.88 lbs), the seat with 400g (0.88 lbs), the transport bag with 550g (1.21 lbs) and the pump tube with 50g (0.11 lbs). The individual components are quite heavy compared to other packrafts on the market but the packraft itself is quite light. Thus, the Itiwit packraft makes it into the typical weight category of a classic packraft, which with equipment weighs around 4kg. For certain uses, you can leave the thigh straps at home and save some weight.

The transport bag is used as a inflation bag, i.e. as a kind of air pump. To do this, you need to open the valve at the bottom of the transport bag and attach the supplied pump tube. The other end of the pump tube is attached to the valve of the packraft or seat cushion. Both the valve of the packraft and the seat cushion are of high quality. Both valves have a check valve so that the air cannot escape during inflation.

itiwit packraft accessoires
Packraft with bag, seat and thigh straps

According to the manual, first the boat and then the seat is inflated and fixed in the interior. However, we find it much easier to attach and place the inflated seat in the interior before inflating the packraft.

On the bottom of the seat cushion there is a strap adjustable in length with two hook buckles (G-buckle) each end. These two hooks are used to secure the seat cushion to the floor. This prevents the seat cushion from sliding forward or folding upward at will in the boat. When the packraft and seat are tightly inflated, the seat cushion sits very firmly in the packraft.

Compared to many other Packrafts, the seat consists of only a seat cushion and has no backrest. The seat cushion is placed so far back in the interior that you can lean against the air tube. We will see how well this works in practice when we paddle it on the water.

itiwit packraft seat
Seat with fastening straps
itiwit packraft attaching seat
Attaching the seat at the floor

Before inflating the packraft you still have the possibility to stow luggage, e.g. your backpack in the air tube of the packraft. Once the packraft is inflated, you can only access the luggage inside if you let the air out of the packraft. You get access to the inside of the air tube via the waterproof and airtight zipper. Exactly such a TZIP can also be found on very high quality packrafts, which are offered as an optional feature for an extra charge. The Itiwit packraft has the TIZIP already included, which is remarkable in this price range.

However, you should be aware that a TIZIP needs care. Always make sure that it is clean and properly greased with the included silicone grease. You should also not bend the TIZIP when rolling it up.

itiwit decathlon packraft tzip
You can store luggage inside the tube
itiwit packraft tzip backpack
Storing a 40 L backpack
packraft tzip
The zipper is 50 cm long

Actually, packraft are filled with air using a lightweight inflation bag, which is screwed or plugged directly onto the valve. This works well and saves the weight and bulky pack size of an air pump. However, filling a packraft with an inflation bag takes some time getting used to for beginners at first and requires some practice to efficiently fill a packraft with air.

The Itiwit packraft is also filled with a inflation bag, but with a small difference and big effect. The pump tube allows the air-filled bag to be placed on the ground and used like a hand pump. You lean on the air-filled bag and pump air into the packraft. You roll the inflation bag a little bit every time to create a sufficiently high air pressure. The lower green part of the blowbag is much more robust than a conventional packraft inflation bag, so you can put it on the ground without getting holes in it. We have not yet experienced an easier inflation of a packraft. Here Itiwit has made the assembly of a packraft much easier with a small simple idea.

Repeat this pumping procedure several times, more precisely according to the manual “9 – 10 times until the inflation bag no longer allows it”. On the inflation bag 1.0 PSI and the packraft valve 1.5 PSI is indicate. The manual does not say how to get the last 0.5 PSI to the packraft. Usually with packrafts (even with Boston valves like this) you generate the final air pressure with your mouth or with a separate small hand pump. We use the Itiwit inflation bag for this and apply small jerky impacts to the bag to get the packraft’s air tube nice and stiff. So, from our point of view, it is not absolutely necessary to create the final air pressure with the mouth or with a small separate hand pump, as with other packrafts. Here you should be careful not to create overpressure, because otherwise material damage can occur.

We therefore recommend that you create the final air pressure with your mouth or with your own breath during the first set-up, as this will prevent you from creating overpressure. Then reach into the air tube to get a feeling of how the packraft feels with the correct air pressure. You can use this firmness as a reference for later assemblies when you want to create the final air pressure with the inflation bag.

itiwit packraft adventure 500 setup
Inflating the packraft with the inflation bag
itiwit inflation bag
Connecting the tube with the inflation bag
itiwit packraft valve
Boston valves are used

The workmanship looks really solid overall. At first glance, we can’t see any weak points. Aluminum is used instead of plastic for many components (e.g. buckles, fastening hooks, carabiners), which creates a certain high quality. The material of the boat’s skin also feels valuable as well as robust and completes the high-quality first impression of the Packraft.

The packraft itself consists of a coated nylon fabric material. The fabric has a thickness of 420d (= denier) in the bottom and 210d in the side tube (except the orange rear part of the stern, where the TIZIP is also 420d). These are common values for packrafts. Only whitewater packrafts have higher material thicknesses in the bottom, twice as strong. The outside of the side tube and the outside and inside of the bottom are coated with TPU (thermoplastic polyurethane), which has a high abrasion resistance and is also used from other packraft brands.

itiwit decathlon packraft
You only need a few minutes to assembly the packraft
itiwit packraft bottom
The workmanship of the packraft is good
itiwit packraft adventure 500 material quality
The floor does not give additional protection to the hull

The inside of the side tube, which is not accessible, is covered with a PU coating. If deeper scratches damage the outer coating, the tube is still waterproof and airtight due to the second inner coating and does not need to be patched. However, other manufacturers (e.g. Anfibio, MRS, Alpacka) do without this inner coating in order to preserve the elasticity of the base material (which is made of nylon or polyester) and thus achieve a higher tear resistance of the material.

The bottom is very cleanly and evenly attached to the side tube. Here, however, we would have liked to see the more robust bottom overlap the more sensitive side tube significantly more, thus additionally protecting the side tube (the only buoyancy of the packraft) from ground contact. This is common practice of other manufacturers to protect the side tube and at the same time the only air tube of a packraft. Only with ultralight Packrafts (e.g. Anfibio) we know that the bottom does not generously cover the side tube due to weight saving.

Instead of using the bottom material for the orange part of the air tube at the rear, it would have been better in our view to make this part from 210d and to donate an overhang of the bottom for it, which would protect the side tube.

itiwit pack carabiner thigh straps
Carabiner for fastening the thigh straps
itiwit packraft thigh straps
Thigh belts mounted in the packraft

The seating position is not variable compared to many other packrafts, because the packraft does not have an adjustable backrest. Instead, the air tube serves as a backrest. You get the necessary support in the packraft via the thigh straps.

The padded thigh straps are attached to the side tube with two carabiners and can be tightened or loosened with a strap. They are quite heavy with the carabiners for a packraft, but very high quality and sturdy. Nevertheless, the 2-point thigh straps cannot be compared to the very individually adjustable 4- or 5-point thigh straps of whitewater packrafts from Alpacka or MRS. Nevertheless, they are a good alternative to the footrest to find sufficient support while paddling.

itiwit packraft cockpit
The Itiwit Packraft is a semi-open packraft and has a front deck

Packrafts are available as open and closed (= with deck) boats. The Itiwit Packraft is a semi-open packraft. It has a front deck. Due to the raised and voluminous bow, the deck is not mainly used as a splash water protection, but to attach luggage or especially a bicycle, without disturbing the footwell.

Packrafts usually have at least four holding loops at the bow and two at the stern for attaching luggage, equipment or a bicycle. The Itiwit Packraft has five carrying handles at the bow and two large carrying handles at the stern, which can serve as holding loops or carrying handles. Thus, you have enough attachment options to securely attach luggage and equipment to the packraft.

The carrying handles are a practical alternative to the conventional holding loops. Whether in a capsize, when pulling the packraft to shore, when two people are carrying the boat on river trips or when you carry the boat alone on your shoulder, there is always a possibility to grab the packraft properly. In our model, however, the front carrying handle is quite tightly dimensioned, so that it is difficult to grab the tightly inflated Packraft.

packraft itiwit dry bag
The transport bag can be attached to the deck
decathlon packraft dry bag
Rolled up, the contents are packed waterproof
packraft carry bag
The transport bag is quickly and easily at hand

You can either store the transport bag with the tube under the deck or attach it directly to the deck. We like to use this as a dry nag, as it is waterproof when rolled up and with the valve closed, and attach it to the deck. The best way to attach it is via the packing straps on the side grab handles on the deck. This way you have a dry bag that you can access at any time without having to detach it from the deck.

Other small luggage (e.g. a waterproof dry abs with valuables) can be stowed in the footwell between your legs. There are three fastening loops on the floor.

Review of the Itiwit Packraft Adventure 500 on the water

The Packraft is easy to carry to the water. You can either shoulder the packraft or use the thigh straps as carrying handles. If you have loaded the packraft with a lot of luggage, it is still recommended to set up the packraft close to the water. If you paddle with somebody else it is then easier to carry it together to the water. You can use the carrying handles at the bow and stern.

decathlon packraft
The packraft can be carried easily over the shoulder or via the thigh straps to the water

The interior of the Itiwit packraft feels very spacious, which offers enough room for tall people. We with a height of 189 cm (6’2”), we can fully stretch out our legs, depending on our footwear. This is partly due to the fact that no space is given away by a backrest. Nevertheless, we paddle with our legs slightly bent. In this case the thigh straps serve their purpose well in order to provide sufficient support in the boat. Therefore, we recommend that you always have the thigh straps with you, as in our view they serve as a substitute for a footrest.

decathlon itiwit packraft review
The interior offers enough space even for tall people

Experience on lakes and calm rivers

Only for short tours we would omit the thigh straps, so you save almost 1/2 kg in weight. Instead, a dry bag in the footwell can then serve as a footrest, which provides sufficient support while paddling. On longer trips, we consider the thigh straps to be a useful feature.

Overall, we find the seating comfort very good despite having no backrest. We do not miss the backrest. You can find good support for your lower back on the air tube. The seat height is also very comfortable, allowing a clean paddle stroke despite the voluminous side tube. On calm waters, the seat also remained very well in position and did not slip.

In addition to space and seat comfort, driving characteristics are another important aspect we’d like to discuss in more detail. Unloaded (no luggage in the air tube or on the bow), the Itiwit packraft turns very easily, which is common for packrafts of this length without a skeg. With a steeper and less powerful paddle stroke, it can be used well for small tours on the lake or long distances on rivers with noticeable current. Especially on small rivers you will benefit from the maneuverability of the packraft.

itiwit packraft experience
On longer tours, the thigh straps are a useful addition, even on calm waters, as there is no foot brace

The packraft also offers high tipping stability. The voluminous sides and stern contribute to the fact that it has a large surface on the water. As a beginner, you will already feel safe in the packraft right away due to the high tipping stability and seating position.

As usual with open packrafts, splashing water gets on your clothes and into the interior on longer tours. Double-bladed paddles with drip rings provide can help to keep some of the splash water out.

In the summer, none of this is a problem. In the off-season, you should wear at least rain pants, and better yet, proper cold weather protection in the form of a dry suit. If you often paddle in the off-season, a packraft with a closed deck might suit you better (e.g. Anfibio Rebel 2K, nortik TrekRaft Expedition). This is because a closed deck serves as protection against splashing water, rain and cold. The Itiwit packraft with its small front deck at the bow cannot offer you this protection.

reviewing decathlon packraft
The packraft offers a high tipping stability

Bikerafting with the Itiwit packraft

We were with the Itiwit Packraft not only on several lakes in Sweden and rivers in Bavaria, but have also done a bikerafting tour. That means we did one section by bike and another section with the bike on the bow of the packraft paddling on the river.

itiwit packraft adventure 500 white water
A 13 kg mountain bike on the bow of the Itiwit Packraft

Light as well as moderate forest and gravel tails can be ridden without problems with the mountain bike and the packraft on the handlebars. The 4kg on the handlebars you hardly feel.

The transport bag of the Packraft can be very well attached to the handlebars of the bike with the two compression straps. The bag is dimensioned narrow enough so that it does not cover the brake levers and gear shift. However, the straps of the bag should be properly tightened so that the bag does not hang too far down.

If your bike has a front suspension fork, check that the bag does not touch the tire when it is compressed. If necessary, you should close the fork, pack the packraft even more compactly or put individual parts (seat, thigh straps, …) in the backpack to ensure sufficient distance from the tire.

itiwit packraft biking
The packraft on the handlebar
bikerafting decathlon
It is fastened with the compression straps
bikerafting
You can easily attach the mountain bike on this packraft

To mount the bike on the bow of the packraft, it is best to remove the front and rear wheels. The bike frame is placed on the bow first, and then the wheels are placed on the frame. To securely attach everything to the carrying handles on the top of the front deck, you will need at least four, and preferably six, packing straps.

Be sure to set up the packraft close to the water, as it is pretty unhandy to carry the packraft with the bike mounted. The best way to put the packraft with bike in the water is to reach under the deck with the palms of your hands and lift it up. Then you reach directly under the center of gravity and keep the best control when you carry it to water.

mounting bike on itiwit packraft
The bike is attached to the front of the bow
itiwit packraft with mountainbike
For this you need at least 4-6 straps

On the water, we really like the Itiwit packraft with the bike on the bow. The packraft is still nicely maneuverable and tip-resistant. You feel very safe on the water right away. Although the Packraft with its 2.3m is not longer than traditional packrafts, it feels longer inside. The front deck with its carrying handles allows the bike to be mounted nice and far forward. In combination with the seat without backrest, you get enough distance to the bike so that the bike doesn’t disturb you when paddling.

bikerafting white water
The packraft is very easy to paddle with the bike on the bow

Where luggage is usually stowed, the bike is located, which is on the bow. A dry bag can still be stowed under the deck, as the interior is very spacious. Nevertheless, we find the TIZIP at the rear really practical, especially when bikerafting. So even tours with a lot of luggage or even longer bikerafting tours are possible without any problems.

From our point of view, the Packraft with the bag, the TIZIP and front deck, among other things, has been designed specifically for bikerafting and thus delivers a really good performance.

bikerafting experience
We specially liked bikerafting with the Itiwit packraft

Whitewater paddling with the Itiwit packraft

Decathlon claims a suitability of whitewater stage 2. We paddled the Itiwit Packraft on a white water river (whitewater stage 1 and 2) and played with the one or other groundsill and went in and out of quite a bit of eddies.

Compared to calm rivers and lakes, a packraft has to cope with a lot more in white water. Groundings are inevitable in whitewater and much more frequent than in other waters. Especially if the water level is low, you don’t know the river yet or you don’t have much experience in finding the right line in whitewater. That’s why packrafts for whitewater have a generous bottom, i.e. the more robust bottom has an overhang and gives additional protection to the lower part of the side tube (which provides the air buoyancy of the packraft). This is not the case with the Itiwit Packraft. This is not a big issue. However, it has a higher risk of getting a hole in the side tube than a packraft that is designed for white water use (e.g. Mekong Pablo Whisky Bar, MRS Alligator 2S or Alapacka Expedition). 

itiwit packraft performance
Packrafting on a whitewater river

For regular paddling in whitewater stage 2, we also miss a whitewater deck or drain opening. Without this option, you have to stop and empty the boat more often. The voluminous and raised bow rides many waves well. Nevertheless, especially in white water stage 2, one or the other wave comes into the boat from the front or from the side. The front deck is too short for effective splash protection and hangs down to the interior due to the raised bow. If a wave hits the bow, it will flow into the interior.

For these reasons, we recommend the Itiwit packraft for white water stage 1 and at most for occasional use in white water stage 2. In our view, it is not a packraft designed for regular use in white water stage 2. However, we would now also like to look at the equipment for whitewater suitability. Because here some weak points of the packrafts show up.

On the one hand, the seat cushion does not sit as firmly in the interior as expected. Due to the low water temperature of whitewater rivers compared to the air temperature of the environment, the pressure of the air tube and seat cushion decreases, so that both become softer. This is completely normal for inflatable boats. In this case, you have to re-pump after a short time or you put the boat to the water before the tour, let it “cool down” there and then re-pump.

itiwit packraft seat modification
The minimum length of the strap is still too long, so that the seat can slip back and forth

If the air tube and the seat cushion have too little air pressure, the seat cushion will slide forward about 10 cm the next time you hit the ground with the packraft (even though we have tightened the fastening strap of the seat cushion on the floor of the packraft to the maximum). The cushion is then too far forward and leaning against the tube is no longer possible. You slide with the bottom partly in the gap that has arisen. Paddling is then no longer fun. So, you need then to stop, pump up some air and position the seat correctly.

There would be a way to fix the seat more firmly to the floor with the strap (was mentioned as an idea in the reviews on decathlon.fr). This involves maximizing the length of the strap and inserting the seat cushion upside down (top of the seat cushion on the inside floor of the packraft) so that the strap is on the seat surface. Then the seat cushion sits much tighter, even though the air tube and seat cushion are softer. However, we do not see this alternative as a solution. The strap is very short for this and builds up too much tension at the fastening loops (where the strap is hooked to the floor).

From our point of view, the rear fastening loop for the seat cushion should be positioned further back on the inner floor and, above all, the distance between the two fastening loops should be short enough to prevent the seat cushion from sliding forward.

Another point of criticism are the non-locking carabiners of the thigh straps. With this type, the carabiner can be opened at any time by pressure intended but also unintentionally. There is no danger of a thigh belt coming loose as a result. This is because the carabiner has a kind of nose for this purpose, and it is not possible for thigh straps under pressure to slip out of the attachment loop. The real danger is that you get could get caught unintentionally (for example, with the life jacket or a piece of clothing in a capsize).

itiwit packraft 500 river
Most weaknesses came up on the whitewater usage

If you still want to use the Itiwit packraft occasionally in whitewater, you should replace the carabiners with lockable carabiners or do without the thigh straps and use a dry bag as a footrest instead. In our opinion, the luggage net with its long cord under the front deck is another danger if the cord stopper is not tightened (then there is a large loop in the footwell, which is another source of danger for getting caught in a capsize).

From the driving characteristics, you can definitely use the packraft for whitewater stage 2. It offers a sufficiently high air buoyancy, is very stable in the water, is nicely maneuverable to paddle into the eddies and the thigh straps (with the right carabiners) are a useful equipment to have enough support in the boat.

Repair of the Itiwit packraft

On a tour in Sweden, we unfortunately got a small crack in the floor of the packraft. The shores of the lakes we paddled were covered with sharp rocks. This was unfortunately bad luck and can happen with inflatable boats and that’s why you should always have a patch kit with you.

For small holes and cracks, the packraft already comes with three small and three large round patches that are suitable for quick and long-term repairs. The self-adhesive patches have a 3M 300LSE adhesive, which promises a high initial adhesion and a durable adhesive strength. The material of the patch is sufficiently thick so that the patched area should withstand stresses (e.g. grounding).

Patching the small crack worked very well for us right away, and the packraft is fully usable again with a small cosmetic blemish. However, the bottom did get more deep scratches, which we will observe over time.

Whole in the floor of the packraft
Choosing the right patch
Repaired packraft

Dismantling the packraft

The dismantling of the Itiwit packraft is as usual with Packrafts simple and fast. You open the valve of the packraft and release the air. If you have luggage in the air tube, you can now open the TIZIP.

On the seat you open the valve as well. There is a push button that you have to push in order to be able to push the air out. Theoretically, you can leave the thigh straps and the seat in the boat and fold the packraft like this. We take both out and put them separately in the transport bag.

First fold the packraft lengthwise. Make sure that it is not wider than the transport bag. Then you can roll up the packraft from the front to the rear. This has two advantages. Firstly, the remaining air can flow out of the valve unhindered. Secondly, the TIZIP is rolled up at the end and is not bent. The TIZIP should be closed so that no dirt gets into it when rolling it up, packing it or storing it. Now you can compress the packraft a bit with the included compression strap. The main purpose of the strap is to prevent the packraft from unrolling on its own.

itiwit packraft bag
Storing the packraft in the transport bag

When the packraft is folded narrowly, it fits wonderfully in the bag with accessories and can be compressed to the original pack size. To do this, pull the compression straps together. The packraft is compactly packed and compressed as soon as the side click closures on the bag can be closed.

Sometimes you just want to transport the packraft to the car and dry and fold it at home. Since the transport bag is generously sized and can be varied in size thanks to its roll closure, it is no problem to pack the packraft in a less well compressed state. The transport bag can be closed like a conventional dry bag with roll closure at the top and can be used as a handle for transport, unless you use the outer compression straps.

Strengths and weaknesses of the Itiwit packraft

The great strength of the Itiwit packraft is the very good price-performance ratio. It brings many features that are available from other manufacturers only in the higher price segment ( for example, TIZIP luggage compartment). Another strength is the very simple and convenient assembly. The inflation bag, which serves as a transport bag and dry bag, is brilliant.

The biggest weakness from our point of view reveals itself in the Itiwit packraft in white water. Here we lack the necessary robustness, a more effective splash water protection or a drain option and a better attachment of the seat. In addition, the non-lockable carabiners are a potential source of danger for getting caught in a capsize.

packrafting itiwit
The biggest strength of the Itiwit packraft is the price-performance ratio

Advantages

good workmanship + very good price-performance ratio + large and high-quality equipment in the price range (TIZIP, thigh straps, … ) + very easy and fast assembly through the pump bag + pump bag can be used as a transport and dry bag + sufficient carrying and safety handles available + simple but comfortable thigh straps (good padding and adjustable) + very well suited for bikerafting and multi-day river tours + numerous options to attach and stow luggage + good seating comfort + safe handling in calm waters (high tilt stability, high seat cushion, thigh straps, good maneuverability) + self-adhesive repair patches included

Disadvantages

– lower side of the side tube is hardly protected against high stresses – above-average heavy equipment for a packraft (seat cushion, thigh straps and inflation bag) – low splash water protection – only conditionally suitable for whitewater (insufficient seat attachment, non-lockable carabiners for the thigh straps, too little protection of the side tube, no sufficient splash protection or drain possibility) – according to the valve of the packraft 1.5 PSI should go up (unclear when these are reached, no hints in the description)

Conclusion on the Itiwit packraft

Itiwit has managed to bring a well-made packraft to the market at an entry-level price, which in many aspects goes far beyond an entry-level packraft. It is a packraft with a high level of equipment and a good range of applications and its price is a segment where the basic models of other manufacturers only start.

The Itiwit packraft Adventure 500 does not try to be one of the lightest or most robust packrafts for the most demanding packrafting. Instead, emphasis was placed on high-quality and high equipment (e.g. carrying handles instead of holding loops, thigh straps with carabiners, TIZIP, …).

packrafts decathlon
The Itiwit packraft is overall a good packraft

If you want to get into packrafting, you can’t go wrong with the Itiwit packraft in our opinion. It is a good all-rounder for large tours in flowing water and small tours on lakes. In addition, we consider the Itiwit packraft to be really well suited for bikerafting and multi-day river tours with noticeable current due to its luggage compartment and bows.

If, on the other hand, you are looking for a packraft mainly for whitewater use, we recommend another packraft (e.g. from Alpacka or MRS like the Alpacka Expedition or MRS Alligator 2S). The same applies if you want to go packrafting with a very high hiking part. Also in this area there are packrafts (e.g. from Anfibio like the Anfibio Delta MX) that weigh only half as much (so-called ultra-light packrafts) and offer similar driving characteristics, a comparable robustness, a good amount of space and sufficient comfort.

If you travel with your packraft in the off-season, you should also ask yourself when buying whether you need a closed deck to protect you from the cold, rain and spray. The small front deck of the Itiwit packraft does not offer this protection.

Alpacka Expedition Packraft Review

Alpacka Packrafts are very popular and have a high reputation in the packraft scene, especially among packrafters who do a lot of whitewater. In addition, Alpacka Raft promises to produce one of the best packrafts. In this review, we would like to take a closer look at the Alpacka Expedition and summarize our experiences with the packraft on the water. In particular, we have reviewed the Alpacka Expedition in size Large and with a removable whitewater deck.

alpacka expedition packraft

Technical Specs

Max. paddlers:
Length:
Width:
Capacity:
Packed size:
Material:

1
246 cm | 8’1”
91 cm | 3′
159 kg | 351 lbs
43 x 20 cm | 1’4” x 7”
210d high count nylon (hull)
840d ballistics nylon (floor)

Weight:
Produced in:

3.8 kg | 8.4 lbs
USA

Which model has been reviewed?

Alpacka Expedition with removable whitewater deck from 2020

How did we organize the review?

The Alpacka Expedition was provided to us on a rental basis by Packraft Europe. Packraft Europe is the Alpacka Raft dealer for the EU and delivers Alpacka Packrafts and packrafting equipment to any country within the European Union. Our review is independent of the manufacturer or store and reflects our own opinion of the boat.

How intensively has the product been tested?

low

high 1 bar = 1-3 km paddled (first impressions)
2 bars = min. 1 day/ 2 half-day tours
3 bars = min. 4 tours
4 bars = min. 8 tours
5 bars = min. 12 tours (very intense)

Where have we tested the product?

Whitewater

Calm rivers

Lakes

Table of Contents

Assembly and first impressions

The Alpacka Expedition is available in several color combinations (or custom color scheme for an additional charge), three sizes, and with a fixed or removable whitewater deck. You choose the size based on your required seat length. Depending on the size, the Alpacka Raft has an outer length of 231 to 246 cm. The width is identical for all three sizes.

Of the two deck options, the fixed whitewater deck provides the most effective splash protection and is ideal for paddlers who do a lot of challenging whitewater. For an additional cost, the Alpacka Expedition comes with a removable whitewater deck, giving you the ability to customize the packraft to suit your needs. We’re curious to see how well the removable deck keeps out the water on our model.

Alpacka completely eliminates the need for a plastic bag as packaging and packs the packraft and accessories in a lightweight thin fabric bag that you can use elsewhere. We think the idea of avoiding plastic is really great. A more robust bag for permanent use would have been even better, because the size of the bag is optimally adapted to the packraft and its accessories.

alpacka expedition bag
The packraft comes in a thin bag
alpacka expedition scope of celivery
Scope of delivery of the Alpacka Expedition
alpacka expedition large deflated
The unfolded packraft

The Expedition series is standard equipped with a Cargo Fly (luggage compartment accessible via a T-Zip zipper in the rear). A T-Zip is a waterproof and airtight zipper, which allows you to store your luggage inside the hull dry and safe. You must place the luggage in the inner tube before inflating the packrafts.

alpacka carry handle cargo fly
T-Zip of the Cargo Fly (inner luggage compartment)
alpacka dry bags
Dry bag (left) inside the hull

The packraft can be inflated with the supplied inflation bag.The dark green inflation bag is lightweight and makes a robust impression. Make sure that the T-Zip is completely closed before inflating.

The valve of the boat makes a very high-quality impression. The screw thread is very easy to handle. The valve can be opened and closed via the blue thread. To inflate with the inflation bag, you have to turn the blue thread slightly counterclockwise and screw on the thread of the inflation bag. Here we are missing the obvious marking that shows whether the valve is open or closed. With the inflation bag you get the packraft filled to about 80% with air. Then you turn the airbag off and create the final air pressure with your mouth. Here you should blow as hard as possible to get a good stiffness. Inflating the packraft with your mouth also works very well. No separate mouthpiece is required.

packraft setup
The inflation bag is used to inflate the packraft
alpacka packraft valve
The inflation bag is screwed on the valve
alpacka expedition inflation
You create the final pressure with your mouth

Then inflate the seat cushion via its air hose. It is best not to inflate it completely so that it is easier to place in the interior. The seat cushion is attached to the floor so that it cannot slip during the paddling tour. Then you inflate the seat according to your desired thickness. This is very easy, because the air hose of the seat is long enough.

The backrest (or back strap) is attached via four attachment points. You can adjust the backrest forward and backward via the two front straps, so you can adjust the packraft to fit your height and clothing (neoprene socks vs. hiking boots). Thanks to the generous dimensions of the seat cushion, there is still enough seating space when you put the backrest all the way forward.

alpacka expedition seat backrest
Alpacka Expedition seat cushion and back rest
alpacka expedition removable cockpit whitewater
Packraft without deck
alpacka packraft deck whitewater
Packraft with deck

The deck is attached via four zippers and two Velcro fasteners. The attachment and removal of the deck is very simple and works easiest when the packraft is not yet inflated or only slightly inflated.

The mounting of the coaming is simple and cleverly solved. The coaming is stiffened with an plastic ring. On the coaming there are two large insertion openings, each of which can be opened via a zipper. Here you can insert the ring, which is a robust plastic tube. The two openings make handling very easy. The second opening helps you to “push” the tube around better. When the plastic tube is back in the first opening, you can connect the two ends of the tube and close the zippers. This will give you a stiff coaming. The plastic tube stays in place and cannot come loose. This concept is very well thought out.

alpacka expedition coaming
Plastic tube for stiffening the coaming

When using the deck, you don’t have the full length of the interior available. The back rest can be set very far back, but then the deck is in the way, so you would be leaning against the coaming. For tall people, it would have been handy if the seat hatch started a little further back.

alpacka expedition packraft backrest
When the deck is used, the entire seat area cannot be used

Alpacka offers 4-point thigh straps and a foot brace as accessories for maximum performance in white water. The thigh straps can be adjusted very well. The footrest can be adjusted individually via the air pressure, so that it fills more or less space from the bow.

alpacka thigh straps
Optional thigh straps
alpacka packraft foot brace
Optional foot brace

The floor is made of 840D ballistic nylon coated on both sides, which is a high value for a packraft and makes an extremely robust impression. Ballistic nylon is one of the most durable weave patterns, which gives the material a very high tightness and tear resistance.

The hull is made of a 210D nylon, which is coated on one side (i.e. only from the outside). The one-sided coating saves weight on the one hand and on the other hand it increases the tear resistance of the material in contrast to a material coated on both sides (the fabric is not too embedded in the coatings and can react more flexibly when stressed. Thus, it does not tear until later). The only disadvantage of a one-sided coating is that it can leak more quickly in case of damage.

To prevent this, Alpacka has placed the floor very generously on the hull, so that it is additionally protected. This makes perfect sense, as the highest stresses occur on the bottom of the packraft.

The hull material is sewn together, taped and double welded. The bottom is both glued and welded to the hull.

alpacka packraft workmanship material
The workmansip is very good
packraft material
440D nylon (top) vs. 840D ballistic nylon (below)
alpacka expedition floor
The bottom is generously placed on the hull.

Dry bags are included in US and available as option in Europe. They can be attached inside the boat tube with a clip. They are used for safe and watertight stowage of luggage in the air tube. In addition, they additionally serve as separate air chambers in the packraft and thus increase the safety of the packraft.

alpacka packraft space
Dry bags for the Alpacka Expedition

you buy the dry bags separately they are a pretty expensive. We could not identify any special features of the dry bags compared to conventional dry bags. We recommend that you do not buy the dry bags if they are not included for the moment and buy them later if necessary. We had stowed luggage in the tube without the dry bags on several tours, which worked without problems. On a multi-day tour with sleeping bag and sleeping pad the dry bags were a useful addition, so that the camping equipment would stay dry in case of a tear in the boat skin. However, inexpensive dry bags are also sufficient here.However, these can then not be fixed inside the boat.

Very practical are also the attached red carrying loops at the bow and stern. Thus, the packraft can be carried comfortably to the water even in fully loaded condition by two persons.

Review of the Alpacka Expedition on the water

We have done very different tours with the packraft (from a small afternoon trip on a lake or river to whitewater tours between WW1-2+ and a multi-day tour with camping and hiking part). Depending on weather and use, we used the packraft as an open or closed packraft.

packraft bow bag
Alpacka Expedition with the optional Alpacka Bow Bag (24 liters)

If you don’t got whitewater paddling and good weather is announced, you can leave the deck at home. Without the deck you not only save weight (about 300g) and space in the hiking backpack, but also have more space in the Alpacka Expedition as a tall person.

We carried the bow bag (optional accessory) with us on every tour, as it proved to be very practical. It holds 24 liters, is easily accessible on the water and is securely attached to the bow via four carabiners. The bag opens via a waterproof zipper. It is ideal for storing camera, drinks and break snacks that you want to have at hand during the tour.

open packraft alpacka expedition
Without deck and with bow bag
alpacka expedition deck
With deck and bow bag
packrafting outdoor
With deck and hiking boots, the interior space is narrow even in size L

The opening of the deck is very large, so that getting in and out is possible without any big problems. With the deck up, we (189 cm / 6’2”) find the footwell a bit small, or just enough. After a while, we mostly paddled with our legs bent so that our knees stuck out. Without the deck, the space is much better for taller people.

packrafting river tour
Despite the slim back rest, the voluminous rear offers the possibility to lean comfortably.


We initially had to get used to the backrest because it sits very low. For comfortable paddling tours, we would have liked a higher backrest, because we are probably just used to it from other inflatable kayaks. Nevertheless, it is very easy to relax or paddle relaxed in the Expedition, because you can loosen the backrest on the water and thus lean on the tube.

In calm waters, the straight-line characteristic and speed is that of a 1-person packraft usual and does not differ from other packrafts without fins (e.g. nortik TrekRaft Expedition).  Packrafts with fins (e.g. Anfibio or MRS) have better straight-line characteristic in calm water. 

The packraft offers a lot of space without deck

We had tested the Alpacka Expedition on different whitewater rivers. In this water we liked the paddling performance best. The handling in white water is very good. It reacts more precisely and you can use more technique than, for example, on a nortik TrekRaft Expedition or Kokopelli Rogue. First, you sit higher due to the high seat cushion. Second, the Alpacka is minimally more tippy, but it’s easier to edge as a result.

The precisely adjustable backrest allowed us to adjust the packraft exactly to our height and needs. The thigh straps give even more control from whitewater 2 and 3. In whitewater, we found the interior space to be optimal in combination with the deck. It is a bit narrow, but offers such a good hold.

whitewater packrafting
The Alpacka packraft performs really well on whitewater

Attaching the spray skirt is really easy. It is extremely light and yet it made a robust and high-quality impression. The splash skirt has not slipped off us even once in the white water, even if you push against it with your knees. Nevertheless, it can be pulled down very quickly and easily with the help of the front loop, if it should be necessary.

The protection against splashing water by the removable whitewater deck in combination with the splash skirt is very effective. We had slight concerns at first that some water would get into the boat over time, especially in whitewater due to the water-permeable zippers. In whitewater level 2, we could not perceive any disadvantage to a solid whitewater deck. Although the zippers are not waterproof, the front and rear Velcro covers protect it from water. There is also an additional cover under each zipper so that the water is blocked from entering and is drained away again.

Dismantling the Alpacka Expedition

The seat cushion and the backrest can be removed from the boat very easily. For the seat cushion, you open the air hose and press out the air. You can leave the deck on the boat. Only the hose of the coaming should be pulled out before rolling up the packraft.

Now open the valve of the boat and push the air out of the packraft while folding it. The Packraft can then be rolled up again very easily into its original packing size, so that it fits into the supplied bag again without any problems. However, make sure that the T-Zip is closed and does not bend when rolling up.

alpacka expedition folded
The packraft rolls up very well into its original pack size.

Strengths and weaknesses of the packraft

The packraft’s greatest strength is its high quality, which is reflected in the material, workmanship, design and equipment. You can see that Alpacka has the ambition to build the best packrafts. If you look at the manufacturers or dealers website, you will quickly see that it is a boat made by packrafters for packrafters. We could not find any real weaknesses. At most points there are rather things that we liked less. But even that is complaining on a high level.

Advantages

+ very well thought out packraft + high configurability + very high quality workmanship + very robust bottom, which also sufficiently protects the side tubes from below + high quality valve + good seating comfort and fastening + high load capacity + very good performance in whitewater

Disadvantages

– high purchase price – valve position (whether open or closed) not immediately obvious – supplied bag in the long term not usable as a transport bag – complete interior with deck not completely usable and with hiking boots for tall people on long and relaxed paddling tours a bit narrow – holder for an optional fin would be useful

alpacka packraft review
A very well thought out and high quality packraft

Conclusion

The Alpacka Expedition is a very high priced and extremely high quality packraft. The material and workmanship indicate a long life. Alpacka rafts are among the most expensive packrafts on the market. Packrafts generally have a high price, at which outsiders can probably only shake their heads. The question arises whether the extra price is justified here. After testing and comparing it with other packrafts, we can say: Yes, the extra price is justified. You get an almost perfect packraft here, which is hardly anything to complain about. Nevertheless, you should consider whether you really need such a high-end packraft before buying it. It would be a shame if it is only used once or twice a season.

If you only want to paddle calm rivers or lakes, you can also choose a cheaper Alpacka Raft or packraft of another brand. However, for those who will use their packraft a lot and will put a lot of stress on it (e.g. whitewater), the Alpacka Expedition is a good choice.